Were you aware that correctly fitting your bike can enhance both your comfort and performance while also helping to avoid injuries? Indeed, research from the Journal of Science and Cycling has shown that an incorrect bike fit may result in musculoskeletal discomfort, reduced power output, and potential nerve damage. This highlights the importance of ensuring your bike is properly adjusted before you embark on any road or trail adventures.
Fitting a bike may seem daunting, but with a few simple adjustments, you can ensure that your ride is comfortable, efficient, and safe. In this article, we’ll guide you through the process of finding the right size bike, adjusting the saddle height and handlebar position, and fine-tuning your bike fit.
So grab your bike and let’s get started!
Key Takeaways
- Proper bike fit is crucial for comfort, performance, and injury prevention.
- Body proportions and inseam measurement are important factors to consider when finding the right size bike.
- Adjusting saddle height, handlebar position, and foot alignment can improve comfort, control, and efficiency.
- Regularly checking and fine-tuning bike fit, as well as maintaining proper alignment, can prevent potential injuries and ensure optimal performance.
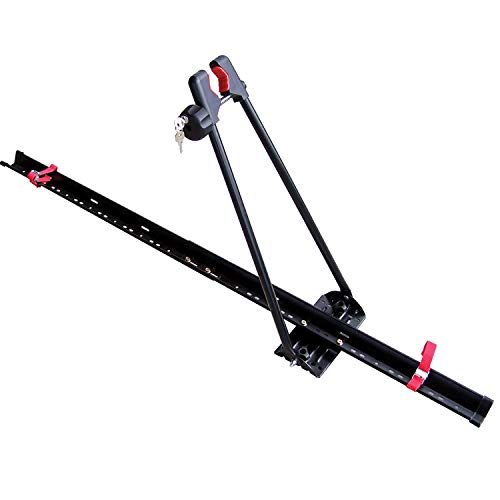
Swagman UPRIGHT Roof Mount Bike Rack
EASY TO ASSEMBLE: The UPRIGHT roof rack installs in minutes following the instructions and carries one bike with...
As an affiliate, we earn on qualifying purchases.
Find the Right Size Bike
You’ll want to make sure you’re getting the right size bike for you so that you can ride comfortably and efficiently. To do this, you’ll need to consider your body proportions and use measuring techniques to determine the appropriate size of the bike.
One of the most important measurements to consider is your inseam, which is the distance from the ground to your crotch. To measure your inseam, stand with your feet shoulder-width apart and place a book between your legs, up against your crotch. Measure the distance from the ground to the top of the book. This measurement will give you an idea of the appropriate size of the bike for you.
Keep in mind that different types of bikes may have slightly different sizing guidelines, so be sure to consult a sizing chart specific to the type of bike you’re interested in.
Once you’ve found a bike that fits your body proportions, the next step is to adjust the saddle height. By adjusting the saddle height correctly, you’ll be able to ride more efficiently and avoid injury.

TOOENJOY Rooftop Bike Rack for Car SUV, Upright Roof Mount Bicycle Rack with 2 Arms for Movable Crossbar, 1 Bike Carrier
Enhanced Bike Security: The dual rotatable load arms securely grip the bike by the wheels, ensuring zero contact...
As an affiliate, we earn on qualifying purchases.
Adjust the Saddle Height
Once you’ve found the right size bike, the next step to ensure a comfortable and efficient ride is to adjust the saddle height.
The saddle height is the distance between the top of the saddle and the center of the pedal axle. To determine the correct saddle height for you, start by measuring your inseam.
Stand barefoot against a wall with your feet shoulder-width apart and measure the distance from the floor to your crotch. Multiply this number by 0.883 to get an estimate of your saddle height.
Once you have set your saddle height, make sure you’re wearing the shoes you plan to ride in and adjust the saddle accordingly.
The ball of your foot should be directly over the center of the pedal axle when the pedal is at its lowest point. Adjust the saddle either up or down until this alignment is achieved.
A proper saddle height can help improve pedaling efficiency, reduce knee strain, and prevent discomfort or injury.
With your saddle height dialed in, it’s time to focus on adjusting the handlebar position for optimal comfort and control.

TOOENJOY Rooftop Bike Rack for Car SUV, Upright Roof Mount Bicycle Rack with 2 Arms for Movable Crossbar, 2 Bike Carrier
Enhanced Bike Security: The dual rotatable load arms securely grip the bike by the wheels, ensuring zero contact...
As an affiliate, we earn on qualifying purchases.
Adjust the Handlebar Position
To adjust the handlebar position on your bicycle, start by setting the initial position based on your body type and riding style. Fine-tune the position by adjusting the stem and handlebar height and angle to ensure a comfortable and efficient riding posture.
Finally, check the position while riding to make sure it feels right and allows for proper control and handling of the bike. Keep in mind that small adjustments can make a big difference in your overall riding experience.
Set the Initial Position
Start by positioning yourself on the bike in a comfortable and natural way. Make sure your feet are on the pedals and your hands are resting lightly on the handlebars. The importance of posture can’t be overstated, so ensure that your back is straight and your shoulders are relaxed.
Common mistakes to avoid include slouching, leaning too far forward, or hunching your shoulders. Once you are comfortable, it’s time to set the initial position of the handlebars. Here are three steps to follow:
- Loosen the bolt on the stem cap with a 5mm Allen key
- Adjust the stem to the desired height and angle
- Tighten the bolt back up, making sure it is secure but not over-tightened
Fine-tuning the position of the handlebars will come later, but for now, you have set a solid foundation to build upon.
Next, we will explore how to adjust the handlebars to fit your body even better.
Fine-Tune the Position
As you get into the groove of riding, tweaking the handlebars to suit your style is like adding a pinch of salt to a dish – it’s all about finding that perfect balance. One of the most important aspects of fine-tuning your bicycle’s fit is achieving optimal handlebar placement. This can greatly affect your posture, comfort, and overall performance.
To determine the optimal handlebar placement, it’s important to consider the width of your shoulders, the length of your arms, and the type of riding you’ll be doing. Generally, the handlebars should be positioned so that your arms form a comfortable, slightly angled bend, with your hands resting comfortably on the grips. Additionally, it’s important to pay attention to proper foot alignment, as this can greatly affect your balance and stability while riding. By adjusting the position of your seat and pedals, you can ensure that your feet are properly aligned with the pedals and that your weight is evenly distributed between your feet and hands.
Properly fine-tuning your bicycle’s fit is crucial for an enjoyable and efficient riding experience. Once you’ve adjusted your handlebars and pedals, it’s important to check the position while riding to ensure that everything feels comfortable and secure. By regularly assessing and adjusting your bicycle’s fit, you can avoid discomfort and improve your overall performance on the road or trail.
Check the Position While Riding
While riding, make sure to regularly check that everything feels comfortable and secure, ensuring optimal posture and performance on the road or trail. Maintaining comfort is crucial to avoid injuries and ensure you can ride longer and farther.
The importance of posture and alignment cannot be overstated, as they affect your body’s mechanics and the power you can generate with each pedal stroke. As you ride, pay attention to your body’s feedback, such as any discomfort, pain, or numbness. Adjust your position accordingly, whether it’s by changing your hand position on the handlebars, adjusting the saddle height, or shifting your weight.
In addition to maintaining comfort, checking your position while riding can also help you improve your efficiency and power output. By maintaining proper alignment, you can make sure that your body is in the optimal position to generate the most power with the least amount of effort. This can help you ride faster, longer, and with less fatigue.
As you ride, focus on maintaining a neutral spine, keeping your shoulders relaxed and down, and engaging your core muscles. By doing so, you can ensure that your body is balanced and stable, allowing you to tackle any terrain with confidence. To further optimize your position, you may need to adjust the reach of your bike, which we’ll discuss in the next section.

GATHERSKY Roof Bike Rack Mount Upright Rooftop Bike Rack with Two Arms 1 Bike Carrier Car Roof Bicycle for Car SUV Only Suitable for Removable Crossbars
【More Bike Security】Two pivoting upright arms hold your bike firmly by the wheels. No Front wheel removal required...
As an affiliate, we earn on qualifying purchases.
Adjust the Reach
Okay, let’s adjust your reach by moving your handlebars closer or further away from your body until your arms are comfortably extended and your shoulders relaxed. This will ensure that you can ride for longer periods without discomfort or pain.
Here are three things to consider when adjusting your reach:
-
Hand position: Make sure your hands are comfortably resting on the handlebars with your fingers wrapped around the brake levers.
-
Grip width: Adjust the width of your handlebars so that your grip feels natural and comfortable. This will help prevent strain in your shoulders and arms.
-
Importance of reach in avoiding injury: A proper reach is essential in preventing injury to your neck, back, and shoulders. When your reach is too long, it can cause excessive strain on your lower back and neck. When it’s too short, it can cause shoulder fatigue and discomfort.
Now that you have adjusted your reach, it’s time to fine-tune your bike fit to ensure that everything is in the right place. This will help you achieve maximum comfort and efficiency on the bike.
Fine-Tune Your Bike Fit
Now that you’ve adjusted the reach of your bicycle, it’s time to fine-tune your bike fit.
First, adjust the cleat position to ensure proper alignment of your feet with the pedals.
Next, adjust the pedal spacing to optimize power transfer and prevent knee pain.
Lastly, remember to check your fit regularly to account for any changes in your body or riding style.
By making these small adjustments, you can improve your comfort, performance, and prevent injuries while cycling.
Adjust the Cleat Position
To optimize your cycling efficiency, it’s important to adjust the position of your cleats. The importance of cleat alignment cannot be overstated. Proper alignment allows for the most efficient transfer of power from your legs to the pedals. Common cleat position mistakes, such as positioning them too far forward or too far back, can lead to discomfort, decreased power output, and even injury.
To adjust your cleat position, start by placing your shoe on the pedal and aligning the ball of your foot directly over the pedal axle. Then, adjust the cleat position so that the ball of your foot is directly over the center of the cleat. This will ensure that your foot is in the most stable and powerful position on the pedal. Check your alignment by looking down at your feet while pedaling. If you notice any discomfort or unevenness in your pedal stroke, adjust the cleat position accordingly. Once your cleats are properly aligned, you can move on to adjusting the pedal spacing.
Adjust the Pedal Spacing
You want your pedals to be just the right distance apart, like a comfortable pair of shoes that fit just right. Choosing pedals and adjusting their spacing can be a crucial step in fitting your bike. Pedal spacing determines the width of your stance while riding, which can affect your pedaling efficiency and comfort.
When choosing pedals, consider the type of riding you’ll be doing. Mountain bikers and commuters may prefer wider platform pedals for stability, while road cyclists may opt for clipless pedals for power transfer. Once you’ve selected your pedals, it’s time to adjust their spacing.
Start by standing in your riding shoes with your feet hip-width apart and parallel. Using a pedal wrench, loosen the pedal axle and slide the pedal to your desired width. A pedal stroke analysis can help determine the ideal spacing for you. A professional bike fitter or coach can provide this service, or you can do it yourself by observing your natural pedaling motion and adjusting accordingly. Remember to tighten the pedal axle securely once you’ve found your ideal spacing.
Now that you’ve adjusted your pedal spacing, it’s important to check your fit regularly to ensure it remains optimal. Over time, your body may change or your riding style may evolve, and adjustments may need to be made.
Regularly evaluating your fit can improve your riding experience and prevent discomfort or injury. Next, we’ll discuss how to check your fit regularly.
Check Your Fit Regularly
It’s important to regularly assess how comfortable and efficient you feel while riding, as your body and skills may change over time. Checking your fit regularly ensures that you are able to ride with ease and prevent any potential injuries.
Here are some things to keep in mind when checking your fit:
-
Importance of flexibility: Regular stretching can help improve your flexibility, which in turn can help with your fit on the bike. A lack of flexibility can cause discomfort and even lead to injury if your body is not able to properly adjust to the bike’s position.
-
Proper cycling attire: Wearing proper cycling attire can also help improve your fit. Clothing that is too loose or too tight can interfere with your ability to properly adjust your position on the bike. Additionally, cycling shoes with stiff soles can help improve power transfer and reduce any discomfort in your feet.
In addition to these factors, it’s important to make sure that your bike is properly maintained and adjusted. Regularly checking your fit can help ensure that you are comfortable and efficient while riding, which can lead to a more enjoyable cycling experience.
Frequently Asked Questions
How do I know if my bike is the right fit for my body type?
To ensure your bike fits your body type, start by checking measurements such as inseam length and reach. Seeking professional help from a bike shop or fitting specialist can also improve your comfort and performance.
What should I do if I experience discomfort in my feet while cycling?
If you’re experiencing discomfort in your feet while cycling, consider adjusting the pedals to ensure proper alignment. Additionally, footwear options such as clipless pedals or shoes with stiff soles can improve comfort and performance.
How can I improve my posture while cycling?
Are you struggling with maintaining proper posture while cycling? Posture tips include keeping your back straight, shoulders relaxed, and core engaged. Training techniques like yoga and strength exercises can also improve your posture on the bike.
Is it necessary to wear padded cycling shorts for longer rides?
For longer rides, wearing padded cycling shorts can provide benefits like reducing chafing and increasing comfort. Alternatives include padded seat covers or using a gel cushion for your seat.
What are some common mistakes to avoid when fitting a bicycle?
To improve technique and avoid mistakes when fitting a bike, ensure the proper saddle height, handlebar reach, and pedal cleat positioning. Ensure bike measurements are accurate and account for individual anatomy to prevent discomfort and injury.
Conclusion
Congratulations, you’ve successfully fitted your bicycle! By following the steps outlined in this article, you’ve ensured that your bike is the perfect size for you. The saddle height is adjusted to your body, the handlebar position is comfortable, and the reach is just right.
This attention to detail may seem excessive to some, but to a serious cyclist, it can mean the difference between a comfortable, enjoyable ride and a painful, unproductive one. A properly fitted bike can also help prevent injury and improve performance.
So go ahead, take your newly fitted bike out for a spin, and enjoy the ride!