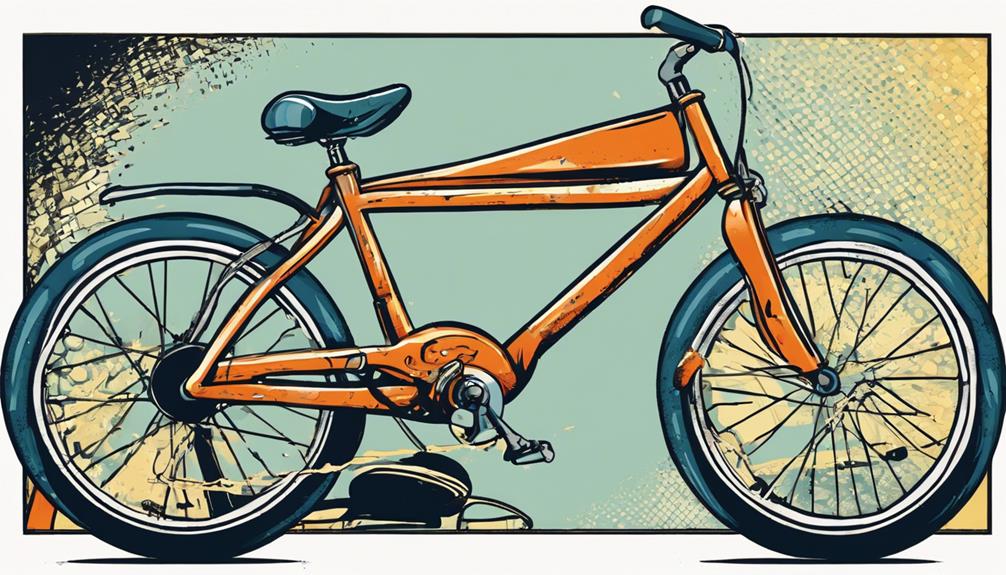
Repairing a bicycle chain might appear intimidating for beginners in bicycle upkeep. Yet, by following several straightforward steps, one can quickly fix or substitute it.
In this article, I will walk you through the process of assessing the damage, removing the chain, repairing or replacing it, lubricating it, and testing the chain to ensure it is functioning properly.
The first step in fixing a bicycle chain is to assess the damage. Look for any signs of wear and tear, such as rust or kinks in the chain links. If the chain is severely damaged, it may need to be replaced.
However, if the damage is minimal, it can usually be repaired with a few simple tools. By following these steps, you can ensure your bicycle chain is in top condition and ready for your next ride.
Key Takeaways
- Properly assessing chain damage is crucial before repairing or replacing the chain.
- Regularly lubricating the chain with the appropriate lubricant will help ensure smooth operation.
- Testing and adjusting chain tension is important for optimal performance and to prevent excessive wear.
- Indicators for chain replacement include excessive wear, chain skipping, and chain noise.

Under Armour Squeeze Water Bottles, 32 oz Water Bottles, Sideline Sports Water Bottle with Quick-Shot Lid, Quick & Easy Hydration, Gym Water Bottles, Squeeze Bottle, 1 32oz Bottle
- Easy Hydration: Quick-shot lid and one-way valve
- On-the-Go Use: One-hand operation for active hydration
- Measurement Markings: Ounces and milliliters for tracking
As an affiliate, we earn on qualifying purchases.
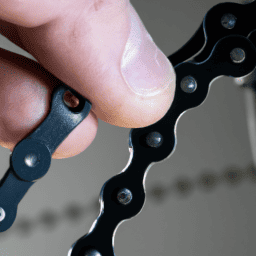
Assess the Damage
Take a close look at the chain to see if it’s mangled or twisted, and don’t be afraid to get your hands a little dirty. Inspecting chain wear is crucial to identifying common chain issues that could be causing your bicycle chain to malfunction.
There are several ways to inspect chain wear, including checking for elongation or stretching by measuring the distance between links, or looking for signs of rust or corrosion. Identifying common chain issues such as bent or broken links, or a damaged master link, can help you pinpoint the problem and determine the best course of action to fix it.
Once you have assessed the damage, you can move on to the next step of removing the chain and getting it ready for repair.
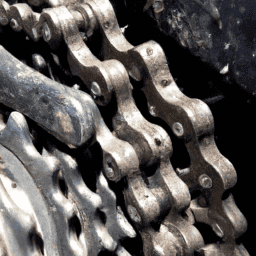
Remove the Chain
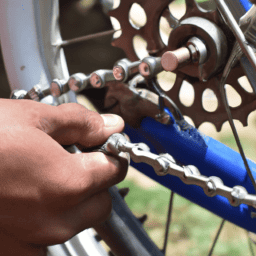
To detach the circular link, it’s best to delicately release the connection without disrupting the surrounding components. First, I grab my bike maintenance tools: a chain tool, pliers, and a quick release link.
Using my pliers, I carefully unclip the quick release link that holds the chain together. Then, I use my chain tool to push out the pin that connects the two ends of the chain. It’s important to make sure the chain is in the correct position on the tool to avoid damaging it.
Once the chain is completely removed, I inspect it for any damage or wear. Chain maintenance is important to ensure a smooth and safe ride, so I always take the time to thoroughly examine it. If the damage is beyond repair, it’s time to replace the chain. However, if it’s just a minor issue, I can move on to repairing it.
Repair or Replace the Chain
Once the circular link is detached, it’s crucial to assess the state of the chain to determine whether it needs repairing or replacing. There are various factors to consider when deciding whether to repair or replace bicycle chains. Below is a table outlining the pros and cons of repairing versus replacing bicycle chains, as well as the factors to consider:
| Pros of Repairing | Cons of Repairing | Pros of Replacing | Cons of Replacing |
|---|---|---|---|
| – Cheaper | – May not fix the issue | – Guaranteed to fix the issue | – More expensive |
| – Environmentally friendly | – May not last as long | – Can upgrade to a better quality chain | – More wasteful |
When determining whether to repair or replace a bicycle chain, it’s important to consider the chain’s age, wear and tear, and overall condition. If the chain is relatively new and only has minor issues, repairing it may be the best option. However, if the chain is old and showing significant signs of wear, replacement may be the better choice. It’s also important to consider the cost and environmental impact of each option.
In order to keep your bike chain in good condition, it’s important to regularly lubricate it.
Lubricate the Chain
When maintaining my bicycle chain, I always make sure to apply enough lubricant to ensure smooth operation. Using high-quality lubricant with the proper viscosity helps the chain operate smoothly and efficiently.
After applying the lubricant, it’s essential to wipe off any excess to prevent dirt and debris from sticking to the chain. This can cause additional wear and tear.
Overall, lubricating the chain is an essential part of bicycle maintenance that shouldn’t be overlooked.
Apply Lubricant to the Chain for Smooth Operation
For a smoother ride, it’s important to regularly apply lubricant to your bike chain. Regular lubrication not only helps to reduce friction and wear on the chain, but also helps to prevent rust and corrosion. By keeping your chain properly lubricated, you can extend its lifespan and improve the overall performance of your bike.
When it comes to choosing the best lubricant for your bicycle chain, there are several options available on the market. Some popular choices include wax-based lubricants, dry lubricants, and wet lubricants. Each type of lubricant has its own advantages and disadvantages, so it’s important to choose one that’s best suited for your riding conditions and personal preferences.
By applying lubricant to your chain regularly and choosing the right type of lubricant, you can ensure that your bike runs smoothly and efficiently.
To move onto the next step, it’s important to wipe off any excess lubricant from the chain to prevent attracting dirt and debris.
Wipe Off Any Excess Lubricant
After applying lubricant to the chain, it’s important to wipe off any excess. Excess lubricant can attract dirt and debris, causing faster wear. To wipe off excess lubricant, use a clean rag and run it along the length of the chain. Be sure to get between the links and wipe off any excess.
When choosing a lubricant, it’s important to choose one specifically made for bicycle chains. This ensures the best possible protection and performance for your chain. Additionally, choose a cleaning technique gentle on the chain. Harsh cleaning methods can damage the chain and cause faster wear.
Now that the excess lubricant has been wiped off, it’s time to test the chain.
Test the Chain
Check the tension of your chain by gently pulling it away from the bike frame and feeling for any looseness or slackness. If the chain’s loose, adjust the tension using the appropriate tool, such as a chain tensioner or a derailleur. Once you’ve adjusted the tension, test the chain again to ensure it’s not too loose or too tight.
It should have just enough slack to move up and down slightly, but not so much that it slips off the gears or causes excessive wear on the chain and gears. When testing the chain, pay attention to the following indicators to determine if it needs to be replaced: excessive wear on the chain, chain skipping, and chain noise.
To check for wear, use chain wear indicators or simply measure the distance between the links. If it has stretched beyond the manufacturer’s specifications, it needs to be replaced. Additionally, use proper chain cleaning techniques to maintain the chain’s longevity.
Regularly cleaning the chain and gears with a degreaser and lubricating it with a high-quality chain oil will help prevent wear and tear, and ensure that your bike is running smoothly. Remember to always test your chain before each ride to avoid potential accidents or damage to your bike.
Frequently Asked Questions
How often should I lubricate my bicycle chain?
I lubricate my bicycle chain every 100-150 miles. It’s important to clean the chain before lubricating it to prevent buildup. For wet conditions, use a wet lubricant, and for dry conditions, use a dry lubricant.
Can I use any type of lubricant on my bicycle chain?
Wow, there are so many different lubricants for bicycle chains! While some are great for reducing friction and increasing longevity, others can attract dirt and grime. It’s important to choose a lubricant that is compatible with your specific chain type to ensure optimal performance.
What tools do I need to repair a bicycle chain?
For bicycle chain repair, essential tools include a chain tool, pliers, and a master link. Tips for beginners include checking for wear, selecting the right replacement link, and properly sizing the chain.
How do I know if my bicycle chain is too worn to be repaired?
To determine if my bike chain needs replacing, I measure the wear using a chain wear tool. Preventive maintenance, like keeping the chain clean and lubricated, can extend its life. Chain replacement is necessary when wear exceeds 0.75%.
What should I do if my bicycle chain keeps slipping even after I’ve fixed it?
If my bicycle chain slips even after fixing it, I’d adjust tension by loosening the rear wheel and pulling it back to increase tension. If that doesn’t work, I’d replace a worn chain link.
Conclusion
In conclusion, fixing a bicycle chain may seem daunting at first, but with the right tools and mindset, it can be done smoothly and efficiently.
It’s important to assess the damage before proceeding with any repairs. This will determine whether the chain can be salvaged or needs to be replaced entirely.
Once the chain is removed and repaired or replaced, it’s crucial to lubricate it properly. This ensures smooth operation and prevents further wear and tear.
Finally, testing the chain before hitting the road is a must to ensure safety and avoid any mishaps.
Fixing a bicycle chain may not be the most exciting task, but it’s a necessary one for any avid cyclist. So next time you find yourself in a chain predicament, remember that with a little elbow grease and determination, you can get back on the road in no time. In fact, fixing a chain can be so satisfying, it’s like winning the Tour de France without all the sweat and tears.