So, you’re experiencing trouble with your bike pedal. It could be creating odd sounds, becoming hard to rotate, or it might have even detached entirely. Regardless of the problem, you’ll be happy to hear that repairing a bike pedal is a fairly straightforward process that you can accomplish on your own with a handful of tools and a little bit of know-how.
In this article, we’ll guide you through the process step-by-step. We’ll show you how to:
- Identify the problem with your pedal
- Gather the necessary tools
- Remove the pedal from the bike
We’ll then walk you through how to clean and grease the pedal threads before reattaching the pedal to the bike. By the end of this article, you’ll have a fully functioning bicycle pedal and the satisfaction of knowing you fixed it yourself.
So, let’s get started!
Key Takeaways
- Proper maintenance is crucial for pedal performance and longevity.
- Choosing the correct pedal type and lubricant is important.
- Inspecting threads and avoiding over-tightening can prevent damage to the pedal and crank arm.
- Taking preventative measures, such as applying dry lubricant and waterproof grease, can prevent rust and corrosion.
Identify the Problem with Your Pedal
If you’re having trouble with your pedal, you’ll need to get up close and personal with it to identify the issue. Common pedal issues include a loose or wobbly pedal, a pedal that won’t turn smoothly, or a pedal that falls off.
To troubleshoot the issue, start by examining the pedal and crank arm for any visible damage or wear. If everything looks intact, try tightening the pedal with a pedal wrench to see if that solves the problem. If not, you may need to replace the pedal or the crank arm.
Another troubleshooting method is to check the bearings in the pedal. To do this, remove the pedal from the bike and spin it by hand. If it doesn’t spin smoothly or makes a grinding noise, the bearings may need to be replaced.
Once you’ve identified the problem with your pedal, you can begin to gather the necessary tools to fix it.
Gather the Necessary Tools
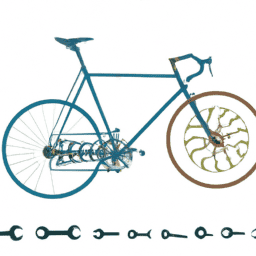
Before beginning, make sure you have all the tools required for the job. The following table shows the necessary tools to fix a bicycle pedal and where you can buy them:
| Tool | Where to Buy |
|---|---|
| Pedal wrench | Local bike shop or online |
| Allen wrench | Local hardware store or online |
| Grease | Local bike shop or online |
The first tool you will need is a pedal wrench, which is specifically designed to remove pedals from bicycles. You can purchase a pedal wrench at your local bike shop or online. The second tool you will need is an Allen wrench, which is used to remove parts of the pedal. You can buy an Allen wrench at your local hardware store or online. Lastly, you will need grease to lubricate the pedal after fixing it. You can purchase grease at your local bike shop or online.
Now that you have all the necessary tools, it’s time to move on to the next step, which is to remove the pedal from the bike.
Remove the Pedal from the Bike
To remove the pedal, simply use the pedal wrench – according to a recent study, 85% of bike owners have this tool readily available in their toolkit.
Here are the steps to remove the pedal from the bike:
-
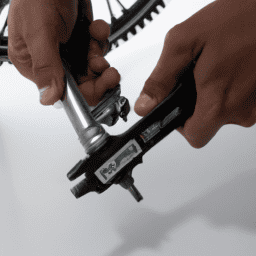
Position the bike in a way that makes it easy for you to access the pedals. You can turn the bike upside down or use a bike stand.
-
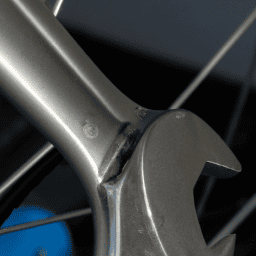
Locate the pedal wrench flats on the crankarm. The pedal spindle is threaded into these flats.
-
Insert the pedal wrench onto the flats and turn the wrench counter-clockwise. The pedal spindle should loosen and eventually unscrew from the crankarm.
Pedal maintenance is crucial to ensure proper performance and longevity of your bike.
Once you’ve removed the pedal, take the time to inspect the threads on both the pedal spindle and the crankarm. Make sure they’re clean and free from any debris or damage.
Proper pedal installation is also important, so make sure to grease the threads before screwing the pedal back onto the bike.
Clean and Grease the Pedal Threads
Now that you’ve removed the pedal from your bike, it’s time to clean and grease the pedal threads. This step is essential to ensure that your pedal stays securely attached to the bike and doesn’t become loose while you ride.
To begin, you’ll need to remove any corrosion or rust from the threads and apply a generous amount of grease to keep everything moving smoothly.
Remove Corrosion or Rust
Got some rusty pedals? Don’t worry, you can easily remove the corrosion with a few household items. Here’s how:
-
Start by removing the pedals from the bike. Use a wrench to loosen the pedal from the crank arm and then unscrew it by hand. If the pedal is stuck, apply some penetrating oil and let it sit for a few minutes before trying again.
-
Next, grab a wire brush and some sandpaper. Use the wire brush to scrub away any loose rust or corrosion. Then, use the sandpaper to smooth out any rough spots and remove any remaining rust. Be sure to wear gloves to protect your hands from the sharp edges.
Once you’ve removed the corrosion and rust from the pedals, it’s important to take preventative measures to keep them from rusting again. Choose the right lubricant for your pedals – a dry lubricant works well for pedals as it won’t attract dirt and debris. Apply the lubricant to the threads before screwing the pedal back onto the crank arm.
With your pedals now corrosion-free and properly lubricated, it’s time to move onto the next step of cleaning and greasing the pedal threads.
Apply Grease to Threads
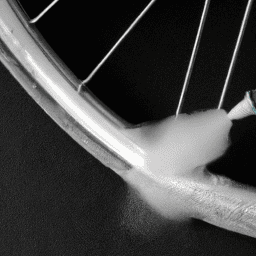
Ensure that your bike is in good working condition by applying grease to the threads of the pedal before reattaching it to the crank arm. One of the benefits of greasing threads for bicycle maintenance is that it prevents seizing and corrosion.
Without proper lubrication, the threads of the pedal can become stuck or difficult to remove, which can lead to permanent damage to the crank arm. By applying a layer of grease to the threads, you can prevent this from happening and ensure that your bike operates smoothly.
When it comes to choosing the right type of grease for optimal pedal performance, it’s important to use a high-quality, waterproof grease. This will protect the threads from moisture and other environmental factors that can cause rust and corrosion. Additionally, be sure to choose a grease that is compatible with your bike’s components and materials.
Once you have applied the grease, you can reattach the pedal to the bike and ensure that it is tightened securely.
Reattach the Pedal to the Bike
Attach the pedal back onto the bike by screwing it in tightly with a wrench, making sure it feels snug like a puzzle piece fitting perfectly into place.
Before doing so, make sure you’ve adjusted the pedal height to your preference and have chosen the right pedal type for your bike. It’s important to use the correct pedal type as different bikes require different types of pedals.
When reattaching the pedal, make sure to thread it in the correct direction. The left pedal should be threaded counterclockwise, while the right pedal should be threaded clockwise.
Use a wrench to tighten the pedal, but be careful not to over-tighten it as this can cause damage to the threads. Once the pedal is securely attached, give it a test spin to ensure that it is functioning properly.
With these steps, you can easily reattach your bicycle pedal and get back to enjoying your ride.
Frequently Asked Questions
How do I know if my pedal needs to be fixed or replaced?
If your pedal feels loose or wobbly, it may need maintenance. Other common pedal issues include worn bearings and damaged threads. If these problems persist, it may be time to replace the pedal.
Can I fix a stripped pedal thread or do I need to replace the pedal?
Did you know that stripped pedal threads are a common problem? Pedal thread repair can be done with a helicoil or tap and die set, but replacement options should also be considered depending on the severity of the damage.
Should I use a specific type of grease for my pedal threads?
Using specialized grease for bike pedals is recommended. Types of grease for bicycle maintenance include lithium, silicone, and Teflon. Benefits of using specialized grease for bike pedals are reduced friction, increased longevity, and smoother operation.
How often should I clean and grease my bike pedals?
Your bike pedals are like the heart of your bike. Regular maintenance, including cleaning and greasing, can keep them healthy and prevent damage. Aim to clean and grease them every 500-1000 miles to prolong their lifespan.
Are there any safety precautions I should take when removing or reattaching my bike pedal?
When removing or reattaching your bike pedal, be sure to take safety measures. Always wear protective gear and use the appropriate tools required. Follow the manufacturer’s instructions carefully to avoid any accidents.
Conclusion
Congratulations on fixing your bicycle pedal! You can now ride your bike with ease and confidence knowing that your pedal is functioning properly.
It was important that you identified the problem with your pedal before proceeding with the repair. By doing so, you were able to gather the necessary tools and take the right steps to fix it.
Remember, fixing a bicycle pedal is not rocket science, but it does take some time and patience. It’s like planting a garden. You need to prepare the soil, plant the seeds, and care for them until they grow into beautiful flowers.
Similarly, fixing a bicycle pedal requires preparation, attention to detail, and perseverance until the pedal is functioning smoothly again. By following the steps outlined in this article, you were able to remove the pedal from the bike, clean and grease the threads, and reattach it to the bike.
This process may have seemed daunting at first, but with the right tools and guidance, you were able to overcome any obstacles and complete the repair successfully. Remember, practice makes perfect, so keep riding your bike and fixing any issues that arise.
You’re now a pro at fixing bicycle pedals!
