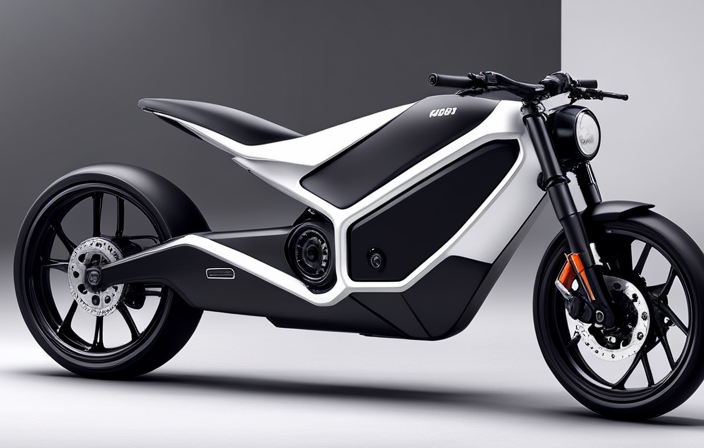
I’ve been there before, frustrated and puzzled by a razor electric bike that turns on but refuses to move. But fear not, because in this article, I’m going to guide you through the steps to fix this issue.
We’ll dive into the nitty-gritty details, from checking the battery connection to inspecting the throttle and controller.
By the end, you’ll have a clear understanding of how to troubleshoot and resolve any problems preventing your electric bike from moving.
Let’s get started!
Key Takeaways
- Inspect battery terminals for cleanliness and debris
- Check for loose connections to the wiring harness
- Verify throttle connection to handlebars
- Test motor windings’ resistance with a multimeter

GPUTEK Mini Bike Tire Air Pump: Fast Inflate Portable Small Bicycle Electric Pump for Presta and Schrader Valves, 120 Psi High Pressure Pump with Digital Gauge for Road Bike, Mountain Bike, E-Bike
Portable and Lightweight Design: The GPUTEK bike electric pump measures a compact 2.81 x 1.77 x 1.25 inches...
As an affiliate, we earn on qualifying purchases.
Check the Battery Connection
You should first check if the battery is properly connected before moving on to other troubleshooting steps. Start by inspecting the battery terminals. Make sure they are clean and free from any corrosion or debris. If there is any buildup, you can use a wire brush to gently clean the terminals.
Next, test the battery voltage using a multimeter. This will help determine if the battery is providing enough power. Connect the red probe to the positive terminal and the black probe to the negative terminal. A fully charged battery should read around 12.6 volts. If the voltage is significantly lower, it may indicate that the battery needs to be charged or replaced.
Now, let’s transition to the next section about inspecting the throttle and controller. It’s important to ensure that these components are functioning properly, as they play a crucial role in the bike’s movement.

HOTO Mini Bike Tire Pump, 25s Fast Inflate Bicycle Pump with Guage, 150PSI Portable Electric Bike Air Pump with Presta and Schrader Valve for Road Bike, Motorcycle, Mountain Bike, BMX, Sports Ball
NOTICE: The Presta valve adapter is a separate accessory, always attach the Presta adapter securely to the tire...
As an affiliate, we earn on qualifying purchases.
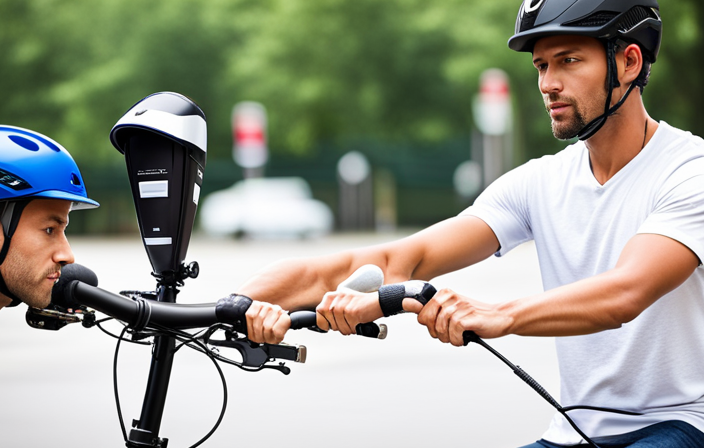
Inspect the Throttle and Controller
Inspecting the throttle and controller can help identify any issues with the bike’s movement. Here are some troubleshooting tips and common issues to look out for:
-
Check the throttle: Ensure that the throttle is properly connected to the controller. Look for any loose or damaged wires. If the throttle feels sticky or unresponsive, it may need to be replaced.
-
Examine the controller: Inspect the controller for any visible damage or loose connections. Check if the LED lights on the controller are functioning properly. If the controller is faulty, it may need to be repaired or replaced.
-
Test the throttle output: Use a multimeter to measure the voltage output of the throttle. Compare the readings with the manufacturer’s specifications. If the output is significantly different, there may be a problem with the throttle or controller.
-
Inspect the wiring harness: Carefully inspect the wiring harness that connects the throttle, controller, and motor. Look for any frayed wires, loose connections, or damaged insulation. Repair or replace any faulty wiring.
By thoroughly inspecting the throttle and controller, you can troubleshoot common issues that may prevent your electric bike from moving.
Now, let’s move on to testing the motor to further diagnose the problem.

CYCPLUS Electric Air Compressor Portable Bicycle Pump Car Tire Inflator, Max 150 PSI, Auto Shut-Off Air Pump with Presta and Schrader Valves for All Bicycles Motorcycles and Cars
【150PSI Fast Inflation】CYCPLUS Portable Air Compressor delivers 𝟏𝟓𝟎 𝐏𝐒𝐈/𝟏𝟎.𝟑 𝐁𝐚𝐫, allowing you to fully inflate a bike tire...
As an affiliate, we earn on qualifying purchases.
Test the Motor
To diagnose the issue with the motor, start by testing its functionality. The motor is a crucial component of an electric bike, and when it malfunctions, it can prevent the bike from moving. Motor troubleshooting involves identifying common motor issues and determining if the motor is the root cause of the problem.
One way to test the motor is by checking its electrical connections. Ensure that all the wires are securely connected and there are no loose or damaged connections. Additionally, use a multimeter to measure the voltage at the motor terminals while the bike is turned on and the throttle is engaged. This will help determine if the motor is receiving the proper power supply.
Another test to perform is to check the resistance of the motor windings. Disconnect the motor from the controller and use a multimeter to measure the resistance across the motor’s terminals. Compare this value to the manufacturer’s specifications to determine if the motor windings are within the acceptable range.
Here is a table summarizing the motor troubleshooting steps:
| Motor Troubleshooting Steps |
|---|
| Check electrical connections |
| Measure voltage at motor terminals |
| Check resistance of motor windings |
Once the motor has been thoroughly tested and any issues have been addressed, the next step is to examine the brake system. This will ensure that there are no issues with the brakes that could be causing the bike to not move properly.

CYCPLUS AS2 PRO Tiny Bicycle Pump with Gauge, Max 120 PSI Electric Mini Pump, Auto Stop, with Presta and Schrader Valve for E-Bike, MTB, and Road Bike (2025 Updated Version)
【Pocket Size & Portable】: Weight: 𝟒.𝟐𝟑 𝐨𝐳 (𝟏𝟐𝟎𝐠); Size: 𝟐.𝟕𝟓 𝐱 𝟏.𝟏𝟎 𝐱 𝟏.𝟗𝟐 inches - mini and...
As an affiliate, we earn on qualifying purchases.
Examine the Brake System
Once you have finished testing the motor, it’s time to turn your attention to examining the brake system. Troubleshooting common brake issues is crucial to ensure the safe operation of your razor electric bike.
The first step is to check if the brake lever is functioning properly. If the lever feels loose or does not engage the brake, it may need adjustment or replacement. Additionally, inspect the brake pads for wear and tear. Worn-out brake pads can reduce braking effectiveness and should be replaced promptly.
If you are experiencing a stuck brake system, follow these steps to fix it. Begin by inspecting the brake cable for any obstructions or kinks. Straighten or replace the cable if necessary. Next, check the brake caliper for any debris or corrosion that might be preventing it from moving freely. Clean and lubricate the caliper as needed.
To ensure a smooth transition into the subsequent section about ‘check the chain and sprocket’, it is important to note that a properly functioning brake system is essential for the overall performance of your razor electric bike.
Check the Chain and Sprocket
Make sure the chain and sprocket are properly lubricated to ensure smooth movement. When troubleshooting an electric bike that turns on but does not move, checking the chain and sprocket is crucial. Start by inspecting the chain for any signs of damage or excessive wear. Look for loose or missing links, as these can cause the bike to lose power or not move at all.
Next, examine the sprocket to ensure it is in good condition. Check for any broken teeth or worn-out edges that could hinder the bike’s performance.
In addition to visual inspection, it’s important to check the gear ratio. The gear ratio determines the speed and torque of the bike. If the gear ratio is incorrect, it can cause the bike to struggle or not move at all. Consult the manufacturer’s manual or website to find the recommended gear ratio for your specific electric bike model. Adjust the gear ratio accordingly to optimize the bike’s performance.
Lastly, inspect the motor brushes. These small, replaceable components are responsible for transferring power from the battery to the motor. Over time, the brushes can wear down or become dirty, resulting in decreased power output. Remove the brushes carefully and clean them using a soft brush or compressed air. If the brushes are excessively worn or damaged, replace them with new ones.
Now that we have checked the chain and sprocket, let’s move on to the next step and inspect the wheels and tires.
Inspect the Wheels and Tires
Check if your wheels are properly inflated and examine the tires for any signs of damage or wear. Start by using a tire pressure gauge to check the tire pressure. The recommended tire pressure for your electric bike can usually be found on the sidewall of the tire. If the pressure is too low, inflate the tires to the recommended level using a bicycle pump or an air compressor.
Next, visually inspect the brakes and brake pads. Look for any signs of excessive wear or damage. The brake pads should have a thickness of at least 1/8 inch. If they are worn down, replace them immediately.
Additionally, check for any signs of damage or wear on the wheels. Look for cracks, dents, or loose spokes. Any damage to the wheels can affect the performance and safety of your electric bike.
Verify the Functionality of the Power Switch
To ensure your electric bike is functioning properly, you need to verify if the power switch is turning on and off as it should. The power switch is a crucial component that controls the flow of electricity to the bike’s motor. If there are any issues with the power switch, it can result in your bike not moving despite being turned on. Troubleshooting the power switch is essential in diagnosing and resolving this problem.
There are a few common power switch issues that you should be aware of. First, check if the switch is securely connected to the wiring harness. Loose connections can cause intermittent power supply, resulting in the bike’s inability to move. Additionally, inspect the switch for any signs of damage or corrosion. These issues can interfere with the proper functioning of the switch and may require replacement.
To examine the wiring connections, it is necessary to move on from the power switch. By ensuring that all the wiring connections are secure and free from damage, you can eliminate any potential problems that may be affecting the functionality of your electric bike.
Examine the Wiring Connections
Take a close look at the wiring connections to ensure they are secure and free from any damage. This is a crucial step in troubleshooting your razor electric bike that turns on but does not move. Faulty or loose wiring connections can disrupt the flow of electricity and prevent the bike from functioning properly.
Here are three key points to consider when examining the wiring connections:
-
Inspect the wiring harness: Carefully examine the wiring harness, which contains a network of wires that connect various electrical components. Look for any signs of frayed or damaged wires, loose connections, or corrosion. Make sure all the wires are securely connected and properly insulated.
-
Check the battery connections: Verify that the battery connections are clean, tight, and free from corrosion. Clean any dirt or debris that may have accumulated on the battery terminals. Ensure that the positive and negative terminals are securely connected to the appropriate cables.
-
Test the electrical components: Use a multimeter to test the electrical components, such as the throttle, controller, and motor. Test for continuity and proper voltage at each connection point. If any component fails the test, it may need to be replaced or repaired.
Test the Fuse
Make sure you test the fuse to determine if it is functioning properly. The fuse is an essential component in the electrical system of your razor electric bike. It protects the bike from electrical overload and prevents any damage to the motor or other crucial parts.
To check the fuse connection, start by locating the fuse box. It is usually located near the battery compartment or under the seat. Open the fuse box and inspect the fuse for any signs of damage, such as a blown fuse or a loose connection.
Troubleshoot the fuse issue by using a multimeter to test the continuity. Set the multimeter to the resistance mode and touch the probes to both ends of the fuse. If the multimeter displays a reading close to zero, the fuse is functioning properly. However, if there is no continuity, it means the fuse is blown and needs to be replaced.
Now, let’s move on to the next step and inspect the circuit breaker.
Inspect the Circuit Breaker
Now, let’s check if the circuit breaker is working properly. To inspect the circuit breaker, we need to troubleshoot the wiring and ensure that all connections are secure. Begin by locating the circuit breaker panel, which is usually found in the basement or utility room. Open the panel and visually inspect the circuit breaker for any signs of damage, such as burned or melted components. Check if any of the circuit breakers are in the ‘tripped’ position, indicated by a switch pointing in a different direction than the others. If you find a tripped breaker, firmly push it to the ‘off’ position and then back to the ‘on’ position. This will reset the breaker.
Next, carefully inspect the wiring connected to the circuit breaker. Look for any loose or damaged wires that may be causing the issue. If you notice any problems, tighten or replace the wiring as necessary.
Moving on from inspecting the circuit breaker, the next step is to check for any loose or damaged parts.
Check for Any Loose or Damaged Parts
After checking the circuit breaker, it’s important to inspect for any loose or damaged parts. Here are four steps to guide you through checking for loose connections and inspecting for damaged parts:
-
Examine the wiring harness: Start by visually inspecting the wiring harness for any loose or disconnected wires. Ensure that all connections are securely fastened and properly seated. Look out for any signs of fraying or damage to the wires, as this could cause electrical issues.
-
Check the battery connections: Next, inspect the battery connections. Make sure that the terminals are clean and free from corrosion. Tighten any loose connections and ensure that the battery is securely fastened in its compartment.
-
Inspect the motor controller: Carefully examine the motor controller for any signs of damage or loose connections. Check all the wiring connections to and from the motor controller. Look out for any loose or disconnected wires, as they can prevent the bike from functioning properly.
-
Verify the throttle connection: Finally, check the throttle connection. Ensure that the throttle is securely connected to the handlebars and that there are no loose or damaged wires. A faulty throttle connection can result in issues with the bike’s acceleration.
Verify the Functionality of the Accelerator Pedal
To ensure proper operation, it’s essential to check if the accelerator pedal is functioning correctly. When troubleshooting accelerator issues or motor problems on a Razor electric bike, it’s important to start with the accelerator pedal as it controls the motor’s power output.
Begin by inspecting the pedal for any physical damage or loose connections. Make sure that it moves smoothly and without any resistance. If the pedal feels sticky or does not return to its original position, it may need to be cleaned or replaced. Additionally, check the wiring harness connected to the pedal for any loose or damaged wires. A loose or damaged wire can cause intermittent power loss or erratic acceleration.
Test the Voltage Output of the Battery
Checking the voltage output of the battery is crucial to ensure proper operation of the motor. Troubleshooting common battery issues is an essential step in diagnosing why a Razor electric bike may turn on but not move. Understanding the importance of battery maintenance will help in preventing future problems.
To test the voltage output of the battery, you will need a multimeter set to the DC voltage setting. First, locate the battery pack and disconnect it from the bike. Then, connect the positive probe of the multimeter to the positive terminal of the battery and the negative probe to the negative terminal. Turn on the multimeter and check the voltage reading. A fully charged battery should read around 12-14 volts. If the voltage is significantly lower, it may indicate a weak or dead battery. In this case, recharging or replacing the battery is necessary.
Now, let’s move on to inspect the charger to further troubleshoot the issue without skipping a beat.
Inspect the Charger
You should now inspect the charger to determine if it is functioning correctly. Start by visually examining the charger for any visible damage or loose connections. Check the power cord for any fraying or exposed wires.
Next, plug the charger into a power source and verify that it is receiving electricity. Look for any indicator lights on the charger that would indicate it is receiving power. If there are no lights or signs of power, try plugging the charger into a different outlet to rule out a faulty power source.
Additionally, check the charging port on the electric bike for any debris or dirt that may be obstructing the connection. Clean the port if necessary.
After confirming that the charger is receiving power and the charging port is clean, connect the charger to the electric bike and observe if the charging indicator light turns on. If the light does not turn on or flashes irregularly, it may indicate a problem with the charger. In such cases, it is recommended to seek professional assistance to further diagnose and repair the issue.
Seek Professional Assistance if Needed
If you’re unable to troubleshoot the issue with the charger, it may be necessary to seek professional assistance. While many electric bike problems can be fixed with basic troubleshooting, there are instances where the issue may be more complex and require the expertise of a professional.
When it comes to electric bikes, there are various components and systems that can go wrong, such as the motor, battery, controller, or wiring. These components are interconnected and require specialized knowledge to diagnose and repair.
Seeking professional help for complex issues ensures that the problem is accurately identified and resolved. Professionals have the necessary tools and experience to troubleshoot and repair electric bikes effectively. They can also provide valuable advice on maintenance and preventive measures to avoid future problems. Additionally, professionals have access to genuine replacement parts, ensuring the longevity and optimal performance of your electric bike.
Frequently Asked Questions
How can I fix a razor electric bike if the battery connection is loose?
To fix a razor electric bike with a loose battery connection, start by turning off the bike and locating the battery compartment.
Carefully remove the battery and inspect the connection points for any signs of damage or corrosion. If necessary, clean the connection points with a soft cloth and ensure they are securely fastened.
Reinstall the battery and test the bike to see if the issue is resolved. If not, further troubleshooting of the battery system may be required.
What should I do if the throttle and controller of my razor electric bike are not working properly?
If the throttle and controller of my Razor electric bike are not working properly, there are several troubleshooting techniques I can try.
Firstly, I would check the wiring connections to ensure they are secure and not damaged.
Next, I would inspect the throttle and controller for any signs of wear or damage. If necessary, I would replace these components with new ones.
It’s important to remember that alternative transportation options, like electric bikes, require regular maintenance to ensure their proper functioning.
How can I determine if the motor of my razor electric bike is faulty?
To determine if the motor of your Razor electric bike is faulty, you can perform motor troubleshooting.
Start by checking for common motor issues such as loose connections, damaged wires, or a faulty motor controller.
Inspect the motor for any physical damage or signs of overheating.
Test the motor by connecting it directly to a power source to see if it spins properly.
If these steps don’t resolve the issue, it may indicate a faulty motor that needs to be replaced.
What steps should I take to examine and fix the brake system of my razor electric bike?
To troubleshoot and fix the display panel issue on your Razor electric bike, follow these steps.
First, check the connection between the display panel and the wiring harness. Ensure they are securely connected and free from any damage. If the connection is fine, proceed to inspect the display panel for any visible signs of damage or malfunction. If necessary, replace the display panel with a new one.
For examining and fixing the suspension system, begin by inspecting the suspension forks for any damage or leaks. Next, check the suspension springs for proper tension and adjust if necessary. Finally, ensure that all suspension components are securely fastened and lubricated as needed.
What should I do if the chain and sprocket of my razor electric bike are not functioning properly?
If the chain and sprocket of my razor electric bike are not functioning properly, there are a few troubleshooting tips I can try.
First, check if the chain is properly aligned and tensioned. If not, adjust it accordingly.
Inspect the sprocket for any damage or wear, and replace it if necessary.
Additionally, ensure that the chain is properly lubricated.
Common problems with the chain and sprocket include misalignment, excessive wear, and lack of lubrication.
Conclusion
After carefully inspecting and testing every component of the Razor electric bike, it is evident that fixing the issue requires a comprehensive approach.
The battery connection, throttle, controller, motor, brake system, chain and sprocket, accelerator pedal, voltage output of the battery, and charger all need to be thoroughly examined. Each of these elements plays a vital role in the bike’s functionality.
While the cause of the problem remains unknown, it is crucial to seek professional assistance to ensure a precise and effective solution.
The suspense of the situation heightens as the audience awaits the resolution to this perplexing issue.