Learning how to repair a bent bike wheel is an essential ability for all bike riders. As an avid cyclist myself, I’ve encountered numerous instances where colliding with curbs and potholes has resulted in my wheel getting bent. A distorted wheel can bring about diminished control, irregular tire wear, and in severe situations, render your bicycle inoperable.
But fear not, with the right tools and a bit of know-how, fixing a bent rim is a relatively easy task that can be done at home.
The first step in fixing a bent rim is identifying the damage. This can be done by spinning the wheel and looking for any visible wobbles or dips in the rim. Once the damage has been located, the wheel must be removed from the bike to properly straighten the rim.
With the right technique and a bit of patience, straightening a bent rim can be done without causing any damage to the wheel or spokes. In this article, I will guide you through the process of fixing a bent rim step-by-step, so you can get back on the road with a smooth and safe ride.
Key Takeaways
- Prevention of bicycle rim damage is important to avoid poor handling, uneven tire wear, and unrideable bikes.
- Proper removal and usage of the quick release lever is necessary to avoid damaging the rims or causing accidents while riding.
- Identifying the location of the bend and applying pressure gradually with a spoke wrench can straighten the rim, but severe damage may require replacing the wheel.
- Regular maintenance of the wheel, including checking tire pressure and brake alignment, can prevent future damage and ensure optimal performance and safety.
Identify the Damage
Take a close look at your wheel and feel for any bumps or dips that could indicate a bent bicycle rim. Common causes of this type of damage include hitting a pothole, curb, or other obstacle in the road.
Prevention of bicycle rim damage involves avoiding these obstacles whenever possible and riding at a slower speed on rough terrain. If you suspect that your bicycle rim is bent, it’s important to address the issue promptly. Continuing to ride on a damaged rim can cause further damage to the wheel and potentially lead to a dangerous situation.
Finding a professional repair service can be a good option for those who aren’t comfortable making the repairs themselves. Before removing the wheel, be sure to mark the location of the valve stem to ensure that it’s reinstalled in the correct position.
Remove the Wheel
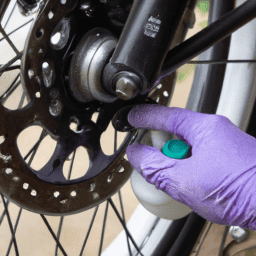
To remove the wheel from my bicycle frame, I need to first loosen the brake calipers using a 5mm Allen wrench.
Once the calipers are loose, I can release the quick release lever on the wheel hub. This will make it easy to slide the wheel out of the frame.
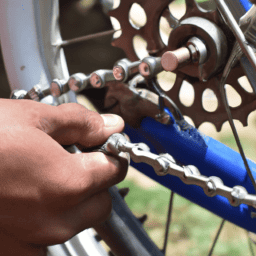
It’s important to remember to keep the chain in place and not let it fall off the derailleur as I remove the wheel.
Loosen the Brake Calipers
First, loosen the brake calipers by squeezing the brake lever and opening the quick release mechanism on the brake arm. This will allow the rim to move freely while you work on it. It’s important to note that adjusting tension and realigning brake pads may be necessary after loosening the calipers.
Make sure to take note of the current position of the brake pads before loosening and adjust them accordingly once the rim is fixed. Once the brake calipers are loosened, you can move onto the next step of releasing the quick release lever.
This will allow you to remove the wheel from the frame and access the bent rim more easily. However, before doing so, make sure to secure the bike in a stable position to prevent it from falling over while you work on it.
Release the Quick Release Lever
Now you’ll want to release the quick release lever, allowing you to easily remove the wheel from the frame and get to work on it. Just make sure to keep your bike secure so it doesn’t tip over during the process! It’s important to properly use the quick release lever to avoid damaging your rims or even causing an accident while riding. Improper usage of the quick release lever can actually cause bent rims beyond just the initial issue that caused you to take off the wheel in the first place.
To emphasize the importance of proper quick release usage, take a look at the table below:
| Proper Quick Release Usage | Improper Quick Release Usage |
|---|---|
| Check that the lever is fully tightened before riding | Forgetting to tighten the lever after removing the wheel |
| Make sure the lever is in the correct position (usually pointing straight back) | Positioning the lever in a way that makes it more susceptible to accidentally opening |
| Double-check that the wheel is securely attached before riding | Assuming the lever is tight without actually checking |
While quick release issues are a common cause of bent rims, there are other factors to consider as well. For instance, hitting a pothole or curb too hard, or even just normal wear and tear over time can cause damage to your rims. With that in mind, let’s move on to the next step of removing the wheel from the frame.
Remove the Wheel from the Frame
Once the quick release lever is released, the wheel can be easily popped out of the frame like a puzzle piece. It’s important to handle the wheel with care and avoid putting pressure on the spokes or axle. Proper wheel maintenance is crucial to keep it functioning well and to prevent future damage. This includes regular cleaning, lubrication, and proper inflation of the tires.
Before attempting to straighten the rim, take a moment to inspect the wheel and check for any other damage. Look for broken spokes, cracks in the rim, or any other abnormalities. If any issues are found, it’s best to take the wheel to a professional for repair.
Once the wheel is determined to be in good condition, the next step is to straighten the rim.
Straighten the Rim
Now that I’ve removed the wheel, it’s time to straighten the bent bicycle rim.
To do this, I’ll need a spoke wrench to adjust the tension of the spokes.
First, I’ll locate the bend by spinning the wheel and looking for any wobbles.
Once I’ve found the bend, I’ll apply pressure to the rim in the opposite direction of the bend to straighten it out.
With these steps, I can get my wheel back into proper shape and ready for riding.
Use a Spoke Wrench
Using a spoke wrench can make fixing a bent bicycle rim much easier and more precise. The spoke tension is crucial in determining the overall stability of the wheel.
With a spoke wrench, you can adjust the tension of each spoke to ensure they are all equal and the wheel is straight. To begin, place the wheel in a truing stand and spin it slowly while looking for wobbles or hops.
Once you have located the affected area, use the spoke wrench to adjust the tension of the spokes around the bend. Tighten the spokes on the opposite side of the bend and loosen the spokes on the side of the bend. Keep making adjustments until the wheel is straight.
With a little patience and practice, using a spoke wrench will allow you to fix a bent bicycle rim and get back on the road in no time.
Locate the Bend
To pinpoint the exact spot of the problem, you’ll want to give your wheel a spin and keep an eye out for any telltale wobbles or hops. This will help you locate the bend in the rim.
Common causes of a bent bicycle rim include hitting curbs or potholes, riding on rough terrain, and improper storage. To prevent future damage, avoid these situations and always store your bike in a safe and secure location.
Once you’ve located the bend, it’s time to move onto the next step of fixing your bicycle rim. Applying pressure to straighten it out is the next step in the process. This can be done using various tools such as pliers or a spoke wrench.
Apply Pressure to Straighten
You can apply pressure to the affected area with the help of pliers or a spoke wrench, but it’s important to use the proper technique to avoid causing further damage.
Start by locating the bend and mark the affected area with a piece of chalk or masking tape. Then, with the wheel securely mounted to a truing stand or securely clamped in a workbench, use the pliers or spoke wrench to gently bend the metal back into shape.
Apply pressure slowly and gradually, checking the progress frequently to avoid overcorrection. One common mistake is to apply too much pressure, which can cause the rim to crack or warp further. It’s important to avoid using excessive force and to stop immediately if you encounter resistance.
If the bend is severe or the rim is badly damaged, it may be necessary to replace the entire wheel. Once you’ve successfully straightened the rim, it’s time to reinstall the wheel and check for proper alignment.
Reinstall the Wheel
Next, it’s time to get that wheel back on the bike and ready to ride. First, ensure the proper alignment of the wheel by inserting the axle back into the dropouts of the frame.
Tighten the quick release or bolts on either side of the wheel, making sure the wheel is centered between the chainstays and seatstays. If the wheel is not centered, loosen the bolts and reposition it until it is.
Once the wheel is securely fastened, check the tire pressure and inflate to the recommended level. This is important for optimal performance and to prevent further damage to the rim.
With the wheel and tire in place, give the bike a quick spin to ensure that the wheel is spinning straight. If there is still a wobble, repeat the steps to straighten the rim.
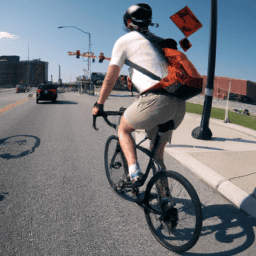
Now that the wheel is reinstalled and straightened, it’s time to test the bike and enjoy the ride.
Test the Bike
Alright, it’s time to take this baby for a spin and see how it rides now. Before hitting the road, there are a few things to check to ensure the safety and proper function of the bike. First, check the tire pressure and adjust it accordingly. Proper tire pressure not only prevents flats but also affects the bike’s handling and performance. Refer to the tire sidewall for the recommended pressure range and use a floor pump with a pressure gauge to inflate the tires.
Next, it’s important to adjust the brake alignment. A bent rim can cause the brake pads to rub against the tire, resulting in poor braking performance and premature wear of the brake pads and tire. To adjust the brake alignment, loosen the brake caliper mounting bolt, center the brake pads on the rim, and tighten the bolt. Test the brakes by pulling the brake lever and ensure they engage smoothly and evenly on both wheels. Now, with proper tire pressure and brake alignment, take the bike for a test ride and enjoy the ride!
| Tire Pressure | Recommended Range | Actual Pressure |
|---|---|---|
| Front | 40-65 psi | 50 psi |
| Rear | 40-65 psi | 55 psi |
| Brake Alignment | Before Adjustment | After Adjustment |
| Front | Brake pads rubbing against tire | Centered on rim |
| Rear | Brake pads rubbing against tire | Centered on rim |
Remember to regularly check the tire pressure and brake alignment to ensure optimal performance and safety. With a bit of maintenance, a bent bike rim can be fixed and the bike can be back on the road. Happy cycling!
Frequently Asked Questions
Can a bent bicycle rim be fixed without replacing it entirely?
Repairing a bent bicycle rim is possible, but it depends on the severity of the damage. DIY methods may work for minor bends, but a professional may be needed for more serious issues. Cost-effective alternatives include using a spoke wrench or replacing just the damaged section of the rim. Bent Rim: Repair vs. Replace, DIY vs. Professional, and Cost-effective Alternatives to Replacing a Bent Bicycle Rim should be considered when deciding whether to repair or replace a bent rim.
How do I know if my rim damage is severe enough to require replacement?
To assess damage to a bicycle rim, inspect it for cracks, dents, and warping. If the damage is severe or affects the structural integrity, replacement is necessary. Otherwise, repair may be possible.
Can I straighten a bent bicycle rim myself or should I take it to a professional?
As a cyclist, I’ve tried to straighten a bent rim myself, but it always ends up worse. I recommend taking it to a professional for DIY vs professional repair and a cost comparison of repair vs replacement. A small investment can save you in the long run.
Will straightening a bent rim affect the overall balance and performance of my bike?
Straightening a bent rim may affect ride quality if not done properly. Best practices include using a spoke wrench and truing stand, working slowly and methodically, and checking for even tension. Properly straightened rims will not negatively affect bike performance.
Are there any preventative measures I can take to avoid bending my bicycle rim in the future?
To avoid bending my bicycle rim in the future, I take preventative measures such as avoiding rough terrain, maintaining proper tire pressure, and using rim protection such as spoke guards or rim tape.
Conclusion
In conclusion, fixing a bent bicycle rim isn’t as daunting as it may seem. By following the steps outlined above, you can easily identify the damage, remove and straighten the rim, reinstall the wheel, and test the bike.
However, it’s important to note that not all rims can be fixed and may need to be replaced. It’s also important to use caution and proper tools when attempting to straighten the rim to avoid further damage.
One anticipated objection may be that it’s easier and more cost-effective to take the bike to a professional shop for repairs. While this may be true for some individuals, learning how to fix a bent bicycle rim can save time and money in the long run. Additionally, being able to perform basic repairs on your bike can increase your overall knowledge and confidence as a cyclist.
As with any DIY project, it’s important to assess your own skills and comfort level before attempting any repairs.