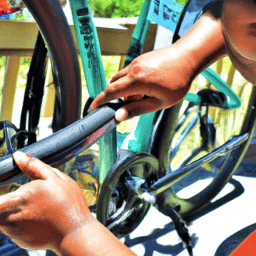
Cycling down the road, with the breeze sweeping through your hair and the warm sunlight caressing your face, provides a sense of liberation and excitement unique to biking. However, the sudden realization that your brakes are malfunctioning can dampen this experience. Perhaps they’re emitting an unusual sound, or their stopping power has diminished over time. Regardless of the specific problem, it’s critical to rectify this issue promptly to ensure both your safety and that of everyone else sharing the road.
In this article, you will learn how to fix your bicycle brakes and ensure that they are functioning properly. We’ll guide you through identifying the type of brakes on your bike, diagnosing common issues, adjusting or replacing brake pads, checking and adjusting brake cables, and testing your brakes to ensure proper functioning.
With these simple steps, you’ll be able to get your brakes back in top shape and get back to enjoying the freedom of the open road.
Key Takeaways
- Common brake issues include squeaking, rubbing, weak braking, and no braking.
- Troubleshooting brake problems involves cleaning/replacing brake pads, adjusting wheel alignment, tightening cables, and checking for broken cables or malfunctioning brake levers.
- Maintaining rim brakes involves choosing compatible brake pads, adjusting pad alignment, monitoring pad wear, and cleaning rims and pads.
- Upgrading brakes may require replacement of the entire brake system, depending on the type of upgrade. Regular maintenance and testing is important for safety and longevity.
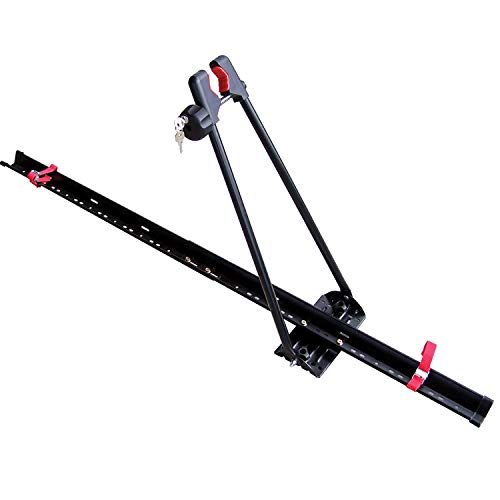
Swagman UPRIGHT Roof Mount Bike Rack
EASY TO ASSEMBLE: The UPRIGHT roof rack installs in minutes following the instructions and carries one bike with...
As an affiliate, we earn on qualifying purchases.
Identify the Type of Brakes on Your Bicycle
So, you’re ready to fix your bicycle brakes, but first things first – do you know what type of brakes your bike has? Let’s take a closer look and figure it out together.
The most common types of bicycle brakes are rim brakes, disc brakes, and coaster brakes. Rim brakes clamp down on the rim of the wheel to slow down or stop the bike. Disc brakes use a caliper to squeeze a rotor attached to the wheel hub, providing more stopping power and better performance in wet conditions. Coaster brakes, also known as back-pedal brakes, are typically found on kids’ bikes or cruisers and work by pedaling backward to slow down or stop the bike.
Knowing the type of brakes on your bicycle is crucial for brake maintenance and upgrade options. For example, if you have rim brakes and want to upgrade to disc brakes, you’ll need to replace not only the brakes but also the rims and hubs. On the other hand, if you have disc brakes and want to upgrade to hydraulic disc brakes, you’ll need to replace the entire brake system.
Now that you’ve identified the type of brakes on your bicycle, let’s move on to diagnosing common issues and fixing them ourselves.

TOOENJOY Rooftop Bike Rack for Car SUV, Upright Roof Mount Bicycle Rack with 2 Arms for Movable Crossbar, 1 Bike Carrier
Enhanced Bike Security: The dual rotatable load arms securely grip the bike by the wheels, ensuring zero contact...
As an affiliate, we earn on qualifying purchases.
Diagnose Common Issues
Identify the pesky culprits that keep your ride from reaching the next level of smoothness and control. Common brake problems include squeaking, rubbing, weak braking, and no braking. Squeaking brakes may indicate dirty or worn brake pads, while rubbing brakes may mean the wheel is out of alignment or the brake pads are not properly positioned. Weak braking could be due to worn pads or a loose cable, and if there is no braking, it may be due to a broken cable or a malfunctioning brake lever.
To diagnose these common issues, refer to the table below for troubleshooting tips. By following these steps, you can easily pinpoint the problem and resolve it. Once you have identified the issue, you can move on to adjusting or replacing the brake pads to get your bike back to its optimal performance.
| Common Brake Problems | Troubleshooting Tips |
|---|---|
| Squeaking brakes | Clean or replace brake pads |
| Rubbing brakes | Adjust wheel alignment or brake pad position |
| Weak braking | Tighten cable or replace worn pads |
| No braking | Check for broken cable or malfunctioning brake lever |
Now that you know how to diagnose common brake problems, let’s move on to adjusting or replacing brake pads.

TOOENJOY Rooftop Bike Rack for Car SUV, Upright Roof Mount Bicycle Rack with 2 Arms for Movable Crossbar, 2 Bike Carrier
Enhanced Bike Security: The dual rotatable load arms securely grip the bike by the wheels, ensuring zero contact...
As an affiliate, we earn on qualifying purchases.
Adjust or Replace Brake Pads
Now it’s time to adjust or replace your brake pads.
If you have rim brakes, start by loosening the brake pad retention bolt with an Allen wrench, then slide the pad out of the holder.
If the pad is worn or damaged, replace it with a new one of the same type.
For disc brakes, locate the small cotter pin holding the pad retention bolt in place and remove it with pliers.
Then, slide the pad out and inspect it for wear or damage before replacing it if necessary.
Rim Brakes
Rim brakes work by gripping the rim of the wheel to slow down or stop the bicycle. To ensure that your rim brakes are working properly, it’s important to select the right brake pads and maintain them regularly. Here are some tips to help you with your rim brake maintenance:
-
Choose the right brake pads: Make sure you select brake pads that are compatible with your rim’s material (aluminum or carbon). Also, consider the type of riding you’ll be doing and choose a pad that matches your needs (e.g. wet weather, high heat).
-
Check and adjust pad alignment: Your brake pads should be positioned correctly to ensure they are making full contact with the rim. Use a 5mm Allen key to adjust the position of the pads, making sure they are centered and have equal distance to the rim.
-
Monitor pad wear: As you use your brakes, the pads will wear down. It’s important to regularly check the wear of your pads and replace them before they become too worn down.
-
Clean your rims and pads: Dirt and debris can affect the performance of your brakes. Regularly clean your rims and pads with rubbing alcohol to ensure they’re free of any build-up.
Now that you’ve got some tips for maintaining your rim brakes, let’s move on to the next section about disc brakes.
Disc Brakes
When you’re flying down a steep hill, disc brakes give you the stopping power you need to feel safe and in control. But to keep your brakes in top condition, you’ll need to follow a few maintenance steps. One of the most important is bleeding the brakes. This process removes any air bubbles that may have gotten into the brake lines, which can reduce the effectiveness of your brakes. To bleed your disc brakes, you’ll need a few tools, including a bleed kit, a torque wrench, and a set of Allen wrenches. You’ll also need to follow a specific procedure to ensure that you get the best results.
Another important part of disc brake maintenance is brake rotor maintenance. The rotor is the metal disc that the brake pads grip to stop the bike. Over time, the rotor can become worn or damaged, which can reduce the effectiveness of your brakes. To keep your rotors in top shape, you’ll need to inspect them regularly for signs of wear or damage. If you notice any problems, you should replace the rotor as soon as possible. You should also clean your rotors regularly to remove any dirt or debris that may have accumulated. By following these steps, you can keep your disc brakes in great condition and enjoy the stopping power you need to stay safe on the road. Now, let’s move on to checking and adjusting your brake cables.

GATHERSKY Roof Bike Rack Mount Upright Rooftop Bike Rack with Two Arms 1 Bike Carrier Car Roof Bicycle for Car SUV Only Suitable for Removable Crossbars
【More Bike Security】Two pivoting upright arms hold your bike firmly by the wheels. No Front wheel removal required...
As an affiliate, we earn on qualifying purchases.
Check and Adjust Brake Cables
First, make sure your brake cables are properly tightened and adjusted so you can stop safely and confidently. Do you really want to risk your safety by neglecting this crucial step?
Brake cable maintenance is important to ensure that your brakes function at their best. Over time, brake cables stretch and require adjustments. If you notice that your brakes feel spongy or loose, it may be time to adjust your brake cables.
If adjusting your brake cables doesn’t improve your braking performance, it may be time for a replacement. Brake cable replacement is a straightforward process, but it’s important to choose the right cable for your bike. Make sure the cable is the correct length and diameter for your brake system.
Once you’ve installed the new cable, be sure to adjust it properly before riding. Now that you have checked and adjusted your brake cables, it’s time to test your brakes and ensure proper functioning.
Test Your Brakes and Ensure Proper Functioning
To ensure your safety while riding your bicycle, it is crucial to test your brakes and ensure they are functioning correctly. Start by giving your brakes a test, squeezing them gently and then more firmly. As you come to a complete stop, you should feel the pressure and resistance of the brakes.
After testing your brakes, it is essential to perform brake maintenance and performance testing regularly. This will help you identify any issues with your brakes and ensure they are working optimally. Use the table below as a guide to help you determine the performance of your brakes. By regularly performing brake maintenance and testing, you can ensure the safety and longevity of your bike’s brakes.
| Brake Performance | Action Required | ||
|---|---|---|---|
| Weak | Adjust or replace brake pads | ||
| Spongy | Bleed brake system or replace brake cables | ||
| Noisy | Clean and lubricate brake components | ||
| Unresponsive | Replace brake cables or brake levers | In extreme cases, a complete overhaul of the brake system may be necessary. |
Frequently Asked Questions
How often should I replace my brake pads?
To ensure optimal safety, replace your brake pads every 1,000-3,000 miles or when signs of wear appear such as reduced stopping power or squeaking. Factors that affect brake pad longevity include frequency of use, weather conditions, and type of terrain.
Can I use any type of brake cable on my bicycle?
To ensure proper braking, it’s important to use the right type of brake cable for your bike. Check your bike’s manual or consult a professional to find compatible cables. When replacing cables, make sure to follow proper installation procedures for optimal performance.
How do I know if my brake calipers need to be replaced?
To diagnose wear on your brake calipers, check for any visible damage or signs of corrosion. If the brake pads are worn down to the metal, it’s time to replace the calipers. It’s crucial to always replace worn parts to ensure optimal braking performance.
Is it necessary to bleed hydraulic brakes and how often should this be done?
As the old saying goes, "prevention is better than cure."Bleeding hydraulic brakes is a preventive measure that ensures optimal performance. DIY bleeding can be done every 6-12 months or when brake lever feel changes.
What should I do if my brakes feel spongy or unresponsive?
If your brakes feel spongy or unresponsive, it may be due to air in the hydraulic system. Bleeding techniques can remove air, but first, try adjusting brake lever tension. If this fails, perform a brake bleed.
Conclusion
Congratulations! You’ve successfully fixed your bicycle brakes! Now you can enjoy a smooth ride without worrying about sudden stops or accidents.
Remember to always identify the type of brakes on your bicycle and diagnose common issues before starting any adjustments.
Adjusting or replacing brake pads is a simple task that can greatly improve your braking performance. Make sure to check and adjust brake cables as needed, and test your brakes to ensure proper functioning.
It’s always better to be safe than sorry, so don’t forget to regularly maintain your brakes to avoid any future problems.
As the saying goes, "An ounce of prevention is worth a pound of cure."Taking care of your bicycle brakes will not only ensure a safe ride, but it will also save you time and money in the long run.
So keep your brakes in tip-top shape, and happy cycling!