If you’re passionate about cycling, you understand how annoying it is when your brakes are in constant contact with your wheel. This not only reduces the efficiency of your ride, but could also pose a risk to your safety if it’s not dealt with.
As someone who has experienced this issue firsthand, I’m here to share with you my knowledge on how to fix bicycle brakes rubbing.
First and foremost, it’s important to identify the source of the problem. Is it the brake pads rubbing against the rim, or is it the wheel itself that’s out of alignment? Once you’ve determined the culprit, you can then proceed to make the necessary adjustments to fix the issue.
In this article, I’ll walk you through step-by-step instructions on how to adjust your brake pads, wheel, and brake cable tension to get your brakes working smoothly again.
So, let’s get started!
Key Takeaways
- Identify the source of the problem: whether it’s misaligned brake pads, worn brake pads, loose brake mounting bolts, or warped rotors.
- Adjust brake pads, wheel, and brake cable tension properly to fix the rubbing.
- Test brakes for proper clearance and smooth operation by squeezing the brake lever firmly.
- Regularly check cable tension and lubricate to prevent rust.
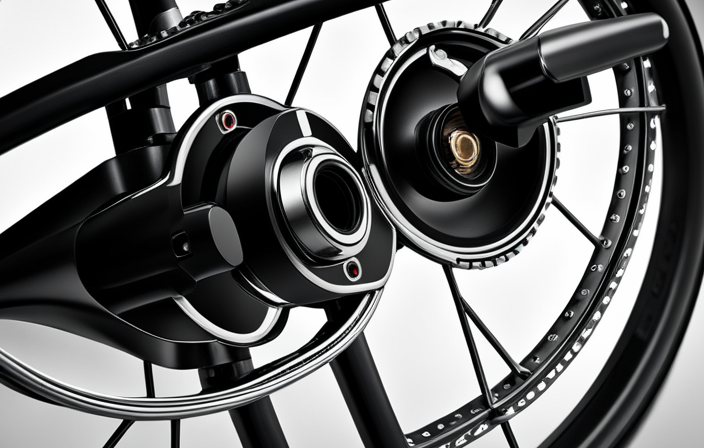
Identify the Source of the Problem
You might be feeling frustrated and annoyed, but the first step to fixing those annoying brake rubs is to identify where the problem is coming from.
Common causes of brake rubbing include misaligned brake pads, worn brake pads, loose brake mounting bolts, and warped rotors. To troubleshoot, start by spinning the wheel and observing where the rubbing is occurring.
If it’s happening at a specific spot, check to see if the rotor is warped. If it’s rubbing all the way around, then it’s likely an issue with the brake pads.
Once you’ve identified the source of the problem, you can move on to adjusting the brake pads. But before you do that, make sure that the wheel is properly seated in the dropouts and that the quick-release or thru-axle is securely tightened.
With the wheel in place, use an Allen wrench to loosen the brake pad mounting bolts and adjust the position of the pads so that they are evenly spaced on either side of the rotor. Tighten the bolts back up and give the wheel a spin to check for any remaining rubbing.
Adjust the Brake Pads
Ah, the sweet sound of smooth braking! Adjusting brake pads is the key to achieving that satisfying silence.
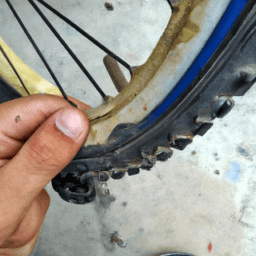
To adjust the brake pads, start by loosening the brake cable with a 5mm Allen wrench. Then, use your fingers to squeeze the brake pads together and align them with the rim of the wheel. Proper pad placement is crucial for the brakes to function effectively. The brake pads should make contact with the rim of the wheel evenly, with no part of the pad touching the tire.
Once the pads are aligned, tighten the brake cable and test the brakes to ensure they’re functioning properly. It’s important to consider the material of the brake pads when adjusting them. Brake pad material can vary, with some being softer and some being harder. Softer pads will wear down faster but provide better stopping power, while harder pads will last longer but may not be as effective.
Be sure to choose the right material for your needs and adjust the pads accordingly. With proper pad placement and consideration for the pad material, your brakes should be functioning smoothly and effectively.
Now, let’s move on to the next step of adjusting the wheel.
Adjust the Wheel
Now, let’s move onto adjusting the wheel.
To do this, I first loosen the quick release lever on the affected wheel. Then, I gently center the wheel between the brake pads. Finally, I tighten the quick release lever until it’s snug.
This’ll ensure that the wheel is properly aligned and the brake pads aren’t rubbing against it.
Loosen the Quick Release Lever
Interestingly enough, loosening the quick release lever can magically transform those annoying brake rubs into smooth sailing. But before we dive into the steps of loosening the lever, let’s first understand why the quick release lever can cause issues. The importance of lubrication cannot be overstated when it comes to the quick release lever. Without proper lubrication, the lever can become stiff and difficult to operate, leading to misalignment of the wheel. Additionally, common causes of quick release lever issues include improper installation or adjustment, dirt and debris buildup, and wear and tear over time.
To loosen the quick release lever, follow these simple steps:
| Step | Action | Result |
|---|---|---|
| 1 | Open the quick release lever by flipping it up | Wheel is now loose and can be adjusted |
| 2 | Loosen the nuts on both sides of the wheel | Wheel can now move freely |
| 3 | Center the wheel between the brake pads | Brake rub is eliminated |
| 4 | Tighten the nuts on both sides of the wheel | Wheel is now secure |
| 5 | Close the quick release lever by flipping it down | Wheel is locked in place |
By loosening the quick release lever, we are able to address issues that may arise from improper installation or adjustment, as well as dirt and debris buildup. Once the lever is loosened, we can easily center the wheel between the brake pads, eliminating any brake rubs. With the wheel secure and the lever closed, we can confidently ride our bike without any annoying rubbing sounds.
Center the Wheel between the Brake Pads
To get your bike running smoothly, the next step is to center the wheel between the brake pads. Wheel alignment is crucial for efficient braking and preventing unnecessary wear on the brake pads. Here are some tips to help you center the wheel:
- Inspect the brake pads for wear and tear. If they are worn out, replace them to avoid misalignment and rubbing.
- Loosen the brake pad fixing bolt and adjust the position of the brake pads. Make sure they are not touching the tire and are positioned symmetrically on both sides of the wheel.
- Use a ruler or a caliper to check if the distance between the rim and each brake pad is equal. Adjust the position of the brake pads until they are centered.
Once you have centered the wheel, the next step is to tighten the quick release lever. This will secure the wheel in place and prevent any movement that can cause rubbing.
Tighten the Quick Release Lever
After centering the wheel between the brake pads, the next step is to tighten the quick release lever. This lever is responsible for securing the wheel in place and preventing it from wobbling. It’s important to ensure that the lever is tightened properly, as a loose lever can cause the wheel to move and the brakes to rub.
When tightening the quick release lever, it’s important to avoid common mistakes such as not using enough force or not tightening it evenly on both sides. Another key factor to keep in mind is the importance of lubrication. Applying a small amount of lubricant to the lever and the contact points between the wheel and frame can make it easier to tighten the lever and prevent it from getting stuck.
With the quick release lever properly tightened, the next step is to adjust the brake cable tension.
Adjust the Brake Cable Tension
By pulling the brake lever and feeling the tension, you can adjust the cable tension to fix the rubbing brakes on your bicycle. It is important to check the cable tension regularly and to lubricate the cables to prevent rust and ensure smooth operation. Common cable tension mistakes include over-tightening or under-tightening, which can result in poor braking performance or even brake failure.
To adjust the cable tension, first, locate the barrel adjuster on the brake lever or brake caliper. Turn the adjuster clockwise to tighten the cable tension or counterclockwise to loosen it. Use the table below as a guide for adjusting the cable tension. Remember to make small adjustments and test the brakes after each adjustment to ensure proper braking performance. Once you have achieved the desired cable tension, you can move on to testing the brakes.
| Symptom | Solution | Adjustment |
|---|---|---|
| Brake pads too close to rim | Loosen cable tension | Turn adjuster counterclockwise |
| Brake pads too far from rim | Tighten cable tension | Turn adjuster clockwise |
| One brake pad closer to rim than the other | Adjust brake pad position | Loosen brake pad bolt, adjust position, tighten bolt |
With the cable tension properly adjusted, it is time to test the brakes. Squeeze the brake lever firmly and ensure that the brake pads engage the rim evenly and stop the wheel smoothly. Make any necessary adjustments and test again until you are satisfied with the braking performance.
Test the Brakes
Now that I’ve adjusted the brake cable tension, I need to test the brakes to make sure they’re working properly.
The first thing I need to check is for proper clearance between the brake pads and the rim.
Then, I’ll test the brakes for smooth operation by squeezing the brake levers and observing how the pads engage with the rim.
Finally, I’ll take a test ride to ensure that the brakes are functioning properly under actual riding conditions.
Check for Proper Clearance
First, imagine yourself straddling your bike and looking down at the wheel. Are there any parts of the brake that are rubbing against the wheel? If so, you’ll need to adjust the clearance to fix the problem.
Proper clearance is essential for the smooth operation of your brakes. It ensures that the brake pads are not constantly rubbing against the wheel, which can cause unnecessary wear and tear on your bike.
However, checking for proper clearance can be tricky, and there are some common mistakes that people make. Firstly, make sure that you’ve released the brake lever completely before checking for clearance. Secondly, check the clearance on both sides of the brake to ensure that it’s even. Lastly, use a flashlight to check for any debris or dirt that may be causing the brakes to rub.
By following these simple steps, you can ensure that your brakes are properly adjusted and ready for smooth operation.
Now that we’ve checked for proper clearance, it’s time to test the brakes for smooth operation.
Test the Brakes for Smooth Operation
To ensure smooth operation of your bike’s brakes, you’ll want to test them by squeezing the brake lever firmly while straddling the bike. This will help identify any issues with the brake system, such as rubbing or sticking.
Common causes of rubbing brakes include misaligned brake pads, worn brake pads, and loose brake components. Checking for these issues and performing regular brake maintenance can help prevent rubbing and ensure your brakes are functioning properly.
When testing your brakes, pay attention to how they feel and sound. The brake lever should feel firm and responsive, without any sponginess or hesitation. The brakes should also engage smoothly and quietly, without any scraping or grinding sounds.
If you notice any issues, take the time to address them before riding. Once you’ve tested your brakes and ensured they’re functioning properly, it’s time to take a test ride to ensure proper functioning.
Take a Test Ride to Ensure Proper Functioning
After ensuring your brakes are functioning properly, hop on your bike and take a test ride to ensure your safety and a smooth ride. It’s important to test your brakes in a safe environment, such as an empty parking lot or a quiet street.
Start by riding slowly and gently apply your brakes to ensure they respond as they should. Gradually increase your speed and apply the brakes with more force to test their effectiveness.
While test riding, make sure to practice proper riding technique. Keep your body relaxed and your eyes focused on the road ahead. Use your brakes early and avoid sudden stops or hard braking, which could cause your brakes to lock up or your tires to skid.
Lastly, it’s important to avoid common mistakes that could affect the accuracy of your test ride. Avoid riding with loose clothing or accessories that could get caught in the spokes or chain, and make sure your tires are properly inflated to prevent unnecessary friction. By following these tips, you can ensure a safe and effective test ride.
Frequently Asked Questions
How often should I check my bicycle brakes for rubbing?
I check my bicycle brakes for rubbing at least once a month as part of my regular bicycle brake maintenance. It’s important to ensure proper brake performance and prevent excessive wear on brake pads and rims.
Can I fix rubbing brakes without any tools?
Fixing rubbing brakes without tools is possible if the issue is minor. However, identifying common brake issues and using proper techniques is crucial. Tips & tricks include adjusting the brake pads and checking for loose bolts.
What if adjusting the brake pads and wheel doesn’t fix the problem?
If adjusting the brake pads and wheel doesn’t work, it’s likely time for professional maintenance. Common causes include worn or contaminated brake pads, damaged rotors or cables. Troubleshooting techniques may involve replacing brake components.
Is it safe to ride my bicycle if the brakes are rubbing?
If my bike brakes are rubbing, I should not ride for safety reasons. Proper brake maintenance is crucial for safe riding. Consult a bike mechanic if adjusting the pads and wheel does not fix the issue.
How can I prevent my bicycle brakes from rubbing in the future?
I’ll never forget the frustration of constantly dealing with brake rub on my bike. Proper maintenance is key to preventing it. Choosing brake pads made from high-quality materials will also help keep them from rubbing in the future.
Conclusion
So there you have it, folks! That’s how I fixed my bicycle brakes when they were rubbing. It wasn’t as difficult as I thought it would be, and I was able to do it all on my own with just a few simple tools.
The key is to identify the source of the problem, which in my case was the brake pads being misaligned. Once I adjusted them and the wheel, the rubbing stopped.
Of course, if you’re feeling up to the challenge, give it a try! You might be surprised at how easy it is to fix simple problems like this on your own. And who knows, you might even discover a new hobby or passion for bike maintenance along the way.
Happy riding!