
Cycling through life mirrors cycling on a path – it’s a journey that can be seamless at times, yet challenging when unforeseen hurdles appear. Among the most aggravating challenges for cyclists is encountering a flat tire. No matter if you’re enjoying a casual ride or heading to your job, a flat tire can certainly spoil your plans for the day.
But fear not, fellow cyclist! In this article, I will guide you through the steps to fix a bicycle flat and get back on the road in no time. As a bike enthusiast and avid rider, I know firsthand the importance of being able to fix a flat tire quickly and efficiently. Not only does it save you from being stranded on the side of the road, but it also saves you time and money from having to take your bike to a repair shop.
With a little bit of knowledge and some basic tools, anyone can learn how to fix a bicycle flat. So, let’s dive in and learn how to tackle this common yet frustrating problem.
Key Takeaways
- Identifying the cause of a flat tire is crucial before fixing it, inspect the tire, tube, and rim for damage or debris.
- Fixing a flat tire requires noting wheel alignment and tire pressure, releasing all air, prying the tire away from the rim with a tire lever, assessing the damage to the tube, and deciding whether to patch or replace it.
- Prevent future flats by regularly checking tire pressure, avoiding road hazards, using puncture-resistant tires, such as Schwalbe, Continental, and Bontrager, and inspecting tires regularly for damage.
- Proper maintenance is crucial for avoiding flat tires and improving bicycle performance.
Identify the Cause of the Flat Tire
Don’t panic, but it’s time to figure out what the heck caused that darn flat tire. Common causes of flat tires include punctures, pinch flats, worn out tires, and valve issues.
A puncture occurs when a sharp object, such as a nail or glass, penetrates the tire and tube. Pinch flats happen when the tire is compressed against the rim, causing the tube to puncture. Worn out tires are more susceptible to punctures and pinch flats. Valve issues can also cause flat tires. Make sure the valve is tight and not damaged.
To properly inspect the tire, start by removing it from the bicycle. Check the tire for any visible cuts, holes, or debris that may have caused the puncture. Run your fingers along the inside of the tire to feel for any sharp objects that could have caused the flat. Make sure to also inspect the rim for any sharp edges or debris.
If you are unable to find the cause of the flat tire, you may need to replace the tire or take it to a professional for further inspection. With the cause of the flat tire identified, it’s time to remove the tire and tube.
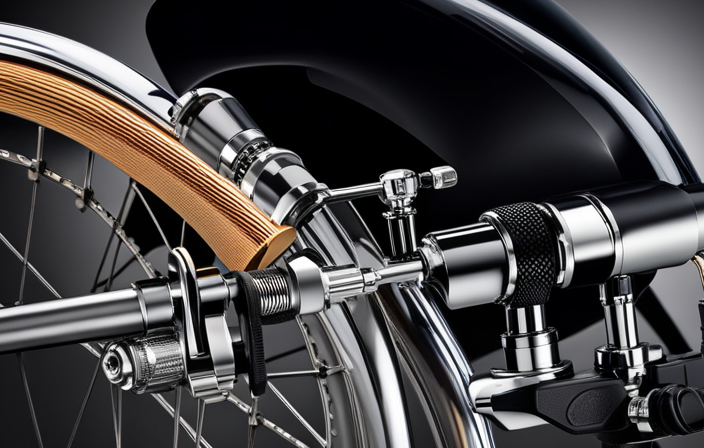
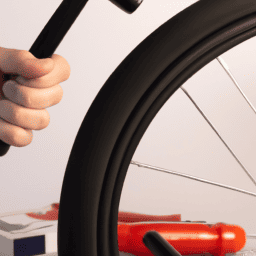
Remove the Tire and Tube
First, you’ll need to release all the air from the tire, so it deflates like a balloon losing its air. To do this, use a tire lever to pry the tire away from the rim and expose the inner tube. Once you can see the inner tube, use the valve stem to let out all the air.
Then, use the tire lever to remove one side of the tire from the rim, making sure not to damage the rim or the tire in the process. Once one side of the tire is off, you can easily remove the inner tube.
Before removing the tire and tube, it’s important to note the wheel alignment and the tire pressure. Once you have the tire off, inspect the rim and make sure it’s straight and not damaged. A damaged rim can cause future flats, so it’s important to address any issues now.
Additionally, check the tire pressure and make sure it’s at the recommended level, which can usually be found on the sidewall of the tire.
Once you’ve removed the tire and tube, you can move onto the next step of patching or replacing the tube.
Patch or Replace the Tube
After assessing the damage to the inner tube, I can decide whether to patch or replace it. A small puncture can be easily fixed with a tube repair kit. This kit typically includes patches, sandpaper, and glue.
Simply deflate the tube completely and locate the puncture by inflating the tube slightly and listening for a hissing sound or feeling for air escaping. Once the puncture is located, use the sandpaper to rough up the area around the puncture. Then, apply the glue and patch, making sure to press down firmly and wait for the glue to dry completely before re-inflating the tube.
However, if the puncture is too large or if there are multiple punctures in close proximity, it may be more efficient to replace the tube entirely. In such cases, have a spare tube on hand and swap it out with the damaged one.
Alternatively, some riders may opt for alternative solutions such as using a tire liner or sealant to prevent future punctures. Whatever the solution may be, once the tube is patched or replaced, it’s time to put everything back together and continue riding.
Put Everything Back Together
Once you’ve successfully revived your deflated friend, it’s time to put the pieces of your journey back together and hit the road once more.
The first step is to reattach all of the components that were removed during the flat fixing process. This includes the wheel, brake pads, and quick release skewer. Make sure that everything is properly aligned and tightened to avoid any safety hazards on your ride.
Next, check the alignment of your wheel to ensure that it is straight. If it’s not, adjust it accordingly until it’s centered between the brake pads.
Once everything is in place and secure, give your bike a test ride to make sure that everything is functioning properly. Don’t forget to check your tire pressure to ensure that it’s at the recommended level.
By following these steps, you can put everything back together and continue your cycling journey with confidence.
To prevent future flats, there are a few tips to keep in mind. These include regularly checking your tire pressure, avoiding debris on the road, and using puncture-resistant tires.
By taking these precautions, you can enjoy a smooth and uninterrupted ride.
Tips for Preventing Future Flats
As a cyclist, I’ve experienced my fair share of flat tires. To prevent future flats, I’ve found that using puncture-resistant tires is crucial. It may be more expensive, but it’s worth the investment in the long run.
Additionally, keeping your tires properly inflated and avoiding road hazards like glass or debris can also greatly reduce your chances of getting a flat.
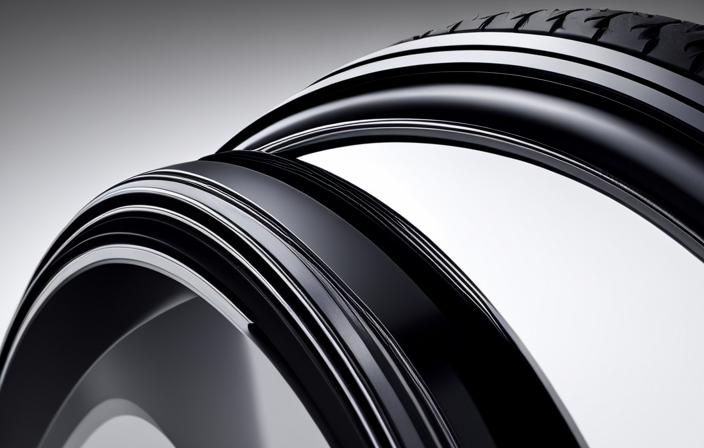
Use Puncture-Resistant Tires
To prevent the hassle of fixing a bicycle flat, you should consider using puncture-resistant tires. Not only can they save you time and frustration in the long run, but they can also significantly reduce the frequency of flats. The advantages of puncture-resistant tires are clear: they are designed with puncture-resistant materials that make them much more durable and resistant to debris on the road.
There are several brands that make high-quality puncture-resistant tires. Some of the best brands for puncture-resistant tires include Schwalbe, Continental, and Bontrager. These brands offer different levels of puncture resistance and durability, so it’s important to choose the one that best fits your needs. With puncture-resistant tires, you can ride with confidence, knowing that you are less likely to experience a flat. And while puncture-resistant tires may be a bit more expensive than standard tires, the investment is well worth it in the long run. In the next section, we will discuss the importance of keeping your tires properly inflated.
| Advantages of Puncture-Resistant Tires | Best Brands for Puncture-Resistant Tires | Proper Maintenance |
|---|---|---|
| Reduced frequency of flats | Schwalbe | Regularly check tire pressure |
| Durable and resistant to debris | Continental | Avoid riding on rough terrain |
| Increased confidence while riding | Bontrager | Inspect tires regularly for damage |
| Cost-effective in the long run | Michelin | Avoid overloading the bike |
| Available in different levels of resistance | Vittoria | Use tire sealant for added protection |
Properly inflated tires can also help prevent flats, so it’s important to keep an eye on your tire pressure. By regularly checking your tire pressure and ensuring that it is at the recommended level, you can reduce the risk of flats caused by pinch flats or punctures. Additionally, inspecting your tires regularly for cuts, punctures, or other damage is crucial for maintaining their integrity. By taking these steps and investing in puncture-resistant tires, you can significantly reduce the likelihood of experiencing a flat while riding.
Keep Your Tires Inflated
Make sure your tires are properly pumped up to prevent pesky punctures. The importance of maintenance can’t be stressed enough when it comes to avoiding flat tires.
Checking tire pressure regularly is a crucial part of maintaining your bicycle’s tires. When the tires are underinflated, they become more susceptible to punctures. The rubber is closer to the ground and more likely to be pinched by debris or sharp objects.
To ensure that your tires are inflated to the proper pressure, use a tire pressure gauge to check the air pressure in each tire. The recommended pressure will be indicated on the sidewall of the tire, and it’s important to inflate the tires to the correct pressure.
Not only does this prevent punctures, but it also improves the overall performance of your bicycle. With properly inflated tires, you’ll experience less rolling resistance and more efficient pedaling.
Now that you know the importance of maintaining your tires, let’s move on to the next step in avoiding flat tires: avoiding road hazards.
Avoid Road Hazards
Now that we’ve covered the importance of keeping your tires properly inflated, let’s talk about avoiding road hazards to prevent flats. As a cyclist, it’s crucial to be aware of the road conditions and potential hazards that can cause damage to your tires. Potholes, glass, sharp rocks, and debris are just a few examples of hazards that you may encounter on your ride. By avoiding these hazards, you can greatly reduce the risk of getting a flat tire.
Proper maintenance and tire selection also play a significant role in preventing flat tires. Regularly checking your tires for wear and tear, as well as keeping them clean and properly inflated, can go a long way in preventing flats. Additionally, choosing the right tires for your riding style and the terrain you’ll be riding on can also make a big difference. For example, if you plan on riding on rough or gravelly roads, a tire with thicker tread and a higher puncture resistance may be a better choice. By taking these precautions, you can minimize the risk of getting a flat tire and enjoy a smoother, safer ride.
| Tips for Avoiding Road Hazards | Importance of Proper Maintenance | Choosing the Right Tires |
|---|---|---|
| – Keep an eye out for potholes, glass, and sharp rocks. | – Regularly check your tires for wear and tear. | – Consider the terrain you’ll be riding on. |
| – Avoid debris on the road. | – Keep your tires clean and properly inflated. | – Choose a tire with thicker tread for rough roads. |
| – Slow down when approaching hazards. | – Replace worn tires before they become a problem. | – Look for tires with a high puncture resistance. |
| – Stay alert and aware of your surroundings. | – Make sure your wheels are properly aligned. | – Consult a professional for advice on tire selection. |
Frequently Asked Questions
Can I ride on a flat tire?
It’s not safe to ride with a flat tire as it can cause damage to the rim and affect your riding safety. It’s important to fix the flat before continuing to ride for optimal performance.
How often should I check my tire pressure?
Oh boy, how often should I check my tire pressure? Let me tell you, maintaining proper tire pressure is crucial. Before and after long rides, check it. Benefits include better handling, increased efficiency, and avoiding flats. Trust me, check it.
What tools do I need to fix a flat tire?
To fix a flat tire, pump selection and proper patching techniques are essential. I recommend a pump with a gauge to ensure accurate pressure. You’ll need tire levers, a patch kit, and a wrench to remove and replace the wheel.
How do I know if I need to replace my tire instead of just patching the tube?
I determine whether to replace or patch my tire by examining its condition. If the tire has multiple punctures, is worn out, or has cuts on the sidewall, I replace it. Otherwise, I patch it.
Can I use any type of patch kit to fix my tube?
To fix a bicycle tube, one must use a patch kit that is compatible with the tube material. Alternative repair methods such as using duct tape or glue are not recommended and can lead to further damage.
Conclusion
In conclusion, fixing a flat tire on a bicycle is a necessary skill for any cyclist. With the right tools and knowledge, it can be a quick and easy process.
Remember to always identify the cause of the flat tire and remove the tire and tube carefully. Then, patch or replace the tube and put everything back together.
One example of a preventable flat tire occurred when a friend of mine forgot to check the pressure in her tires before a long ride. About 20 miles into the ride, her tire went flat due to low pressure. She had to walk her bike for several miles until she found a bike shop to fix the issue. This situation could’ve been easily prevented by checking the tire pressure before the ride.
To avoid future flats, it’s important to regularly check tire pressure, avoid debris on the road, and consider using puncture-resistant tires. By following these tips and properly fixing a flat tire, cyclists can enjoy a smooth and safe ride.
Related Posts:


Ralf is a devoted husband and father who loves spending time with his family. He enjoys riding his bicycle as much as possible, and takes every opportunity he can to get out on the open road. Ralf is a kind and gentle person who wants only the best for those around him.