
Are you having trouble with your bike pedal? Don’t allow a malfunctioning pedal to spoil your cycling experience! While repairing a bike pedal might appear challenging, it becomes an easy task with the correct tools and understanding.
In this article, we’ll walk you through the steps to fix your bicycle pedal, so you can get back on the road safely and comfortably.
First, you’ll need to identify the issue with your pedal. Is it loose, making strange noises, or not spinning smoothly? Once you’ve determined the problem, you can take the necessary steps to fix it.
In some cases, you may need to remove the pedal to properly diagnose and repair the issue. Don’t worry, removing a pedal is a straightforward process that can be accomplished with a few basic tools.
By following the steps outlined in this article, you’ll be able to get your pedal back in working order in no time.
Key Takeaways
- Identifying the issue and inspecting for visible damage or wear is the first step towards fixing a bicycle pedal.
- Checking for proper lubrication and debris is important for troubleshooting the issue.
- Pedal removal may be necessary for diagnosis and repair and requires specific tools available at bike shops.
- Proper footwear while testing and paying attention to unusual noises or vibrations during test ride is important for safety.

Under Armour Squeeze Water Bottles, 32 oz Water Bottles, Sideline Sports Water Bottle with Quick-Shot Lid, Quick & Easy Hydration, Gym Water Bottles, Squeeze Bottle, 1 32oz Bottle
- Easy Hydration: Quick-shot lid and one-way valve
- On-the-Go Use: One-hand operation for active hydration
- Measurement Markings: Ounces and milliliters for tracking
As an affiliate, we earn on qualifying purchases.
Identify the Issue
If you’re experiencing difficulty pedaling or your pedal is loose, it’s time to identify the issue and get your bike back in top shape!
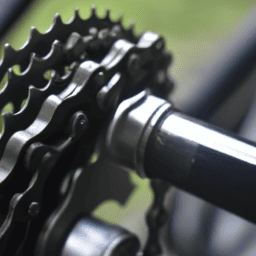
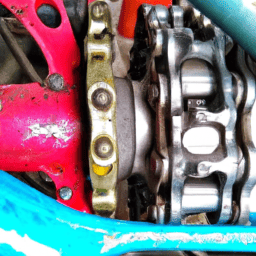
First, inspect the pedal for any visible damage or wear. Check if the threads and bearings are still intact and if the pedal body is still securely attached to the crank arm. To do this, hold the crankarm and try to wiggle the pedal. If it moves, then it needs to be tightened.
Another technique is to remove the pedal and inspect the threads on both the pedal and the crank arm. If the threads are worn or damaged, then it’s time to replace the pedal or the crank arm.
Troubleshooting tips include checking if the pedal is properly lubricated and if there’s any debris or dirt that may be causing the issue. Once you’ve identified the problem, you can move on to removing the pedal.
Remove the Pedal
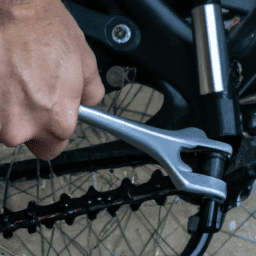
To detach the component, you’ll need to loosen the axle by rotating it counter-clockwise. This can be done using pedal removal tools, which are available at most bike shops.
Once you have the tool, attach it to the pedal and turn it counterclockwise to loosen the pedal. Be sure to turn the tool in the opposite direction if you’re removing the left pedal.
Once the pedal is loose, you can remove it by hand. It’s important to note that the left pedal has a reverse thread, so it will need to be turned clockwise to loosen it.
When reinstalling the pedal, make sure it’s properly aligned and tightened to the appropriate torque using a pedal installation tool. This will help prevent future issues and ensure proper functioning of the bike.
Now that the pedal is removed, it’s time to clean and lubricate it for optimal performance.
Clean and Lubricate the Pedal
Now that you’ve successfully removed the pedal, it’s important to give it proper lubrication and cleaning. This will ensure that your pedal performs optimally and reduces the risk of wear and tear.
The first step is to clean the pedal thoroughly with a soft-bristled brush or a cloth. Make sure to remove any dirt and grime that may have accumulated on the surface of the pedal. Be careful not to use harsh cleaning agents that could damage the surface of the pedal.
Once your pedal is clean, it’s time to lubricate it. Proper lubrication is essential for smooth pedal movement and to reduce friction between the pedal and the crank arm. Apply a small amount of lubricant to the pedal spindle and threads. Be sure not to overdo it, as excess lubricant can attract dirt and grime, which will lead to premature wear. Remember to wipe off any excess lubricant before reattaching the pedal.
Common mistakes include using the wrong type of lubricant or not applying enough. Keep in mind that proper lubrication will extend the life of your pedal and keep it functioning smoothly.
With the pedal now cleaned and lubricated, it’s time to reattach it to the bike.
Re-Attach the Pedal
First, you’ll want to make sure the pedal threads are clean and free of any debris before reattaching it to your bike. This is important to ensure proper installation and prevent any damage to your bike.
After cleaning the threads, apply a small amount of grease or lubricant to the threads to make it easier to screw the pedal back in.
When reattaching the pedal, it’s important to remember to screw it in counterclockwise on the left side and clockwise on the right side. This is a common mistake that can lead to the pedal falling off while riding.
Make sure the pedal is screwed in tightly, but be careful not to overtighten it as this can damage the threads and make it difficult to remove in the future.
Once the pedal is securely attached, it’s time to move on to testing it and riding safely!
Test the Pedal and Ride Safely!
After reattaching the pedal, take your bike for a test ride to ensure it’s securely attached and ride with confidence knowing you’ve taken the necessary steps to ensure your safety. Before heading out, make sure you’re wearing proper footwear, such as closed-toe shoes or sneakers, to prevent your feet from slipping off the pedals. Proper footwear will also give you better control over your bike, allowing you to ride more confidently and comfortably.
During your test ride, pay attention to any unusual noises or vibrations. If the pedal feels loose or wobbly, stop and check the attachment again. It’s also a good idea to periodically clean and maintain your pedals to ensure they’re functioning properly. This includes checking for any damage or wear and tear and tightening any loose bolts or screws. By regularly maintaining your pedals, you can prevent future issues and ensure a safe and enjoyable ride.
Frequently Asked Questions
What tools are needed to fix a bicycle pedal?
Fixing a bicycle pedal requires Bicycle pedal maintenance. Essential tools for pedal repair include a pedal wrench, a crank puller, and a hex key. These tools will help you remove and replace pedals with ease.
How often should bicycle pedals be serviced?
Regular maintenance is crucial to ensure optimal performance of your bicycle pedals. Signs of wear and tear include clicking sounds, difficulty in turning, or a loose feeling. Service your pedals every 6-12 months to prevent damage and maximize their lifespan.
Can a damaged pedal be repaired or does it need to be replaced?
When a pedal is damaged, it’s best to evaluate whether to repair or replace it. The pros and cons of each option should be considered, as well as alternative fixes like replacing the bearings or spindle. Don’t pedal around the issue, take action.
How do I know if my pedals need to be replaced?
To know if your pedals need replacing, look for signs of worn pedals such as play or looseness in the pedal body, excessive noise, or difficulty clipping in/out. Regular maintenance can prolong their lifespan- lubricate the threads, clean, and inspect regularly.
Is it necessary to remove both pedals when fixing just one?
Yes, it is necessary to remove both pedals when fixing just one. Pedal maintenance requires proper pedal installation, which is difficult to achieve if the other pedal is still attached. Ensure both pedals are tightened correctly before use.
Conclusion
Well done! You’ve successfully fixed your bicycle pedal and saved yourself a trip to the bike shop. Nothing beats the satisfaction of a DIY repair, except maybe the satisfaction of knowing you won’t have to pay a professional to do the job.
But let’s not get too carried away with our newfound mechanical prowess. After all, fixing a pedal is just the tip of the iceberg when it comes to bicycle maintenance. Who knows what other malfunctions might be lurking beneath the surface of your trusty steed, waiting to strike at the most inconvenient moment?
So, go ahead and pat yourself on the back for a job well done. But don’t get too cocky. Remember, there are plenty of other things that can go wrong with a bike, and you don’t want to be caught unprepared.
Keep your tools handy, stay vigilant, and ride safely!