Ever found yourself cycling and unexpectedly noticed your brakes aren’t functioning as they should? It’s a horrifying feeling, akin to attempting to halt a train barreling out of control. However, there’s no need to panic. Repairing your brakes is an easy job that you can complete on your own with the proper equipment and a bit of knowledge.
Think of your bike’s braking system like a symphony orchestra. Each part plays a crucial role in creating a harmonious and efficient system. But just like in an orchestra, if one part is off, the whole system can fall apart.
That’s why it’s important to identify the problem, gather the necessary tools, and make the necessary adjustments or replacements to get your braking system back in tune. With a little patience and attention to detail, you’ll be back on the road with a safe and reliable braking system in no time.
Key Takeaways
- Regular maintenance is essential for top condition and safety.
- Identifying the problem is the first step in fixing bike brakes.
- Brake pads are crucial and can be easily replaced.
- Adjusting brake tension can improve function.
Identify the Problem
You can’t ride your bike safely until you identify what’s wrong with those darn brakes! Troubleshooting techniques can help you figure out what’s causing the problem so you can fix it and get back on the road.
One common brake issue is when the brakes squeal or squeak when you apply them. This is often caused by dirty or worn brake pads, which can be easily replaced. Another issue could be that your brakes just aren’t stopping the bike as quickly as they used to. This could be due to worn brake pads, a stretched brake cable, or a problem with the brake mechanism itself.
If you’re having trouble identifying the issue, start by testing your brakes in a safe, open area. Listen for any unusual sounds or vibrations, and pay attention to how quickly your bike comes to a stop. If you’re still not sure what’s causing the problem, take your bike to a professional for a thorough inspection.
Once you’ve identified the issue, it’s time to gather the necessary tools to fix it.
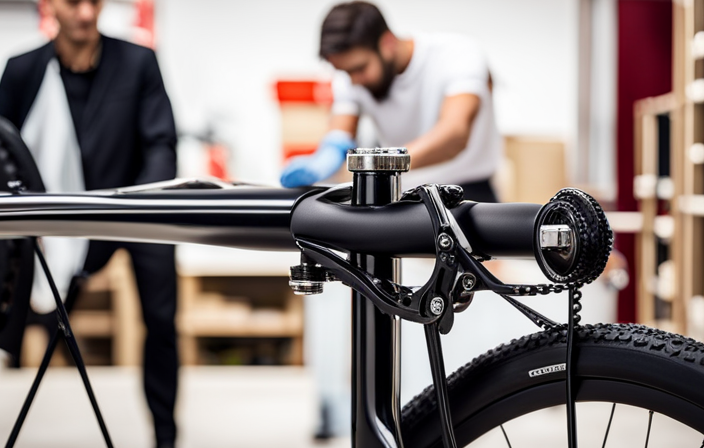
Gather Necessary Tools
Context:
Gather necessary tools.
Input:
First, gather all the required tools for the job, such as a wrench, pliers, screwdriver, and a cable cutter. Here’s a list of the essential tools and their uses:
- Wrench – for removing and tightening nuts and bolts
- Pliers – for holding and manipulating cables and housings
- Screwdriver – for adjusting brake levers and calipers
- Cable Cutter – for trimming brake cables and housing to the correct length
It’s also important to organize your tools before starting the job. Place them in a designated area to avoid losing any pieces or tools during the process.
If you don’t have access to these specific tools, there are some alternatives that you can use. For example, instead of a cable cutter, you could use a pair of wire cutters, but be careful not to damage the cable or housing.
Proper tool organization and utilization will make the job easier and more efficient.
Now that you have all the necessary tools, you can proceed to adjust or replace brake components.
Adjust or Replace Brake Components
To properly maintain your bike’s braking system, it’s essential to regularly adjust or replace its components. One of the most important components to focus on are the brake pads. Over time, brake pads can become worn down and lose their effectiveness.
To replace them, first remove the wheel and then carefully remove the brake pad from the brake caliper. Install the new brake pad, making sure it is properly aligned with the rim. Repeat the process for the other brake pad and reattach the wheel.
Another important component to adjust is the brake tension. If your brakes feel too loose or too tight, adjusting the tension can help improve their function. To adjust the tension, locate the barrel adjuster on the brake lever and turn it clockwise or counterclockwise as needed.
Test the brakes after adjusting the tension to ensure they are working properly. With these adjustments made, you can move on to testing your brakes to ensure they are in top working condition.
Test Your Brakes
Before hitting the road, make sure your bike’s braking system is functioning properly by giving it a test run and feeling the reassuring grip of safety. Follow these four easy steps to properly test your brakes:
-
Check the brake pad wear by looking at the rubber compound. If it’s worn down to less than 1/8 inch, replace the pads.
-
Apply the brakes and check the cable tension. The brake lever should feel firm and not pull all the way to the handlebar.
-
Test the brakes at different speeds to ensure they work properly in any situation.
-
Try emergency stops to test the effectiveness and response time of your brakes.
Regular maintenance is essential to ensure your bike’s braking system remains in top condition.
Regular Maintenance
To keep your brakes in top condition, regular maintenance is crucial. This includes checking and replacing brake components as needed. By doing so, you can ensure optimal performance and safety while riding.
Some tips for maintaining your brakes include regularly cleaning and lubricating them, checking brake pad wear, and tightening any loose bolts or cables.
Be sure to check your brakes at least once a month or before any long rides to prevent any potential issues.
Importance of regular maintenance
Regular maintenance is crucial for ensuring the safety and longevity of your bicycle’s brakes. By conducting regular maintenance, you can reap the benefits of consistent maintenance, which include a decrease in repair costs and a reduction in the likelihood of accidents.
Preventative maintenance techniques such as cleaning, lubrication, and adjustment of the brake system can help keep your brakes in optimal condition. Neglecting regular maintenance can lead to damages in the brake system, such as worn brake pads, malfunctioning cables, and ineffective braking. These issues can compromise the safety of your ride and require costly repairs or replacements.
By making sure you conduct regular maintenance, you can save yourself from these troubles and ensure that your brakes are always in top condition. With that being said, let’s move on to some tips for keeping your brakes in top condition.
Tips for keeping your brakes in top condition
One of the best ways to ensure your rides are always safe and smooth is by implementing a few quick and easy maintenance tips for keeping your brakes in top condition. Firstly, it is important to regularly check and replace your brake pads. The type of brake pad material you choose can greatly affect the overall performance of your brakes. For example, organic brake pads may provide better stopping power, but they tend to wear out faster than metallic ones. On the other hand, metallic brake pads may last longer, but they can be noisy and may not perform as well in wet conditions.
Secondly, make sure to adjust the brake cable tension periodically. If it is too loose, your brakes may feel spongy and have reduced stopping power. If it is too tight, your brake pads may wear out faster and you may experience brake lock-up. By following these simple tips, you can ensure that your brakes are always in top condition and ready to perform when you need them most. As a result, you can have peace of mind while riding and enjoy a safer and more enjoyable cycling experience.
When it comes to keeping your bike’s brakes in top condition, it’s important to know how often to check and replace brake components. By regularly inspecting your brake pads and cables, you can catch any issues before they become serious safety hazards. In the next section, we will discuss some guidelines for how often to perform these checks and when it may be time to replace your brakes altogether.
How often to check and replace brake components
Keeping your bike’s braking system in top shape is like maintaining a well-oiled machine; it requires regular check-ups and replacements of brake components. Brake maintenance not only prolongs the life of your bike but also ensures your safety on the road.
Here are some safety tips and guidelines for keeping your brake components in check:
-
Check your brake pads regularly for wear and tear. Worn-out pads reduce the stopping power of your brakes and can damage your rims. Replace them when they’re less than 1mm thick.
-
Inspect your brake cables and housing for fraying and kinks. Replace them if they’re damaged or have excessive wear, as they can cause your brakes to fail.
-
Keep your brake system clean and lubricated. Dirt and grime can accumulate on your brake components and reduce their effectiveness. Use a clean rag and lubricant to keep your brakes clean and functioning smoothly.
By following these guidelines, you’ll ensure that your brakes are in good working order and ready to stop you when you need them most. Remember, regular brake maintenance is essential for your safety on the road.
Frequently Asked Questions
How often should I replace my brake pads?
You should replace your brake pads when they have worn down to around 1mm thickness. Brake pad lifespan varies depending on materials used. Ceramic and metallic pads have longer replacement intervals and provide better performance compared to organic pads.
Can I use any type of brake cable for my bicycle?
To ensure safe and efficient braking, it’s important to use brake cables that are compatible with your bike’s braking system. When installing the cable, make sure it’s properly tensioned and securely fastened to avoid any potential issues.
How do I know if my brake lever needs to be replaced?
To determine if your brake lever needs replacement, look for signs of wear such as cracks, looseness, or difficulty in braking. Regular maintenance can prevent issues. Check the lever regularly and replace if necessary.
Is it necessary to lubricate brake components?
Did you know that over 22,000 cycling injuries related to braking occur annually in the US? Lubricating your brake components can prevent these injuries and increase braking power. Avoid over-lubricating and using the wrong type of lubricant for optimal results.
Can I adjust the brake tension myself or should I take it to a professional?
You can adjust the brake tension yourself with a few tools and knowledge of the process, but it’s important to follow proper procedures. Professional brake repairs can cost upwards of $50, so DIY brake adjustments can save you money.
Conclusion
Congratulations! You’ve successfully fixed the brakes on your bicycle. Now, you can enjoy a smooth and safe ride every time you hit the road.
Remember, proper maintenance of your bike’s brakes is essential for your safety and the longevity of your bicycle. As the great cyclist Eddy Merckx once said, "The race is won by the rider who can suffer the most."However, when it comes to your everyday ride, safety should always come first.
By following the steps outlined in this article, you’ve shown your commitment to safe cycling and the proper maintenance of your trusty steed. So, whether you’re commuting to work, going for a leisurely ride, or tackling the toughest mountain trails, you can ride with confidence, knowing that your brakes are in top-notch condition.
Keep up with regular maintenance and be sure to address any issues as soon as they arise. Happy cycling!