Were you aware that malfunctioning brakes are a primary reason behind collisions involving electric bicycles?
It’s a scary thought, but the good news is that fixing your electric bike brakes is a relatively simple task that you can do on your own.
In this article, I will guide you through the step-by-step process of identifying and fixing common brake issues.
So grab your tools and get ready to ensure your safety on the road with properly functioning brakes.
Key Takeaways
- Lubricate brake calipers and levers to reduce friction and improve overall brake performance.
- Regularly inspect and maintain brake pads, cables, and calipers to ensure optimal functionality and prevent damage.
- Test brake performance by squeezing brake levers and regularly perform brake tests for safety.
- Seek professional help from an electric bike mechanic for diagnostics, repairs, and professional brake service to ensure safety, efficiency, and a worry-free ride.

OutIn Nano Portable Electric Espresso Machine, Travel Coffee Maker for Camping, Car Coffee Maker Self-Heating with USB-C, With Ground Coffee & NS Capsule for RV, Hiking, Office
【LIGHTWEIGHT & PORTABLE】: OutIn Portable Espresso Machine weighs only 670 grams. Made of food-grade stainless steel and sustainable...
As an affiliate, we earn on qualifying purchases.
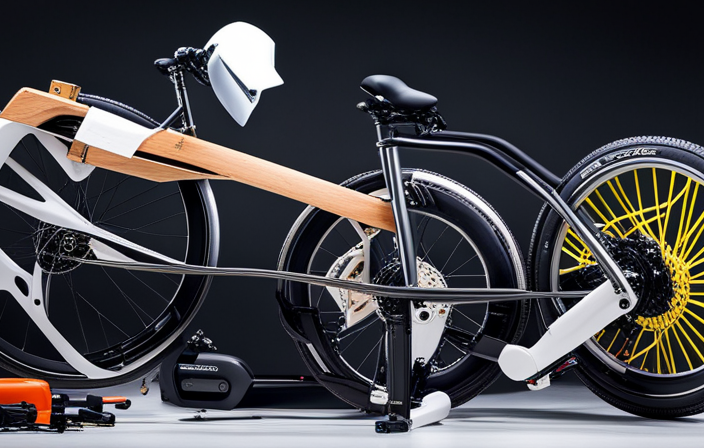
Identify the Problem with Your Electric Bike Brakes
You need to identify the problem with your electric bike brakes.
The first thing you should do is to check if the brakes are dragging or not engaging properly. This could be caused by worn brake pads or a misaligned brake caliper.
Next, listen for any unusual sounds when you apply the brakes. Squeaking or grinding noises may indicate that the brake pads need to be replaced.
Additionally, pay attention to the feel of the brakes. If they feel spongy or loose, it could be a sign of air in the brake lines or a problem with the brake fluid.
Once you have identified the issue, you can move on to gathering the necessary tools and supplies to fix your electric bike brakes.

AeroPress Go, Extra Small Portable Coffee Maker Kit, Travel, Hiking & Camping, All-in-One French Press, Pour-Over & Espresso Style Manual Brewer, 2 Min Brew Makes a Less Bitter, More Flavorful Cup
Compact Travel Coffee System – Brew smooth, rich coffee anywhere in under 2 minutes. Includes a small, portable...
As an affiliate, we earn on qualifying purchases.
Gather the Necessary Tools and Supplies
First, make sure you have all the necessary tools and supplies on hand. You will need a set of Allen wrenches, a cable cutter, a pair of pliers, a screwdriver, and some brake fluid. These tools will help you effectively fix your electric bike brakes.
The Allen wrenches will be used to remove the brake caliper from the frame, while the cable cutter will come in handy for trimming the brake cable to the correct length. The pliers will assist in adjusting the brake pads, and the screwdriver will be used to loosen and tighten the brake caliper bolts. Lastly, the brake fluid will be necessary for bleeding the brakes.
With these tools and supplies ready, you can now move on to adjusting the brake cable tension.
Amazon Product B0FM3KHHK6
As an affiliate, we earn on qualifying purchases.
Adjust the Brake Cable Tension
To adjust the tension of the brake cable, start by loosening the brake caliper bolts. This will allow you to manipulate the cable tension and ensure proper braking performance. Once the bolts are loosened, you can adjust the tension by either pulling the cable tighter or releasing it slightly. It’s important to find the right balance, as too much tension can cause the brakes to drag, while too little tension can result in weak braking power. A helpful way to determine the right tension is by referring to a brake cable tension chart. This chart provides guidelines based on the type of brake system and the weight of the rider. Once you have adjusted the tension, tighten the caliper bolts to secure the cable in place. Now, let’s move on to cleaning the brake pads and rotors.
![COLETTI Scoutmaster Coffee Percolator Camping — The Ultimate Camping Coffee Maker [24 Cup]](https://m.media-amazon.com/images/I/417KiUXdACL._SL500_.jpg)
COLETTI Scoutmaster Coffee Percolator Camping — The Ultimate Camping Coffee Maker [24 Cup]
NO ALUMINUM, NO PLASTIC—PURE, BOLD CAMP COFFEE – The SCOUTMASTER percolator coffee pot is built for those who...
As an affiliate, we earn on qualifying purchases.
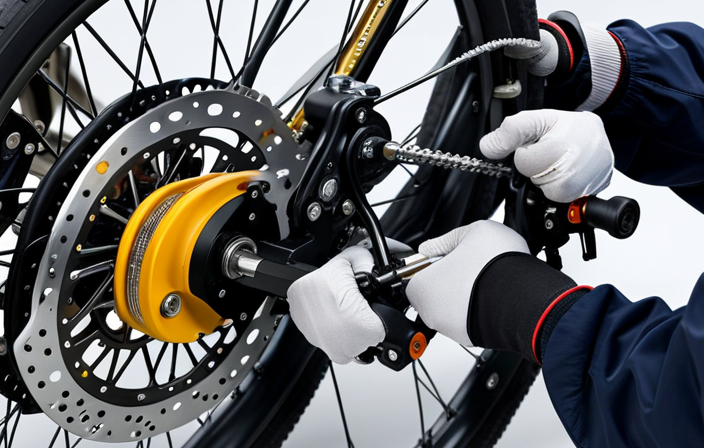
Clean the Brake Pads and Rotors
When it comes to maintaining my electric bike’s brakes, one important step is to clean the brake pads and rotors.
To do this, I first remove the brake pads from the caliper. Then, I use a clean cloth and brake cleaner to thoroughly clean both the brake pads and the rotors.
This helps remove any dirt, debris, or brake dust that may have built up, ensuring optimal brake performance.
Remove the Brake Pads
Once you’ve gathered the necessary tools, you can easily remove the brake pads on your electric bike. It’s a simple process that can be done in a few steps. First, locate the brake caliper on your bike’s front or rear wheel. Then, using a suitable Allen wrench, loosen and remove the bolts that hold the brake pads in place. Once the bolts are removed, carefully slide the brake pads out of the caliper. Be mindful not to damage the brake rotor while doing this. Finally, set the removed brake pads aside for cleaning or replacement. With the brake pads removed, you can now proceed to the next step of cleaning the brake pads and rotors, ensuring optimal performance.
Clean the Brake Pads and Rotors
After removing the brake pads, I will need to clean them and the rotors to ensure optimal performance. Cleaning the brake pads and rotors is crucial as it helps remove any dirt, grime, or debris that can affect the braking efficiency. Here are three reasons why this step is important:
- By cleaning the brake pads and rotors, you can prolong their lifespan, saving you money on replacements.
- A clean braking system enhances safety by ensuring smooth and effective stopping power.
- Regular cleaning prevents squealing and grinding noises, creating a more pleasant and enjoyable riding experience.
Once the brake pads and rotors are clean, it’s time to move on to the next section about replacing worn-out brake pads. This ensures that your electric bike’s brakes remain in top condition and provide reliable stopping power.
Replace Worn Out Brake Pads
To replace worn out brake pads on your electric bike, start by removing the wheel.
First, locate the brake caliper and loosen the bolts holding it in place. Once the caliper is loose, slide it off the rotor and carefully remove the old brake pads.
Take note of how the pads are positioned so you can install the new ones correctly. Next, insert the new brake pads into the caliper, making sure they are aligned properly.
Once the pads are in place, slide the caliper back onto the rotor and tighten the bolts. Finally, give the brake lever a few squeezes to ensure the pads are making contact with the rotor.
Now, let’s move on to checking and adjusting the brake calipers.
Check and Adjust Brake Calipers
Now, you’ll want to make sure to check and adjust your brake calipers.
Start by visually inspecting the calipers for any signs of damage or misalignment. If you notice any issues, it’s important to address them before proceeding.
Next, loosen the mounting bolts on the calipers and squeeze the brake lever a few times to center the calipers on the rotor. Tighten the bolts back up, making sure the calipers are aligned properly.
After that, check the brake pad clearance by spinning the wheel and looking for any rubbing or dragging. If necessary, adjust the calipers by turning the adjustment screw until the pads are properly aligned with the rotor.
Once you’ve checked and adjusted the brake calipers, you can move on to test and fine-tune the brakes for optimal performance.
Test and Fine-Tune the Brakes
In order to ensure the brakes on my electric bike are functioning properly, I need to test them on a flat surface. This will allow me to assess their responsiveness and effectiveness.
If I find that the brakes are not engaging as they should, I will need to adjust the brake pads to ensure they are making proper contact with the wheel.
Test the Brakes on a Flat Surface
First, make sure the brakes on your electric bike are working properly by testing them on a flat surface. Find a safe and open area where you can ride the bike at a moderate speed.
Begin by gently squeezing the brake levers to see if they engage smoothly and provide sufficient stopping power. Pay attention to any unusual noises or resistance.
Next, increase your speed and apply the brakes more forcefully to test their effectiveness under different conditions. If the brakes feel weak or unresponsive, it may be necessary to adjust the brake pads. This will ensure that they make proper contact with the wheel rim, maximizing their stopping power.
With the brakes tested, we can now move on to the next section and adjust the brake pads if necessary.
Adjust the Brake Pads if Necessary
After testing the brakes on a flat surface, if you find that they are not working properly, the next step is to adjust the brake pads if necessary. This is an important task to ensure the brakes are functioning optimally and providing the right amount of stopping power. To adjust the brake pads, you will need to loosen the bolts that hold them in place and then position them correctly so that they make even contact with the rim of the wheel. Once you have made the necessary adjustments, tighten the bolts back up and test the brakes again. If the brakes still don’t feel right, you may need to repeat the process or seek professional assistance. Now, let’s move on to the next section where we will discuss how to lubricate moving parts for smoother operation.
Lubricate Moving Parts
When it comes to maintaining an electric bike, one important step is to lubricate the moving parts.
This includes applying lubricant to the brake calipers and lubricating the brake levers. By doing this, I ensure that the brakes operate smoothly and effectively, providing me with a safe and reliable riding experience.
Apply Lubricant to Brake Calipers
To fix your electric bike brakes, start by applying lubricant to the brake calipers. This is an important step to ensure smooth and efficient braking.
First, locate the brake calipers, which are usually located near the wheel hubs. Use a lubricant specifically designed for bike components, and apply a small amount to the moving parts of the calipers. This will help reduce friction and prevent any sticking or squeaking noises.
Make sure to wipe away any excess lubricant to avoid attracting dirt and debris. Once the brake calipers are properly lubricated, you can move on to the next step of lubricating the brake levers, which will further enhance the performance of your electric bike brakes.
Lubricate Brake Levers
Now that we have applied lubricant to the brake calipers, let’s move on to the next step in fixing electric bike brakes: lubricating the brake levers. This is an important part of the process as it ensures smooth operation and prevents any sticking or seizing of the levers.
To lubricate the brake levers, start by applying a small amount of lubricant to a clean cloth. Gently wipe the lubricant onto the levers, making sure to cover all the moving parts. This will help reduce friction and improve the overall performance of your brakes.
As you work on your electric bike brakes, it’s important to keep in mind that regular maintenance is key. By inspecting and maintaining your brakes regularly, you can ensure their optimal performance and extend their lifespan. So, let’s move on to the next section and learn how to properly inspect and maintain your electric bike brakes.
Inspect and Maintain Your Electric Bike Brakes Regularly
Regularly inspecting and maintaining your electric bike brakes is crucial for safety and efficiency. Here are some key steps to follow:
-
First, examine the brake pads for wear and tear. If they appear thin or damaged, replace them immediately.
-
Next, check the brake cables for any fraying or stretching. If needed, adjust or replace them to maintain proper tension.
-
Additionally, inspect the brake calipers for misalignment or looseness. Tighten any loose bolts and realign if necessary.
-
Finally, test your brakes by squeezing the brake levers. Ensure they engage smoothly and bring the bike to a complete stop.
By regularly performing these inspections and maintenance tasks, you can extend the lifespan of your electric bike brakes and ensure they function properly.
If you encounter any difficulties or are unsure about any aspect of the process, seek professional help to avoid any potential risks.
Seek Professional Help if Needed
When it comes to seeking professional help for my electric bike brakes, I always consult an electric bike mechanic. They have the expertise and knowledge to diagnose any issues and provide the necessary repairs.
If the problem is beyond my own capabilities, I also consider getting a professional brake service to ensure the safety and optimal performance of my electric bike.
Consult an Electric Bike Mechanic
If you’re not confident in your own skills, it’s best to consult an electric bike mechanic to fix your brakes.
An electric bike mechanic has the expertise and experience to properly diagnose and repair any issues with your brakes. They have the necessary tools and knowledge to ensure that your brakes are working efficiently and safely.
Additionally, an electric bike mechanic can provide valuable advice on how to maintain and care for your brakes to prevent future problems. By consulting a professional, you can have peace of mind knowing that your brakes will be fixed correctly.
Furthermore, considering a professional brake service can save you time and frustration, allowing you to get back on the road quickly and safely.
Consider a Professional Brake Service
A professional brake service can provide valuable assistance in ensuring the efficiency and safety of your braking system. They have the knowledge and expertise to diagnose any issues with your electric bike brakes and recommend the best course of action. Here are a few reasons why considering a professional brake service is a great idea:
-
Experience: Professional mechanics have years of experience working with electric bikes and are familiar with the specific requirements of their braking systems.
-
Specialized Tools: They have access to specialized tools that are necessary for properly adjusting and repairing electric bike brakes.
-
Quality Parts: A professional brake service will use high-quality parts that are specifically designed for electric bikes, ensuring optimal performance and longevity.
-
Safety: By trusting a professional, you can have peace of mind knowing that your brakes are in good hands and that your bike will be safe to ride.
Overall, a professional brake service can help you maintain the efficiency and safety of your electric bike’s braking system, allowing you to enjoy a smooth and worry-free ride.
Frequently Asked Questions
How do I know if my electric bike brakes need fixing?
You can tell if your electric bike brakes need fixing if you experience reduced stopping power, squeaking or grinding noises, or if the brake lever feels loose. It’s important to address these issues promptly for safe riding.
Can I use regular bike brake pads for my electric bike?
Yes, you can use regular bike brake pads for your electric bike. However, it’s important to ensure they are compatible with the type of brakes on your electric bike to maintain optimal performance and safety.
Is it necessary to clean the brake pads and rotors regularly?
Yes, it’s necessary to clean brake pads and rotors regularly for optimal performance. Think of it like wiping off muddy shoes before entering a clean house – it ensures smooth stopping power and prevents wear and tear.
How often should I inspect and maintain my electric bike brakes?
I should inspect and maintain my electric bike brakes regularly to ensure their proper functioning and safety. It’s important to check them at least once a month and address any issues promptly.
When should I seek professional help for my electric bike brakes?
I should seek professional help for my electric bike brakes when they are not functioning properly despite my attempts to fix them myself or when I am unsure how to properly diagnose or repair the issue.
Conclusion
Well, after spending hours trying to fix my electric bike brakes, I can confidently say that I am now an expert in brake maintenance.
It’s amazing how a simple task can turn into a frustrating ordeal. But hey, at least now I know that I should have just taken it to a professional from the start.
So, if you’re feeling adventurous and want to waste some time, go ahead and try fixing your electric bike brakes. But trust me, it’s much easier to just let the experts handle it.