
Are you experiencing a loss of power and efficiency in your electric bike? Fear not, for we have the solution to your motor troubles!
In this article, we will guide you through the process of fixing your electric bike motor, step by step. From checking the battery connection to testing the power output, we will leave no stone unturned.
So, saddle up and join us on this journey to get your electric bike back on the road in no time!
Key Takeaways
- Testing the electric bike’s display and controls is essential to ensure proper functionality.
- Consulting the manufacturer’s troubleshooting guide can provide step-by-step instructions and explanations to diagnose and resolve common problems.
- Seeking professional help is recommended for complex issues or if unsure about resolving the problem independently.
- Fixing the electric bike motor without proper knowledge and skills can lead to further damage, making professional assistance important for effective and safe repairs.

ANCHEER 27.5 '' Electric Bike for Adults, Peak 750W Ebike, 3 Hours Fast Charge, 60 Miles Electric Bicycle with 48V/499Wh Battery, Electric Mountain Bike with 21 Speed (Blue Trailblazer XT)
✅【499Wh High-Capacity Fast-Charging Battery】 – Enjoy a range of 25-60 miles per charge with the powerful 48V 10.4Ah...
As an affiliate, we earn on qualifying purchases.
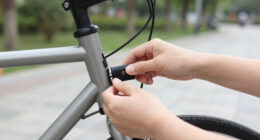
Check the Battery Connection
First, make sure you’ve disconnected the battery before checking its connection.
To check the battery connection on your electric bike motor, you will need a set of tools including a wrench or a socket set.
Start by locating the battery compartment, usually located near the rear wheel or under the seat.
Carefully remove the battery cover, exposing the connection terminals.
Inspect the terminals for any signs of corrosion or loose connections.
If you notice any corrosion, use a wire brush to gently clean the terminals.
Tighten any loose connections using the appropriate size wrench or socket.
Once you have ensured a secure connection, replace the battery cover and reconnect the battery.
With the battery connection checked, it’s now time to inspect the wiring for any damage.

Electric Bike for Adults, 48V 20Ah Removable Battery, 1500W Peak & 100+ Miles Ebike, Dual Suspension Electric Motorcycle, 20'' Fat Tires All-Terrain UL 2849 for Mountain,Snow,Sand,Commuter
1500W PEAK POWER & HIGH TORQUE: Dominate challenging terrain with a 1500W high-torque motor engineered for powerful acceleration...
As an affiliate, we earn on qualifying purchases.
Inspect the Wiring for any Damage
Before inspecting the wiring, make sure to disconnect the battery. This is crucial to prevent any electrical accidents or damage to the motor. Once the battery is disconnected, carefully examine the wiring for any signs of wear, fraying, or loose connections.
Start by visually inspecting the wires, looking for any exposed or damaged sections. Next, gently wiggle the wires to check for loose connections. If you notice any issues, it is important to address them promptly. Use electrical tape to cover any exposed wires or connectors and secure any loose connections.
Remember to follow the manufacturer’s guidelines and refer to the wiring diagram if available. Now that the wiring has been inspected and repaired if necessary, you can proceed to test the motor for power output.

ASKGO Electric Bike for Adults, 1500W Peak Mountain Ebike with 25 MPH, 65 Miles Range, 48V 10.4Ah Removable Battery Ebike, 26" Electric Bicycle for Commute
Color-coded speed configurations: Features a 7-speed system for the Black and Blue models to handle various terrains, and...
As an affiliate, we earn on qualifying purchases.
Test the Motor for Power Output
Now that the wiring has been inspected and any necessary repairs have been made, you can proceed to check if the motor is producing power. Here’s how you can test the motor for power output:
-
Connect the motor to a power source: Attach the motor’s positive and negative terminals to a suitable power supply, such as a battery or a power outlet.
-
Measure the voltage: Use a multimeter to measure the voltage across the motor’s terminals. Make sure the power supply is providing the correct voltage as specified by the motor’s manufacturer.
-
Check for any abnormal readings: If the voltage reading is significantly lower or higher than the specified range, there may be an issue with the motor or the power supply.
-
Monitor motor performance: Turn on the power supply and observe if the motor is functioning smoothly without any unusual noises or vibrations.

Loeook Electric Bike for Adults, 26" Ebike with 1000W Peak Motor, 20MPH 50Miles Electric Mountain Bike with 48V Removable Battery, 7-Speed, Front Suspension, LCD Display, UL 2849 Certified
500W Powerful Brushless Motor: The electric bike is powered by a high-performance 500W motor (1000W peak), delivering robust...
As an affiliate, we earn on qualifying purchases.
Clean and Lubricate the Motor Parts
Once you have tested the motor for power output, it’s time to clean and lubricate its parts to ensure optimal performance. Cleaning and lubricating the motor is essential to remove any dirt, debris, or excess grease that may impede its functionality.
Start by disconnecting the motor from the power source and removing any protective covers. Use a soft brush or compressed air to gently remove any dirt or dust from the motor’s components. Pay special attention to the bearings, as they are prone to collecting debris.
Once clean, apply a thin layer of lubricant to the bearings and other moving parts. This will reduce friction and prolong the lifespan of the motor. Remember to refer to the manufacturer’s guidelines for the appropriate type of lubricant to use.
After cleaning and lubricating the motor, you can move on to the next step of troubleshooting: replacing any faulty components.
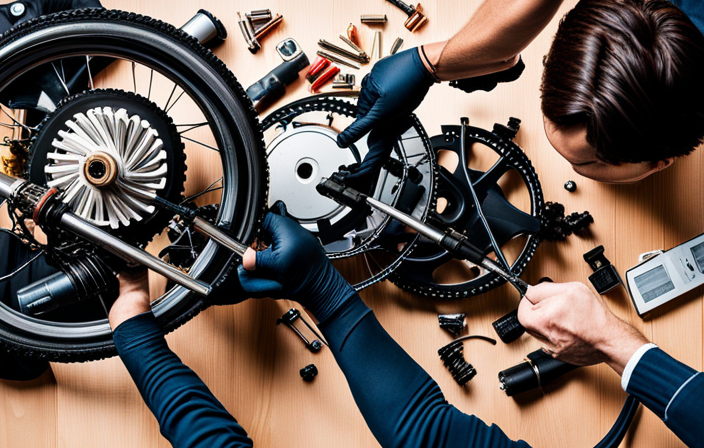
Replace any Faulty Components
To ensure optimal performance, check for any faulty components and replace them as needed. Start by inspecting the electrical connections, making sure they’re secure and free from corrosion. Check the wiring harness for any frayed or damaged wires, as these can cause issues with the motor’s functionality.
Next, examine the motor itself for any signs of wear or damage. Look for cracks or breaks in the casing, and listen for any unusual noises when the motor is running. If you notice any issues, it may be necessary to replace the motor entirely.
Additionally, inspect the battery pack for any signs of damage or deterioration, as a faulty battery can also impact the motor’s performance.
Once you have replaced any faulty components, you can move on to adjusting the motor controller settings to fine-tune the performance of your electric bike.
Adjust the Motor Controller Settings
Check the settings on the motor controller to make sure they are adjusted correctly for optimal performance.
To ensure your electric bike’s motor controller is set up properly, follow these steps:
- Confirm that the voltage settings match the specifications of your battery.
- Adjust the current limit to prevent overheating and extend the lifespan of the motor.
- Fine-tune the speed limit to suit your riding preferences and local regulations.
- Calibrate the throttle response for smooth and precise acceleration control.
By carefully adjusting these settings, you can maximize the efficiency and power output of your electric bike’s motor.
Now that you have optimized the motor controller, it’s time to move on to the next important step: checking the throttle and pedal assist sensors.
Check the Throttle and Pedal Assist Sensors
Make sure you test the throttle and pedal assist sensors to ensure they are functioning properly. These sensors are crucial for providing the right amount of power and assist while riding your electric bike. To test the throttle sensor, twist the throttle and observe if the motor responds accordingly. If there is a delay or no response, the throttle sensor may need to be replaced. Additionally, check the pedal assist sensor by pedaling the bike and monitoring if the motor engages smoothly. A faulty pedal assist sensor can lead to inconsistent power delivery. To help you understand the significance of these sensors, here is a table highlighting their importance and potential issues:
| Sensor | Importance | Potential Issues |
|---|---|---|
| Throttle Sensor | Controls the motor’s power output when using the throttle | Delayed response, no response, inconsistent power delivery |
| Pedal Assist Sensor | Determines the level of assistance provided based on pedaling input | Inaccurate assistance level, no assistance, sudden changes in power output |
Now that you have tested the throttle and pedal assist sensors, it is time to move on to the next step and test the electric bike’s display and controls.
Test the Electric Bike’s Display and Controls
Now that you’ve tested the throttle and pedal assist sensors, it’s time to see if the electric bike’s display and controls are functioning properly.
The display is the interface that provides information about your bike’s speed, battery level, and other important data. To test it, turn on the bike and make sure the display lights up.
Check if all the buttons and controls respond when pressed or turned. Try adjusting the pedal assist levels and see if the display accurately reflects the changes.
Additionally, test the brakes and make sure the bike comes to a smooth stop.
If you encounter any issues with the display or controls, consult the manufacturer’s troubleshooting guide for further assistance.
Consult the Manufacturer’s Troubleshooting Guide
If you encounter any issues with your electric bike motor, consult the troubleshooting guide provided by the manufacturer for further assistance.
The manufacturer’s troubleshooting guide is designed to help you diagnose and fix common problems that may arise with your electric bike motor. It provides step-by-step instructions, along with detailed diagrams and explanations, to help you identify the cause of the issue and find the appropriate solution.
The troubleshooting guide covers a wide range of potential problems, including motor not starting, loss of power, unusual noises, and other performance issues. By following the troubleshooting guide, you can often resolve the problem on your own, without the need for professional help.
However, if the issue persists or you are unsure about the steps involved, it is always recommended to seek professional help.
Seek Professional Help if Necessary
Seeking professional help is always recommended if you are unsure about resolving the issue on your own. When it comes to fixing the electric bike motor, there can be complex problems that require specialized knowledge and skills.
Electric bike motors are intricate systems that involve various components such as the battery, controller, and wiring. A professional technician has the expertise to diagnose and repair these components accurately. They have access to advanced diagnostic tools and equipment, enabling them to pinpoint the exact cause of the problem.
Additionally, they have the necessary training and experience to ensure the repair is done safely and effectively. Trying to fix the motor yourself without proper knowledge or skills may lead to further damage or safety risks.
Therefore, if you are unsure or unfamiliar with electric bike motor repairs, it is highly recommended to seek professional help.
Conclusion
So there you have it! By following these steps, you should be able to fix your electric bike motor and get back on the road in no time.
Remember to always start by checking the battery connection and inspecting the wiring for any damage.
Test the motor for power output and clean and lubricate the motor parts regularly.
If you find any faulty components, make sure to replace them.
Don’t forget to check the throttle and pedal assist sensors, as well as the electric bike’s display and controls.
And if all else fails, consult the manufacturer’s troubleshooting guide or seek professional help.
Enjoy your electric bike ride!