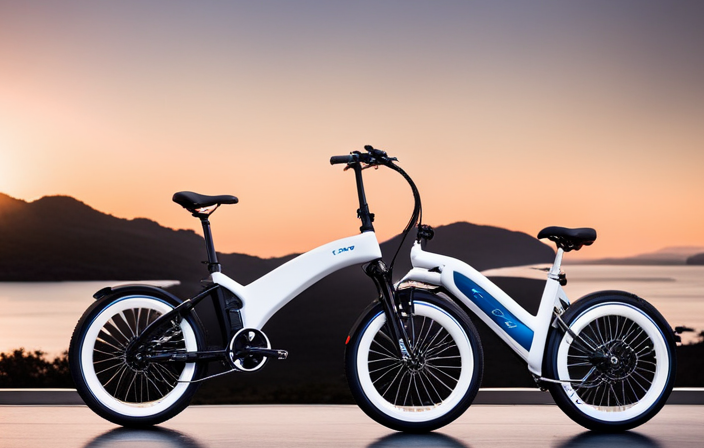

Are you feeling frustrated because your electric mini bike isn’t running smoothly? Do you daydream about effortlessly zipping around, feeling the wind in your hair? Look no further!
In this article, we will guide you step by step on how to fix your electric mini bike. From assessing the problem to fine-tuning the electric system, we’ll cover it all.
Get ready to roll with confidence as we take you through the process of restoring your mini bike to its full potential.
Key Takeaways
- Throttle issues can be resolved by inspecting and adjusting the throttle cable and grip, and replacing them if necessary.
- Troubleshooting the charging system involves checking battery connections, inspecting charging cables, testing the charger, and using a multimeter to check battery voltage.
- Tire and wheel problems can be addressed by locating punctures, patching or replacing inner tubes, adjusting axle alignment, and tightening axle nuts.
- Suspension maintenance includes inspecting and replacing shock absorbers and worn suspension springs to improve ride quality.

Faireach 800D Heavy Duty Bike Cover for Transport 2 Bikes, Outdoor Bike Covers for 2 Bikes on Rear Bike Rack, Waterproof Windproof Electric Bicycle Cover with Straps & Storage Bag
800D Heavy Duty & Super Waterproof Bike Cover: Crafted from premium 800D Oxford fabric with PU coating, Faireach...
As an affiliate, we earn on qualifying purchases.
Assessing the Problem: Identifying the Issue
You’ll need to start by figuring out what’s wrong with your electric mini bike. Identifying common issues and using troubleshooting techniques can help you narrow down the problem.
Begin by checking if the bike is not turning on at all. This could indicate a dead battery or a faulty power switch.
If the bike turns on but doesn’t move, it could be a problem with the motor or the throttle. Strange noises or vibrations might suggest an issue with the chain or the bearings.
Additionally, inspect the wiring and connectors for any loose or damaged parts. Once you have assessed the problem, you can move on to checking the battery and troubleshooting battery-related problems.
This will help you determine if the issue lies with the battery or another component.

Topcrown Bike Cover Waterproof Outdoor Storage for 1/2/3 Bikes, Bicycle Cover Rain Sun UV Dust Wind Proof with Storage Bag for Mountain Road Bike/Ebike (210D Black+Green, XL Size for 1 bike)
Fabric Characteristics - Topcrown bike cover uses 210D fabric combined with a hydrophobic coating, PU waterproof coating, and...
As an affiliate, we earn on qualifying purchases.
Checking the Battery: Troubleshooting Battery Related Problems
First, check if the battery is the cause of any issues with your mini bike. Here are three things to consider when troubleshooting battery-related problems:
-
Battery Maintenance: Ensure that the battery is properly charged and the connections are secure. Check for any signs of corrosion on the terminals and clean them if necessary. Additionally, inspect the battery for any physical damage or leaks.
-
Battery Voltage: Use a multimeter to measure the voltage of the battery. A fully charged battery should read around 12.6 volts. If the voltage is significantly lower, it may indicate a faulty battery that needs to be replaced.
-
Battery Replacement: If the battery is old or damaged beyond repair, it may be necessary to replace it. Look for a compatible battery that meets the specifications of your electric mini bike.
By checking the battery, you can determine if it is the source of the problem. Once you have addressed any battery-related issues, you can move on to inspecting the motor for any malfunctions.

Bike Tracker for Android, Android Airtag Compatible with Google Find My Device App, Replaceable Battery Item Finder, Tracker Tag for Keys, Suitcase, Backpack, Wallet, Luggage (for Bike)
【Easy to locate】Air tag Tracker is designed for Android devices and seamlessly integrates with Google's "Find My Device"...
As an affiliate, we earn on qualifying purchases.
Inspecting the Motor: Diagnosing Motor Malfunctions
To diagnose motor malfunctions, start by inspecting the motor for any signs of damage or abnormal noise. Look for any visible cracks, leaks, or loose components. Pay attention to any unusual motor noise, such as grinding or squealing sounds, as this could indicate a problem.
Additionally, check for overheating issues, which can be identified by a burning smell or excessive heat coming from the motor. If you notice any of these signs, it’s likely that the motor is malfunctioning and will need to be repaired or replaced.
Once you have inspected the motor, the next step is to test the wiring to ensure proper electrical connections. This will help identify any issues related to the electrical system of your electric mini bike.

PerfiPro Airtag Bike Mount - Hidden GPS Tracker Case for Apple Airtag, Anti-Theft Holder for Electric Bicycle and Scooter
【HIDDEN DESIGN】Airtag bike mount looks like a normal reflector, so that thieves won't know Airtag is hidden inside!...
As an affiliate, we earn on qualifying purchases.
Testing the Wiring: Ensuring Proper Electrical Connections
Make sure to test the wiring to ensure that all electrical connections are properly functioning. Electrical continuity is crucial in maintaining the efficient operation of your electric mini bike.
Start by visually inspecting the wiring for any signs of damage, such as frayed or exposed wires. Use a multimeter to check for continuity along the wires, making sure that there are no breaks or interruptions in the electrical flow.
Additionally, perform voltage testing on the connectors and terminals to ensure that they are receiving the correct voltage. If any faulty connections are detected, carefully repair or replace the affected wiring.
Once you have confirmed that all electrical connections are in good condition, you can proceed to the next section about replacing faulty components, swapping out defective parts.
Replacing Faulty Components: Swapping Out Defective Parts
After confirming that all electrical connections are in good condition, proceed to replace any faulty components by swapping out the defective parts.
To diagnose battery issues, start by checking the voltage with a multimeter. If the voltage is significantly lower than the manufacturer’s specifications, it may be time to replace the battery.
Troubleshooting motor problems involves inspecting the wiring connections and testing the motor’s resistance using an ohmmeter. If the motor fails these tests, it is likely faulty and needs to be replaced.
When swapping out components, make sure to disconnect the power source and follow the manufacturer’s instructions. Remember to label any disconnected wires to ensure proper reconnection.
By replacing faulty components, you can restore the functionality of your electric mini bike.
Next, we will discuss repairing or replacing the controller to address control system issues.
Repairing or Replacing the Controller: Dealing with Control System Issues
When troubleshooting control system issues, repairing or replacing the controller is often necessary. If you’re experiencing problems with your electric mini bike’s control system, there are a few steps you can take to address the issue.
Start by inspecting the controller for any visible damage. Look for any signs of burnt or damaged wires, as these could be causing the problem. If you find any, you will need to replace them with new ones.
Additionally, consider reprogramming the controller to ensure that it is functioning properly. This may involve resetting the controller or updating its software.
By replacing damaged wires and reprogramming the controller, you can resolve many control system issues.
Now, let’s move on to the next section and discuss adjusting the brakes to fine-tune the braking mechanism.
Adjusting the Brakes: Fine-tuning the Braking Mechanism
Now that you have learned about repairing or replacing the controller to fix control system issues in your electric mini bike, let’s move on to the next step: adjusting the brakes.
Fine-tuning the brake pads is crucial for ensuring optimal braking performance. Start by checking the brake pads for any signs of wear or damage. If necessary, replace them with new ones.
Next, adjust the brake lever position to ensure that it engages the brakes smoothly and effectively. This can be done by loosening the clamp bolt on the brake lever and repositioning it to your desired angle. Once adjusted, tighten the bolt securely.
Properly adjusted brakes will provide you with the confidence and control needed for a safe ride.
Speaking of control, the next section will focus on cleaning and lubricating moving parts to maintain optimal performance.
Cleaning and Lubricating Moving Parts: Maintaining Optimal Performance
To maintain optimal performance, it is important to regularly clean and lubricate the moving parts of your electric mini bike. Cleaning the moving parts is essential to remove dirt, dust, and debris that can accumulate over time and affect the bike’s performance. Here are some cleaning techniques you can follow:
- Use a soft brush or cloth to gently remove any visible dirt or dust from the moving parts.
- Use a mild detergent and water solution to clean the parts thoroughly, making sure to rinse them well afterward.
- Avoid using harsh chemicals or abrasive cleaners that can damage the surfaces of the bike.
- After cleaning, make sure to dry the parts completely before applying lubrication.
Lubricating the moving parts is crucial to reduce friction and ensure smooth operation. Here are some lubrication methods you can use:
- Apply a small amount of lubricant, such as bike chain lubricant or silicone spray, to the moving parts.
- Make sure to distribute the lubricant evenly and wipe off any excess to prevent accumulation of dirt and grime.
By regularly cleaning and lubricating the moving parts of your electric mini bike, you can maintain its optimal performance and extend its lifespan.
Now, let’s move on to fixing the throttle and resolving acceleration and deceleration problems.
Fixing the Throttle: Resolving Acceleration and Deceleration Problems
To resolve acceleration and deceleration problems, you should check and adjust the throttle on your electric mini bike. Start by inspecting the throttle cable for any signs of damage or wear. Ensure that it is properly connected to the throttle grip and the throttle body.
If the cable looks fine, move on to adjusting the throttle tension. Loosen the locknut on the throttle cable adjuster and rotate the adjuster until you achieve the desired tension. Tighten the locknut to secure the adjustment.
Next, check the throttle grip for any sticking or binding. Clean and lubricate it if necessary. If these steps don’t resolve the acceleration troubleshooting or deceleration issues, you may need to replace the throttle cable or the throttle grip assembly.
Transitioning into the next section about troubleshooting the charging system, it’s important to also address any charging difficulties you may encounter.
Troubleshooting the Charging System: Dealing with Charging Difficulties
If you’re experiencing charging difficulties, you’ll need to troubleshoot the charging system. Start by checking the battery connections. Ensure they are secure and free from corrosion.
Next, inspect the charging cables for any signs of damage such as fraying or exposed wires. If you find any issues, replace the damaged cables immediately.
Additionally, test the charger itself by plugging it into a different outlet or using a different charger altogether. If the problem persists, it may be necessary to test the battery itself. A multimeter can be used to check the voltage and determine if the battery needs to be replaced.
By troubleshooting battery charging and checking the charging cables, you can effectively address charging difficulties.
Moving forward, let’s discuss addressing tire and wheel issues: resolving punctures and misalignments.
Addressing Tire and Wheel Issues: Resolving Punctures and Misalignments
Now that you have tackled the troubleshooting of the charging system, it’s time to shift your attention to another common issue that may arise with your electric mini bike – tire and wheel problems.
Dealing with punctures and misalignments can be frustrating, but fear not, as I will guide you through the process of resolving these issues.
When it comes to puncture repair, start by locating the source of the leak, then remove the wheel and patch or replace the damaged inner tube.
As for wheel misalignments, you will need to examine the alignment of the axle and adjust it accordingly. This may involve loosening the axle nuts, realigning the wheel, and tightening the nuts back in place.
By addressing these tire and wheel issues, you will ensure a smooth and stable riding experience.
Now, let’s move on to the next section about fixing the suspension and restoring that smooth ride you desire.
Fixing the Suspension: Restoring Smooth and Stable Riding
Restoring a smooth and stable riding experience involves addressing the suspension issues of your electric mini bike.
One of the most important components of the suspension system is the shock absorbers. Over time, these may become worn or damaged, resulting in a bumpy and uncomfortable ride.
To restore the shock absorbers, start by inspecting them for any signs of leakage or damage. If necessary, replace them with new ones designed specifically for your mini bike.
Additionally, check the suspension springs for any signs of wear and replace them if needed. By restoring the shock absorbers and improving the ride quality, you will be able to enjoy a smoother and more comfortable ride on your electric mini bike.
Now, let’s move on to the next section about adjusting the chain: correcting chain tension and alignment.
Adjusting the Chain: Correcting Chain Tension and Alignment
To ensure smooth and stable riding, you need to adjust the chain tension and alignment on your electric mini bike. Proper chain tension is crucial for the overall performance and longevity of your bike.
Here are some steps to help you get it right:
- Begin by loosening the rear wheel axle nuts.
- Use a chain tensioner to adjust the tension. Rotate the tensioner clockwise to tighten the chain and counterclockwise to loosen it.
- Ensure the chain is aligned properly by checking the sprockets. They should be in a straight line.
- Once the tension and alignment are correct, tighten the rear wheel axle nuts.
Remember to regularly lubricate the chain to prevent excessive wear and maintain optimal performance. With a well-adjusted chain, you’ll experience smoother rides and improved power delivery.
Now let’s move on to fine-tuning the electric system for optimized power delivery.
Fine-tuning the Electric System: Optimizing Power Delivery
Fine-tuning the electric system involves optimizing power delivery for improved performance. One crucial aspect of this process is power management, which ensures that the right amount of power is being delivered to the motor.
To achieve this, you may need to adjust the voltage regulation settings on your electric mini bike. Voltage regulation helps maintain a steady flow of electricity to the motor, preventing any power surges or fluctuations that could affect its performance.
By fine-tuning the electric system, you can maximize the power output of your mini bike and ensure a smoother ride.
Once you have optimized the power delivery, it is essential to move on to the next step. This involves conducting safety checks and taking the mini bike for a test ride to ensure that it is both safe and fully functional.
Safety Checks and Test Ride: Ensuring a Safe and Functional Mini Bike
Before taking it out for a test ride, make sure to conduct safety checks to ensure your mini bike is safe and fully functional.
Start by evaluating battery life to ensure it has enough capacity to support your ride. Check for any visible damage or leaks in the battery pack, as this can lead to potential hazards.
Next, inspect the wiring and connections for any signs of wear or loose connections. Tighten any loose wires and replace any damaged components.
Additionally, make sure to select appropriate safety gear before riding your mini bike. This includes wearing a helmet, gloves, and sturdy shoes to protect yourself in case of an accident.
Remember, safety should always be a priority when operating any vehicle, so take the time to perform these checks and gear up properly before hitting the road.
Frequently Asked Questions
What are some common issues that can cause the electric mini bike to not start?
To troubleshoot electric mini bike starting issues, there are a few common problems to consider.
Firstly, check the battery to ensure it is fully charged and properly connected.
Next, inspect the wiring for any loose or damaged connections.
Additionally, examine the ignition switch and spark plug for any faults.
If these components are functioning properly, it may be necessary to assess the motor or controller for potential issues.
Following these troubleshooting tips can help diagnose and resolve electric mini bike starting problems.
How can I determine if the battery is the source of the problem?
To determine if the battery is the culprit behind your electric mini bike’s issues, you’ll need to conduct some battery testing.
Start by troubleshooting the mini bike battery by checking its voltage with a multimeter. A fully charged battery should show around 12.6 volts. If it reads significantly lower, it may need to be recharged or replaced.
Additionally, inspect the battery for any signs of damage, such as leaking or corroded terminals.
What are some signs of a malfunctioning motor in an electric mini bike?
Signs of a malfunctioning motor in an electric mini bike include sudden loss of power, strange noises such as grinding or whining, and a burning smell.
To troubleshoot the issue, start by checking the motor connections for any loose or damaged wires.
Inspect the motor for physical damage or excessive heat.
Test the motor by connecting it to a power source outside the bike. If the motor fails to run smoothly or doesn’t run at all, it is likely malfunctioning and needs repair or replacement.
How can I ensure that all the electrical connections in my mini bike are properly functioning?
To ensure that all the electrical connections in your mini bike are properly functioning, there are some testing techniques and troubleshooting tips you can follow.
Start by visually inspecting all the connections for any loose or damaged wires.
Use a multimeter to test the continuity of the wires and check for any voltage drops.
Additionally, you can use a wire-pulling test to check for loose connections.
These techniques will help you identify and fix any issues with the electrical connections in your mini bike.
What steps should I take if I suspect that the controller is causing issues with my mini bike’s performance?
To troubleshoot controller issues on your electric mini bike, start by checking for loose or damaged wiring connections.
Inspect the controller for any visible signs of damage, such as melted components or burnt smells.
Test the voltage output from the controller using a multimeter to ensure it matches the manufacturer’s specifications.
If the controller is faulty, replace it by disconnecting the power supply, removing the old controller, and installing the new one, ensuring all connections are secure and properly insulated.
Conclusion
In conclusion, fixing your electric mini bike requires a systematic approach to address various potential issues. By assessing the problem, checking the battery, inspecting the motor, testing the wiring, and replacing faulty components, you can restore your mini bike’s functionality.
Additionally, adjusting the suspension, chain, and fine-tuning the electric system will optimize performance. It is crucial to prioritize safety by conducting thorough safety checks and test rides.
Did you know that 90% of mini bike malfunctions are due to battery-related problems? Taking the time to troubleshoot and address these issues will ensure a smooth and enjoyable riding experience.