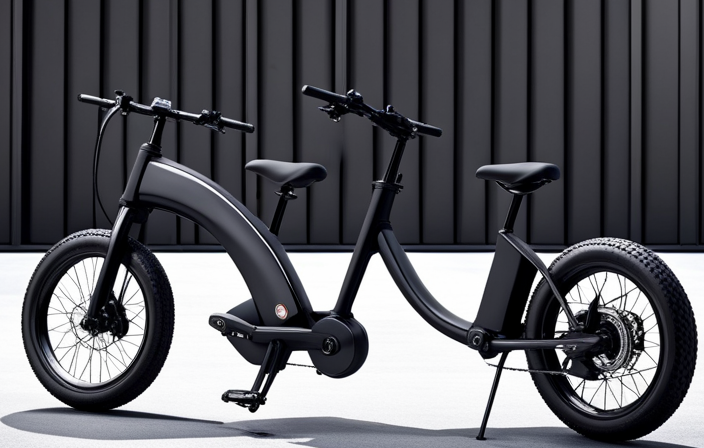
Connect with us

Electric Bike

How To Fold Archer Electric Bike

Published

on

An image showcasing a step-by-step guide on folding the Archer Electric Bike

Did you know that the Archer Electric Bike is not only a convenient mode of transportation but also incredibly compact when folded?

In this article, I will guide you through the step-by-step process of folding the Archer Electric Bike, ensuring that all components are securely locked in place for stability.

By following these precise instructions, you’ll be able to easily store or transport your folded bike, making it a hassle-free solution for your daily commute or weekend adventures.

Key Takeaways

  • Follow the manufacturer’s instructions for proper folding and storage of the Archer electric bike.
  • Utilize a sturdy bike bag or case with padding and durable material to protect the folded bike.
  • Use bungee cords or straps to securely hold the folded bike in place during transportation.
  • Consider compact folding mechanisms for tight storage spaces to ensure easy storage and transport of the bike.

Familiarize Yourself with the Bike’s Components

Familiarize yourself with the bike’s components by checking the user manual. Understanding bike parts is crucial when it comes to folding the Archer electric bike.

Advertisement

Let’s start with an overview of its components. The bike consists of a frame, wheels, pedals, brakes, gears, and a battery. The frame is made of lightweight aluminum, ensuring durability and easy maneuverability. The wheels are designed for stability and smooth rides, while the pedals provide the necessary power to propel the bike. The brakes ensure quick and efficient stopping, and the gears allow you to change the bike’s speed according to your preference. Finally, the battery is responsible for powering the electric motor.

Now that we have a clear understanding of the bike’s components, let’s move on to adjusting the seat and handlebars for a comfortable ride.

Adjust the Seat and Handlebars

To make adjustments, simply loosen the bolts and move the seat and handlebars to your desired position. Proper seat and handlebar adjustment is crucial for comfortable riding on the Archer electric bike. Here are some tips to ensure you achieve the best fit:

  • Position the seat at a height where your feet can comfortably reach the ground when you’re sitting on it.
  • Adjust the handlebars so that your arms are slightly bent and your back remains upright for a more ergonomic riding posture.
  • Check that the seat and handlebars are securely tightened after making the adjustments to avoid any unexpected movement while riding.

In addition to proper adjustment, it’s important to maintain the folding mechanism of the electric bike. Regularly inspect the bolts and hinges, and tighten them if necessary. Lubricate any moving parts to prevent rust and ensure smooth folding and unfolding.

Now, let’s move on to the next step: folding the pedals.

Fold the Pedals

Advertisement

Adjusting the pedals is an important step in preparing your Archer electric bike for folding. To fold the pedals, start by rotating them counterclockwise until they are in a parallel position with the frame. This will ensure that the pedals are securely locked and won’t interfere with the folding process.

Once the pedals are folded, you can move on to collapsing the handlebars. This will involve loosening the handlebar clamp and folding the handlebars down towards the front wheel. Make sure to tighten the clamp once the handlebars are in the folded position to ensure stability during transportation.

By following these steps, you can easily fold your Archer electric bike and make it more compact for storage or transportation.

Collapse the Handlebars

Loosen the handlebar clamp and fold them down towards the front wheel to collapse the handlebars. To accomplish this, follow the steps below:

Advertisement
  • First, locate the handlebar folding mechanism, usually located near the center of the handlebars.
  • Use a tool, such as an Allen wrench, to loosen the handlebar clamp. This will allow the handlebars to move freely.
  • Once the clamp is loosened, gently push the handlebars downward towards the front wheel.
  • Keep applying pressure until the handlebars are fully collapsed and securely in place.
  • Finally, tighten the handlebar clamp to ensure the handlebars remain stable during use.

Now that the handlebars are collapsed, we can move on to the next step: lowering the seat tube. This will further compact the bike for storage or transportation.

Lower the Seat Tube

Now that the handlebars are collapsed, we can proceed to lower the seat tube.

Lowering the seat height and adjusting the seat position are important steps in folding the Archer electric bike.

To begin, locate the quick-release lever or bolt on the seat tube clamp. Loosen the lever or unscrew the bolt to release the seat tube.

Advertisement

Once loose, carefully lower the seat tube to the desired height. Make sure it is secure by tightening the quick-release lever or screwing the bolt back in. This step is crucial to ensure a compact and secure fold of the bike.

With the seat tube lowered, we can now move on to the next section, which involves folding the frame in half, creating a compact and portable form.

Fold the Frame in Half

To proceed, simply grasp the frame firmly and carefully fold it in half. The Archer electric bike is designed with a simple yet effective folding mechanism that allows for easy storage and transportation.

Start by locating the folding latch, typically found near the middle of the frame. Depress the latch and gently fold the front wheel towards the rear wheel, ensuring that the two halves of the frame align properly.

Once folded, secure the bike with the included straps to prevent any accidental unfolding. It is important to note that if you encounter any issues while folding the bike, such as resistance or difficulty in aligning the frame, it is recommended to consult the troubleshooting section of the user manual or contact customer support for assistance.

Advertisement

Transitioning into the next section, securing the bike with the included straps adds an extra layer of protection during transport.

Secure the Bike with the Included Straps

Once you have folded the frame in half, you can secure the bike with the included straps for added protection during transportation. Using additional straps for added security is one of the best practices for securing an electric bike.

To begin, locate the anchor points on the bike frame where the straps can be attached. These anchor points are specifically designed to withstand the pressure and ensure the bike remains stable during transportation.

Place the straps over the frame and tighten them securely, making sure they are snug and there is no excess slack. This will prevent any unnecessary movement or shifting of the bike while in transit.

Once the straps are securely fastened, you can proceed to the next step of checking that all components are securely locked in place.

Advertisement

Check that all Components are Securely Locked in Place

Make sure all the components on your Archer electric bike are securely locked in place before moving on to the next step. Regular maintenance is crucial for electric bikes to ensure optimal performance and longevity.

It is essential to check that all the components, such as the handlebars, pedals, and seat, are tightly secured to prevent any accidents or damage while riding. Additionally, inspect the battery and motor connections to ensure they are firmly attached.

When choosing the right electric bike for your needs, consider factors such as the terrain you will be riding on, the distance you plan to travel, and your desired level of assistance.

Once you have confirmed that everything is securely locked in place, you can proceed to test the folded bike for stability in the upcoming section.

Test the Folded Bike for Stability

Check if the folded bike feels stable when you hold it in your hands. Testing the stability is crucial to ensure the safety and performance of the Archer electric bike. Here are three key aspects to evaluate the bike’s stability and performance:

Advertisement
  1. Balance: Gently rock the folded bike back and forth to check if it maintains a steady balance. A well-balanced bike will not tip over easily, providing confidence in its stability.

  2. Rigidity: Hold the bike firmly and try to twist or flex it. A stable and rigid frame is essential for a secure ride. Any excessive movement or flexing can indicate a potential issue with the folding mechanism or locking components.

  3. Handlebar Stability: Ensure that the handlebar is securely locked in place by giving it a gentle tug. It should not move or rotate while holding onto it.

Once you have tested the stability and performance, you can proceed to store or transport the folded bike without any concerns.

Store or Transport the Folded Bike

To store or transport your folded bike, simply ensure that it is securely locked and ready for the journey ahead. When it comes to folding bike accessories for storing and transporting, there are a few must-haves.

First, a sturdy bike bag or case will provide protection and ease of handling. Look for one with padding and durable material.

Additionally, bungee cords or straps are essential for securing the folded bike in place. These will prevent any movement or damage during transportation.

As for different methods of folding and storing an electric bike, there are a few alternatives. Some bikes can be folded in half, while others have a compact folding mechanism that allows for easy storage in tight spaces. It’s important to follow the manufacturer’s instructions to ensure proper folding and secure storage.

Advertisement

Frequently Asked Questions

Can the Archer electric bike be folded while the seat and handlebars are adjusted to my preferred height?

Yes, the Archer electric bike can be folded while the seat and handlebars are adjusted to your preferred height. The folding process is simple and allows for easy storage and transportation.

Are there any specific instructions on how to fold the pedals of the Archer electric bike?

To fold the pedals of the Archer electric bike, first, ensure that the seat and handlebars are adjusted to your preferred height. Then, locate the pedal release mechanism and follow the specific instructions provided in the user manual for folding the pedals securely.

Is it possible to fold the handlebars of the Archer electric bike without collapsing the seat tube?

Yes, it is possible to fold the handlebars of the Archer electric bike without collapsing the seat tube. This can be achieved through specific handlebar adjustments and folding techniques.

Are there any additional steps to be taken after folding the frame in half to ensure the bike is securely locked in place?

After folding the frame in half, it is crucial to engage the locking mechanism to ensure the bike is securely locked in place. Failure to do so can result in accidents and damage to the bike.

What precautions should I take while storing or transporting the folded Archer electric bike to prevent any damage?

When storing the folded Archer electric bike, it is important to keep it in a dry and secure place, away from extreme temperatures. When transporting, use a bike bag or box to protect it from scratches and damage.

Advertisement

Conclusion

In conclusion, folding the Archer Electric Bike is a straightforward process that can be easily mastered with a little practice. By familiarizing yourself with the bike’s components and following the steps outlined, you can effortlessly transform the bike into a compact and portable form.

The adjustable seat and handlebars, collapsible pedals, and secure locking mechanisms ensure stability and safety while storing or transporting the folded bike.

Remember to always check that all components are securely locked in place for a smooth and worry-free ride.

Olivia's writing is not only informative but also inspiring. She has a knack for telling stories that capture the essence of cycling and the joy it brings to people's lives. Her writing has been praised by readers and industry experts alike for its clarity, depth, and authenticity. In addition to her writing, Olivia is also an avid cyclist. She enjoys exploring new trails and routes and has participated in several cycling events and races. Her first-hand experience with cycling gives her a unique perspective on the sport, reflected in her writing. Overall, Olivia is a talented writer passionate about cycling and dedicated to producing high-quality content for FlatironBike. Her contributions to the magazine have helped make it a go-to source for cycling enthusiasts worldwide.

Continue Reading
Advertisement

Electric Bike

How To Turn Your Bike Electric

Published

on

By

An image showcasing the step-by-step transformation of a traditional pedal-powered bike into an electric one

Are you prepared to upgrade your bike with more power? Converting your ordinary bike into an electric one is simpler than you may believe. With the appropriate conversion kit and a few easy steps, you’ll be enjoying rides on an electric bike in no time.

In this article, we’ll guide you through the process, from assessing your bike’s compatibility to installing the electric components.

So, strap on your helmet and get ready to pedal into the future with your very own electric bike.

Key Takeaways

  • Choose a motor and battery based on power output, size, weight, and compatibility with the bike.
  • Consider the range, charging time, and capacity of different battery options for desired distance requirements.
  • Select a motor type for optimal efficiency and battery range, such as lithium-ion batteries with high energy density and long lifespan.
  • Ensure proper wiring installation and controller compatibility for safe and efficient conversion.

Assess Your Bike’s Compatibility

You’ll need to assess if your bike is compatible for an electric conversion. Start by choosing the right motor for your bike. Consider factors such as the power output, size, and weight of the motor.

Advertisement

Evaluate battery options based on their capacity, voltage, and weight. Determine if your bike has enough space to accommodate the battery and if it can handle the added weight. Additionally, consider the range and charging time of different battery options.

Once you have assessed your bike’s compatibility and chosen the right motor and battery, you can move on to the next section about choosing the right conversion kit. This will ensure that you have all the necessary components to successfully convert your bike to electric.

Choose the Right Conversion Kit

When choosing the right conversion kit for your electric bike, there are three key points to consider.

First, you need to consider the motor type that’s compatible with your bike and your specific needs.

Second, evaluate the different battery options available. Take into account factors such as capacity, weight, and range.

Advertisement

Lastly, determine the controller requirements for your conversion kit. Ensure that it’s compatible with your bike’s existing components and provides the necessary functionality.

Consider Motor Type

To make your bike electric, you can choose from different motor types. When considering motor type, it is important to think about motor efficiency and battery range.

The motor efficiency refers to how effectively the motor converts electrical energy into mechanical energy. A higher motor efficiency means that your bike will be able to go further on a single charge.

The battery range, on the other hand, refers to how far your bike can travel on a full battery. This is influenced by both the motor efficiency and the capacity of the battery.

By selecting the right motor type, you can ensure that your bike will have optimal motor efficiency and battery range.

Advertisement

Now, let’s move on to evaluating battery options for your electric bike.

Evaluate Battery Options

Now, let’s take a look at the different battery options available for your e-bike. When converting your bike to electric, the battery is a crucial component to consider. Here are some battery options you can evaluate:

  • Lithium-ion batteries: These are the most common and widely used batteries for e-bikes due to their high energy density and long lifespan.

  • Lead-acid batteries: Although they are cheaper, lead-acid batteries are heavier and have a lower energy density than lithium-ion batteries.

  • Nickel-metal hydride (NiMH) batteries: These batteries are less common nowadays due to their lower energy density and shorter lifespan compared to lithium-ion batteries.

  • Lithium polymer (LiPo) batteries: These batteries have a higher energy density than lithium-ion batteries, but they are more expensive and require special care during charging.

When choosing a battery for your e-bike, consider the battery capacity, as it determines the range you can achieve. Also, evaluate the charging options available for the battery you choose. They can vary from plug-in charging to removable batteries with external chargers.

With the battery options covered, let’s now transition into determining the controller requirements for your electric bike conversion.

Determine Controller Requirements

Next, let’s explore the necessary controller requirements for your e-bike conversion.

Advertisement

Controller selection is a critical aspect of turning your bike electric. It serves as the brain of your electric system, controlling the power output to the motor and managing the flow of electricity from the battery.

When choosing a controller, consider factors such as voltage compatibility, current rating, and motor compatibility.

Wiring installation is another crucial step in the process. Ensure that you have the appropriate connectors, wires, and tools to connect the controller to the battery and motor. Proper wiring is essential for a safe and efficient electric bike conversion.

Once you have determined the controller requirements, you can move on to the next step of gathering the necessary tools for the installation process.

Gather the Necessary Tools

First, gather all the necessary tools for the job. Here are three essential items you’ll need to get started:

Advertisement
  • A conversion kit: Choose the right conversion kit that suits your bike’s specifications and provides the power and speed you desire.

  • Compatible batteries: Find lithium-ion batteries specifically designed for electric bike conversions. Ensure the battery has enough capacity to meet your distance requirements.

  • Basic tools: Have a set of wrenches, screwdrivers, and pliers to remove and install components during the conversion process.

Once you have gathered all the necessary tools, you can move on to the next step, which is removing non-essential components from your bike.

Remove Non-Essential Components

To begin the conversion process, start by removing any non-essential components from your bicycle. This step is crucial in making room for the electric components that you will be installing later on. Take off accessories such as fenders, racks, and bells that are not necessary for the functioning of the electric bike.

By doing this, you can reuse these components on another bicycle or sell them to recover some of the costs associated with the conversion. If you don’t plan on reusing these components, there are cost-effective alternatives available in the market. For example, instead of using a traditional rear rack, you can opt for a seat post rack that doesn’t require any additional mounting points.

Once you have removed these non-essential components, you can move on to the next step of installing the electric components, which will give your bike the power it needs.

Install Electric Components

To install electric components on your bike, you’ll need to follow a few key steps.

Advertisement

First, attach the motor to the bike frame securely using the provided brackets and screws.

Next, mount the battery and controller in a convenient and balanced location. Make sure they are easily accessible but won’t interfere with your riding.

Finally, connect the wiring and cables, making sure to follow the provided instructions to ensure proper functioning of the electric system.

Attach Motor to Bike Frame

After attaching the motor to the bike frame, you can move on to the next step in the bike motor installation process.

To ensure a secure attachment, begin by aligning the motor with the frame and making sure it is centered.

Advertisement

Use the appropriate mounting brackets and hardware to secure the motor in place.

Tighten all bolts and screws to ensure a stable connection.

It is important to double-check the alignment and tightness of the motor to prevent any issues during operation.

Once the motor is securely attached, you can now proceed to the next section about mounting the battery and controller.

This step is crucial in completing the electric bike conversion process and will provide power to the motor for a smooth and efficient ride.

Advertisement

Mount Battery and Controller

Once the motor is securely attached, you can now move on to mounting the battery and controller. Battery installation is a crucial step in converting your bike into an electric one. The battery provides the necessary power to run the motor and ensures a smooth ride. To mount the battery, follow these steps:

  1. Choose a suitable location on the bike frame, ensuring it is secure and easily accessible.
  2. Use straps or brackets to attach the battery securely to the frame, minimizing any movement or vibration during rides.
  3. Connect the battery to the controller using the provided wiring harness and connectors.
  4. Mount the controller near the battery, ensuring it is protected from any external elements.
  5. Use zip ties or clamps to secure the controller to the bike frame, keeping it stable and preventing damage.

Once the battery and controller are securely mounted, you can now proceed to connect the wiring and cables. This ensures proper communication and power flow between the motor, battery, and controller, allowing for a seamless electric biking experience.

Connect Wiring and Cables

First, connect the wiring and cables to ensure proper communication and power flow between the motor, battery, and controller. This step is crucial for the functioning of your electric bike. Here are some wire connection techniques and cable routing tips to help you with this process:

  1. Use proper wire connectors such as butt connectors or soldering for secure connections.
  2. Organize and route the cables in a way that avoids interference with other bike components.
  3. Secure the cables using zip ties or cable clamps to prevent them from getting caught in moving parts.
  4. Test the connections by gently tugging on the wires to ensure they are properly secured.

Once you have completed the wiring and cable connections, you can move on to the next step of reassembling and adjusting the components of your electric bike.

Reassemble and Adjust

To reassemble and adjust your bike, you’ll wanna start by attaching the electric motor to the frame. Ensure that it is securely fastened using the appropriate bolts and brackets.

Next, reconnect the wiring and cables, making sure to follow the correct color-coded scheme. Double-check that all connections are tight and free from any damage.

Once the motor is in place, adjust the tension of the drive belt or chain to ensure smooth operation. Use adjustment techniques such as loosening or tightening the tensioner bolts as needed.

Advertisement

If you encounter any issues during this process, troubleshoot by checking the wiring connections and making sure all components are properly aligned.

Finally, ensure safety measures are in place by testing the brakes and adjusting them if necessary. This will guarantee a safe and reliable electric bike experience.

Ensure Safety Measures

Now that you have reassembled and adjusted your electric bike, it’s time to focus on ensuring safety measures.

Safety precautions are of utmost importance when it comes to riding an electric bike. Before you hit the road, make sure to have the right protective gear. A helmet is essential to protect your head from potential injuries. Elbow and knee pads can protect your joints in case of a fall. Don’t forget to wear gloves to enhance your grip and protect your hands.

Additionally, reflective clothing or accessories can increase your visibility, especially when riding at night. Following these safety measures will greatly reduce the risk of accidents and injuries.

Advertisement

With your safety gear in place, you are ready to learn to ride electric and experience the thrill of your newly transformed bike.

Learn to Ride Electric

Once you feel comfortable with the safety gear, it’s time to start experiencing the thrill of riding an electric bike.

Riding an electric bike offers numerous benefits that make it a popular choice among cycling enthusiasts. First and foremost, electric bikes provide assistance in pedaling, allowing you to cover longer distances with less effort. They also offer various levels of assistance, so you can choose the level that suits your fitness level and desired intensity of workout.

However, it’s important to take certain safety precautions when riding an electric bike. Always wear a helmet and other protective gear, obey traffic laws, and be mindful of your surroundings. Additionally, make sure to familiarize yourself with the controls and features of your electric bike before taking it for a spin.

Now, let’s move on to the next section and learn how to maintain your electric bike properly.

Advertisement

Maintain Your Electric Bike

Make sure you regularly check and maintain the various components of your e-bike to ensure its optimal performance. Electric bike maintenance is crucial to keep your bike running smoothly and avoid any unexpected issues. Here are some key tasks you should perform:

  • Check the tire pressure regularly to ensure proper traction and efficiency.
  • Clean and lubricate the chain to prevent excessive wear and ensure smooth operation.
  • Inspect the brakes for any signs of wear or misalignment and adjust them if necessary.

Troubleshooting common issues is also an important part of maintaining your electric bike:

  • If your battery doesn’t hold a charge, try resetting it or consider replacing it.
  • If your motor is not functioning properly, check the connections and consult the user manual for troubleshooting steps.

By following these maintenance tips and promptly addressing any issues, you can enjoy your electric bike to the fullest without any interruptions.

Enjoy Your Electric Bike

Get ready to have a blast riding your e-bike and experience the thrill of effortless speed and freedom.

Electric bikes offer a range of benefits that enhance your riding experience. Firstly, they provide assistance with pedaling, making it easier to tackle hills and long distances. This means you can ride for longer periods without getting tired.

Additionally, electric bikes allow you to travel at higher speeds, reaching up to 20 mph, while still maintaining control and safety.

To make the most out of your electric bike, consider investing in some accessories. A helmet is essential for safety, while a bike lock ensures your e-bike stays secure. Other popular accessories include lights for visibility, fenders to protect against splashes, and a pannier or basket for carrying your belongings.

Advertisement

With these accessories, you can fully enjoy the convenience and pleasure of riding your electric bike.

Frequently Asked Questions

Can any type of bike be converted into an electric bike?

Yes, any type of bike can be converted into an electric bike. Converting a mountain bike has pros such as enhanced performance, but cons like increased weight. To choose the right battery, consider factors like capacity, voltage, and compatibility with your bike’s motor.

What factors should be considered when choosing a conversion kit?

Consider the electric bike conversion cost and opt for the best electric bike conversion kits. Keep in mind factors like motor power, battery capacity, ease of installation, and compatibility with your bike model. Remember, "You get what you pay for."

Are there any specific tools required for the conversion process?

To convert your bike into an electric one, you will need specific tools such as wrenches, pliers, wire cutters, and a soldering iron. The step-by-step conversion process involves removing the bike’s pedals, attaching the motor, and connecting the battery and controller.

Can the non-essential components be reinstalled after converting the bike?

Sure, you can reinstall non-essential components after converting your bike, but be cautious of compatibility issues. Ensure the components are compatible with the electric conversion and won’t interfere with the new system’s performance.

Advertisement

How long does it typically take to complete the conversion process?

The time it takes to complete the conversion process depends on various factors, such as your familiarity with bike mechanics, availability of tools, and the complexity of the conversion kit. Common challenges include wiring issues and compatibility problems with existing bike components.

Conclusion

In conclusion, by following these steps, you can successfully turn your bike into an electric one.

While some may argue that the process is complicated and time-consuming, it is worth the effort for the benefits it brings.

Not only will you be able to enjoy a faster and smoother ride, but you will also contribute to a greener environment.

Don’t let the initial challenges discourage you; with the right tools and instructions, you can easily transform your regular bike into an electric one and experience the joy of riding in a whole new way.

Advertisement

Continue Reading

Electric Bike

How To Turn On Nakto Electric Bike

Published

on

By

An image showcasing a close-up of a hand firmly gripping the Nakto Electric Bike's handlebar, while the other hand reaches down to press the power button located on the battery pack

So you just got your hands on a new Nakto electric bike, and you’re ready to start riding.

But wait! Before you can embark on your thrilling adventure, you need to know how to turn on this sleek and powerful machine.

In this article, I will guide you through the step-by-step process of familiarizing yourself with the controls, checking the battery level, and activating the power button.

Get ready to unleash the full potential of your Nakto electric bike and experience the exhilaration of effortless riding.

Key Takeaways

  • Locate the power button on the display panel
  • Ensure the battery is fully charged before turning on the bike
  • Familiarize yourself with icons and symbols on the display panel
  • Press the power button to turn on the bike

Familiarizing Yourself with the Controls

Advertisement

To turn on the Nakto electric bike, familiarize yourself with the controls. Understanding the gear system is crucial for a smooth and efficient ride. The Nakto electric bike typically comes with a gear selector located on the handlebars.

By shifting gears, you can adjust the bike’s resistance and speed. Lower gears are ideal for climbing uphill or starting from a stop, while higher gears are suitable for cruising at faster speeds. Take some time to practice shifting gears before hitting the road to ensure a comfortable ride.

Additionally, it is essential to know how to use the brakes effectively. The Nakto electric bike usually has both front and rear brakes that can be engaged by squeezing the brake levers. Practice applying the brakes gradually and evenly to ensure a safe and controlled stop.

Familiarizing yourself with the gear system and mastering the art of using the brakes effectively will enhance your overall riding experience on the Nakto electric bike.

Checking the Battery Level

First, you’ll want to check the level of your battery. This is an important step in battery maintenance to ensure that you have enough power for your ride.

Advertisement

Here are some charging tips to help you keep your Nakto electric bike battery in good condition:

  1. Locate the battery indicator on your bike’s control panel. It is usually a series of bars or a digital display.

  2. Turn on the bike by pressing the power button.

  3. Look at the battery indicator to see the current level. If it is low, you’ll need to charge the battery before riding.

  4. To charge the battery, plug the charger into a power outlet and connect it to the battery port on your bike. Make sure the charger is securely plugged in.

Remember to follow the manufacturer’s instructions for charging and maintaining your battery. Regularly checking the battery level will help ensure a smooth and enjoyable ride.

Adjusting the Seat and Handlebars

Adjusting the seat and handlebars is an essential step in customizing your riding experience. It ensures that you are comfortable and in control while riding your Nakto electric bike. When adjusting the seat, make sure it is set at a height that allows your feet to touch the ground when seated and provides a slight bend in your knee when pedaling. The handlebars should be adjusted to a position that allows you to maintain a relaxed and upright posture.

Advertisement

In order to adjust the brakes, locate the brake levers on the handlebars. Squeeze the levers to test the brakes and make sure they engage properly. If they feel too loose or too tight, adjust the tension using the barrel adjuster located near the brake levers.

Finding the right gear is crucial for a smooth and efficient ride. Use the gears to match your pedaling speed with the terrain you are riding on. Shift to a lower gear when climbing hills or starting from a stop, and shift to a higher gear when riding on flat or downhill surfaces. Experiment with different gears to find the one that feels most comfortable and efficient for you.

Adjusting the seat, handlebars, brakes, and finding the right gear will greatly enhance your riding experience on your Nakto electric bike. Take the time to make these adjustments and enjoy a comfortable and safe ride.

Seat Adjustment Handlebar Adjustment Brake Adjustment Gear Selection
Adjust height for feet to touch ground Adjust for relaxed and upright posture Test and adjust tension Match pedaling speed to terrain
Slight bend in knee when pedaling Comfortable grip and reach Proper engagement Lower gear for climbing, higher gear for flat or downhill surfaces
Personalize for optimal comfort Enhance control and maneuverability Ensure responsiveness Experiment for best performance

Turning on the Display Panel

Make sure you know how to power on the display panel. It is an essential step in getting your Nakto electric bike up and running.

Once you have adjusted the seat and handlebars to your liking, it’s time to dive into the display panel. This is where you can adjust the gears and understand the display settings.

Advertisement

Here are a couple of tips to help you navigate the display panel like a pro:

  • Adjusting the gears:

  • Use the up and down arrows to shift between gears.

  • Experiment with different gear settings to find the one that suits your riding style and terrain.

  • Understanding the display settings:

  • Familiarize yourself with the different icons and symbols on the display panel.

  • Pay attention to important information like battery level, speed, and distance traveled.

By mastering these aspects of the display panel, you will have complete control over your Nakto electric bike.

Activating the Power Button

To activate the power button, simply press the button located on the display panel. This button is usually marked with a power symbol or labeled ‘on/off.’

Advertisement

If you are experiencing any power issues with your Nakto electric bike, troubleshooting the power system can help identify and resolve the problem. Start by checking the battery level and ensuring it is fully charged. If the battery is low, connect the charger and wait for it to reach a sufficient charge before attempting to turn on the bike.

Additionally, familiarize yourself with the different power modes available on your electric bike. Understanding these modes can help you optimize the bike’s performance and battery life. It’s important to note that different Nakto models may have varying power modes and features, so refer to the user manual for specific instructions.

Engaging the Pedal Assist Mode

Engaging the pedal assist mode is a simple way to enhance your riding experience. It allows you to effortlessly glide through various terrains while enjoying the benefits of electric assistance.

To activate the pedal assist mode on your Nakto electric bike, follow these steps:

  • Press the power button to turn on the bike.
  • Once the bike is powered on, locate the pedal assist button on the handlebar.
  • Press the pedal assist button to cycle through the different pedal assist settings.

The pedal assist mode offers several benefits. It provides an extra boost of power when you pedal, making uphill climbs and long rides more manageable. The different pedal assist settings allow you to customize the level of assistance according to your preference and riding conditions.

Whether you want a gentle assist or a more powerful boost, the pedal assist mode on your Nakto electric bike can be adjusted to suit your needs.

Advertisement

Testing the Throttle

Once you’ve activated the pedal assist mode, you can test the throttle by gently twisting it to experience the instant acceleration and control it provides.

The throttle on the Nakto electric bike is designed to give you a seamless riding experience. When you twist the throttle, the bike responds immediately, providing you with a burst of power that propels you forward.

It’s important to test the throttle in a safe and controlled environment, ensuring that you have enough space to maneuver and adjust to the acceleration.

Additionally, while testing the throttle, it’s a good idea to also test the brakes to ensure they are responsive and functioning properly. This will give you confidence in your ability to control the bike’s speed and come to a stop when necessary.

Lastly, don’t forget to adjust the gear shift to find the most comfortable and efficient setting for your riding style.

Advertisement

Ensuring Proper Safety Measures

Make sure you follow all safety precautions to ensure a safe riding experience. One of the most important safety measures to take when riding a Nakto electric bike is wearing a helmet. Wearing a helmet can significantly reduce the risk of head injuries in case of an accident. It is important to choose a helmet that fits properly and meets safety standards. Additionally, it is recommended to wear other protective gear such as knee and elbow pads, especially for beginners or when riding on uneven terrains.

To emphasize the importance of safety, here is a table highlighting some key safety precautions to follow when riding a Nakto electric bike:

Safety Precautions
Wear a helmet
Use proper hand signals
Follow traffic rules
Check brakes and tires regularly
Be aware of surroundings

Remember, taking these safety precautions can greatly reduce the risk of accidents and injuries while enjoying your Nakto electric bike. Stay safe and happy riding!

Troubleshooting Common Issues

Troubleshooting common issues with your Nakto e-bike can help resolve any problems you may encounter while riding. Here are four common problems and their solutions:

  1. Troubleshooting motor issues: If your Nakto electric bike’s motor is not working, first check the battery to ensure it is properly charged. Then, inspect the motor connections to make sure they are secure. If these steps don’t solve the issue, it might be a faulty motor that needs professional repair or replacement.

  2. Troubleshooting display panel errors: If you encounter errors on the display panel, start by checking the connections between the display and the controller. Ensure they are tightly connected. If the problem persists, try resetting the display panel by turning off the e-bike and turning it back on. If none of these steps work, contact Nakto customer support for further assistance.

Remember, troubleshooting is an essential skill to maintain your Nakto e-bike’s performance and ensure a smooth riding experience.

Advertisement

Enjoying Your Nakto Electric Bike Ride

Having fun on your Nakto e-bike ride is all about embracing the exhilarating experience of electric biking. To fully enjoy your ride, it is important to choose the right riding gear and maintain your electric bike properly. The right riding gear will ensure your safety and comfort throughout your journey. It is recommended to wear a helmet, gloves, and appropriate clothing that allows freedom of movement. Additionally, maintaining your Nakto electric bike is crucial for a smooth and enjoyable ride. Regularly check the tire pressure, brakes, and battery level before each ride. Clean the bike regularly and lubricate the chain to prevent rust and ensure smooth pedaling. By following these tips, you can maximize your enjoyment and make every Nakto e-bike ride a memorable experience.

Riding Gear Maintenance
Helmet Check tire pressure
Gloves Inspect brakes
Appropriate clothing Battery level
Clean and lubricate bike

Frequently Asked Questions

How do I charge the battery of my Nakto electric bike?

To charge the battery of my Nakto electric bike, I simply connect the charger to the bike’s charging port. I ensure the charger is properly plugged in and wait for the battery to fully charge. If I encounter any issues, I troubleshoot common battery problems.

Can I adjust the speed settings on my Nakto electric bike?

Yes, you can adjust the speed settings on your Nakto electric bike. To do this, you will need to navigate the troubleshooting display panel and make the necessary adjustments according to the bike’s user manual.

What do I do if the display panel on my Nakto electric bike is not turning on?

If the display panel on your Nakto electric bike is not turning on, there may be some common display panel issues. Troubleshooting the display panel involves checking the battery connection, ensuring the display is properly installed, and contacting customer support if needed.

How long does it take for the battery of my Nakto electric bike to fully charge?

The battery of my Nakto electric bike takes approximately 4-6 hours to fully charge, depending on the model. This ensures a longer battery life and allows me to enjoy extended rides without worrying about running out of power.

Advertisement

Is there a specific maintenance routine I need to follow for my Nakto electric bike?

To properly maintain my Nakto electric bike, I should follow a specific maintenance routine. This includes regular cleaning, checking tire pressure, lubricating the chain, and inspecting the brakes. Additionally, troubleshooting the display panel is important for identifying any potential issues.

Conclusion

After following these steps, you’re now ready to enjoy your ride on the Nakto electric bike.

First, familiarize yourself with the controls. Make sure you know how to operate the throttle, brakes, and any other features specific to your model.

Next, check the battery level. It’s important to know how much charge you have left before setting off on your ride. This will help you plan your route accordingly.

Then, adjust the seat and handlebars to ensure a comfortable riding position. This will help prevent any discomfort or strain during your ride.

Advertisement

Now, you’ve ensured a comfortable and safe ride. Some may argue that electric bikes are not as powerful as traditional bikes, but imagine the thrill of effortlessly gliding down the road. Feel the wind in your hair and the freedom of the open road.

So, hop on your Nakto electric bike and experience the joy of an eco-friendly and convenient mode of transportation.

Continue Reading

Electric Bike

How To Turn The Light On My Electric Bike

Published

on

By

An image capturing a close-up of a hand firmly grasping the bike's handlebar, fingers positioned on the power button, with the other hand reaching towards the front light switch, ready to toggle it on, showcasing the step-by-step process of turning on the electric bike's light

Are you tired of riding in the dark on your electric bike? Are you wondering how to light up your path and stay safe? Look no further!

In this comprehensive guide, we’ll walk you through the step-by-step process of turning on the light on your electric bike. From familiarizing yourself with the bike’s controls to troubleshooting common light issues, we’ve got you covered.

So, grab your bike and let’s shed some light on the road ahead!

Key Takeaways

  • Locate the light switch on the handlebar or control panel
  • Check the battery level regularly and keep it between 20% and 80%
  • Press the power button to turn on the bike’s power
  • Activate the display panel to adjust light settings and personalize preferences

Familiarizing Yourself with the Bike’s Controls

You’ll need to familiarize yourself with the bike’s controls before you can turn the light on. Understanding the bike controls is crucial for a seamless riding experience.

Advertisement

Start by locating the handlebar, where you’ll find various features and buttons. Look for the control panel, which is usually positioned near the center of the handlebar. This panel allows you to access different functions, including the light switch.

Take a moment to study the layout and labels on the control panel. Each bike may have different symbols or icons, so it’s essential to understand what each one represents.

Once you’ve grasped the basic functions, locate the light switch. It is commonly marked with a light bulb symbol. By pressing or flipping this switch, you can easily turn the light on and illuminate your path.

Locating the Light Switch

To find the switch, look for a small button or lever near the handlebars. The light switch location on electric bikes can vary depending on the model, but it is typically located within easy reach of the rider’s thumb or fingers. Some bikes have a dedicated switch for the lights, while others may have a multifunctional button that controls various features, including the lights. Make sure to familiarize yourself with your specific bike’s controls to locate the light switch easily.

Using bike lights at night is crucial for your safety and visibility. It not only helps you see the road ahead but also makes you more visible to other road users. Once you have found the light switch, you can turn on the lights and ride confidently in low-light conditions.

Advertisement

Now, let’s move on to checking the battery level.

Checking the Battery Level

When checking the battery level, it’s important to know how much power is left in order to plan your ride accordingly. To check the battery level on your electric bike, locate the battery indicator on the display panel. This indicator will show you the current charge level of your battery.

It’s recommended to regularly check the battery level to ensure you have enough power for your desired distance. Proper battery maintenance is crucial for prolonging battery life. To maximize the lifespan of your battery, avoid completely draining it and try to keep it between 20% and 80% charged. This will help prevent excessive wear and tear on the battery cells.

Advertisement

Now that you know how to check the battery level, let’s move on to turning on the bike’s power and getting ready for your ride.

Turning on the Bike’s Power

To start your ride, simply press the power button on the control panel. This button is usually located near the handlebars, within easy reach. Once you press the power button, the bike’s power system will activate, and you’ll be ready to go.

Here are four key things to keep in mind when turning on your electric bike:

  1. Check the battery level: Before starting your ride, it’s important to ensure that the battery has enough charge. You can do this by glancing at the battery indicator on the control panel.

  2. Safety precautions: Always make sure that you are in a safe and stable position before turning on the bike’s power. This will help you maintain balance and prevent any accidents.

  3. Listen for the startup sound: When you press the power button, listen for a startup sound or a beep. This indicates that the bike’s power system has successfully turned on.

  4. Confirm the bike’s readiness: Take a quick look at the control panel to ensure that all the necessary indicators, such as speed, assist level, and battery level, are active and functioning properly.

Once you have turned on the bike’s power, you can proceed to activate the display panel, which will provide you with additional information about your ride.

Activating the Display Panel

Advertisement

To activate the display panel, simply press the corresponding button on the control panel.

The display panel is an essential part of your electric bike as it provides important information about your ride and allows you to access various settings.

Once activated, you will be able to see your speed, battery level, and distance traveled.

Additionally, the display panel also allows you to activate the headlight on your electric bike. This is crucial for ensuring visibility and safety, especially when riding in low light conditions or at night.

Advertisement

To activate the headlight, navigate to the display panel settings and select the option to turn on the headlight. By doing so, you can have a clear view of the road ahead.

Next, we will delve into accessing the settings menu, where you can personalize your bike’s features and preferences.

Accessing the Settings Menu

Accessing the settings menu allows you to customize the features and preferences of your bike.

To access the settings menu, locate the display panel on your electric bike. This panel is usually located on the handlebars or near the center of the bike. Once you have located the display panel, press the power button to turn it on.

Use the buttons on the display panel to navigate through the menu options until you find the settings menu.

Advertisement

Once you have accessed the settings menu, look for the option to customize light settings. This option will allow you to adjust the brightness, mode, and other settings related to the lights on your electric bike.

By customizing the light settings, you can ensure optimal visibility and safety while riding.

To navigate to the lights option, simply scroll through the settings menu until you find the appropriate category.

Navigating to the Lights Option

Once you have located the display panel, simply scroll through the settings menu until you find the category for adjusting the lights on your e-bike.

To navigate to the lights option, follow these steps:

Advertisement
  1. Press the power button on the display panel to turn on the e-bike.
  2. Use the arrow buttons to scroll through the menu options until you see the settings icon.
  3. Press the settings icon to enter the settings menu.
  4. Within the settings menu, continue scrolling until you find the lights option.

Once you have successfully navigated to the lights option, you can proceed to adjust the light settings according to your preference.

This will allow you to select the light mode that best suits your needs.

Selecting the Light Mode

When you have reached the lights option, you can easily choose the light mode that suits your preferences. Ensure proper light alignment by adjusting the light intensity using the controls provided. Here is a table to help you understand the different light modes available:

Light Mode Description
Low Provides a dim light for conserving battery
Medium Offers a moderate amount of brightness for regular use
High Gives a bright light for enhanced visibility

By selecting the appropriate light mode, you can ensure that you have the desired level of brightness while riding your electric bike. Once you have adjusted the light intensity, you can proceed to the next step of adjusting the brightness level.

Adjusting the Brightness Level

To adjust the brightness level, simply use the provided controls to increase or decrease the intensity of the light. On most electric bikes, you can find these controls near the handlebars or on the display panel. By adjusting the brightness level, you can customize the lighting to suit your preference and riding conditions.

If you’re riding in a well-lit area, you may want to lower the brightness level to conserve battery power. On the other hand, if you’re riding in low light conditions or at night, increasing the brightness level will enhance visibility and safety.

Advertisement

Additionally, some electric bikes allow you to adjust the angle of the light, allowing you to direct the beam where you need it most.

Once you have adjusted the brightness level and angle, you can move on to choosing between steady or flashing light modes, which we will cover next.

Choosing Between Steady or Flashing Light

Now that you have adjusted the brightness level of your electric bike’s light, it’s time to choose between a steady light or a blinking light.

The steady light emits a continuous beam of light, providing a consistent source of illumination. This is particularly helpful when riding in low-light conditions or on dark roads, as it allows other road users to easily see you. The steady light also helps improve visibility and reduces the risk of accidents.

On the other hand, the blinking light flashes intermittently, which can attract attention and make you more noticeable to others on the road. However, it may not provide as much visibility as the steady light.

Advertisement

Now that you understand the benefits of using a steady light, let’s move on to testing the functionality of the light.

Testing the Light Functionality

Before proceeding, it’s important to ensure that the light on your electric bike is functioning properly. To test the light functionality, follow these steps:

  1. Turn on the bike’s power and locate the light switch or button.
  2. Press or toggle the switch to activate the light.
  3. Check if the light turns on and stays steady or flashes, depending on your preference.
  4. If the light doesn’t turn on, check the battery connection and make sure it’s securely attached.
  5. Ensure that the light bulb is not burnt out by visually inspecting it or replacing it with a new one.
  6. If the light still doesn’t work, consider upgrading your bike’s lighting system to a more reliable and brighter option.

Troubleshooting common light issues will be discussed in the next section, where we will address potential problems and provide solutions.

Troubleshooting Common Light Issues

If your bike’s light is not functioning properly, troubleshooting common light issues can help you identify and solve the problem. Here are some steps to troubleshoot the connections and replace light bulbs:

  • First, check the connections between the light and the battery or power source. Ensure that all the cables are securely connected and free from any damage or corrosion.

  • If the connections are fine, then the issue might be with the light bulb itself. To replace the light bulb, refer to the manufacturer’s instructions or user manual. Usually, you would need to remove the casing or cover of the light and carefully unscrew the old bulb. Replace it with a new bulb of the same type and wattage.

  • After replacing the light bulb, test the functionality by turning on the light. If it still doesn’t work, consider seeking professional help or contacting the manufacturer for further assistance.

To ensure the longevity and proper functioning of the light, it is crucial to maintain and clean it regularly.

Maintaining and Cleaning the Light

To keep your bike light in optimal condition, make sure to regularly clean and maintain it. Cleaning techniques for your electric bike light will depend on the specific model, but most can be wiped clean with a soft cloth and mild soap and water. Avoid using harsh chemicals or abrasive materials that could damage the light. Additionally, check the light for any loose or damaged parts and tighten or replace them as needed. It’s important to keep the light free from dirt, dust, and moisture to ensure it functions properly. Regularly inspect the wiring and connections to make sure they are secure and undamaged. By following these maintenance tips, you can ensure your bike light stays in top shape for years to come. Now, let’s move on to using additional light accessories to enhance your biking experience.

Advertisement

Using Additional Light Accessories

Using extra light accessories can enhance your biking experience by increasing visibility and safety. When it comes to bike light installation, choosing the right light accessories is crucial. Here are three essential accessories to consider:

  1. Headlights: Invest in a powerful headlight that emits a bright beam to illuminate the path ahead. Look for headlights with multiple brightness settings and a long battery life.

  2. Taillights: A taillight is essential for visibility from behind. Opt for a taillight with a flashing mode to grab the attention of drivers and ensure they can see you, especially in low-light conditions.

  3. Reflective gear: In addition to lights, wearing reflective gear such as vests, arm bands, and ankle straps can greatly increase your visibility. These accessories reflect light from car headlights, making you more noticeable on the road.

By incorporating these additional light accessories into your biking routine, you can stay safe and visible on the road, ensuring a worry-free ride.

Staying Safe and Visible on the Road

Make sure you wear bright and reflective clothing to stay safe and visible on the road.

Nighttime visibility is crucial when riding your electric bike, as it can be difficult for drivers to see you in the dark. Reflective clothing helps to increase your visibility by reflecting light from car headlights, making you more noticeable.

It is important to choose clothing that has reflective strips or patches on the front, back, and sides. This will ensure that you are visible from all angles. Additionally, consider wearing a reflective vest or jacket for added visibility.

Advertisement

Remember, the more visible you are, the safer you will be on the road. So, make it a priority to wear bright and reflective clothing every time you ride your electric bike at night.

Frequently Asked Questions

How do I change the light bulb on my electric bike?

To change the light bulb on your electric bike, start by locating the light assembly. Depending on the model, you may need to remove a cover or unscrew the assembly.

Once exposed, carefully remove the old bulb and replace it with a new one of the same type and wattage.

If you’re still experiencing light issues after changing the bulb, consider troubleshooting the wiring connections or checking the battery power.

Can I use a different type of light on my electric bike?

Switching up the light on your electric bike? No worries, there are a plethora of alternative light options available in the market.

Advertisement

To make the best choice, consider reputable brands known for their stellar performance, like [insert best light brands here]. These brands offer a range of lights designed specifically for electric bikes, ensuring optimal brightness, energy efficiency, and durability.

So go ahead, illuminate your ride with a new light that suits your style and needs!

How often should I clean and maintain the light on my electric bike?

To clean and maintain the light on your electric bike, start by disconnecting the light from the power source.

Use a soft cloth or sponge to gently wipe away any dirt or debris on the surface of the light.

For stubborn stains, you can use a mild soap and water solution.

Advertisement

After cleaning, make sure the light is completely dry before reconnecting it to the power source.

Regularly check for any loose connections or damage to ensure proper functioning.

Are there any regulations or laws regarding the use of lights on electric bikes?

To ensure your safety and comply with regulations, it’s crucial to understand the rules regarding lights on electric bikes.

The brightness of the light must meet specific regulations, typically ranging from 300 to 1000 lumens.

Additionally, the required light colors vary depending on your location. For example, in some areas, a white light is required at the front, and a red light at the rear.

Advertisement

Familiarize yourself with the regulations in your region to ensure your electric bike’s lights meet the necessary requirements.

Can I adjust the angle or direction of the light on my electric bike?

To adjust the angle or direction of the light on your electric bike, look for a small screw or lever near the light housing. Loosen the screw or move the lever to change the position of the light.

Adjusting the light angle has several benefits, including increased visibility and improved safety during nighttime rides. A brighter light can help you see the road ahead more clearly, making your rides safer and more enjoyable.

Conclusion

As you embark on your electric bike journey, remember that the light represents more than just illumination. It symbolizes safety, visibility, and a connection to the world around you.

By understanding the bike’s controls, locating the light switch, and ensuring the battery is charged, you can activate this powerful symbol.

Advertisement

Maintain and clean the light, and consider using additional accessories to enhance your visibility.

As you ride, let the light guide you, and may it serve as a beacon of safety on your path.

Continue Reading
Advertisement

Affiliate disclaimer

As an affiliate, we may earn a commission from qualifying purchases. We get commissions for purchases made through links on this website from Amazon and other third parties.

About us

We are a passionate team driven by the belief that cycling is a fantastic and accessible way to stay active while enjoying the beauty of the outdoors. Our mission is to share our love for cycling with as many people as possible. We provide a welcoming environment for individuals of all ages, abilities, and backgrounds to come together and ride bikes. With Ralf’s visionary leadership, Zane’s expertise in cycling adventures, and Olivia’s dedication to community building, we strive to create a vibrant space where everyone can experience the joy of cycling. Through group rides, workshops, and inclusive events, we inspire and empower individuals to embrace an active lifestyle. Join us in our quest to pedal together, embrace the joy of cycling, and foster connections that last a lifetime.

Advertisement

Trending