Picture the excitement of riding your bike on a beautiful sunny day, only to be disappointed by the sight of rust. Just like a stubborn foe, rust can damage the appearance and performance of your beloved bike.
But fear not, for I am here to guide you through the process of banishing rust from your bicycle. With a few simple steps and the right tools, you can restore your bike to its former glory and ensure many more rust-free rides in the future.
Key Takeaways
- Regularly lubricate the chain, derailleurs, brake and shift cables, and pedals to prevent rust formation.
- Apply rust inhibitor or protective coatings on vulnerable areas of the bicycle.
- Store the bicycle in a dry and protected environment with the use of protective covers.
- Seek professional help for extensive rust damage or restoration needs to ensure the bike is returned to its former condition.
Assess the extent of the rust damage
You should start by assessing how much damage the rust has caused to your bicycle. This step is crucial because it helps determine the severity of the rust and the appropriate course of action.
Begin by inspecting the affected areas, such as the frame, handlebars, or chain. Look for signs of corrosion, such as reddish-brown flakes or pitting. Assess the extent of the damage by checking if the rust has penetrated the metal or if it’s merely surface-level. Additionally, consider any underlying causes of rust, such as exposure to moisture or improper storage.
Understanding the severity of the rust will guide your decision-making process when it comes to choosing the right rust prevention techniques and products.
Once you have assessed the damage, you can move on to gathering the necessary tools and materials for the rust removal process.
Gather the necessary tools and materials
First, gather all the tools and materials you’ll need for removing rust from your bike. Here’s a handy table to help you get organized:
| Tools | Materials |
|---|---|
| Wire brush | Rust remover |
| Sandpaper | Lubricating oil |
| Soft cloth | Protective gloves |
To effectively remove rust and prevent it from returning, having the right tools and materials is crucial. A wire brush will help you scrape away any loose rust particles, while sandpaper can be used for more stubborn areas. Rust remover will chemically dissolve the rust, leaving your bike clean and ready for further steps. Don’t forget to wear protective gloves to keep your hands safe. Additionally, using lubricating oil after removing rust will help prevent future oxidation. Proper bike storage is also important in rust prevention. By keeping your bike in a dry and well-ventilated area, you can minimize exposure to moisture and reduce the chances of rust formation. Now that we have all our tools ready, let’s move on to the next step of removing any loose rust with a wire brush or sandpaper.
Remove any loose rust with a wire brush or sandpaper
Next, take the wire brush or sandpaper and gently scrub away any loose rust particles from your bike. This step is crucial in preparing the surface for further treatment.
Use the wire brush to target hard-to-reach areas, such as the crevices between gears or under the seat. For larger areas, sandpaper can be more effective in removing rust. Start with a coarse grit sandpaper and gradually switch to a finer grit for a smoother finish.
Remember to work in a well-ventilated area and wear protective gloves to prevent any injuries. Once you have successfully removed the loose rust, you can proceed to the next step of applying a rust remover or vinegar solution to the affected areas, which will be discussed in the following section.
Apply a rust remover or vinegar solution to the affected areas
After removing any loose rust with a wire brush or sandpaper, it’s time to apply a rust remover or vinegar solution to the affected areas. Rust removal techniques are essential to restore the bike’s appearance and prevent further damage. There are several natural rust removers that can effectively get rid of rust. One option is to use a rust remover that can be found at your local hardware store. Another option is to create a vinegar solution by mixing equal parts vinegar and water. The acidity of vinegar helps break down the rust. To make the rust removal process more engaging, here is a table showcasing three popular natural rust removers:
| Rust Remover | Ingredients | Effectiveness |
|---|---|---|
| Rust Remover A | Lemon juice, salt | High |
| Rust Remover B | Baking soda, water | Medium |
| Rust Remover C | Coca-Cola | Low |
Let the solution sit for a few minutes and then scrub the rust away using a brush or sponge. Transitioning into the subsequent section, this step will ensure that the rust is completely eradicated from your bicycle.
Let the solution sit for a few minutes and then scrub the rust away
Once the solution has been applied, simply let it sit for a few minutes before scrubbing away the rust.
When it comes to scrubbing techniques, it’s important to use a gentle yet firm hand. I recommend using a soft-bristled brush or a sponge to gently scrub the affected areas. Avoid using abrasive materials that could further damage the bike’s surface.
As you scrub, you’ll notice the rust starting to loosen and come off. Be patient and thorough, paying attention to every nook and cranny.
Once the rust is removed, it’s crucial to take rust prevention methods seriously. Apply a protective coating or wax to the bike’s frame to create a barrier against future rust formation. This will help prolong the life of your bicycle.
Moving on to the next step, rinse the area with water and dry it thoroughly to ensure all remnants of the rust remover or vinegar solution have been removed.
Rinse the area with water and dry it thoroughly
To complete the rust removal process, make sure to thoroughly rinse the area with water and ensure it is completely dry afterward. This step is crucial in preventing further rusting and maintaining the longevity of your bicycle. Rust prevention techniques are essential to keep your bike in top shape. One effective way to prevent rust is by storing your bicycle in a dry and well-ventilated area. Moisture is a major catalyst for rust, so it’s important to keep your bike away from damp environments. Additionally, using a bike cover or storing your bike indoors can provide extra protection. Proper storage for bicycles goes a long way in preventing rust and extending the life of your bike. By following these rust prevention techniques, you can ensure that your bicycle stays rust-free and ready for your next adventure. Now, let’s move on to applying a rust converter or primer to prevent future rusting.
Apply a rust converter or primer to prevent future rusting
Applying a rust converter or primer can help prevent future rusting and maintain the longevity of your bike.
When it comes to rust converters, it is important to choose one specifically designed for bicycles. Look for a converter that is easy to apply and provides long-lasting protection. A good rust converter should also have anti-corrosive properties and be compatible with different types of bike frames.
As for primers, opt for a high-quality primer that is suitable for the material of your bike frame. Consider factors such as the primer’s adhesion, durability, and resistance to moisture.
By applying a rust converter and a suitable primer, you create a protective barrier that helps to ward off rust and keep your bike looking its best.
Now, let’s move on to how you can touch up any paint or coating on the bicycle frame.
Touch up any paint or coating on the bicycle frame
To touch up any paint or coating on your bike frame, you can use a small brush or sponge to apply a matching touch-up paint or clear coat. Make sure the area is clean and dry before starting the touch-up process.
Gently sand the rusted or chipped area to remove any loose particles and create a smooth surface. Then, using the brush or sponge, carefully apply the touch-up paint or clear coat in thin layers, allowing each layer to dry completely before applying the next.
Repeat this process until the color or coating matches the rest of the frame. Once the touch-up is complete, you can proceed to clean and lubricate the bicycle’s components by following the next section’s instructions about proper maintenance.
Clean and lubricate the bicycle’s components
After touching up any paint or coating on the bicycle frame, it’s important to clean and lubricate the components regularly for proper maintenance. Keeping your bike’s parts clean and well-lubricated not only ensures smooth operation but also helps prevent rust from forming. To maintain optimal performance, here are some key lubrication techniques:
| Component | Lubricant | Frequency |
|---|---|---|
| Chain | Bicycle-specific chain lubricant | Every 100 miles or after wet rides |
| Derailleurs | Light oil or spray lubricant | Every few weeks |
| Brake and shift cables | Cable lube or light oil | Every few months |
| Pedals | Grease or light oil | Every few months |
| Bearings (hubs, bottom bracket, headset) | Grease | Annually |
Regular maintenance is crucial to extend the lifespan of your bicycle. By incorporating these lubrication techniques, you can prevent rust and ensure your bike performs at its best. Next, we’ll explore how to inspect and replace any rusted or damaged parts.
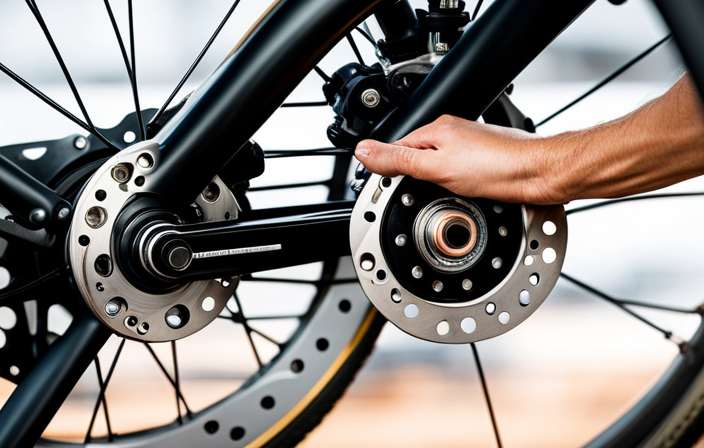
Inspect and replace any rusted or damaged parts
After thoroughly cleaning and lubricating the bicycle’s components, it is important to inspect and replace any rusted or damaged parts. This step is crucial in maintaining the overall functionality and longevity of the bicycle.
As an experienced cyclist, I have learned the importance of regularly inspecting my bike for any signs of rust or damage. Here are some key areas to focus on during the inspection:
- Frame: Check for any rust spots or weak points that could compromise the structural integrity of the bike.
- Handlebars and stem: Look for any signs of rust or corrosion that could affect steering and control.
- Brakes: Ensure that the brake pads, cables, and levers are not rusted or worn down.
- Chain and drivetrain: Inspect for rusted links or worn-out gears that could hinder smooth shifting and pedaling.
- Wheels and tires: Check for any rust or damage on the rims and spokes, as well as any punctures or worn tread on the tires.
By inspecting and replacing any rusted or damaged parts, you can ensure that your bicycle is in optimal condition for your next ride.
Moving forward, let’s explore how to use a rust inhibitor or protective coating on vulnerable areas.
Use a rust inhibitor or protective coating on vulnerable areas
To prevent rust on vulnerable areas of your bike, consider using a rust inhibitor or protective coating. Rust can easily form on exposed metal surfaces, especially in areas where moisture and salt are present. A rust inhibitor creates a barrier on the metal, preventing moisture and oxygen from reaching the surface and causing rust to form.
Protective coatings, such as paint or clear sealants, can also provide an extra layer of defense against corrosion. When applying a rust inhibitor or protective coating, make sure to thoroughly clean and dry the surface beforehand to ensure proper adhesion. Regularly inspect and touch up any areas where the coating may have worn off or been damaged.
By using these rust prevention techniques, you can extend the lifespan of your bicycle and keep it looking and performing its best.
Now, let’s move on to how to store the bicycle in a dry and protected environment.
Store the bicycle in a dry and protected environment
Make sure you store your bike in a dry and protected environment to prevent damage and maintain its condition. This is crucial in preventing rust from forming on your bicycle. One effective way to protect your bike is by using protective covers. These covers act as a barrier against moisture and dust, keeping your bike safe from rust-causing elements. Additionally, consider storing your bicycle in an area with humidity control. High humidity levels can accelerate the formation of rust on metal surfaces. By controlling the humidity, you can significantly reduce the risk of rust.
To further emphasize the importance of storing your bike properly, refer to the following table:
| Protect your bike with: | Benefits: |
|---|---|
| Protective covers | Shields against moisture and dust |
| Humidity control | Reduces the risk of rust formation |
By taking these precautions, you can ensure that your bike remains rust-free. Now, let’s move on to the next section on how to regularly clean and maintain the bicycle to prevent future rusting.
Regularly clean and maintain the bicycle to prevent future rusting
To prevent future rusting, you should regularly clean and maintain your bike. Keeping your bicycle clean is essential in preventing rust from forming. After each ride, make sure to wipe down your bike with a clean, dry cloth to remove any dirt or moisture that may have accumulated.
Pay extra attention to areas prone to rust, such as the chain, derailleur, and brake calipers. Use a brush or toothbrush to scrub away any stubborn dirt or grime.
Additionally, consider using rust-resistant materials or coatings for future bicycle purchases. These materials can provide an extra layer of protection against rust and extend the lifespan of your bike.
By taking these preventative measures, you can keep your bike in top condition and avoid the hassle of dealing with rust in the future.
Consider using rust-resistant materials or coatings for future bicycle purchases
Consider using rust-resistant materials or coatings when purchasing your next bike to extend its lifespan and prevent future rusting.
Investing in a bicycle made with rust-resistant materials, such as stainless steel or aluminum alloys, can significantly reduce the risk of rust formation. These materials are specifically designed to withstand exposure to moisture and other corrosive elements, ensuring your bike stays in top condition for longer.
Additionally, applying a rust-resistant coating, such as a powder coating or zinc plating, adds an extra layer of protection to vulnerable areas of the bike. This coating acts as a barrier, preventing moisture from reaching the underlying metal and causing rust.
By choosing rust-resistant materials and coatings, you can enjoy the benefits of a durable and long-lasting bicycle that is more resistant to rust. Transitioning into seeking professional help for extensive rust damage or restoration needs will ensure your bike remains in optimal condition for years to come.
Seek professional help for extensive rust damage or restoration needs
After considering the use of rust-resistant materials or coatings for future bicycle purchases, it’s important to acknowledge that sometimes the damage has already been done. If your bicycle has extensive rust damage or requires restoration, seeking professional help is often the best course of action.
While it may seem daunting, the benefits of professional assistance far outweigh the potential risks of attempting a DIY fix. Professionals have the expertise and specialized tools needed to assess the extent of the rust damage and determine the best course of action. Additionally, they can provide a thorough restoration, ensuring that your bicycle is returned to its former glory.
While the cost of professional help may vary depending on the extent of the damage, it is often a more cost-effective solution compared to replacing your entire bicycle.
Frequently Asked Questions
How long does the rust remover or vinegar solution need to sit on the affected areas?
The rust remover or vinegar solution should be left on the affected areas for at least 10 to 15 minutes. This allows the solution to penetrate and dissolve the rust effectively. The best method for removing rust from a bicycle chain is to soak it in a rust remover or vinegar solution for 30 minutes, followed by scrubbing with a brush.
What should I use to touch up the paint or coating on the bicycle frame?
When it comes to touch up paint or coating options for your bicycle frame, I recommend using a high-quality enamel paint. It provides excellent coverage and protection, ensuring your frame looks as good as new.
How often should I clean and maintain the bicycle to prevent future rusting?
To prevent future rusting, I clean and maintain my bicycle every couple of months. I use a mild detergent and water to clean the frame, making sure to dry it thoroughly. I also apply a protective coating to prevent rust.
What are some examples of rust-resistant materials or coatings for future bicycle purchases?
I have researched and found that stainless steel and aluminum are excellent examples of rust-resistant materials for bicycles. Additionally, using rust-resistant coatings provides added protection, preventing future rusting and extending the lifespan of the bike.
What kind of professional should I seek help from for extensive rust damage or restoration needs?
For extensive rust damage or restoration needs, it is best to consult a professional specializing in bicycle restoration or repair. They have the expertise and tools to assess the damage and utilize rust restoration techniques effectively.
Conclusion
After following these steps to get rid of rust on your bicycle, you’ll be amazed at the transformation.
The combination of a wire brush or sandpaper, rust remover or vinegar solution, and some elbow grease will have your bike looking like new again.
But the journey doesn’t end here. Remember to store your bicycle in a dry and protected environment, regularly clean and maintain it, and consider using rust-resistant materials or coatings in the future.
Don’t let rust take over your ride – take action now and enjoy a rust-free cycling experience.