
Mounting a bike might appear to be a straightforward activity, yet it demands accuracy and appropriate materials to guarantee the security of both your bicycle and your environment. As someone passionate about cycling, I recognize the significance of correctly storing and keeping my bike in good condition, and one of the optimal methods to achieve this is by hanging it.
In this article, I will walk you through the step-by-step process of hanging a bicycle, from gathering the necessary materials to maintenance and safety tips.
First and foremost, it is crucial to have the right tools and materials for the job. You will need a sturdy wall or ceiling hook, a drill, screws, and potentially anchors depending on the type of wall or ceiling you are working with.
Choosing the right location for your bike is also important, as you want to make sure it is easily accessible and won’t be in the way of any foot traffic or other objects.
With the right tools and location in mind, let’s get started on hanging your bike.
Key Takeaways
- Choose the right location and storage options based on weight and size of the bike.
- Use a sturdy hook and proper installation techniques to ensure a secure hold.
- Regularly inspect the hook and bike for wear or damage.
- Use a sturdy lock to prevent theft and regularly maintain the bike to avoid equipment failure.

monTEK Swivel Bike Wall Mount, Bike Hangers for Garage, Space-Saving Vertical Bike Rack, Sturdy Bike Storage Rack Holds Up to 66lbs, Easy to Install, 4 Pack
【Strong, Safe & Secure】 monTEK bike wall mount is made of heavy-duty solid steel are able to hang...
As an affiliate, we earn on qualifying purchases.
Gather Your Materials
You’ll want to grab all your gear before you get started, so you don’t have to stop and search halfway through – trust me, it’s a frustrating feeling. The most important tool you’ll need is the right hook. Choosing the right hook is crucial to ensure your bike is securely fastened to the wall. There are plenty of options available, but a J-hook or a ladder hook are popular choices.
Once you’ve chosen the right hook, you’ll need to measure the height at which you want to hang your bike. This will depend on the size of your bike, but a general rule of thumb is to hang it at a height where the seat meets the top tube. This will ensure that the bike is easy to hang and remove, and won’t be in your way when you’re walking around.
With the right hook and the correct height measurement, you’re ready to move onto finding the right location for your bike.

PRO BIKE TOOL Bike Wall Mount - Horizontal Indoor Bike Rack for 1 Bicycle - Bike Rack for Garage - Safe and Secure Bike Hook for Road, Mountain or Hybrid Bikes - Bike Hanger, Bicycle Storage
Durable and Reliable: Sturdy steel wall mount bike rack with scratch-proof coating; ratchet gear system ensures dependable bike...
As an affiliate, we earn on qualifying purchases.
Find the Right Location
When finding the right location to hang my bike, there are a few key points I always consider.
Firstly, I take into account the weight and size of my bike to ensure that the location I choose can support it.
Secondly, I look for a stud or solid wall to hang it on to guarantee it stays in place.
Lastly, I check for any obstructions that could cause damage to my bike or make it difficult to hang.
By following these guidelines, I can confidently hang my bike in a safe and secure location.
Consider the Weight and Size of Your Bike
Before hanging up your bike, it’s important to take into account how heavy and large it is to ensure the proper support. Consider bike weight when choosing your storage options. If you have a heavier bike, you’ll need a stronger hook and a more secure wall mount.
For instance, if you’re using a hook, make sure it’s rated for the weight of your bike and that it’s anchored to a stud or solid wall. Size is also an important factor to consider. If your bike is particularly large, you may need to purchase a specialized storage hook to ensure that it fits properly.
It’s important to make sure that your bike is not too close to the wall, as this can make it difficult to hang and could cause damage to your bike or your walls. With these factors in mind, you can choose the best storage option for your bike and ensure that it is hung safely and securely.
When considering the weight and size of your bike, it’s also important to look for a stud or solid wall to anchor your hook or mount to.
Look for a Stud or Solid Wall
Finding a secure stud or solid wall to anchor your bike storage hook or mount is crucial for avoiding accidents and damage to your walls, ensuring your peace of mind. When looking for a stud, use a stud finder to locate the wooden beams behind your drywall. Once you’ve found a stud, mark it with a pencil and use a drill to create a pilot hole. Then, screw in your bike hook or mount using a long screw that can penetrate the stud.
If you can’t find a stud in the desired location, alternative mounting options such as wall anchors can be used. Wall anchors are designed to distribute the weight of your bike evenly across the drywall, preventing damage to your walls. However, it’s important to choose the right type of wall anchor for your wall material and the weight of your bike. Check the weight limit of the wall anchor and make sure it can support the weight of your bike.
Once you’ve found a suitable anchor, follow the manufacturer’s instructions to install it securely. With a secure mounting option in place, you can move on to the next step of checking for obstructions.
Check for Obstructions
Now you need to take a careful look at the wall where you will be mounting your hook or bike rack, checking for any potential obstructions that could interfere with your installation. Clearing obstacles is crucial to ensure that the bike hangs securely and doesn’t bump into anything. Look for items such as light switches, vents, or electrical outlets that could get in the way. Even small obstacles can cause big problems when it comes to properly hanging your bike.
Additionally, measuring height is important to ensure that your bike will hang at the right level. You don’t want it to be too high or too low, as this can make it difficult to hang or retrieve your bike. Use a tape measure to determine the height at which you want your bike to hang, and mark this spot on the wall. This will give you a clear reference point when it comes time to install the hook. With these steps in mind, you can now move on to the next section and install the hook with confidence.

monTEK Swivel Bike Wall Mount, Bike Hangers for Garage, Space-Saving Vertical Bike Rack, Sturdy Bike Storage Rack Holds Up to 66lbs, Easy to Install, Black
【Strong, Safe & Secure】 MONTEK bike wall mount is made of heavy-duty solid steel are able to hang...
As an affiliate, we earn on qualifying purchases.
Install the Hook
Alright, now that I’ve found the right location, it’s time to install the hook.
The first step is to mark the spot where the hook will be installed. Then, using a drill, I’ll make a hole where the hook will go. Finally, I’ll screw in the hook until it’s secure and ready to hold my bicycle.
Mark the Spot
Once you’ve located the perfect spot, it’s time to mark where you want your bicycle to hang. Measuring accurately is crucial in ensuring that the bike hangs level and stable.
To do this, grab a measuring tape and measure the distance between the center of the saddle and the center of the handlebars. This measurement will be the distance from the wall that the hook needs to be installed.
Choosing the right hook is also important in ensuring that the bike hangs securely. Look for a hook that’s rated for the weight of your bicycle and has a secure mounting system. Once you’ve chosen the right hook, use a pencil to mark the exact spot on the wall where the hook will be installed.
This will ensure that the bike hangs at the correct height and is stable once hung. With the spot marked, it’s time to move on to the next step – drilling the hole.
Drill the Hole
To start drilling the hole for your bike hook, grab your power drill and check to make sure the bit you’re using matches the size of the hook’s mounting screws.
Then, select a location on the wall where you want to hang your bike, making sure it’s at a comfortable height and not in the way of any potential hazards.
When drilling the hole, it’s important to use the correct drilling techniques to ensure a secure hold for your hook. Hold the drill perpendicular to the wall and apply constant pressure while slowly drilling through the wall. If you encounter a stud, adjust your location accordingly.
If you’re unsure of your drilling abilities, consider hanging alternatives such as a freestanding bike rack or a ceiling-mounted storage system.
Once the hole is drilled, you can move on to the next step of screwing in the hook.
Screw in the Hook
Now that the hole’s been drilled, it’s time to screw in the hook and secure it in place with a firm grip. There are different types of hooks that can be used to hang a bike, such as L-shaped hooks, J-shaped hooks, and simple screw hooks.
The type of hook to use depends on the size and weight of the bicycle, as well as the type of wall it will be hung on. It’s important to choose the right hook to ensure that the bike is securely held in place.
Alternative hanging methods for bicycles include using a wall-mounted bike rack or a freestanding bike stand. These options are especially useful for those who own multiple bikes or have limited wall space.
Regardless of the method chosen, it’s important to ensure that the bike is hung securely and won’t fall or slide. Once the hook is securely installed, it’s time to hang your bike and enjoy the newly organized space.
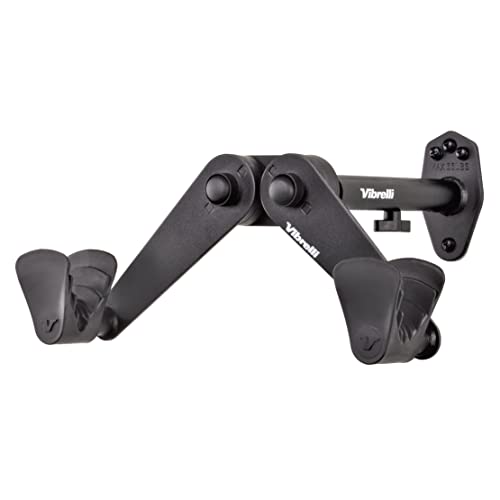
Vibrelli Bike Wall Mount - Horizontal Storage Rack for Hanging Bicycles in Garage - Adjustable Bike Hanger, Holder - Wall Bike Rack Hooks for Bicycle
BIKE COMPATIBLITY - Not suitable for step-through or ladies bikes (unless using a frame adaptor), or fat tire...
As an affiliate, we earn on qualifying purchases.
Hang Your Bike
Hanging your bike on the wall not only saves space but also adds a stylish touch to your home decor. There are various alternative storage options, but nothing beats the convenience and aesthetic appeal of wall-mounted bike racks.
Different hanging methods are available, ranging from hooks to brackets, and choosing the right one for your bike depends on its weight and frame material. When hanging your bike, it’s essential to consider the space and the wall’s stability. Make sure to measure the distance between the two hooks or brackets carefully.
The hooks should be installed at a height where the bike’s top tube can rest comfortably. You can also use a horizontal bike rack that attaches to the wall, allowing you to hang your bike by the wheels. Regardless of the method, always ensure that your bike is securely fastened to prevent it from falling and causing damage or injury.
To ensure your bike stays in great condition, regular maintenance and safety checks are necessary. When hanging your bike, make sure to inspect it for any signs of damage or wear and tear. Check the tires, brakes, and gears, and ensure that the bolts and screws are tight.
Regularly cleaning your bike and lubricating the chain can also help keep it in top shape. By following these maintenance and safety tips, you can enjoy your bike for years to come.
Maintenance and Safety Tips
When it comes to maintaining my bike and ensuring its safety, I always follow three important tips.
Firstly, I regularly check the hook that holds my bike in place to ensure it’s still secure and hasn’t loosened over time.
Secondly, I inspect my bike frequently for any signs of wear and tear, such as loose bolts or worn brake pads, that may compromise its safety.
And finally, I always use a lock when leaving my bike unattended to prevent theft or tampering.
By following these tips, I can rest assured that my bike’s safe and in good working condition.
Check the Hook Regularly
To make sure your bike stays secure, you should regularly check the hook for any signs of wear or damage. As a study found that 70% of bike-related accidents are caused by equipment failure, it is crucial to prioritize this step in hanging your bicycle. Checking hook durability will ensure that your bike stays in place and doesn’t fall, causing damage or injury.
To help you remember to check the hook regularly, here is a simple table outlining the steps you should take:
| Step | Action |
|---|---|
| 1 | Visually inspect the hook for any signs of wear or damage. |
| 2 | Test the hook’s strength by pulling down on it with your hand. |
| 3 | Check the screws or bolts that hold the hook in place to ensure they are tight. |
| 4 | Make sure the hook is properly aligned and level. |
| 5 | Replace any damaged hooks immediately. |
Regular inspections of the hook are essential for ensuring the safety and security of your bike. Once you have checked the hook, the next step is to inspect your bike to ensure that it is in good condition for riding.
Inspect Your Bike
Before you ride, make sure you’ve inspected your bike thoroughly for any potential issues or damage that could compromise your safety on the road. Inspecting your bike is an essential part of hanging it on the wall or ceiling.
First, check the wheels to make sure they’re true and not bent. You can do this by spinning each wheel and checking if it wobbles or rubs against the brakes.
Next, inspect the frame for cracks or dents, especially around the head tube, seat tube, and bottom bracket. These areas are under high stress and can develop cracks over time.
Check the brakes and brake pads to ensure they’re working correctly and aren’t worn down. Finally, inspect the chain and derailleur for any damage or wear. If you notice any issues during the inspection, make sure to address them before hanging your bike.
Now that you’ve inspected your bike and made sure it’s in good shape, it’s time to move on to the next step of hanging it on the wall or ceiling – using a lock. A lock is essential to prevent theft and ensure your bike is secure when hanging. So, let’s dive into how to use a lock to hang your bike.
Use a Lock
Secure your beloved ride with a sturdy lock, which acts as a shield against potential thieves. Using a lock is a great way to deter bike theft and ensure your bike stays safe and secure. However, it’s important to note that not all locks are created equal, and each type has its own pros and cons.
-
U-locks: These locks are made of hardened steel and are extremely difficult to cut through. They’re also compact and easy to carry around, but their shape can make it difficult to lock up your bike to certain objects.
-
Cable locks: These locks are flexible and easy to use, but they can be easily cut with bolt cutters. They’re best used as a secondary lock in combination with a U-lock.
-
Chain locks: These locks are heavy and bulky, but they offer the highest level of security. They’re difficult to cut through and can be used to secure your bike to a wide variety of objects. However, they’re not as convenient to carry around as other types of locks.
When choosing a lock, consider the level of security you need and the convenience factor. Using a combination of different types of locks can also provide added security for your bike. Remember, investing in a good lock is a small price to pay for the peace of mind that comes with knowing your bike is safe and secure.
Frequently Asked Questions
How much weight can the hook support?
I can determine the weight capacity of a hook by examining its specifications. The installation process and different hook types, such as screw-in or adhesive, also affect weight capacity.
Can the hook be installed on any type of wall material?
Oh, sure, you can install the hook on any type of wall material you want. Just make sure you follow some installation tips, and choose the right hook size for your bike. Easy-peasy, right?
How much space should be left between the bike and the wall?
When considering bike storage solutions, maximizing garage space is key. Leaving 6-12 inches between the bike and wall allows for easy access and prevents damage. This can be achieved with various hooks or racks.
Is it safe to hang a bike by the front wheel?
Did you know that hanging a bike by its front wheel can reduce the risk of damaging the frame and gears? However, it may cause stress on the wheel and handlebars. Consider using a pulley system for storage to evenly distribute weight.
How often should the hook be inspected for wear and tear?
As a bike owner, I recommend inspecting the hook for wear and tear every 6 months. Look for cracks, rust, or bending. To prolong hook lifespan, avoid overloading it and ensure proper installation.
Conclusion
Well, that’s it folks! You’ve officially learned how to hang a bicycle like a pro.
With a little bit of patience and attention to detail, you can safely store your bike and free up valuable space in your home or garage.
Remember to gather all necessary materials, find the perfect location, and install the hook securely before hanging your bike. And don’t forget to maintain the hook and the bike itself for optimal safety and longevity.
Now that you know how to hang a bicycle, you can rest easy knowing that your trusty two-wheeler is in good hands.
Just imagine the satisfaction of walking into your clutter-free space with your bike hanging neatly on the wall, calling out to you for your next adventure.
So go forth and hang your bike with confidence, knowing that you have the skills and knowledge to do it right.
Happy cycling!