As someone who is passionate about cycling but faced with limited room, I frequently encounter the challenge of finding sufficient space to store my bicycles. A strategy that has proven effective for me is suspending my bicycle from the ceiling. This approach not only clears up crucial space on the ground but also protects my bike from potential damage.
Before you start hanging your bike from the ceiling, it’s important to choose the right location. You’ll need to find a spot with enough clearance to accommodate your bike, as well as a solid support structure to anchor the necessary hardware.
Once you’ve found the right location, gather your tools and hardware, prepare your bike, and follow these steps to safely and securely hang your bike from the ceiling.
Key Takeaways
- Before hanging a bike, clean it and adjust the seat to the correct height.
- Choose the right location by considering clearance, support structure, and potential obstructions, and locate and mark the studs on the ceiling.
- Use the proper tools and hardware, such as bike hooks, a drill and drill bits, and screws and anchors, for installation.
- For safety, securely fasten the bike to the mount, use a strong and secure lock or strap, and ensure the bike is not in a location where it could accidentally hit anyone or anything.
Choose the Right Location
Before you can hang your bike from the ceiling, you’ll need to choose the right spot. This means maximizing space while also taking into consideration safety considerations.
The ideal location is somewhere high up where the bike won’t be in the way, but also within easy reach for when you need to take it down.
When choosing a location, make sure to take into account any potential obstructions such as light fixtures, ceiling fans, or other objects that may get in the way. Additionally, make sure the ceiling is strong enough to support the weight of the bike and any additional hardware you’ll be using to hang it.
Once you’ve found the perfect spot, gather the necessary tools and hardware to get started.
Gather the Necessary Tools and Hardware
To get started, you’ll need to round up all the tools and hardware required for the job. Here’s a list of items that you’ll need to gather before beginning the installation process:
-
Types of bike hooks: There are a variety of bike hooks available in the market, such as ceiling hooks, wall hooks, vertical hooks, and horizontal hooks. Each type of hook is designed to hold a different type of bike, so it’s essential to choose the right one for your bike.
-
DIY vs professional installation: You can either install the bike hooks yourself or hire a professional to do it for you. If you’re experienced in DIY projects and have the necessary tools, you can save money by doing it yourself. However, if you’re not confident in your abilities, it’s best to hire a professional to ensure that the installation is done correctly.
-
Drill and drill bits: You’ll need a drill to make holes in the ceiling for the bike hooks.
-
Screws and anchors: You’ll need screws and anchors to attach the bike hooks to the ceiling.
Once you have all the required tools and hardware, you can move on to the next step of the installation process. It’s essential to prepare your bike before hanging it from the ceiling to ensure that it’s secure and won’t fall.
Prepare Your Bike
First things first, make sure your bike is in good condition and ready for storage up high. Before hanging your bike from the ceiling, it’s important to give it a thorough cleaning to remove any dirt or debris. You don’t want to store a dirty bike, as it can attract pests and cause damage to the bike over time.
Once your bike is clean, take the time to adjust the seat to the correct height. This will not only make your ride more comfortable but also ensure that the bike hangs properly from the ceiling. The last thing you want is for your bike to be at an awkward angle or for the seat to slip during storage.
With a clean bike and properly adjusted seat, you’re now ready to move on to installing the hardware for hanging your bike from the ceiling.
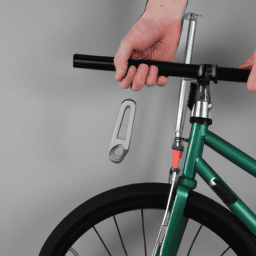
Install the Hardware
To install the hardware for hanging my bike from the ceiling, I first located and marked the studs on the ceiling using a stud finder.
Then, I drilled pilot holes for the hooks or hangers I planned to use.
Finally, I secured the hooks or hangers into the pilot holes with screws, making sure they were level and spaced correctly for my bike.
Locate and Mark the Studs
You’ll want to grab your trusty stud finder and run it along the ceiling until you hear a beep, indicating a stud.
Locating studs can be tricky, so here are some tips and tricks to make the process easier:
- Move the stud finder slowly along the ceiling to ensure you don’t miss any studs.
- Keep the stud finder level to get an accurate reading.
- Mark the location of the stud with a pencil or masking tape to avoid confusion later on.
Common stud finding mistakes include not calibrating the stud finder properly or not checking for electrical wires before drilling. Remember to always double-check before drilling into a stud to avoid any damage or accidents.
With the studs located and marked, it’s time to move onto the next step: drilling pilot holes.
Drill Pilot Holes
Now that I’ve located and marked the studs on my ceiling, it’s time to drill pilot holes.
Pilot holes are small holes drilled into the wood before inserting screws. These holes help to prevent the wood from splitting and ensure that the screws go in straight. The benefits of using pilot holes are numerous, including preventing damage to the wood, making it easier to drive screws, and ensuring a secure fit.
One common mistake with pilot holes is choosing the wrong size drill bit. The diameter of the drill bit should match the diameter of the screw, but the pilot hole should be slightly smaller than the screw.
Another mistake is not drilling the pilot hole deep enough. The pilot hole should be about ¾ of the length of the screw, so that the screw can go in all the way and hold securely.
By taking the time to drill pilot holes correctly, I can ensure that my bike will be securely hung from the ceiling.
Now that I’ve drilled the pilot holes, it’s time to secure the hooks or hangers.
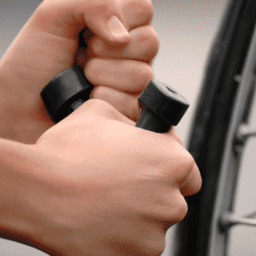
Secure the Hooks or Hangers
Once the pilot holes are drilled, it’s time to attach the hooks or hangers for a secure and stable bike storage solution.
Before proceeding, make sure the ceiling is strong enough to hold the weight of your bicycle. Also, consider the weight capacity of the hooks or hangers. For example, if your bike weighs 50 pounds, choose hooks that can hold at least 75-100 pounds to be safe.
Next, determine the distance between the hooks. This depends on the size of your bike and the distance between the handlebars and seat. Ideally, the hooks should be placed wider than the width of your handlebars. You can use a measuring tape to ensure the hooks are equidistant from each other.
Once the hooks or hangers are securely attached and properly spaced, your bike is ready to be hung from the ceiling. Hang your bike carefully to avoid any damage or injury.
Hang Your Bike
Now that the hardware is installed, it’s time to hang your bike.
First, lift and secure the bike onto the ceiling mount, making sure it’s level and centered.
Double-check the safety and stability of the bike by giving it a gentle tug and ensuring it doesn’t wobble.
With your bike now safely and securely stored, you can enjoy the extra space in your garage or home.
Lift and Secure the Bike
To easily hoist my bike up to the ceiling, I grabbed a sturdy rope and securely fastened it to the frame. To lift and secure the bike properly, I made sure to adjust the height and weight distribution of the bike to prevent it from swinging or tilting. Here are three key steps I followed:
-
Before hoisting the bike up, I made sure to adjust the height of the rope or bike lift to accommodate the height of my ceiling and the length of the bike. This ensures that the bike is lifted high enough to clear the ground and low enough to easily reach and secure.
-
Next, I made sure to distribute the weight of the bike evenly on the rope or bike lift. This prevents the bike from swinging or tilting uncontrollably, making it more difficult to secure. I shifted the bike around until it was balanced and stable on the rope or lift.
-
Lastly, I explored alternative hanging methods and decided to use a bike lift that allowed me to easily lift and lower the bike with a pulley system. This made it easier to lift the bike up to the ceiling and also allowed me to easily lower it back down when I needed to use it.
With the bike securely lifted and balanced, I double-checked the safety and stability of the setup before moving on to the next step of double-checking the safety and stability of the bike’s storage location.
Double-Check Safety and Stability
Ensuring the safety and stability of your bike storage setup is crucial for preventing accidents and damage. When hanging your bike from the ceiling, there are several stability factors to consider.
First, you need to make sure that the ceiling mount is securely fastened to the ceiling joist. This will ensure that the mount can support the weight of your bike without coming loose. Additionally, you should check the weight limit of the mount to ensure that it can safely hold your bike’s weight.
Once you have checked the stability of the ceiling mount, you should also take safety precautions to prevent accidents. It’s important to make sure that the bike is securely fastened to the mount and cannot accidentally fall. You can do this by using a strong and secure lock or strap to hold the bike in place. Additionally, you should make sure that the bike is not in a location where it could accidentally hit anyone or anything.
By taking these safety precautions, you can ensure that your bike storage setup is both safe and stable. Now that you’ve ensured the safety and stability of your bike storage setup, it’s time to enjoy your extra space! With your bike safely stored away, you can now use your floor space for other activities or storage.
Enjoy Your Extra Space
With your bike safely stored away, you can finally breathe a sigh of relief and enjoy the newfound breathing room in your living space. Maximizing storage is key when it comes to living in a small space, and hanging your bike from the ceiling is a great way to create more room.
Whether you live in a studio apartment or a small house, creative storage solutions are a must to keep your living space tidy. Hanging your bike from the ceiling not only creates more space but also adds a unique design element to your home.
There are various styles of ceiling bike racks to choose from, depending on your preference. Some racks feature a pulley system that makes it easy to lift and lower your bike, while others are stationary and require a bit more effort to install. Regardless of which style you choose, you’re sure to enjoy the extra space and clean look that comes with having your bike stored overhead.
Frequently Asked Questions
How much weight can a ceiling handle when hanging a bicycle?
I’m knowledgeable about ceiling weight capacity and safety precautions. A ceiling’s weight capacity depends on its construction and the weight distribution of the hanging object. Always consult with a professional to ensure safety.
Can I hang multiple bicycles from the same ceiling mount?
I’ve found that the best hanging methods for multi bike storage solutions include using a horizontal or vertical bike rack. These options provide efficient use of space and easy access to all bikes.
Is it safe to hang my bicycle from the ceiling if I have a suspended ceiling?
I have a suspended ceiling and am wondering if it’s safe to hang my bike from it. It’s important to consider the ceiling height requirements and weight limits before attempting to hang a bike. If it’s not possible to safely hang a bike from the ceiling, alternative bike storage solutions should be explored.
How far apart should the ceiling mounts be placed for hanging a bicycle?
I once had a bike fall from a poorly installed ceiling mount. To avoid this, ceiling mount distance should be no more than 4ft apart and installation height should be at least 10ft for safety.
Can I use regular hooks or do I need special bike hooks for hanging my bike?
Regular hooks can be used to hang a bike, but bike-specific hooks have advantages. They offer a more secure hold and prevent damage to the bike frame. However, they tend to be more expensive than regular hooks.
Conclusion
Overall, hanging a bicycle from the ceiling is a great way to save space and keep your bike out of the way. It may seem daunting, but with the right tools and preparation, anyone can do it.
In this article, we’ve covered the importance of choosing the right location. We’ve also talked about gathering the necessary tools and hardware, preparing your bike, installing the hardware, and finally, hanging your bike. By following these steps, you can safely and securely hang your bike from the ceiling, freeing up valuable floor space in your home or garage.
Remember to always double-check your installation and make sure everything is secure before hanging your bike. Happy riding!