Imagine this scenario: you’re riding on your motorcycle down the highway, with the breeze blowing through your hair. However, when the weather gets colder, the thrill of riding can diminish. This is where an electric vest can be a game-changer.
In this guide, I’ll show you how to hook up an electric vest to your bike, so you can stay warm and comfortable on those chilly rides. Get ready to gather your tools, locate the battery connection, and make the necessary connections for a cozy journey ahead.
Key Takeaways
- Use reliable fasteners to securely attach the vest to the bike.
- Regularly inspect the attachments to ensure they are intact.
- Inspect the vest’s wiring before each ride and fix any loose connections immediately.
- Always switch off the vest when not in use and disconnect the power source to prevent electrical malfunctions.
Gather the Necessary Tools and Materials
You’ll need to gather the necessary tools and materials before you can start hooking up your electric vest to your bike.
First of all, you will require a set of basic hand tools such as a screwdriver, pliers, and wire cutters. Additionally, you’ll need a multimeter to test the electrical connections.
In terms of materials, make sure to have a wiring harness specifically designed for motorcycles, as well as electrical connectors and heat shrink tubing. These will ensure secure and reliable connections. It’s also important to have a fuse holder and an appropriate fuse to protect the electrical circuit. Finally, don’t forget to have some electrical tape on hand for insulation purposes.
Now that you have all the necessary tools and materials, let’s move on to locating the battery connection on your bike.
Locate the Battery Connection on Your Bike
First, find the battery connection on your motorcycle. This is where you will connect the electric vest to draw power from the bike’s battery. To locate the battery connection, consult your bike’s owner manual or look for a set of wires leading to the battery. It is essential to find alternative power sources on your bike to ensure proper insulation and prevent any damage to the electrical system.
To help you visualize the process, refer to the table below:
| Bike Make/Model | Battery Connection Location |
|---|---|
| Harley Davidson | Under the seat |
| Honda | Behind the side panel |
| Yamaha | Near the engine |
| Suzuki | Under the fuel tank |
| Kawasaki | Under the rear fender |
Once you have successfully located the battery connection, you can proceed to the next step of preparing the vest for installation.
Prepare the Vest for Installation
To prepare the vest for installation, make sure it is properly adjusted and ready to be connected to the battery. First, choose the right size of vest that fits snugly but allows for comfortable movement. This is crucial to ensure optimal heat distribution and safety while riding.
Once you have the correct size, adjust the vest so that it fits properly around your torso, with the heating elements evenly distributed. Ensure that all zippers and fasteners are securely closed. Additionally, check that the power cables are properly connected and securely attached to the vest. This will prevent any potential hazards while riding.
Now that the vest is prepared, we can move on to the next step of connecting the wires to the battery, which will allow the vest to heat up efficiently.
Connect the Wires to the Battery
Now, connect the wires from the vest directly to the battery for efficient heating.
Begin by locating the positive and negative terminals on the battery. The positive terminal is usually marked with a plus sign, while the negative terminal is marked with a minus sign.
Take the positive wire from the vest and attach it securely to the positive terminal of the battery.
Next, take the negative wire from the vest and connect it to the negative terminal of the battery. Ensure that the connections are tight and secure to prevent any loose connections or potential hazards.
Once the wires are securely connected, proceed to the next step of securing the wires and testing the connection for proper functioning.
Secure the Wires and Test the Connection
After securing the wires and testing the connection, make sure to double-check for any loose connections or potential hazards.
Proper wire management techniques are essential to ensure a safe and reliable electric vest setup on your bike. Start by carefully organizing the wires and securing them using zip ties or electrical tape. This will prevent any unwanted movement or potential damage while riding.
Additionally, troubleshoot common connection issues by inspecting each connection point for loose or frayed wires. Ensure that all connections are tight and secure. If you encounter any problems, refer to the user manual or seek professional assistance.
Once you have verified the connections, it’s time to move on to the next step and attach the vest to your bike.
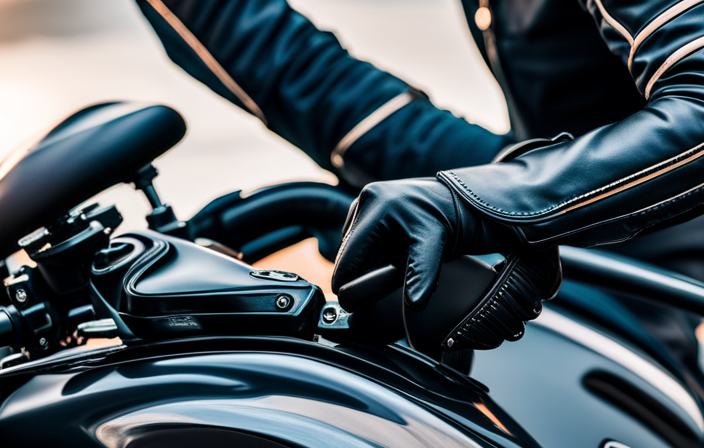
Attach the Vest to Your Bike
Secure the vest firmly to your bicycle frame. Make sure the vest is securely attached to prevent it from falling off during your ride.
The benefits of using an electric vest while riding are numerous. It provides warmth and comfort, especially during chilly weather conditions. Additionally, it promotes safety by keeping your body warm and preventing any potential muscle stiffness or cramps.
There are different types of electric vests available for bikers, including battery-powered and plug-in versions. Battery-powered vests are portable and convenient, allowing you to stay warm even when you are away from your bike. On the other hand, plug-in vests provide continuous warmth as long as they are connected to your bike’s power source.
Once you have securely attached the vest, you can now adjust the temperature settings to your preference.
Adjust the Temperature Settings
To adjust the temperature settings, simply use the controls provided. These controls are usually located on the front of the vest, within easy reach while riding.
Adjusting the temperature is important to ensure your comfort and safety while on the road. Start by locating the temperature control buttons or dials. Press the buttons or turn the dials to increase or decrease the heat level according to your preference.
Take into account the current weather conditions and your personal comfort level. It’s recommended to start with a lower temperature setting and gradually increase it until you find the right level of warmth.
By adjusting the temperature settings, you can maintain the heat level that suits you best during your ride.
Now, let’s move on to testing the vest’s heating function.
Test the Vest’s Heating Function
Check if the heating function of your vest is working properly by turning it on and feeling for warmth. To ensure that your electric vest is functioning correctly, follow these testing procedures and troubleshooting tips. First, connect your vest to a power source and turn it on. Place your hand on the vest’s heating element and check for warmth. If the vest doesn’t heat up, try troubleshooting by checking the power connection, battery charge, and fuse. If these are all in order and the vest still doesn’t heat up, consult the manufacturer’s instructions or contact customer support for further assistance. A table can be used to track and compare the results of multiple tests, helping you identify any patterns or issues. Once you have confirmed that the vest’s heating function is working, you can proceed to enjoy a warm and comfortable ride.
Enjoy a Warm and Comfortable Ride
Get ready to experience a cozy and pleasant journey with the warmth of your heated vest. To maximize battery life, it’s essential to choose the right size vest that fits snugly.
Here are four key aspects to consider:
-
Insulation: Ensure the vest has proper insulation to retain heat effectively.
-
Heating zones: Look for a vest with strategically placed heating zones to target core areas.
-
Temperature control: Opt for a vest with adjustable temperature settings to suit your comfort level.
-
Battery capacity: Check the vest’s battery capacity and choose one that offers longer runtime.
By selecting the right size vest and taking these factors into account, you can enjoy a warm and comfortable ride while making the most of your battery life.
Now, let’s move on to some safety tips and precautions for your electric vest.
Safety Tips and Precautions
Make sure you follow these safety tips and precautions for a worry-free and enjoyable ride.
First and foremost, always read the manufacturer’s instructions for proper vest installation. This will ensure that the vest is securely attached to your bike and will not come loose while riding.
Additionally, make sure to check the wiring and connections of the electric vest before every ride. Look for any frayed wires or loose connections and fix them immediately.
It is also important to wear the vest properly, making sure it is snug but not too tight. This will ensure maximum comfort and effectiveness.
Lastly, always remember to turn off the power to the vest when not in use to prevent any electrical malfunctions or accidents.
By following these safety precautions and properly installing your electric vest, you can enjoy a warm and comfortable ride without any worries.
Frequently Asked Questions
How do I adjust the temperature settings on the electric vest?
To adjust the temperature settings on the electric vest, I simply use the temperature control feature. By pressing the buttons, I can easily increase or decrease the heat levels according to my preference.
Can I use any type of battery for the connection?
No, you cannot use any type of battery for the connection. It is crucial to use a battery that is compatible with the voltage requirements of the electric vest. Using the wrong battery can damage the vest or cause it to malfunction.
What should I do if the wires are not long enough to reach the battery?
If the wires are not long enough to reach the battery, you can use an alternative power source such as a portable battery pack. Alternatively, you can use extension cables to connect the vest to the battery.
How long does it take for the vest to heat up?
To properly wear an electric vest, connect it to the battery using long enough wires. It typically takes around 5-10 minutes for the vest to heat up. After use, store it in a cool, dry place. Remember, "patience is a virtue."
Are there any specific safety precautions I should be aware of while using the electric vest?
When using an electric vest, it is important to take safety measures and ensure proper installation. Follow the manufacturer’s instructions, wear the vest properly, and regularly inspect for any damage or wear.
Conclusion
After following these steps, you can confidently conclude that hooking up an electric vest to your bike is a straightforward process.
First, gather the necessary tools and materials.
Next, locate the battery connection on your bike.
Then, prepare the vest for installation.
Connect the wires to the battery and make sure to secure them properly.
After that, test the connection to ensure everything is in order.
Adjust the temperature settings on the vest and test its heating function.
And voila! You’re ready to enjoy a toasty journey.
Just remember to adhere to necessary safety tips and precautions.