

I know what you’re thinking – hooking wires on a razor electric dirt bike with three 12-volt batteries to make 32 volts sounds like a complicated task. But fear not, because I’m here to guide you through it step by step.
In this article, we’ll go over the necessary materials, understand the wiring diagram, and connect the positive and negative terminals of the batteries.
By the end, you’ll have an enhanced performance on your dirt bike that will surely impress. So, let’s dive in and get started!
Key Takeaways
- Choose appropriate wire gauge for current handling.
- Disconnect batteries before starting wiring.
- Understand the wiring diagram.
- Ensure batteries are fully charged.

EVAPLUS 54.6V 1.5A Smart Charger for 48V Lithium Batteries - UL Certified, Fast Charging with Multi-Safety Protection, Compatible with Electric Bikes/Scooters, DC 5.5 * 2.5/2.1mm Connector
Universal Fast Charging Performance: Designed specifically for 48V lithium-ion batteries (13S configuration), this 54.6V 1.5A smart charger delivers...
As an affiliate, we earn on qualifying purchases.
Gather the Necessary Materials
To begin, make sure you’ve got all the necessary materials.
When hooking wires on a Razor electric dirt bike with 3 12-volt batteries to make 32 volts, it is crucial to choose the right gauge wire. The gauge of the wire determines its ability to handle the current flowing through it. Using a wire with a gauge that is too small can lead to overheating and potential safety hazards. Therefore, I recommend using a wire gauge that is appropriate for the amount of current the batteries will be delivering.
Safety considerations during the wiring process are also important. Make sure to wear protective gloves and eyewear to prevent any accidents or injuries. Additionally, ensure that the batteries are disconnected before starting any wiring work to avoid electric shock.
Lastly, it is essential to understand the wiring diagram. This diagram illustrates the correct connections between the batteries and other components. By studying the diagram, you can ensure that the wires are properly attached and that the bike will function as intended without any issues.
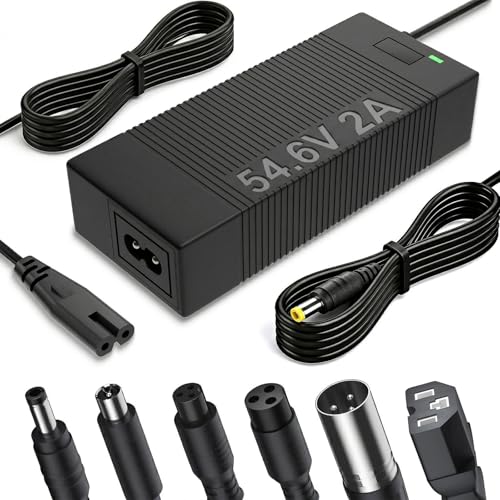
54.6V 2A Ebike Charger for 48V Lithium Battery (13S Li-ion Battery), 48 Volt Electric Bike Scooter Charger with 7 Charging Port Plugs
48V Lithium Battery ebike Charger: Designed for 48V lithium batteries ONLY (13S Li-ion packs / battery voltage marked...
As an affiliate, we earn on qualifying purchases.
Understand the Wiring Diagram
First, you need to grasp the concept of the wiring diagram for your setup. Understanding the circuitry is crucial to ensure the proper functioning of your electric dirt bike. Here are some key points to consider:
-
Pay close attention to the color-coded wires: The wiring diagram will indicate the specific colors for each wire, such as red for positive and black for negative. Make sure to connect the wires accordingly to avoid any potential issues.
-
Identify the components and their connections: The wiring diagram will provide a clear depiction of all the components involved in the circuitry, such as the batteries, motor, and controller. Take the time to understand how these components are interconnected and how the current flows through them.
-
Troubleshoot common problems: The wiring diagram can be a valuable tool when troubleshooting electrical issues. By referencing the diagram, you can identify potential problem areas, such as loose connections or faulty components, and take the necessary steps to resolve them.
By familiarizing yourself with the wiring diagram and its components, you will be better equipped to understand the circuitry of your electric dirt bike. This knowledge will prove invaluable when troubleshooting common problems that may arise.
Now, let’s move on to the next section and discuss the importance of disconnecting the power source.

Hexwatt 54.6V 2A Charger for 48V Lithium-ion Battery ebike Electric Bike Electric Scooter Hoverboard Battery Charger Replacement with 6 Connectors
1️⃣Safer & Smarter Charging – Zero Fire Risk 🔥Say goodbye to cheap plastic chargers that overheat and pose...
As an affiliate, we earn on qualifying purchases.
Disconnect the Power Source
Before proceeding with any maintenance or repairs, always remember to disconnect the power source to ensure your safety. When it comes to working with electrical components, taking precautions is crucial. In the case of wiring a Razor electric dirt bike with three 12-volt batteries to make 32 volts, following safety guidelines is paramount. To help you understand the process, I have prepared a table outlining the safety precautions for wiring:
| Safety Precaution | Description |
|---|---|
| Wear insulated gloves | Protect yourself from potential electrical shocks by wearing gloves designed for electrical work. |
| Use a circuit tester | Before working on any wiring, use a circuit tester to ensure the power source is truly off. |
| Disconnect the power source | Always disconnect the power source by removing the batteries or unplugging the bike. |
| Avoid touching bare wires | Never touch bare wires with your bare hands, as this can result in electrical shock. |
| Insulate exposed wires | When working with wires, make sure to insulate any exposed areas to prevent short circuits. |
EVAPLUS 5 in 1 Plugs 54.6V Fast Charger, Universal for 48V 13S Lithium Batteries, Pinkind 48V Li-ion Battery Charger Replacement for Razor, Jetson, Voyage, Gotrax, Ninebot,Segway, Hiboy
【Charger Specifications】:Input: 100-240V 50/60Hz ; Output: 54.6V 1.5A. PLEASE NOTE: 1.Only for the Device that has a 48V...
As an affiliate, we earn on qualifying purchases.
Connect the Positive Terminals of the Batteries
Now that you have disconnected the power source, it’s time to connect the positive terminals of the batteries.
Before we begin, it’s important to consider safety. Ensure that you are wearing protective gloves and goggles to prevent any accidents. Also, make sure the batteries are fully charged and in good condition, as proper maintenance is crucial for electric dirt bikes.
To connect the positive terminals, start by identifying the positive terminal on each battery. Typically, it is marked with a ‘+’ symbol. Take the positive wire from the first battery and connect it to the positive terminal of the second battery. Use a wrench to tighten the connection securely. Repeat this process to connect the positive terminal of the second battery to the positive terminal of the third battery.
By connecting the positive terminals of the batteries, you are creating a series circuit. This configuration allows the voltage to add up, resulting in a higher overall voltage for your electric dirt bike.
Now, let’s move on to connecting the negative terminals of the batteries. This step is crucial to complete the circuit and power your electric dirt bike.
Connect the Negative Terminals of the Batteries
To complete the circuit, simply attach the negative wire from the first battery to the negative terminal of the second battery and tighten the connection using a wrench. This step is crucial for ensuring the proper flow of electricity and maintaining a stable electrical system. When connecting the negative terminals of the batteries, it is important to follow proper grounding techniques to prevent any electrical hazards.
Here are some key points to keep in mind:
- Ensure that all connections are secure and tight to minimize resistance and maximize conductivity.
- Use high-quality connectors that are specifically designed for this purpose. Cheap or low-quality connectors can lead to poor connections and potential voltage drops.
- Inspect the wires for any signs of damage or wear. Replace any damaged wires to maintain a safe electrical system.
- Double-check the polarity of the batteries before making the final connection. Connecting the negative terminals incorrectly can lead to damage to the batteries or other components.
Once the negative terminals are securely connected, it is time to move on to the next step of connecting the battery pack to the bike’s wiring harness.
By following these steps and using proper grounding techniques and high-quality connectors, you can ensure a safe and efficient electrical connection for your razor electric dirt bike.
Now, let’s move on to connecting the battery pack to the bike’s wiring harness.
Connect the Battery Pack to the Bike’s Wiring Harness
Once the negative terminals are securely connected, it’s time to attach the battery pack to the bike’s wiring harness. This step is crucial in ensuring that the electrical power from the batteries can be properly utilized by the bike’s components.
Before proceeding, it is important to understand the testing procedures and potential risks involved.
To begin, locate the wiring harness on the bike. It is usually found near the battery compartment or under the seat. Identify the positive and negative wires within the harness. The positive wire is typically red, while the negative wire is usually black.
Next, connect the positive wire from the battery pack to the positive wire in the wiring harness. It is essential to ensure a secure and tight connection. A loose connection can result in poor electrical conductivity and potential damage to the bike’s electrical system.
Once the positive connection is made, proceed to connect the negative wire from the battery pack to the negative wire in the wiring harness. Again, ensure a secure and tight connection to maintain proper electrical flow.
After completing the connections, it is important to double-check that everything is securely fastened. This will help prevent any potential risks, such as short circuits or loose connections, which could lead to damage to the bike or even injury.
Double-Check the Connections
Ensure that all connections are securely fastened before proceeding. Double-check the connections to avoid any potential issues or malfunctions. Here are some key points to keep in mind while rechecking the connections:
- Inspect each wire connection point thoroughly, ensuring they are tightly connected and free from any loose or frayed ends.
- Verify that the positive and negative terminals of the batteries are correctly connected to the corresponding terminals on the bike’s wiring harness.
- Use a multimeter to test the voltage output of the batteries. Make sure the reading matches the intended voltage of 32 volts.
By carefully rechecking the connections and testing the voltage output, you can be confident that your razor electric dirt bike will operate smoothly and efficiently.
Once you have ensured the integrity of the connections, you can move on to securely fastening the wires and batteries in place without compromising stability or functionality.
Secure the Wires and Batteries
After double-checking the connections, you can now secure the wires and batteries in place. Proper cable management techniques are crucial to ensure a safe and organized setup.
Start by identifying any loose or dangling wires, and neatly arrange them in a way that minimizes the risk of entanglement or damage. Use zip ties to secure the wires to the frame or other fixed components. This will not only prevent them from getting snagged but also provide an added layer of security.
When securing the batteries, make sure they are tightly fastened to the bike’s frame or designated battery housing. Use appropriate mounting brackets or straps to hold them firmly in place. This will prevent any unnecessary movement or potential damage during operation.
Make sure that the batteries are positioned in a way that allows for easy access to their terminals for future maintenance or replacement.
By following these proper cable management techniques and using zip ties for extra security, you can ensure that the wires and batteries are securely fastened, reducing the risk of accidents or damage.
Now, with everything in place, it’s time to move on to the next step: testing the voltage output.
Test the Voltage Output
After securely hooking the wires and batteries on my Razor electric dirt bike, it was time to move on to the next step: testing the voltage output. This is an important part of the process to ensure that the batteries are providing the correct amount of power to the bike.
To test the voltage output, I followed the following test procedures:
-
Use a multimeter: I carefully selected a multimeter with voltage measurement capabilities to accurately measure the voltage output of the batteries.
-
Connect the multimeter: I connected the multimeter to the positive and negative terminals of the battery pack. It is crucial to make sure the connections are secure to obtain accurate readings.
-
Read the voltage: With the multimeter properly connected, I read the voltage output displayed on the screen. This reading will indicate whether the batteries are providing the desired 32 volts.
Throughout this process, safety measures must be taken to avoid any accidents or damage. It is important to wear protective gloves and goggles to protect against any electrical mishaps.
Once the voltage has been tested, it is essential to make adjustments if necessary.
Make Adjustments if Necessary
If adjustments are necessary, you can use the multimeter to modify the voltage output. Adjusting voltage levels is an important step in ensuring that your razor electric dirt bike operates optimally and safely. However, it is crucial to be aware of the potential risks involved in this process. Mishandling the voltage adjustment can lead to damage to the batteries or even pose a safety hazard.
To make adjustments, follow these steps:
-
Connect the multimeter to the battery terminals to measure the current voltage output. Ensure that the multimeter is set to the appropriate voltage range.
-
Refer to the manufacturer’s instructions or consult a professional to determine the desired voltage level for your razor electric dirt bike. This information will help you make the necessary adjustments.
-
Use the multimeter to modify the voltage output by turning the adjustment knob or switch. Make small increments or decrements until you reach the desired voltage level.
Remember to proceed with caution when adjusting the voltage levels. Incorrect adjustments can lead to battery damage, reduced performance, or potential safety hazards. It is always recommended to seek professional assistance if you are unsure about the process or lack experience in handling electrical components.
Now that we have discussed how to make adjustments if necessary, let’s move on to the next section where we will ensure safety precautions are taken to prevent any accidents or injuries.
Ensure Safety Precautions
To ensure your safety, it’s important to follow these precautions when working with the voltage adjustment on your electric dirt bike.
First and foremost, proper grounding is crucial. Make sure that your dirt bike is properly grounded before attempting any voltage adjustments. This will help prevent any electrical shocks or potential damage to the bike’s electrical system.
Another important precaution is to understand the capacity of the batteries used in your electric dirt bike. Each battery has a specific voltage rating, and it’s important to not exceed this rating when making any adjustments. Exceeding the capacity of the batteries can lead to overheating, damage to the batteries, or even fire hazards.
Before making any adjustments, it’s always a good idea to read the manufacturer’s instructions and guidelines. This will provide you with the necessary information on how to safely adjust the voltage on your specific electric dirt bike model.
Enjoy the Enhanced Performance
Now that you’ve taken the necessary safety precautions, you can start enjoying the enhanced performance of your electric dirt bike. With the proper wiring and power configuration, you can experience increased speed and improved acceleration. By harnessing the power of three 12-volt batteries, you can create a total of 32 volts, giving your dirt bike a boost in performance.
To better understand the impact of this power upgrade, let’s take a look at the following table:
| Battery Configuration | Voltage (V) |
|---|---|
| 1 Battery | 12V |
| 2 Batteries | 24V |
| 3 Batteries | 36V |
| 4 Batteries | 48V |
| 5 Batteries | 60V |
As you can see, by using three 12-volt batteries, you are able to achieve a voltage of 36V, which will significantly increase the speed and acceleration of your electric dirt bike.
Now, let’s transition to the next section where we will discuss maintenance tips for longevity, ensuring that your electric dirt bike continues to perform at its best.
Maintenance Tips for Longevity
For optimal performance and longevity, it’s important to follow these maintenance tips for your electric dirt bike. Regular maintenance techniques and best practices will ensure that your bike keeps running smoothly and stays in top shape.
Firstly, you should regularly clean your bike to prevent dust and dirt from accumulating. Use a damp cloth to wipe down the frame, seat, and handlebars. Additionally, make sure to check and clean the air filter regularly to ensure proper airflow.
Next, inspect the tires for any signs of wear and tear. Check the tire pressure regularly and inflate them to the recommended level. This will not only improve performance but also enhance safety while riding.
Another important maintenance technique is to lubricate the chain and other moving parts of the bike regularly. Use a high-quality lubricant to reduce friction and extend the lifespan of these components.
Lastly, don’t forget to check the battery and electrical connections. Ensure that the battery is fully charged and the connections are tight and secure. This will prevent any electrical issues and ensure a smooth ride.
By following these maintenance techniques and best practices, you can keep your electric dirt bike running smoothly and enjoy its optimal performance for years to come.
Now let’s move on to troubleshooting common issues that you may encounter with your electric dirt bike.
Troubleshooting Common Issues
If you’re experiencing any issues with your electric dirt bike, here are some common problems you may encounter and how to troubleshoot them.
One of the most common problems with electric dirt bikes is battery issues. If your bike is not holding a charge or the battery is draining quickly, it could be due to a faulty battery. To troubleshoot this issue, start by checking the battery connections. Make sure they are clean and tight. If the connections are loose or corroded, it can affect the performance of the battery.
Another common issue is understanding the electrical connections on your electric dirt bike. If your bike is not turning on or there is no power, it could be due to a loose or disconnected wire. Inspect all the electrical connections and make sure they are secure.
If you still cannot identify the problem or the issue persists after troubleshooting, it is recommended to seek professional help to avoid any further damage or potential safety hazards.
Seek Professional Help if Needed
When troubleshooting your electric dirt bike, it’s best to seek professional help if you are unable to identify the problem or if the issue persists after attempting to troubleshoot it yourself. Seeking assistance from a trained technician can ensure that the problem is diagnosed accurately and resolved effectively, minimizing potential dangers and ensuring the safe operation of your electric dirt bike.
Here are three reasons why seeking professional help is crucial when troubleshooting your electric dirt bike:
-
Expertise: Trained technicians have the knowledge and experience to identify and fix complex electrical issues. They understand the intricacies of electric dirt bikes and can quickly pinpoint the problem, saving you time and frustration.
-
Safety: Working with electrical components can be dangerous, especially if you are not familiar with proper safety procedures. Professional technicians are trained to handle these situations safely, reducing the risk of accidents or injuries.
-
Warranty: If your electric dirt bike is still under warranty, attempting to troubleshoot it yourself may void the warranty. By seeking professional help, you can ensure that any repairs or replacements are covered by the manufacturer.
Frequently Asked Questions
How do I gather the necessary materials for hooking wires on a Razor electric dirt bike with 3 12 volt batteries to make 32 volts?
To source the necessary materials for wiring a razor electric dirt bike with 3 12-volt batteries to make 32 volts, I will need to gather items such as appropriate gauge wire, wire connectors, a battery charger, and a voltmeter. These materials will be essential for proper wiring techniques.
What are some common troubleshooting issues that may arise when hooking wires on a Razor electric dirt bike with 3 12 volt batteries?
When hooking wires on a razor electric dirt bike with 3 12 volt batteries, it’s important to be aware of potential troubleshooting issues. To avoid problems, follow these troubleshooting tips and safety precautions.
Are there any specific maintenance tips I should follow to ensure the longevity of the wired setup on my Razor electric dirt bike?
To ensure the longevity of the wired setup on my razor electric dirt bike, I recommend regular maintenance tips such as inspecting the wires for any damage, cleaning the connections, and keeping the batteries fully charged. These longevity tips will help maintain optimal performance.
When should I seek professional help for hooking wires on a Razor electric dirt bike with 3 12 volt batteries?
When it comes to seeking professional help for hooking wires on a Razor electric dirt bike with 3 12-volt batteries, it is important to prioritize safety precautions. Expert assistance ensures proper installation and reduces the risk of electrical hazards.
Can you provide some additional safety precautions that should be taken when working with electrical components on a Razor electric dirt bike?
When working with electrical components on a razor electric dirt bike, it is crucial to follow proper electrical safety precautions. This includes ensuring proper wire insulation to prevent any potential short circuits or electrical shocks.
Conclusion
In conclusion, you can successfully hook wires on a Razor electric dirt bike with 3 12-volt batteries to make 32 volts by following the steps outlined in this article.
With this modification, you’ll experience enhanced performance and an adrenaline rush like never before.
However, it’s important to remember that proper maintenance is crucial for the longevity of your bike.
If you encounter any issues, don’t hesitate to seek professional help.
Now, get ready to embark on thrilling adventures with your electric dirt bike!