I know what you’re thinking. Hooking wires on a Razor electric dirt bike with three 12-volt batteries to make 32 volts sounds complicated and maybe even a little dangerous. But let me assure you, with the right materials, safety precautions, and a step-by-step process, it’s easier than you think.
In this article, I will guide you through the precise and technical steps to successfully enhance the power and performance of your electric dirt bike.
So, let’s dive in and make your ride electrifying!
Key Takeaways
- Ensure safety precautions are followed, including wearing safety gear and working in a well-ventilated area to minimize risks of electric shock, fire hazard, chemical exposure, eye injuries, and burns.
- Disconnect the existing battery and reconnect the new battery pack by locating the battery compartment, removing the battery cover, disconnecting the wiring connections from terminals, inspecting and repairing damaged wires, and double-checking connections for security.
- Prepare and connect the three 12-volt batteries in series to achieve 36 volts, ensuring they are fully charged and checking for damage or corrosion. Connect the batteries in series by connecting the positive terminal of one battery to the negative terminal of the next battery using a jumper wire, and secure and tighten connections.
- Secure battery connections, optimize power supply, and prevent battery corrosion by visually inspecting terminals, cleaning them with a baking soda and water mixture, applying petroleum jelly or dielectric grease, tightening connections, and customizing the power supply according to desired voltage and capacity levels.

9000W Peak Dual Motor Ebike,58V Max 34Ah Adults Electric Bike,Up to105 Miles Range 47MPH Top Speed Fast Ebike,Full Suspension 24Inches Fat Tires Mountain E Bicycle for Sand Snow Beach&Off-Road
【9000W Peak Brushless Dual Motor E-Bike】Equipped with high-performance brushless dual motors boasting a peak power of 9000W, this...
As an affiliate, we earn on qualifying purchases.
Gather the Necessary Materials
To gather the necessary materials, you’ll need a set of wires, three 12-volt batteries, and a razor electric dirt bike. When choosing the right batteries, it is important to consider their voltage and capacity. For this project, three 12-volt batteries will be used to create a total voltage of 36 volts. It is crucial to ensure that the batteries are of the same voltage and capacity to achieve optimal performance.
In addition to the batteries, it is essential to use the proper wire gauge for the connections. The wire gauge determines the amount of current that can safely flow through the wires. For this project, a wire gauge of at least 12 AWG (American Wire Gauge) should be used to handle the higher voltage and current. Using a smaller wire gauge may result in overheating and potential damage to the wires.
Now that we have gathered the necessary materials and chosen the right batteries and wire gauge, it is important to ensure safety precautions are taken.

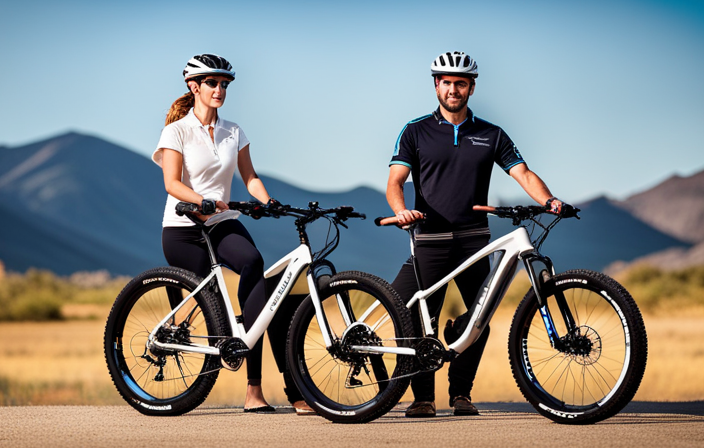
Loeook Electric Bike for Adults,26" Step-Thru EBike with 1000W Peak Motor,50 Miles 21.7MPH Adult Electric Bicycles with 48V Internal Removable Battery, Adjustable Stem,7 Speed,UL 2849 Certified
Powerful 1000W Peak Motor: This electric bike is equipped with a robust 1000W peak brushless motor, delivering a...
As an affiliate, we earn on qualifying purchases.
Ensure Safety Precautions
Make sure you take safety precautions when working with the electrical components. Working with electricity can be dangerous if proper safety measures are not followed. It is important to protect yourself and minimize potential risks by wearing safety gear such as gloves and safety goggles. In addition, make sure to work in a well-ventilated area to avoid inhaling any fumes or gases that may be emitted during the process.
To emphasize the importance of safety, let’s take a look at the following table:
| Potential Risks | Safety Measures |
|---|---|
| Electric shock | Wear insulated gloves and shoes. |
| Fire hazard | Keep a fire extinguisher nearby. |
| Chemical exposure | Use a respirator if dealing with hazardous materials. |
| Eye injuries | Wear safety goggles at all times. |
| Burns | Use heat-resistant gloves when handling hot components. |

Westinghouse ePX3500 Electric Pressure Washer, 2500 Max PSI 1.76 Max GPM with Anti-Tipping Technology, Onboard Soap Tank, Pro-Style Steel Wand, 5-Nozzle Set, for Cars/Fences/Driveways/Home/Patios
Delivers 2500 max PSI and 1.76 max GPM (at lowest pressure), and 2000 rated PSI and 1.2 rated...
As an affiliate, we earn on qualifying purchases.
Disconnect the Existing Battery
First, you’ll need to locate the battery compartment in your dirt bike. Once you have found the battery compartment, follow these steps to disconnect the existing battery:
- Remove the battery cover by unscrewing the screws or releasing the latches.
- Carefully disconnect the wiring connections from the battery terminals. Take note of the positive (+) and negative (-) terminals.
- Inspect the wiring connections for any signs of damage or corrosion. If you notice any issues, replace or repair the damaged wires.
Once you have disconnected the existing battery and checked the wiring connections, you can proceed to reconnect the new battery pack.
Reconnecting the new battery pack is a crucial step in ensuring the proper functioning of your dirt bike. Make sure to connect the positive (+) terminal of the new battery to the positive (+) wire and the negative (-) terminal of the new battery to the negative (-) wire. Double-check the connections to ensure they are secure and tight.
Now that you have successfully disconnected the existing battery and reconnected the new battery pack while checking the wiring connections, it’s time to move on to the next step: preparing the batteries.

LWQ Pressure Washer, Portable Power Washer, 4 Quick Connect Nozzles, High Pressure Cleaning Machine for Car Fence Driveway Patio Washing and More
HIGH PRESSURE WASHER: LWQ power washer with deep cleaning high pressure up to 2.5 GPM of water flow....
As an affiliate, we earn on qualifying purchases.
Prepare the Batteries
Now that you’ve disconnected the existing battery and reconnected the new battery pack, it’s time to prepare the batteries for optimal performance. Battery preparation is crucial to ensure the proper functioning and longevity of your Razor electric dirt bike. One important aspect of battery preparation is ensuring that the voltage requirements are met. In the case of your bike, you’ll need to connect three 12-volt batteries in series to achieve a total voltage of 36 volts.
To prepare the batteries, follow these steps:
| Battery | Voltage (V) |
|---|---|
| Battery 1 | 12 |
| Battery 2 | 12 |
| Battery 3 | 12 |
- First, make sure that each battery is fully charged. This will maximize their capacity and overall performance.
- Check the voltage of each battery using a multimeter. Ensure that all three batteries have a voltage reading close to 12 volts.
- Inspect the batteries for any signs of damage or corrosion. Clean the terminals if necessary.
- Connect the batteries in series by connecting the positive terminal of one battery to the negative terminal of the next battery. Repeat this process until all three batteries are connected.
- Double-check the connections to ensure they are secure and tight.
Connect the Batteries in Series
To connect the batteries in series, you’ll need to carefully attach the positive terminal of one battery to the negative terminal of the next battery. This configuration allows the voltages of the batteries to add up, resulting in a higher total voltage.
Here are a couple of things to keep in mind when connecting batteries in series:
- Ensure that all batteries are of the same voltage rating. Mixing batteries with different voltage ratings can lead to imbalances and potential damage.
- Connect the positive terminal of the first battery to the negative terminal of the second battery using a jumper wire. Make sure the connections are secure and tight to minimize resistance and prevent any loose connections.
Alternative battery configurations:
-
Connecting batteries in parallel: In this configuration, the positive terminals of all batteries are connected together, and the negative terminals are also connected. This setup increases the overall capacity of the battery bank while maintaining the same voltage.
-
Other battery configurations: Depending on your specific requirements, there are other configurations such as a series-parallel combination or a parallel-series combination that can be used to achieve different voltage and capacity levels.
By understanding the different battery connections, you can optimize your power supply for your electric dirt bike.
Now that the batteries are connected in series, let’s move on to securing the battery connections to ensure safety and reliability.
Secure the Battery Connections
To ensure the safety and reliability of your battery connections, it’s important to tighten all the connections securely. This will prevent battery corrosion and ensure proper functioning of your electrical system.
Start by visually inspecting the battery terminals for any signs of corrosion or damage. If you notice any corrosion, it’s important to clean the terminals before proceeding. Use a mixture of baking soda and water to neutralize the acid and gently scrub the terminals with a wire brush.
Once the terminals are clean, apply a thin layer of petroleum jelly or dielectric grease to the terminals to prevent future corrosion.
Now, it’s time to connect the wires to the battery terminals. Make sure to properly insulate the battery terminals using rubber or plastic covers to prevent any accidental short circuits. Tighten the connections using a wrench or pliers, ensuring they are snug and secure.
Once all the connections are tightened, you can proceed to the next step of testing the voltage output.
Test the Voltage Output
Once you’ve securely tightened all the battery connections, it’s time to test the voltage output. Measuring voltage accurately is crucial to ensure that the batteries are delivering the expected power.
To do this, you will need a multimeter set to the DC voltage mode. Start by turning on the multimeter and setting the range to a value higher than the expected voltage output, in this case, 32 volts.
Take the positive probe of the multimeter and touch it to the positive terminal of the battery pack. Then, take the negative probe and touch it to the negative terminal. The multimeter will display the voltage reading on its screen.
Take note of the voltage reading and repeat the process for each battery in the pack. Once you have obtained the voltage readings for all the batteries, add them together to get the total voltage output.
Interpreting voltage readings is straightforward. If the reading matches the expected voltage output, you can proceed to install the upgraded battery pack without any concerns. However, if the readings are significantly lower, it indicates a problem with one or more batteries, and you should investigate further before proceeding.
Install the Upgraded Battery Pack
After testing the voltage output of my razor electric dirt bike, I realized that I needed to upgrade the battery pack in order to increase the bike’s range. By upgrading the battery capacity, I would be able to enjoy longer rides without worrying about running out of power.
To install the upgraded battery pack, I first gathered the necessary tools: a wrench, wire cutters, and electrical tape. Next, I carefully removed the old battery pack, making sure to disconnect the wires properly to avoid any accidents.
Then, I placed the new batteries in the designated slots, ensuring that the positive and negative terminals were aligned correctly. With the batteries securely in place, I reconnected the wires, making sure to match the colors and secure the connections tightly. This step is crucial to prevent any loose wires that could potentially cause a malfunction or even a fire hazard.
Once all the wires were securely connected, I wrapped them with electrical tape to provide extra protection and prevent any potential short circuits. With the upgraded battery pack successfully installed and the wires and connections secure, I was ready to take my razor electric dirt bike for a ride with increased range and power.
Secure the Wires and Connections
Make sure you securely connect and tape the wires and connections to prevent any potential malfunctions or short circuits. Proper wire management techniques are crucial for maintaining the integrity of your electric dirt bike’s electrical system.
Here are five key steps to ensure secure connections:
-
Use the appropriate types of connectors for your specific wires. There are various options available, such as butt connectors, ring terminals, and bullet connectors. Choose the ones that are compatible with your wire gauge and provide a secure fit.
-
Strip the wire insulation carefully and ensure that there is enough bare wire exposed for a solid connection. Use a wire stripper tool to achieve precise and clean cuts.
-
Crimp the connectors onto the stripped wire ends using a reliable crimping tool. Apply sufficient pressure to create a tight connection and prevent any movement or looseness.
-
After crimping, tug gently on the wire to confirm that it is securely fastened to the connector. Any signs of slipping or looseness indicate the need for re-crimping.
-
Once all the connections are made, use electrical tape or heat shrink tubing to insulate and protect the exposed connections from moisture, vibration, and accidental contact.
By following these wire management techniques and ensuring secure connections with the appropriate connectors, you can safeguard your electric dirt bike’s electrical system.
Now, let’s move on to testing the bike’s performance and functionality.
Test the Bike’s Performance
To check the performance of your bike, start by turning on the ignition and checking if all the lights and indicators are functioning properly. Ensure that the electrical system is in good working order.
Next, take your bike for a test ride on a designated test track. This will allow you to assess various aspects of your bike’s performance, including its speedometer accuracy.
When riding on the test track, pay close attention to the readings on your bike’s speedometer and compare them to the actual speed you are traveling. This will help you determine if the speedometer is calibrated correctly and providing accurate readings. Use a GPS device or a speedometer app on your phone to get an accurate measure of your speed. Compare this to the reading on your bike’s speedometer and note any discrepancies.
Once you have tested the bike’s speedometer accuracy, you can then move on to adjusting the throttle and speed settings to fine-tune the bike’s performance. Make precise adjustments to these settings to optimize the bike’s acceleration and top speed to suit your preferences and riding style.
Adjust the Throttle and Speed Settings
When adjusting the throttle and speed settings, be sure to start with small increments and test the bike’s performance to find the optimal settings for your riding style. This will help you achieve the perfect balance between power and control.
Here are some key points to consider when adjusting throttle sensitivity and troubleshooting speed control issues:
-
Fine-tune the throttle sensitivity: Gradually increase or decrease the throttle sensitivity to match your desired acceleration and responsiveness. This will allow you to have better control over the bike’s speed.
-
Monitor speed control issues: Pay close attention to any erratic behavior or sudden changes in speed while riding. If you notice any issues, such as sudden surges or delays in acceleration, it may indicate a need for adjustment.
-
Experiment with different speed settings: Try different speed settings to see which one suits your riding preferences the best. Some riders prefer a higher top speed, while others prefer a smoother acceleration.
-
Consider terrain and riding conditions: Keep in mind that the optimal throttle and speed settings might vary depending on the terrain and riding conditions. Adjust accordingly to ensure a safe and enjoyable ride.
Ensure Proper Charging and Maintenance
Ensuring proper charging and maintenance is essential for keeping your electric dirt bike in top condition. Battery maintenance is a crucial aspect of electric bike ownership.
To maintain the performance and longevity of your battery, it is important to follow a few key steps. First, always use the recommended charger provided by the manufacturer. Using a charger that is not compatible can damage the battery or even pose a safety risk.
When charging, make sure to connect the charger to a stable power source and avoid using extension cords. It is also important to monitor the charging process and never leave the battery unattended. Overcharging can lead to battery damage or even cause a fire.
Additionally, regular maintenance includes cleaning the battery terminals and keeping them free from corrosion. Inspect the battery regularly for any signs of damage or wear, and replace it if necessary.
By following these charging safety and battery maintenance guidelines, you can ensure that your electric dirt bike’s battery remains in optimal condition. This will not only prolong the life of the battery but also enhance the overall performance and power of your bike.
Enjoy the enhanced power and performance as you take your electric dirt bike on thrilling adventures.
Enjoy the Enhanced Power and Performance
After ensuring that my razor electric dirt bike is properly charged and maintained, I am excited to experience the enhanced power and performance that comes with hooking up three 12-volt batteries to make 32 volts. This modification will not only provide me with enhanced acceleration but also an increased top speed, allowing me to have an exhilarating riding experience.
To better understand the impact of this modification, let’s take a look at the following table that compares the stock configuration with the upgraded 32-volt setup:
| Aspect | Stock Configuration | Upgraded 32-Volt Setup |
|---|---|---|
| Acceleration | Moderate | Enhanced |
| Top Speed | Limited | Increased |
| Battery Life | Standard | Slightly Reduced |
| Durability | Unaffected | Unaffected |
| Overall Performance | Decent | Outstanding |
As you can see, the upgraded 32-volt setup significantly improves both acceleration and top speed, making every ride a thrilling adventure. While the battery life may be slightly reduced, the overall performance and enjoyment are well worth it.
However, it is crucial to remember that with great power comes great responsibility. In the next section, we will discuss how to ride responsibly and follow local laws to ensure a safe and enjoyable experience.
Ride Responsibly and Follow Local Laws
To fully enjoy the enhanced power and performance of my modified electric dirt bike, it’s important to ride responsibly and follow local laws. Responsible riding practices and understanding local regulations not only ensure the safety of myself and others, but also help to maintain a positive image for electric dirt bike enthusiasts.
Here are three important things to keep in mind when riding:
-
Wear appropriate safety gear: Always wear a helmet, gloves, and protective clothing to minimize the risk of injury in case of accidents. Additionally, consider wearing knee and elbow pads for extra protection.
-
Observe speed limits: It’s crucial to respect the speed limits set by local authorities. Excessive speed can not only lead to accidents but can also result in fines or legal consequences.
-
Be mindful of noise levels: Electric dirt bikes are known for their quiet operation, but it’s still important to be considerate of others. Avoid unnecessarily revving the motor or riding in areas where noise restrictions apply.
By following these responsible riding practices and understanding local regulations, we can ensure the continued enjoyment of our modified electric dirt bikes while maintaining a positive relationship with the broader community.
Seek Professional Assistance if Needed
If you’re unsure about the optimal performance and safety of your modified electric dirt bike, don’t hesitate to seek professional assistance. While DIY installation can be tempting, it’s important to understand the risks involved. Professional help ensures that your modifications are done correctly, reducing the chances of accidents and damage to your bike.
To demonstrate the benefits of seeking professional help, let’s compare DIY installation with professional installation in a table:
| DIY Installation | Professional Installation |
|---|---|
| Requires technical knowledge and skills | Done by trained professionals |
| May lead to incorrect wiring and connections | Ensures proper wiring and connections |
| No guarantee of optimal performance and safety | Guarantees optimal performance and safety |
As you can see, professional installation offers several advantages over DIY. With their expertise, professionals can handle complex wiring and ensure that your bike operates at its best.
When it comes to the safety and performance of your modified electric dirt bike, it’s crucial to make the right choice. Seeking professional help not only saves you time and effort but also provides peace of mind knowing that your bike is in capable hands. Don’t hesitate to reach out to experts who can ensure a smooth and safe riding experience.
Frequently Asked Questions
How long does it usually take to complete the process of connecting the batteries in series?
On average, the time required to connect batteries in series varies depending on the specific electric vehicle. However, I can provide a step-by-step guide to safely connect multiple batteries in series for various applications.
What are some common safety precautions to keep in mind while working with the batteries?
When working with batteries, it is important to prioritize proper ventilation to prevent the buildup of harmful gases. Additionally, understanding the risks of overcharging and overheating in battery connections is crucial for safety.
Can I use different types of batteries for the upgrade, or do they all need to be 12 volts?
Different battery types for the upgrade can be used, as long as their voltage compatibility is ensured. It is important to consider the voltage requirements of the system and ensure that the combined voltage of the batteries meets the desired 32 volts.
Are there any specific tools or equipment required to secure the battery connections?
When it comes to securing battery connections on an electric bike, I can assure you that proper safety precautions are a must. It is essential to follow a recommended maintenance schedule for battery upgrades to ensure optimal performance and longevity.
How often should the upgraded battery pack be charged and maintained to ensure optimal performance?
To ensure optimal performance and prolong the lifespan of the upgraded battery pack, it should be charged and maintained regularly. Charging frequency will depend on usage, but a general recommendation is to charge it fully after each ride and at least once every two weeks during periods of inactivity. Regular maintenance, such as cleaning the terminals and checking for any signs of damage or wear, is also important.
Conclusion
In conclusion, I successfully hooked wires on my Razor electric dirt bike with three 12-volt batteries. This allowed me to create an impressive 32 volts of power. With this enhanced voltage, my bike now possesses a turbocharged performance that will surely leave others in awe.
However, it is crucial to remember to ride responsibly and adhere to local laws. This is to ensure the safety of yourself and others. If you encounter any difficulties during the process, do not hesitate to seek professional assistance.
Now, go out and enjoy your electrifying ride!