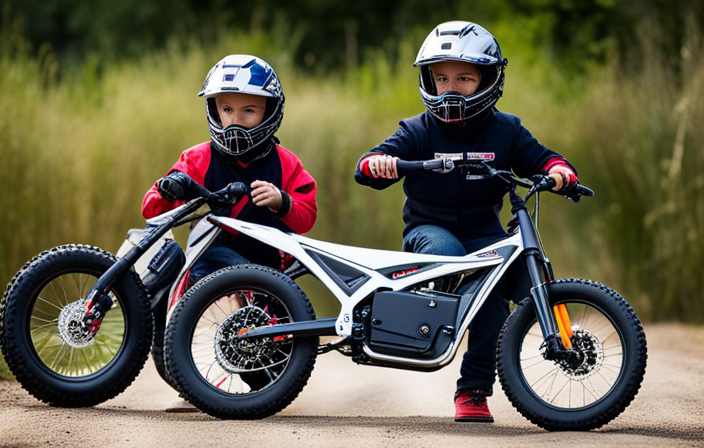
Did you know that increasing the voltage of your razor electric dirt bike can give it a significant boost in power? By hooking up three 12-volt batteries in series, you can create a 36-volt system that will take your riding experience to the next level.
In this article, I will guide you through the step-by-step process of connecting the wires on your bike to achieve this voltage upgrade. So grab your tools and let’s get started on maximizing the performance of your electric dirt bike.
Key Takeaways
- The modification of hooking wires on a razor electric dirt bike with 3 12-volt batteries to make 36 volts offers benefits such as increased speed, faster acceleration, extended battery life, and longer rides without recharging.
- Safety precautions are of utmost importance when performing this modification, including wearing protective gear, using appropriate footwear, maintaining balance and control, and avoiding accidents or falls.
- Controlling speed and braking effectively is crucial, with practices such as controlling speed, preventing sudden stops or skids, maintaining control over rough terrain, focusing on balance, and avoiding accidents or falls.
- Safety should always be prioritized over enjoyment, and measures should be taken to ensure a safe and enjoyable ride while following safety precautions at all times. Additionally, the modification allows for increased power and performance, including significantly increased speed, thrilling rides with increased acceleration, running the motor at a faster rate, enjoying the benefits of a 36-volt system, and riding for longer periods without worrying about power.

WEIZE 700C Hybrid Bike for Adults, 14 Speed Road Bike, City Commuter Bicycle with Caliper Brakes, High-Carbon Steel Racing Adult Bike, Urban Adult Bicycle for Men and Women, White
Caliper brake system: The hybrid bike adopts a dual caliper brake design, making daily maintenance more convenient and...
As an affiliate, we earn on qualifying purchases.
Gather the Necessary Tools and Materials
You’ll need to gather the necessary tools and materials for the job. Before starting, it’s important to ensure proper connection of the wires to avoid any mishaps.
First, make sure to have a wire cutter/stripper, electrical tape, and a soldering iron on hand. These tools will help you properly strip and connect the wires. Additionally, choose the right gauge of wire for the job. For a 36-volt setup, it’s recommended to use a wire gauge that can handle the increased voltage and current. Thicker wires, such as 10 or 12 gauge, are typically suitable.
Remember to use wire connectors or soldering to secure the connections properly.
Now that you have gathered the necessary tools and materials, it’s time to move on to disconnecting the existing battery setup.

AVASTA 700C Road Adult Step-Over Hybrid Bike Bicycle for Men Woman Male Female,Lightweight Aluminum Alloy Frame with 21-Speed Gearing for City Commuting,Dual Disc Brakes,19 inch Frame,Chameleon Grey
🚴♂️【Durable Aluminum Alloy Frame】This lightweight yet strong frame is built to last, offering a perfect balance of durability...
As an affiliate, we earn on qualifying purchases.
Disconnect the Existing Battery Setup
To disconnect the current battery setup, first locate the existing connections. The existing battery connections can usually be found near the rear of the dirt bike, underneath the seat or near the motor. Once located, follow these steps:
- Carefully disconnect the negative wire from the battery terminal by loosening the nut or screw holding it in place.
- Repeat the same process for the positive wire, ensuring that both wires are completely disconnected.
- Inspect the wires for any signs of damage or wear. Replace any damaged wires to ensure proper insulation.
By disconnecting the existing battery setup, we can now move on to reconnecting the new battery configuration. It is crucial to ensure the proper insulation of wires during this process. Proper insulation will prevent any short circuits or other electrical issues.
Now, let’s move on to the next step of connecting the positive terminals of the batteries.

VEVOR Hybrid Bike, Lightweight Aluminum Frame Bike, 700c Wheel Men Women Hybrid Bicycle, Step-Over Adult Urban City Commuter Bikes, with 24-Speed Shimano Drivetrain, Alloy Adjustable Stem, Dual Brakes
Hybrid Bike: The bicycle is made with a lightweight aluminum alloy frame, offering durability and a weight capacity...
As an affiliate, we earn on qualifying purchases.
Connect the Positive Terminals of the Batteries
Now, it’s time to connect the positive terminals of the batteries together. This step is crucial for extending the battery life and optimizing the performance of your electric dirt bike.
Start by identifying the positive terminals on each battery. These terminals are usually marked with a plus sign (+) or the letters ‘POS.’ Once you have located the positive terminals, connect them using a series connection.
To do this, take the positive wire from the first battery and connect it to the positive terminal of the second battery. Then, take the positive wire from the second battery and connect it to the positive terminal of the third battery.
By connecting the positive terminals in this way, you are effectively increasing the voltage output to 36 volts. This will provide the necessary power to enhance the performance of your electric dirt bike.
In the next section, we will discuss how to connect the negative terminals of the batteries to complete the circuit.

XDSBIKE Cross200 21 Speed Hybrid Bike Commuter City Bike, for Men and Women, 700C Wheel Lightweight Aluminum Alloy Frame (Matte Black, Frame Size 15")
Design: Hybrid design combines the best features of road and mountain bikes, alllowing you to navigate efficiently all...
As an affiliate, we earn on qualifying purchases.
Connect the Negative Terminals of the Batteries
First, locate the negative terminals on each battery and securely connect them to complete the circuit. To properly connect the negative terminals of the batteries on a razor electric dirt bike, follow these steps:
| Battery 1 | Battery 2 | Battery 3 |
|---|---|---|
| Negative | Negative | Negative |
- Identify the negative terminal on each battery. It is usually marked with a "-" symbol.
- Use a wrench or a pair of pliers to loosen the nut on each negative terminal.
- Connect the negative terminal of Battery 1 to the negative terminal of Battery 2, ensuring a tight connection.
- Then, connect the negative terminal of Battery 2 to the negative terminal of Battery 3 using the same method.
- Finally, tighten the nuts on all the negative terminals to secure the connections.
By following these steps, you can ensure a secure and reliable connection of the negative terminals on your razor electric dirt bike. Now, let’s double check the wiring connections to ensure everything is properly set up.
Double Check the Wiring Connections
After connecting the negative terminals of the batteries, it is important to double check the wiring connections on your razor electric dirt bike. This step ensures that everything is properly connected and reduces the risk of any loose connections.
Start by visually inspecting all the wires and connectors, making sure that they are securely fastened. Check for any loose connections or signs of wear and tear. Additionally, ensure all wires are properly insulated to prevent any short circuits or electrical hazards.
Inspect each connection point carefully, ensuring that the wires are tightly secured and there are no exposed conductors.
Once you have thoroughly checked the wiring connections, you can proceed to the next step of securing the wiring with zip ties or electrical tape, ensuring everything remains in place.
Secure the Wiring with Zip Ties or Electrical Tape
After double-checking the wiring connections on my Razor electric dirt bike, I moved on to securing the wiring to ensure it stays in place during rides.
There are a few alternative methods for securing the wiring, but the two most common options are zip ties and electrical tape.
Zip ties offer a secure and tight hold, preventing any movement or potential damage to the wires. However, they can be difficult to remove if any adjustments need to be made.
On the other hand, electrical tape is flexible and easy to work with, allowing for adjustments if needed. However, it may not provide as secure of a hold as zip ties.
Personally, I opted for a combination of both, using zip ties for the main sections and electrical tape for any potential areas of movement.
With the wiring securely in place, it’s time to move on to testing the voltage output of the system.
Test the Voltage Output of the System
To test the voltage output of your system, you’ll need a multimeter to measure the electrical potential difference. This is an essential step in troubleshooting voltage issues in an electric dirt bike.
Begin by ensuring that the multimeter is set to the DC voltage range and connect the probes to the positive and negative terminals of the battery. The multimeter will display the voltage output, which should read 36 volts for your three 12 volt batteries. If the reading is lower, there may be an issue with the wiring connections or the batteries themselves.
To increase the voltage output of other electric vehicles, you can parallel or series connect additional batteries, depending on the desired voltage.
Now that you have tested the voltage output, let’s move on to reassembling the battery compartment.
Reassemble the Battery Compartment
Now that the voltage output has been tested, it’s time to put the battery compartment back together.
First, ensure that all the wires are neatly organized and secured in their proper places.
Then, carefully place the batteries back into the compartment, making sure they are aligned correctly. Use the provided battery straps to securely fasten the batteries in place.
Once the batteries are in position, it’s important to install a new battery charger to ensure proper charging of the 36-volt system. Connect the charger to the batteries following the manufacturer’s instructions, double-checking that all connections are secure. This step is crucial for maintaining the longevity and performance of your electric dirt bike.
Additionally, it’s wise to troubleshoot common battery issues such as loose connections or corroded terminals. By addressing these problems, you can avoid potential future complications.
Now, with the battery compartment reassembled and all necessary connections made, you can enjoy the increased power of your electric dirt bike without any worries.
Enjoy the Increased Power of Your Electric Dirt Bike
With the battery compartment reassembled and all connections secure, you can now enjoy the increased power of your electric dirt bike worry-free. By hooking up the three 12-volt batteries to make a 36-volt system, you have significantly increased the speed and performance of your bike. The higher voltage allows the motor to run at a faster rate, giving you a thrilling ride with increased acceleration. Additionally, the extended battery life ensures that you can ride for longer periods without worrying about running out of power. To better understand the advantages of this modification, refer to the table below:
| Advantage | Description |
|---|---|
| Increased Speed | Experience faster acceleration |
| Extended Battery Life | Enjoy longer rides without recharging |
Now that your electric dirt bike is more powerful, it’s important to follow safety precautions while riding to ensure a safe and enjoyable experience.
Follow Safety Precautions While Riding
Ensure your safety by following the necessary precautions while riding your electric dirt bike. One of the most important precautions is wearing protective gear. Always wear a helmet, as well as knee and elbow pads, to protect yourself in case of a fall or accident. It is also crucial to wear appropriate footwear that provides ankle support and grip on the bike’s pedals.
Maintaining proper balance and control is essential when riding an electric dirt bike. Start by positioning yourself in a comfortable and balanced stance on the bike. Keep your body centered and your weight distributed evenly. Use your legs to absorb impacts and maintain stability over rough terrain. Additionally, practice controlling your speed and braking to prevent sudden stops or skids.
By following these safety precautions and focusing on maintaining balance and control, you can enjoy a safe and exhilarating ride on your electric dirt bike. Remember, safety should always be a top priority.
Frequently Asked Questions
How long does it take to gather the necessary tools and materials?
To efficiently gather the necessary tools and materials, potential challenges may include locating specific components or finding them at a reasonable price. Tips include researching online suppliers, visiting local hardware stores, and consulting with experts for guidance in acquiring the needed items.
Can I use different voltage batteries instead of three 12 volt batteries?
Using different voltage batteries for an electric dirt bike can be done, but it has pros and cons. Higher voltage batteries can increase speed but may overload the motor. Lower voltage batteries may not provide enough power.
Is it necessary to disconnect the existing battery setup before connecting the new batteries?
It is important to disconnect the existing battery setup before connecting new batteries to ensure proper wiring connections and optimal performance. Failure to do so can lead to potential risks and complications.
What should I do if the voltage output of the system is not 36 volts?
If the voltage output of the system is not 36 volts, I would first troubleshoot the wiring connections, ensuring they are secure and properly connected. If the issue persists, I would explore alternative battery configurations to achieve the desired voltage.
Are there any specific safety precautions I should follow while riding the electric dirt bike with the new battery setup?
When riding an electric dirt bike, it is crucial to prioritize safety by wearing protective gear. Additionally, regularly inspecting and maintaining the battery setup ensures a safe ride.
Conclusion
In conclusion, successfully hooking wires on a Razor electric dirt bike with 3 12-volt batteries to make 36 volts is a rewarding experience. By following the steps outlined in this article, you can enjoy the increased power and performance of your bike.
Just like a rocket launching into space, the added voltage will propel you forward with a surge of energy. So, gear up, hold on tight, and let your electric dirt bike take you on an exhilarating ride like never before.
Remember to always prioritize safety while enjoying your newfound power.