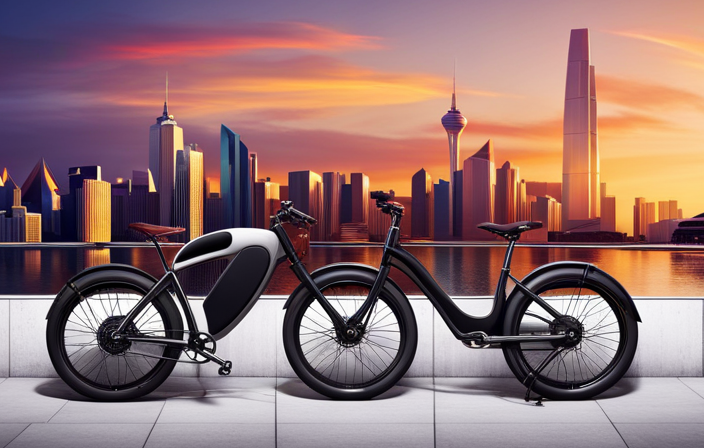
Fed up with the hassle of trying to pump up your bike tire with a presta valve? Worry no more, because we’ve put together an easy-to-follow guide on effortlessly inflating your tire.
Before you begin, gather your tools – a floor pump with a presta valve head, a tire pressure gauge, and a valve adapter if your pump does not have a presta valve head.
Once you have your tools ready, it’s time to prepare your valve for inflation. Follow these simple steps and you’ll be back on the road in no time.
Key Takeaways
- Proper pump selection and pump head compatibility with bike valve are crucial for successful inflation.
- Double-check pump head and valve connection to troubleshoot air leaks, and ensure proper positioning of pump head to avoid damaging valve stem.
- Check pressure frequently to avoid overinflation, and use correct type of pump for valve.
- Maintaining correct tire pressure is important for bike handling, preventing flats, and improving speed and efficiency.
Gather Your Tools
Gather your tools.
You’ll need to grab a few tools before you can start inflating your bicycle tire with a presta valve. First and foremost, you’ll need a bicycle pump that’s compatible with a presta valve. Most pumps will have the option to switch between presta and schrader valves, but it’s important to check before purchasing or borrowing one.
If you don’t have a pump with a presta valve option, some bike shops may offer a pump rental service. In addition to the appropriate pump, you may want to consider alternative valve options, such as valve adapters or valve extenders.
Valve adapters allow you to use a pump with a schrader valve on a presta valve, while valve extenders provide additional length to the valve stem for easier access. However, it’s important to note that these options may not be as reliable as using a pump with a presta valve option.
Once you have the necessary tools, it’s time to prepare your valve.
Prepare Your Valve
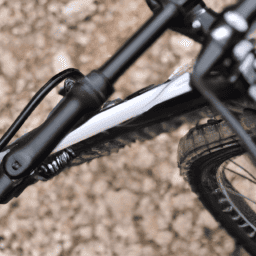
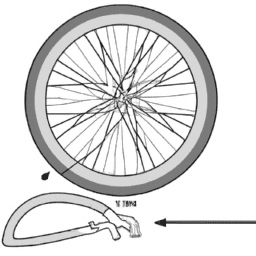
First, check if your pump head is compatible with the valve on your bike. If you have a presta valve, you’ll need a pump head that fits this type of valve. If you’re unsure, look at the valve – it should have a long, thin stem with a threaded top.
Once you have the correct pump head, you can start preparing your valve. To prepare your valve, you may need to remove the valve core. This is a small component inside the valve that can be unscrewed using a valve core removal tool.
Once the core is removed, you can attach your pump to the valve stem. Be sure to check the length of the valve stem – if it’s too short, you may need to use a valve extender to ensure a proper seal.
With your valve prepared and pump attached, you can move on to the next step of inflating your tire.
Attach Your Pump
Now that you’ve prepared your valve, it’s time to attach your pump.
First, check your pump head to make sure it’s compatible with your valve type.
Next, attach the pump head to the valve by aligning the head with the valve stem and pressing it firmly onto the valve.
Finally, secure the pump head onto the valve by tightening any clamps or levers, ensuring a tight seal.
It’s important to follow these steps carefully to ensure a successful inflation.
Check Your Pump Head
Just like a key that needs to fit perfectly into a lock, make sure your pump head matches the valve on your presta tire for a successful inflation. Proper pump selection is crucial when it comes to attaching the pump head to the valve. Here are some tips to ensure a proper fit:
- Look for a pump head with a small diameter opening that can fit snugly around the valve stem.
- Check that your pump head has a locking lever or a screw-on mechanism to secure it in place on the valve.
- If you’re using a pump head with a locking lever, make sure it’s fully engaged before pumping.
- Troubleshoot common issues such as air leaks by double-checking the pump head and valve connection.
With the proper pump head selected and securely attached to the valve, you’re ready to move onto the next step of inflating your presta tire. Attach the pump head to the valve and get ready to pump!
Attach the Pump Head to the Valve
To properly attach the pump head, you’ll need to find the right fit and secure it in place with a locking lever or screw-on mechanism. First, ensure that the pump head is compatible with your Presta valve. The pump head should ideally have a rubber gasket that fits snugly around the valve stem to prevent air from escaping during inflation.
Proper positioning of the pump head is also crucial to avoid damaging the valve stem. Align the pump head with the valve stem and press it down firmly onto the valve. Make sure that the pump head is straight and perpendicular to the valve stem to prevent any bending or warping. Once the pump head is securely attached, you can proceed to the next step of inflating your tire.
| Positioning the Pump Head | Avoiding Damage |
|---|---|
| Align pump head with valve stem | Prevent any bending or warping |
| Press down firmly onto valve | Ensure pump head is straight and perpendicular to valve stem |
| Check for a snug fit |
Now that you know how to properly attach the pump head, the next step is to secure it in place.
Secure the Pump Head
Once you’ve found the right fit for your pump head and attached it securely, the next step is to lock it in place to ensure a steady flow of air during inflation. This is important because without a secure connection, air can escape and cause frustration and wasted time.
To secure the pump head, follow these steps:
- Push the lever or flip the switch to the ‘lock’ position.
- Tighten the connection by turning the pump head clockwise.
- Make sure the connection is snug by gently tugging on the pump head.
It’s also important to note that lubrication can make the connection smoother and prevent damage to the valve. Apply a small amount of silicone grease or oil to the valve threads before attaching the pump head. It’s also helpful to have different pump head options on hand, as some pumps may not fit all valve types.
With a properly secured pump head, you can move on to the next step of inflating your tire.
To inflate your tire, pump air into the tire by using your body weight to push down on the pump handle. Keep an eye on the tire’s pressure gauge and continue pumping until you’ve reached the desired pressure. Remember to periodically check the connection between the pump head and valve to make sure it remains secure.
Inflate Your Tire
Now that you’ve attached your pump to the presta valve, it’s time to inflate your tire.
Before you begin, check your pressure gauge to make sure you’re inflating to the correct pressure.
Begin pumping and keep an eye on the pressure gauge, checking frequently to ensure you don’t overinflate your tire.
Remember to use smooth, steady strokes when pumping.
Check Your Pressure Gauge
Check your pressure gauge before attaching the pump to the valve stem, so you know the current tire pressure and how much more air you need to add. It’s important to have an accurate pressure reading because overinflated tires can lead to a harsher ride and potential damage to the tire, while underinflated tires can cause poor handling and increase the risk of a flat tire.
Before inflating your tire, make sure you understand the valve type on your bike. Presta valves are commonly found on road bikes and have a thinner stem that requires a different pump head than a Schrader valve, which is more common on mountain bikes.
To check the tire pressure, unscrew the valve cap and place the pressure gauge onto the valve stem. Make sure the gauge is seated tightly onto the valve to prevent air from leaking out. The gauge should give you a reading of the current tire pressure in PSI (pounds per square inch).
Once you have this reading, you can attach the pump to the valve and begin pumping to reach the desired pressure. With the pressure gauge, you can monitor the pressure as you pump and stop when you reach the desired pressure.
Begin Pumping
Attach the pump to the stem and start pumping until the pressure gauge shows the desired PSI. To ensure proper inflation, maintain proper posture and use the correct pumping technique.
Here are some tips to help you:
- Stand up straight and keep your arms straight as you pump. This’ll help you generate more force and make it easier to pump.
- Use a smooth, steady pumping motion. Don’t try to pump too quickly or forcefully, as this can cause the tire to overinflate or even burst.
- Make sure you’re using the correct type of pump for your valve. If you’re unsure, check the manufacturer’s instructions or ask a bike shop for advice.
Remember to check your pressure frequently as you pump to ensure that you’re not overinflating the tire. Overinflation can cause the tire to become too hard and increase the risk of a blowout.
Check Pressure Frequently
As you pump air into your bicycle tire with a Presta valve, it’s crucial to frequently check the pressure. The importance of maintenance and proper tire pressure cannot be overstated.
Maintaining the proper inflation level ensures that you have a smooth and efficient ride, and it also prevents potential risks such as a blowout or tire damage. Proper tire pressure benefits your biking experience in several ways.
Firstly, it ensures that your bike handles well and is easy to maneuver. Secondly, maintaining the correct tire pressure can prevent flats and extend the life of your tires. Lastly, proper inflation can improve your bike’s speed and efficiency, making it easier to ride for longer periods.
Remember to check the pressure frequently as you pump, and ensure that it’s at the right level before you finish up.
Finish Up
Now you’re ready to pump up your tire using the presta valve, so let’s get rolling! Follow these four simple steps to successfully inflate your bicycle tire:
-
Place the pump head onto the valve: Make sure the pump head is securely attached to the valve. If the pump head isn’t attached properly, air may leak out, and you won’t be able to inflate the tire.
-
Open the valve: Unscrew the top cap of the valve, and press down on the valve to release any air that may be trapped inside. This will also help you to check whether the valve is working correctly or not.
-
Start pumping: Begin pumping the tire with a slow and steady motion. Keep an eye on the pressure gauge to ensure you’re inflating the tire to the correct pressure. Remember, overinflation can be just as dangerous as underinflation, so be careful not to exceed the recommended pressure.
-
Close the valve: Once the tire is fully inflated, remove the pump head and screw the top cap of the valve back on. Check the pressure one last time, and you’re good to go!
By following these steps, you can avoid common mistakes and troubleshoot any issues that may arise during the inflation process. Don’t forget to check the pressure frequently to ensure your tires are always properly inflated and ready for your next ride.
Frequently Asked Questions
What should I do if my pump doesn’t fit the valve?
If your pump doesn’t fit the valve, don’t worry. There are alternative solutions available to inflate your bicycle tire. You can use a hand pump with a Presta valve adapter or a CO2 inflator with a Presta valve cartridge.
How often should I inflate my bicycle tire?
Do you want to avoid tire wear, punctures, and poor performance? Maintaining proper tire pressure is critical. Check tire pressure once a week, and adjust for temperature changes. Temperature affects tire pressure.
Can I inflate my bicycle tire with a car tire pump?
You can use a car tire pump to inflate your bicycle tire, but it requires an adapter. Pros of using an adapter include versatility. Cons include the need for an adapter and difficulty monitoring pressure. CO2 cartridges are another option for quick tire inflation.
What is the maximum PSI for a bicycle tire?
Maintaining proper tire pressure is crucial for safe and efficient cycling. Choosing the right tire pressure for your ride is key to preventing flats and optimizing performance. The maximum psi for a bicycle tire varies depending on the tire’s size and intended use.
How do I know if my tire is inflated enough?
To maintain proper tire pressure, check it regularly using your fingers or a pressure gauge. Squeeze the tire with your thumb and fingers to check its firmness. If it feels too soft, inflate it until it feels firm.
Conclusion
Congratulations! You’ve successfully inflated your bicycle tire with a Presta valve. By following the steps outlined in this guide, you were able to gather your tools, prepare your valve, attach your pump, and inflate your tire.
Remember to always keep your bicycle tires properly inflated for a smoother ride and better performance. As you continue to use your bicycle, it’s important to check your tire pressure regularly to ensure that it remains within the recommended range. This will not only prevent flats and punctures, but also improve your overall experience while riding.
By mastering the skill of inflating your bicycle tire with a Presta valve, you’ve taken one step closer to becoming a self-sufficient cyclist.
In conclusion, the process of inflating a bicycle tire with a Presta valve may seem daunting at first, but with a little practice and patience, it can become second nature. Remember, as with any task, practice makes perfect. So keep at it, and before you know it, you’ll be able to inflate your bicycle tire with ease and confidence. As the saying goes, "practice makes perfect."Don’t get discouraged if it takes a few tries, just keep practicing and you’ll get there.