Riding a bicycle feels like effortlessly moving through the wind, propelling yourself forward.
But what if you could take that experience to the next level? Imagine the thrill of effortlessly cruising up hills and conquering long distances with the help of an electric motor.
In this article, I will guide you through the process of installing an electric motor on your bike. From choosing the right kit to securing and maintaining the components, get ready to transform your bike into an electrifying ride.
Key Takeaways
- Assess bike size, weight, and frame compatibility with the motor.
- Evaluate riding style and terrain to determine motor power requirements.
- Research and compare different electric motor kits available in the market.
- Prioritize safety and gather necessary tools and equipment for the installation process.

ThinkRider X2Max Smart Bike Trainer Cycle Trainer Bicycle Trainer, Quiet Portable Design for Indoor Driving, Simulates 18% Slope, ANT + & BLE
Strong compatibility: Supports BLE and ANT + dual mode protocols and is compatible with mainstream cycling software such...
As an affiliate, we earn on qualifying purchases.
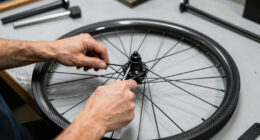
Assess Your Bike and Riding Needs
Assess your bike and riding needs before installing an electric motor on it.
Bike customization is an important consideration when deciding to add an electric motor. Take into account the size, weight, and frame of your bike to ensure compatibility with the motor.
Additionally, consider your riding style and terrain. If you frequently ride uphill or encounter rough terrain, a more powerful motor may be necessary. On the other hand, if you primarily ride on flat surfaces, a less powerful motor may suffice.
After assessing your bike, it is crucial to choose the right electric motor kit. Consider factors such as power output, battery life, and ease of installation.
By carefully selecting the appropriate motor kit, you can ensure a smooth and efficient electric motor installation on your bike.

Wahoo KICKR V6 Smart Indoor Trainer
WiFi Connectivity - Offering a robust 2.4 GHz Wi-Fi connection, the new KICKR transfers ride data to your...
As an affiliate, we earn on qualifying purchases.
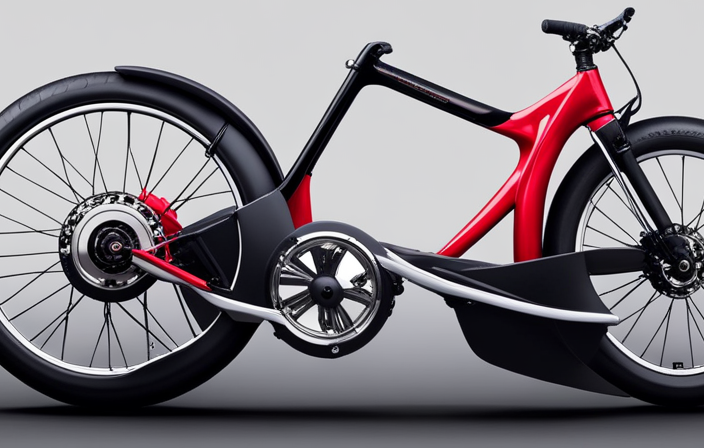
Choose the Right Electric Motor Kit
When researching electric motor kits for my bike, I need to consider key features such as motor power, battery capacity, and compatibility with my bike.
It’s important to find a kit that provides enough power to meet my riding needs, as well as a battery with sufficient capacity for long rides.
Additionally, ensuring compatibility with my specific bike model will guarantee a seamless installation process.
Research different electric motor kits available in the market
Check out the various electric motor kits you can find in the market for your bike. Here is a comprehensive electric motor comparison to help you make an informed decision.
-
Motor Power: Consider the power output of the electric motor kit. Higher power means more speed and better acceleration.
-
Battery Capacity: Look for a kit with a high-capacity battery. This ensures longer riding range and less frequent recharging.
-
Installation Process Details: Research the installation process for each kit. Some kits may require professional assistance, while others can be easily installed at home.
-
Compatibility with Your Bike: Ensure that the electric motor kit is compatible with your bike’s frame and components. Check for compatibility with the wheel size, brake system, and other specifications.
Now that you have compared the electric motor kits, you can move on to considering features such as motor power, battery capacity, and compatibility with your bike.
Consider features such as motor power, battery capacity, and compatibility with your bike
To make an informed decision, you should consider features like the power of the motor, the capacity of the battery, and whether it is compatible with your bike.
When it comes to motor selection, it is crucial to choose one that provides sufficient power to meet your riding needs. Higher wattage motors generally offer better acceleration and hill-climbing capabilities.
Additionally, battery capacity plays a significant role in determining the range of your electric bike. Opt for a battery with a higher amp-hour rating if you plan on riding longer distances.
Lastly, ensure that the motor kit you choose is compatible with your bike’s frame and wheel size. This will ensure a smooth installation process without any compatibility issues.
Now that you have considered these essential features, it’s time to gather the necessary tools and equipment needed for the installation process.

Garmin Tacx Neo 2T Smart Trainer
Material: metal, plastic
As an affiliate, we earn on qualifying purchases.
Gather the Necessary Tools and Equipment
To successfully install an electric motor on my bike, I need to create a checklist of tools required for the installation process. This will help me ensure that I have all the necessary equipment at hand.
It is also crucial to prioritize safety by wearing the appropriate safety gear during the installation.
Create a checklist of tools required for the installation process
Make sure you have all the tools you’ll need for the installation process of your electric motor on your bike. Before diving into the installation, it’s crucial to gather the necessary tools and equipment.
First, consider whether you want to go for an electric motor kit or a pre-built electric bike. A comparison guide can help you make an informed decision.
Next, remember to choose the right battery capacity for your electric bike. This will ensure optimal performance and range.
Now, let’s talk about the tools you’ll need. A basic set of tools should include wrenches, screwdrivers, pliers, and Allen keys. Additionally, you may need specific tools depending on your bike model and the motor kit you’ve chosen. It’s important to have all the necessary tools to avoid any delays or complications during the installation process.
With your tools ready, we can move on to the next section about ensuring you have all the necessary equipment and safety gear.
Ensure you have all the necessary equipment and safety gear
Now that we have created a checklist of tools required for the installation process, it is crucial to ensure that we have all the necessary equipment and safety gear before proceeding further. Assessing safety is of utmost importance when working with electric motors, as it involves dealing with high voltage and potential hazards. To guarantee a safe installation, I recommend wearing protective gear such as gloves, safety goggles, and a helmet. Additionally, it is essential to choose the right equipment for the job. This includes selecting a suitable electric motor that matches the specifications of your bike and ensuring you have the necessary wiring, connectors, and fasteners. By carefully assessing safety and choosing the correct equipment, we can proceed confidently with the installation process. Now, let’s move on to preparing our bike for the installation of the electric motor.

Wahoo Fitness KICKR CORE 2 ZWIFT COG and Click - Orange Cog 3rd Generation
KICKR CORE Zwift is the smarter way to start riding indoors. The new KICKR CORE builds on the...
As an affiliate, we earn on qualifying purchases.
Prepare Your Bike for Installation
First, check the bike frame for any obstructions that may interfere with the electric motor installation. Assessing bike compatibility is crucial to ensure a smooth installation process. Look for any protrusions, cables, or attachments that might obstruct the motor or its components.
Additionally, consider choosing a motor power that best suits your biking needs. Factors such as terrain, weight, and desired speed should be taken into account.
Once you have assessed the bike frame and selected the appropriate motor power, you can proceed with the installation process. By preparing your bike in advance, you will ensure a seamless integration of the electric motor onto your bike.
Now, let’s move on to the next section and learn how to install the electric motor.
Install the Electric Motor
To install the electric motor on my bike, I followed the manufacturer’s instructions for mounting it securely.
I made sure to connect all the necessary wiring and cables as per the provided diagrams or instructions.
Following these steps ensured that the motor was properly installed and ready to be powered up.
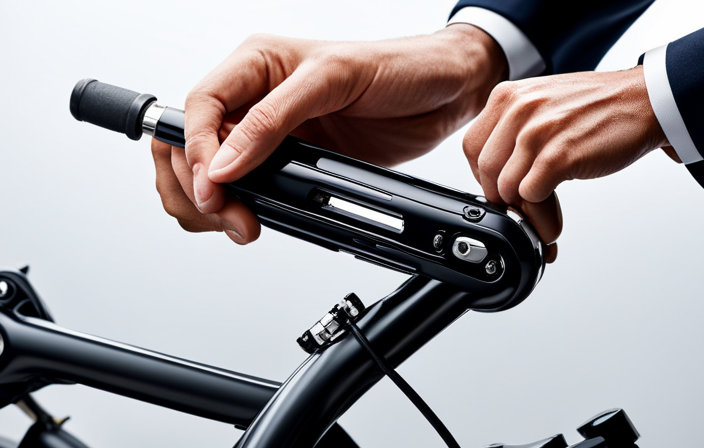
Follow the manufacturer’s instructions for mounting the motor to your bike
Attach the motor to your bike following the manufacturer’s instructions. It is crucial to properly mount the motor on your bike to ensure its stability and functionality. Here are four essential steps to consider when mounting the motor:
-
Determine the appropriate mounting technique: Different electric motors may require specific mounting techniques, such as using clamps, brackets, or custom mounting plates. Consult the manufacturer’s instructions to identify the recommended technique for your motor.
-
Locate the ideal motor positioning: The motor should be positioned in a way that maintains the bike’s balance and weight distribution. Typically, it is mounted near the rear wheel hub or on the frame’s downtube. Consider factors like chain alignment and clearance from other bike components.
-
Securely fasten the motor: Use the provided hardware to firmly attach the motor to your bike. Ensure that all bolts are tightened adequately to prevent any movement during rides.
-
Double-check for stability: Before proceeding to the wiring and cable connections, verify that the motor is securely mounted and doesn’t wobble or shift when applying force.
After successfully attaching the motor, the next step is to connect the necessary wiring and cables according to the provided diagrams or instructions.
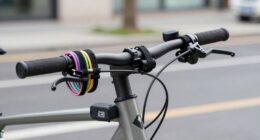
Connect the necessary wiring and cables according to the provided diagrams or instructions
Once the motor is securely mounted, you can proceed to connect the required wiring and cables as per the provided diagrams or instructions.
Start by identifying the different wires and cables and their corresponding connections. It is crucial to ensure that the connections are made correctly to avoid any potential issues or malfunctions.
Begin by connecting the motor’s power cables to the appropriate terminals on the controller. Next, connect the throttle control wires to the designated terminals on the controller. Make sure to double-check all connections and secure them properly to prevent any loose or exposed wires.
If you encounter any difficulties during the wiring process, consult the troubleshooting tips provided in the manufacturer’s instructions.
With the wiring connections complete, you can now move on to the next step of installing the battery and controller, ensuring a seamless integration of your electric motor onto your bike.
Install the Battery and Controller
First, you’ll need to make sure the battery and controller are securely installed on your bike. Begin by selecting a suitable location for the battery and mount it using the provided brackets or straps. Ensure that the battery is positioned securely and won’t interfere with any moving parts or the rider’s legs.
Next, connect the necessary wiring between the battery and controller, following the provided diagrams or instructions. Once the battery is connected, you can proceed with programming the controller. This involves setting parameters such as throttle sensitivity, maximum speed, and battery usage. It’s crucial to follow the manufacturer’s instructions carefully to ensure optimal performance and safety.
With the battery and controller properly installed and programmed, you can proceed to the next step of testing and fine-tuning the system to ensure everything is functioning correctly and to your liking.
Test and Fine-Tune the System
I conducted a test ride to ensure that the motor was functioning properly, and I was pleased to find that it was working smoothly.
I then proceeded to adjust the settings and controls to optimize both the performance and comfort of the system. By fine-tuning these aspects, I was able to achieve a more efficient and enjoyable riding experience.
Conduct a test ride to ensure the motor is functioning properly
To make sure the motor is working correctly, take the bike for a test ride. Here are a few key things to keep in mind during the test ride:
-
Check the motor’s responsiveness: Accelerate and decelerate to see how quickly the motor engages and disengages. This will help you gauge its efficiency.
-
Monitor the battery life: Pay attention to the battery’s charge level and how quickly it drains during the ride. This will give you an idea of the motor’s power consumption.
-
Test the motor on different terrains: Ride on various surfaces like uphill, downhill, and flat roads to see how the motor performs in different conditions. This will help you evaluate its versatility.
-
Troubleshoot any issues: If you encounter any problems during the test ride, such as unusual noises or vibrations, make a note of them. This will allow you to address and resolve any potential issues.
After conducting the test ride and noting any concerns, you can then proceed to adjust the settings and controls to optimize performance and comfort.
Adjust the settings and controls to optimize performance and comfort
Next, adjust the settings and controls on your e-bike to enhance performance and maximize your comfort. To optimize battery life and improve acceleration, it is crucial to fine-tune the settings. Refer to the table below for a comprehensive guide on adjusting key parameters.
| Setting | Range of adjustment |
|---|---|
| Assist level | 1-5 |
| Maximum speed | 20-28 mph |
| Torque sensitivity | Low, Medium, High |
| Regenerative braking | On, Off |
By customizing these settings, you can strike the perfect balance between power and efficiency. For instance, adjusting the assist level to a higher setting will provide more power, but may drain the battery faster. On the other hand, lowering the maximum speed can optimize battery life. Additionally, tweaking torque sensitivity and enabling regenerative braking can further enhance your riding experience.
Finally, to secure and protect the components, we need to take some precautionary measures.
Secure and Protect the Components
Make sure to secure and protect all the components when installing an electric motor on your bike. This is crucial for the longevity and performance of your electric bike. Here are three important steps to follow:
-
Use protective gear: Wear gloves and safety glasses to safeguard yourself from any potential harm during installation. This will help prevent injuries and ensure your safety throughout the process.
-
Ensure weather resistance: Apply a waterproof sealant to all electrical connections and components. This will protect them from moisture and ensure they remain functional even in wet weather conditions.
-
Install protective covers: Use protective covers to shield vulnerable components, such as the battery and controller, from impacts, dust, and debris. This will help prevent damage and extend the lifespan of your electric bike.
By properly securing and protecting your electric bike components, you can enjoy a safe and reliable ride.
Now, let’s move on to regular maintenance and troubleshooting to keep your electric bike in top condition.
Regular Maintenance and Troubleshooting
I will establish a regular maintenance routine for my electric motor and battery to ensure their optimal performance.
By doing so, I will be able to detect and troubleshoot common issues that may arise, allowing me to perform basic repairs if necessary.
This proactive approach will help me maintain the longevity and efficiency of my electric bike’s components.
Establish a maintenance routine for your electric motor and battery
To establish a maintenance routine for your electric motor and battery, you’ll need to regularly check their condition and clean them as needed. This will help ensure optimal performance and extend their lifespan.
Start by inspecting the motor and battery for any signs of damage, such as loose connections or worn-out components. If you notice any issues, address them promptly to prevent further damage.
Additionally, cleaning the motor and battery regularly is crucial to remove dirt, dust, and debris that can hinder their performance. Use a soft cloth or brush to gently wipe away any accumulated dirt.
By establishing a maintenance routine and staying proactive, you can prevent common issues and maintain your electric motor and battery in peak condition.
Moving forward, let’s explore how to troubleshoot common issues and perform basic repairs if needed.
Learn how to troubleshoot common issues and perform basic repairs if needed
Start by familiarizing yourself with common issues that can arise with your electric motor and battery, so you can troubleshoot and perform basic repairs if necessary. Basic troubleshooting is essential to keep your electric bike running smoothly.
One common issue is a sudden loss of power. This could be due to a loose connection or a faulty battery. Check all the connections and make sure they are secure. If the battery is the problem, you may need to replace it.
Another common problem is a noisy motor. This could be caused by loose screws or a worn-out belt. Tighten any loose screws and inspect the belt for signs of wear.
Performing these common repairs will help you maintain your electric motor and battery in good condition.
Once you have mastered troubleshooting and repairs, you can move on to the next section about ‘enjoy your electric bike!’
Enjoy Your Electric Bike!
Now that I’ve installed the electric motor on my bike, I can finally take advantage of its numerous benefits.
With the motor, I can explore new routes and discover new places, all while enjoying the ease of commuting.
Powered cycling brings me immense joy, and I’m excited to experience the thrill of riding with the assistance of the electric motor.
Take advantage of the benefits of your newly installed electric motor
Enjoy the perks of your newly installed electric motor on your bike! With this upgrade, you can maximize efficiency and extend your battery life, allowing for longer rides and less frequent recharging.
-
Increased Range: Experience the freedom of exploring new routes without worrying about running out of power. Your electric motor will provide the extra boost you need to conquer challenging terrains and tackle longer distances.
-
Effortless Commuting: Say goodbye to sweaty commutes! With your electric motor, commuting becomes a breeze. Enjoy a smooth and effortless ride, arriving at your destination feeling refreshed and ready to take on the day.
-
Enhanced Joy: Powered cycling brings a new level of excitement to your rides. Feel the thrill as you effortlessly glide through the scenery, soaking in the sights and sounds of nature.
Now, let’s delve into how to explore new routes, commute with ease, and experience the joy of powered cycling.
Explore new routes, commute with ease, and experience the joy of powered cycling
Discover the thrill of exploring new routes, effortlessly commuting, and embracing the joy of powered cycling with your newly upgraded ride.
With an electric motor installed on your bike, you’ll have the freedom to venture into uncharted territories, uncovering hidden gems and scenic paths that were previously out of reach.
Gone are the days of struggling up steep hills or arriving at your destination drenched in sweat. Commuting with ease has never been so enjoyable.
Whether you’re heading to work, running errands, or simply going for a leisurely ride, the electric motor will provide a smooth and efficient experience.
Say goodbye to traffic jams and parking woes as you zip through the city streets effortlessly.
Embrace the power of technology and unlock a world of endless possibilities with your electric motor-equipped bike.
Frequently Asked Questions
How long does it take to install an electric motor kit on a bike?
The installation time for an electric motor kit on a bike varies depending on the complexity of the kit and the individual’s mechanical skills. The installation process typically involves attaching the motor, battery, and controller, and can take anywhere from a few hours to a full day.
Can I install an electric motor on any type of bike?
Yes, an electric motor can be installed on most types of bikes. However, it is important to choose the right bike for electric motor compatibility. Factors such as frame strength, weight, and compatibility with mounting brackets should be considered.
Do I need any specific tools or equipment to install the electric motor kit?
To install an electric motor kit on your bike, you will need specific equipment such as a motor kit, battery, controller, and necessary tools like wrenches, screwdrivers, and pliers.
How much weight will the electric motor add to my bike?
The electric motor weight can vary depending on the specific motor and battery chosen. It is important to consider the weight distribution and effects on bike performance, such as acceleration, handling, and overall stability.
Can I still use my bike as a regular bicycle after installing the electric motor kit?
Yes, you can still use your bike as a regular bicycle after installing the electric motor kit. However, potential drawbacks include added weight and limited range. Benefits include increased speed and assistance in riding uphill.
Conclusion
In conclusion, after following the step-by-step process, I successfully installed an electric motor on my bike.
The entire experience was a breath of fresh air, as it opened up a whole new world of possibilities for me.
As the saying goes, ‘I was like a fish in water,’ effortlessly gliding through the streets with the power of the motor.
The meticulous preparation and attention to detail paid off, resulting in a smooth and efficient electric bike that I can enjoy for years to come.