Are you looking to transform your regular bike into an electric one? Then you’ve come to the right place!
In this step-by-step guide, I will show you how to install a 36v 250w electric bike conversion kit motor controller.
By the end of this article, you’ll have all the information you need to successfully complete this conversion and enjoy the benefits of an electric bike.
So, let’s get started!
Key Takeaways
- Mount the display securely on the handlebars for easy visibility.
- Connect the display cable to the controller, ensuring a proper connection.
- Wear protective gear such as gloves and safety goggles during installation.
- Familiarize yourself with the kit’s instructions and wiring diagrams to avoid mistakes.
Gather the Necessary Tools and Materials
You’ll need to gather the necessary tools and materials for installing a 36v 250w electric bike conversion kit motor controller.
First and foremost, you should choose the right conversion kit for your bike. Look for one that is compatible with your specific bike model and size. Additionally, consider the power output and features of the kit to ensure it meets your needs.
In terms of tools, you’ll need a set of basic hand tools such as wrenches, screwdrivers, and pliers. It’s also helpful to have a multimeter for troubleshooting common issues that may arise during the installation process. This tool can help you identify any electrical problems and ensure proper connections.
Once you have gathered all the necessary tools and materials, you can move on to preparing your bike for the conversion. This involves removing any existing components that may interfere with the installation, such as the old motor or controller.
Prepare Your Bike for the Conversion
To prepare your bicycle for the conversion, start by ensuring it meets the necessary specifications. Check the bike frame for any signs of damage or weakness, as the motor and battery will put additional stress on it. Make sure the frame is sturdy and in good condition to support the weight and power of the conversion kit.
Next, consider the placement of the battery. Look for a suitable location on the bike frame where the battery can be securely attached without interfering with your pedaling or balance. It should be easily accessible for charging and maintenance as well.
Once you have determined the ideal battery placement, you are ready to move on to the next section and install the electric bike conversion kit motor controller, which will bring your bike one step closer to being electric-powered.
Install the Electric Bike Conversion Kit Motor Controller
Once the battery placement has been determined, it’s time to attach and connect the motor controller, bringing your bike one step closer to becoming electric-powered. Follow these installing instructions to ensure a smooth installation process. Start by locating the motor controller mount on your bike frame. Use the provided screws and bolts to securely attach the motor controller to the mount. Make sure it is positioned in a way that allows easy access to the wires and cables. Next, refer to the table below for proper wire connections. Double-check that each wire is securely plugged into the corresponding port on the motor controller. Once all connections are secure, it’s time to troubleshoot. If you encounter any issues, refer to the troubleshooting tips provided in the kit manual. With the motor controller successfully installed, we can now move on to the next step of connecting the motor and battery to the controller.
Connect the Motor and Battery to the Controller
Now that the motor controller is securely attached to the bike frame, it’s time to connect the motor and battery to the controller. To ensure a smooth and efficient connection, follow these steps:
-
Connect the motor: Locate the motor wires and match them with the corresponding wires on the controller. Use insulated connectors to join the wires securely, ensuring a tight fit. Double-check the connections to avoid any loose or crossed wires.
-
Connect the battery: Find the battery wires and connect them to the designated terminals on the controller. Again, use insulated connectors and ensure a secure connection. Take caution to match the positive and negative terminals correctly to avoid damaging the controller.
Troubleshooting common issues with motor controller connections:
-
If the motor doesn’t respond, check the connections for any loose or damaged wires.
-
If the motor runs but lacks power, inspect the battery connections for any loose or corroded terminals.
Tips for extending the lifespan of your electric bike conversion kit motor controller:
-
Avoid overloading the motor controller by staying within its specified power limits.
-
Regularly inspect and clean the connections to prevent corrosion and ensure optimal performance.
Now, we can move on to the next section about securing and routing the wiring.
Secure and Route the Wiring
Make sure you secure and route the wiring properly to ensure a clean and organized installation. Begin by using cable management techniques to neatly arrange and secure the wires. This will prevent them from tangling or getting in the way of other components.
Additionally, consider using waterproofing techniques to protect the wiring from moisture and other environmental factors. Use waterproof connectors or wrap the connectors in heat shrink tubing to create a watertight seal.
It’s important to take the time to properly secure and route the wiring to avoid any potential issues or complications down the line. Once the wiring is secured and organized, you can move on to the next step of testing the electric bike conversion kit.
Test the Electric Bike Conversion Kit
To ensure proper functionality, it’s important to test the E-bike conversion kit. Here are some benefits of electric bike conversion kit troubleshooting:
-
Verify Motor Operation: Test the motor by applying throttle. Ensure it runs smoothly without any unusual noises or vibrations.
-
Check Power Delivery: Confirm that the battery is supplying sufficient power to the motor. Measure the voltage at the motor controller to ensure it matches the kit’s specifications.
-
Assess Controller Functionality: Test various controller functions such as throttle response, pedal assist, and regenerative braking. Make sure all settings are working as intended.
-
Evaluate Wiring Connections: Inspect all wiring connections for loose or damaged components. Ensure proper insulation and secure connections to prevent any potential electrical issues.
-
Test Battery Life: Assess the battery’s performance by riding the electric bike for a reasonable distance. Ensure it provides adequate power throughout the ride.
Once you have tested the electric bike conversion kit, you can proceed to adjust the settings and fine-tune the controller for optimal performance.
Adjust the Settings and Fine-Tune the Controller
Once you have tested the electric bike conversion kit, you can adjust the settings and fine-tune the controller for optimal performance. The controller configuration plays a crucial role in determining the speed, power, and overall behavior of your electric bike. To make the necessary adjustments, follow the steps below:
| Setting | Description |
|---|---|
| Speed Limit | Adjust the maximum speed your bike can reach. It is important to adhere to local regulations and safety. |
| Assist Level | Set the level of pedal assistance provided by the motor. Higher levels offer more power but drain the battery faster. |
| Regenerative Braking | Enable or disable regenerative braking, which can help recharge the battery while slowing down. |
| Throttle Response | Fine-tune the responsiveness of the throttle for a smooth and controlled acceleration. |
| Error Codes and Troubleshooting Tips | Familiarize yourself with the error codes and refer to the troubleshooting section of the user manual for guidance. |
Once you have configured the controller to your preferences, you are ready to move on to the next step: installing the display and control panel.
Install the Display and Control Panel
After adjusting the settings and fine-tuning the controller, the next step is to install the display and control panel.
This component is crucial for monitoring the performance of your electric bike conversion kit. Start by mounting the display securely on the handlebars, ensuring it is easily visible while riding.
Connect the display cable to the controller, double-checking that it is properly seated. Once the display is installed, you can power on the system and test its functionality. If you encounter any troubleshooting display issues, refer to the user manual provided with the kit for further instructions.
Additionally, the control panel allows you to customize various settings such as speed limits and pedal assist levels. Take your time to adjust these settings according to your preferences and riding style.
Now, let’s move on to the next section where we will ensure proper safety measures are in place.
Ensure Proper Safety Measures
Make sure you prioritize safety by implementing the necessary precautions when installing the 36V 250W electric bike conversion kit motor controller.
Here are some safety precautions and necessary equipment you should consider:
- Wear protective gear, such as gloves and safety goggles, to prevent injuries.
- Disconnect the battery and ensure the power is turned off before starting any installation work.
- Familiarize yourself with the kit’s instructions and wiring diagrams to avoid any mistakes.
- Double-check all connections and ensure they are secure to prevent loose wires or potential short circuits.
- Keep a fire extinguisher nearby in case of any electrical malfunctions.
By following these safety precautions and using the necessary equipment, you can minimize the risk of accidents and ensure a safe installation process.
Now that the safety measures are in place, you can move on to enjoying your newly converted electric bike!
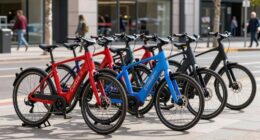
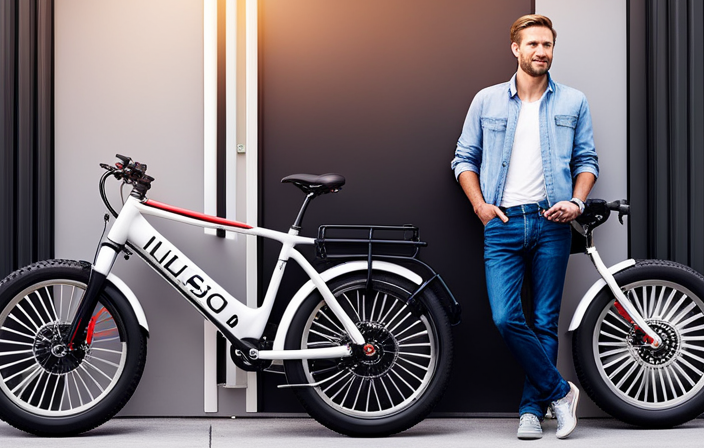
Enjoy Your Newly Converted Electric Bike!
Now that you’ve completed the installation, it’s time to start enjoying your newly converted electric bike!
The benefits of having an electric bike are numerous, and it’s important to take the time to fully appreciate them.
One of the main advantages is the sheer enjoyment you’ll experience when riding your electric bike. With the 36v 250w electric bike conversion kit motor controller, you’ll be able to effortlessly cruise through the streets, feeling the wind in your hair and the thrill of the ride. The smooth acceleration and powerful motor will make every journey a joy.
Additionally, you’ll also reap the benefits of reduced commuting time, improved physical fitness, and a more eco-friendly mode of transportation.
So get out there and start exploring with your newly converted electric bike!
Frequently Asked Questions
How long does it take to complete the installation of an electric bike conversion kit?
The installation time of an electric bike conversion kit can vary depending on experience and the specific kit. Troubleshooting tips may be needed along the way. It’s important to follow the instructions carefully for a successful installation.
Can the electric bike conversion kit be installed on any type of bike?
The compatibility of an electric bike conversion kit depends on the frame and components of the bike. Pros include cost savings and eco-friendliness, while cons involve potential modifications and reduced warranty coverage.
Is it possible to switch back to a regular bike after installing the conversion kit?
Yes, it is possible to switch back to a regular bike after installing the conversion kit. The compatibility of the conversion kit with different types of bikes allows for easy removal and restoration of the original bike components.
What is the average lifespan of a motor controller in an electric bike conversion kit?
The average lifespan of an electric bike conversion kit motor controller can vary depending on several factors. Factors affecting lifespan include usage intensity, maintenance practices, and environmental conditions.
Are there any specific maintenance requirements for the motor controller in an electric bike conversion kit?
The motor controller in an electric bike conversion kit has specific maintenance requirements. Regular inspection, cleaning, and proper wiring connections are necessary. Troubleshooting tips include checking for loose connections, testing the voltage, and ensuring proper ventilation for heat dissipation.
Conclusion
After carefully following each step and ensuring all connections were secure, I successfully installed the 36v 250w electric bike conversion kit motor controller.
The process was meticulous, but the end result was worth it. I can’t wait to hit the road on my newly converted electric bike! It’s like stepping into a time machine and experiencing the thrill of futuristic transportation.
So hop on your own electric bike and join me in the revolution of eco-friendly and efficient travel. Let’s ride into the future together!