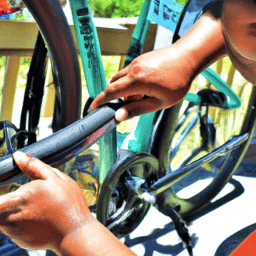
Putting a new bicycle chain on might feel intimidating, yet it becomes an easy task when equipped with the correct tools and understanding. No matter if you’re swapping out an aged chain for a fresh one, making certain that your chain is accurately measured, placed, and tuned is crucial for enhancing the functionality of your bicycle and averting possible mishaps.
To begin, you will need a few tools and materials, including a chain tool, a new chain, a rag, and some lubricant.
Removing the old chain is the first step, and it is important to measure the length of the old chain to ensure that the new one is the correct size.
Once you have the new chain, it is time to install it, making sure to test and adjust it to ensure that it is properly installed and functioning.
In this article, I will guide you through each step of the process, providing you with the necessary knowledge to install a new bicycle chain with ease and confidence.
Key Takeaways
- Proper tools and knowledge are necessary for sizing, installing, and adjusting a bike chain.
- Regular maintenance, including proper lubrication and cleaning, can prevent issues and prolong chain life.
- Calculating chain length correctly and ensuring proper derailleur alignment are crucial for smooth operation.
- Troubleshooting common issues, such as skipping gears or chain breakage, can be addressed with the help of a troubleshooting table.
Gather Your Tools and Materials
You’re gonna need some tools and materials to get that chain installed.
First off, you’re going to need a new chain that’s the right length for your bike. You can measure your old chain and purchase a new one that’s the same length, or you can use a chain tool to remove links from a longer chain. Make sure the new chain is compatible with your bike’s drivetrain and that it has the appropriate number of speeds.
Next, you’ll need some lubrication for the chain. Choosing lubrication can be tricky, but a good rule of thumb is to use a light oil for dry conditions and a thicker grease for wet conditions. Apply the lubrication to the chain before installation and periodically throughout the life of the chain to keep it running smoothly.
Common chain issues include rust, wear, and stretching, so be sure to inspect your chain regularly and replace it as needed.
To remove the old chain, you’ll need a chain tool.
Stay tuned for the next section where I’ll walk you through the steps to remove the old chain and get your bike ready for a new one.
Remove the Old Chain
First off, gotta get rid of that old, worn-out link. Removing the old chain is a crucial step in installing a new one. Here’s how to do it right:
-
Use a chain tool to break the chain at any link. Be careful not to break the wrong link or you’ll have to start over with a new chain.
-
Remove the chain from the derailleur and cassette. Pay attention to how the chain is routed through the derailleur so you can install the new chain correctly.
-
Inspect the chainrings and cassette for wear and damage. If you see any signs of wear or damage, consider replacing them before installing the new chain.
-
Clean the chainrings, cassette, and derailleur pulleys with a degreaser and a rag. This’ll help the new chain run smoothly and quietly.
Common mistakes when removing an old chain include breaking the wrong link, routing the new chain incorrectly, and failing to inspect the drivetrain for wear and damage. Troubleshooting these issues can be time-consuming and frustrating, so take your time and be careful.
Once you’ve removed the old chain and inspected the drivetrain, it’s time to measure and size the new chain.
Now that the old chain’s out of the way, it’s time to determine the length of the new chain.
Measure and Size the New Chain
To get the right fit for your new chain, start by wrapping it around the largest chainring and largest cassette cog. This will give you an idea of the length you need for your new chain.
Keep in mind that chain compatibility is essential. You need to make sure that the chain you purchase is compatible with your bike’s drivetrain. Check your bike’s manual or the manufacturer’s website to find the appropriate chain type and length.
Once you have the correct chain type, you can start calculating the chain length. Measure the distance between the center of the chainring and the center of the cassette’s largest cog, and then add two links to that number. This is your chain length.
Remember that a chain that is too short can snap under strain, and a chain that is too long can cause shifting problems. With the right chain length, you can now move on to installing the new chain.
Install the New Chain
Once you’ve measured and sized your new chain, it’s time to bring in the new player to the team and connect the links together like puzzle pieces to create a strong and agile chain that will smoothly shift gears like a well-oiled machine.
Begin by threading the chain through the rear derailleur, starting from the bottom pulley wheel and working your way up to the top. Then, thread the chain through the front derailleur, ensuring that it sits properly on the chainrings.
Finally, connect the two ends of the chain using a chain tool, making sure to push the pin in until it sits flush with the chain link.
Proper lubrication is crucial for the longevity and smooth operation of your new chain. Apply a generous amount of bike chain lubricant to the chain, making sure to cover each link evenly.
Allow the lubricant to soak in for a few minutes before wiping off any excess oil with a clean rag.
It’s also important to ensure that the new chain is compatible with your bike’s drivetrain. Double-check the number of speeds your bike has and choose a chain that matches that number.
With your new chain installed and properly lubricated, it’s time to move on to testing and adjusting the chain to ensure optimal performance.
Test and Adjust the Chain
Now that I’ve installed the new chain on my bicycle, it’s time to test and adjust it. The key points to consider are checking for proper tension, ensuring smooth shifting, and making final adjustments.
Proper tension is crucial for efficient power transfer and to avoid slipping and skipping. I’ll also need to ensure that shifting is smooth and precise, without any hesitation or noise. Finally, I’ll make any necessary adjustments to fine-tune the chain’s performance.
Checking for Proper Tension
Ensuring the right tension is critical to keeping your bike chain running smoothly and avoiding unnecessary wear and tear. To check for proper tension, start by shifting your chain onto the smallest chainring in the front and the smallest cog in the back. Then, use a ruler or a chain wear tool to measure the distance between the center of the chain and the bottom of the chain stay. This distance should be around 6-8mm for most bikes, but refer to your bike’s manual for specific recommendations.
If your chain is too loose, it can cause the chain to skip or even fall off, while a chain that is too tight can put unnecessary stress on your bike’s components and cause faster wear and tear. Chain lubrication and wear also play a role in chain tension, so make sure your chain is properly lubricated and replace it if it is worn beyond the manufacturer’s recommended limit. By regularly checking and adjusting your chain tension, you can ensure a smoother and more reliable ride.
Ensuring smooth shifting is the next step in installing your bike chain.
Ensuring Smooth Shifting
As I shift gears on my bike, I always make sure that the transition is as smooth as possible. To ensure this, there are a few things I keep in mind.
-
Chain lubrication is key: Proper lubrication is essential for smooth shifting. Without it, the chain won’t move as easily between gears, resulting in jerky transitions. Make sure to apply lubricant to the chain regularly and wipe off any excess oil to avoid attracting dirt and grime.
-
Check for common chain problems: There are a few common issues that can cause shifting problems. One of these is a bent or damaged chain link, which can cause skipping or slipping when shifting. Another problem is a worn chain, which can cause gear slipping and difficulty shifting.
-
Proper derailleur alignment: The derailleur is responsible for moving the chain between gears, so it’s important to make sure that it’s properly aligned. If it’s not, it can cause the chain to rub against the gears, resulting in a noisy and inefficient ride.
-
Cable tension: The tension in the shift cables can also affect shifting performance. If the cables are too loose or too tight, it can cause shifting problems. Adjust the tension as needed to ensure smooth shifting.
Ensuring smooth shifting is an important part of maintaining your bike’s performance. Now that we’ve covered this, let’s move on to making final adjustments to get your bike in top shape.
Making Final Adjustments
To get your ride feeling perfect, take a few moments to make some final adjustments. One of the most important steps is to ensure that your bicycle chain is properly lubricated. A well-lubricated chain will run smoothly and quietly, reducing wear and tear on your bike and improving your overall riding experience. To lubricate your chain, simply apply a few drops of chain lubricant to each link, then wipe off any excess with a clean rag.
In addition to proper lubrication, there are a few maintenance tips to keep in mind when it comes to your bicycle chain. First, make sure to keep your chain clean by wiping it down regularly with a rag. This will help prevent dirt and debris from building up and causing damage to your chain. Additionally, be on the lookout for signs of wear and tear, such as stretched or rusted links, and replace your chain as needed. If you encounter any issues with your chain, such as skipping or jumping, refer to the troubleshooting table below for common causes and solutions.
| Issue | Possible Cause | Solution | ||||
|---|---|---|---|---|---|---|
| Skipping gears | Worn chain | Replace chain | ||||
| Worn cassette or chainrings | Replace cassette or chainrings | |||||
| Misaligned derailleur | Adjust derailleur | |||||
| Dirty or dry chain | Clean and lubricate chain | |||||
| Chain noise | Dry chain | Lubricate chain | ||||
| Worn or dirty cassette | Clean or replace cassette | |||||
| Worn or dirty chainrings | Clean or replace chainrings | |||||
| Loose chain | Adjust tension | |||||
| Chain breakage | Worn or damaged chain | Replace chain | ||||
| Incorrect installation | Reinstall chain correctly | Missing or damaged chain links | Replace missing or damaged links or replace chain |
Frequently Asked Questions
How often should I replace my bicycle chain?
I replace my bicycle chain every 2,000 miles or when it reaches 0.75% wear using a chain wear tool. Good chain maintenance includes keeping it clean and lubricated, which can prolong the chain’s lifespan.
What type of lubricant should I use on my new chain?
For my new bike chain, I recommend using a high-quality lubricant such as Finish Line or White Lightning. Apply the lubricant evenly to each link, and wipe off any excess. Best results come from regularly cleaning and reapplying.
Do I need a special tool to break the old chain?
Breaking an old chain requires a chain tool. Chain maintenance is essential to increase the lifespan of your bike components. Regular chain repair and lubrication can prevent chain wear and cassette damage.
Can I reuse the master link from my old chain on the new chain?
I wouldn’t recommend reusing the master link from your old chain on the new one. The master link compatibility can vary between chains, and it’s better to ensure chain durability by using the correct link for the new chain.
How tight should the new chain be after installation?
Proper tension is crucial for optimal performance of the bike. Over tightening can cause damage to the chain and gears. A new chain should have a slight amount of slack, but not sag or droop excessively when pedaling.
Conclusion
Well, that’s it! You’ve successfully installed a new bicycle chain. Congratulations!
It may have taken some time and effort, but the end result is worth it. Your bike will now run smoothly and efficiently, making your rides more enjoyable.
Remember, proper maintenance of your bike’s chain is crucial for its longevity and performance. Make sure to regularly clean and lubricate it to prevent wear and tear. With a well-maintained chain, you’ll be able to tackle any terrain with ease.
Overall, installing a bicycle chain is a technical process that requires attention to detail and precision. But with the right tools and knowledge, anyone can do it.
So go ahead, pat yourself on the back and enjoy the ride. You’re now a skilled bike mechanic, and that’s no small feat!
