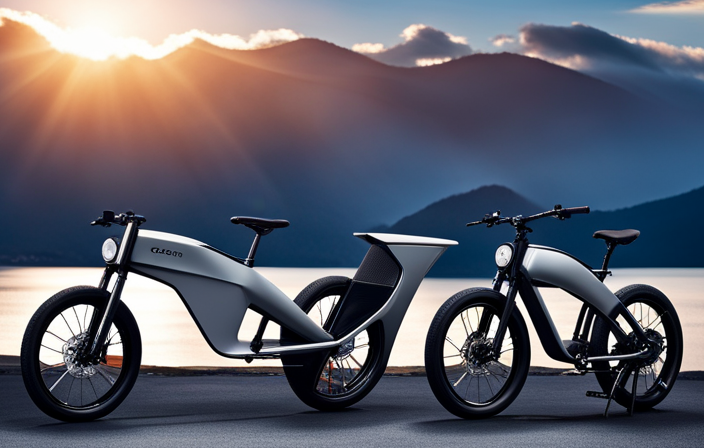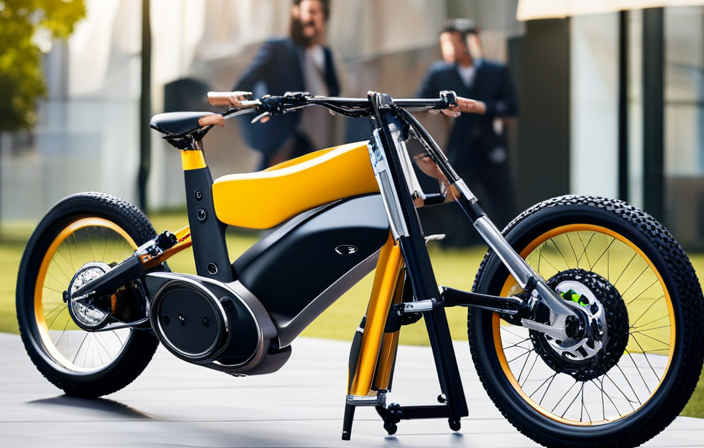
I’ve always loved biking, but recently I’ve been wanting a little extra boost to help me tackle those long, hilly rides. That’s why I decided to install a Dillenger Street Electric Bike Kit.
In this article, I’ll guide you through the step-by-step process of installing the kit on your own bike. From gathering the necessary tools to testing your newly converted electric bike, I’ll provide all the detailed instructions you need to get started.
Let’s dive in and get that extra power on your rides!
Key Takeaways
- Preparation and organization of tools and workspace is important for a successful installation of a Dillenger Street electric bike kit.
- Proper installation of the battery holder, including choosing a suitable spot on the bike frame, attaching it securely with mounting brackets and screws, and ensuring proper wire routing and connections.
- The motor wheel installation involves removing the existing wheel, aligning and securing the motor wheel in the dropouts, and checking for alignment and interference issues.
- Attaching the controller and wiring correctly, securing it with mounting brackets, and taking caution with power and ground connections is crucial for stability and performance.
Gather the necessary tools and equipment
You’ll need a wrench, screwdriver, and wire cutters to gather the necessary tools and equipment for the bike kit installation.
The first step in installing a Dillenger Street electric bike kit is to ensure you have all the required tools and equipment. These tools are essential for a successful installation and will make the process much easier.
The wrench will be used to tighten and loosen nuts and bolts, while the screwdriver will come in handy for removing and securing screws. The wire cutters are necessary for trimming and stripping wires, ensuring a clean and secure connection.
Additionally, it’s important to have a workspace that is well-lit and organized, allowing you to easily access all the components of the bike kit.
Once you have gathered all the necessary tools and equipment, you can begin preparing your bike for installation, ensuring a smooth and efficient process.
Prepare your bike for installation
To get started, make sure your bicycle is ready for the installation process. This involves performing some basic bike maintenance and taking necessary safety precautions. Here’s what you need to do:
-
Check your tires: Ensure they are properly inflated and in good condition. This will provide a smooth and safe ride.
-
Inspect the brakes: Test your brakes to ensure they are in working order. Worn brake pads should be replaced for optimal stopping power.
-
Tighten all bolts: Go over your bike and tighten any loose bolts, including those on the handlebars, seat post, and pedals. This will prevent any unnecessary rattling or accidents.
-
Clean your bike: Give your bike a thorough cleaning to remove any dirt or debris. A clean bike not only looks good but also helps with the smooth functioning of the components.
By following these bike maintenance and safety precautions, you’ll be well-prepared for the installation process.
Now, let’s move on to installing the battery holder.
Now that your bike is ready, let’s move on to the installation of the battery holder.
Install the battery holder
Once you’ve prepared your bike, it’s time to attach the battery holder. This step is crucial for the proper functioning of your electric bike conversion kit. The battery holder serves as a secure and stable platform for the battery, ensuring it stays in place during rides.
To install the battery holder, follow these simple steps:
| Step | Description |
|---|---|
| 1 | Locate a suitable spot on your bike frame to mount the battery holder. This could be on the downtube or the seat tube. |
| 2 | Use the provided mounting brackets and screws to attach the battery holder to the chosen spot. Make sure it is securely fastened. |
| 3 | Before placing the battery in the holder, double-check all connections and ensure the wires are properly routed. |
| 4 | Carefully slide the battery into the holder, ensuring it is snugly fit and does not move around. |
| 5 | Once the battery is securely in place, tighten any straps or fasteners to further secure it to the holder. |
Troubleshooting battery installation:
- If the battery holder does not fit properly on your bike frame, check for any obstructions or modifications that may be necessary.
- Ensure all connections are tight and properly aligned.
- If the battery moves or rattles inside the holder, add additional padding or straps to secure it.
Now that the battery holder is securely installed, we can move on to the next step: installing the motor wheel.
Install the motor wheel
Now that the battery holder is securely in place, let’s move on to attaching the motor wheel.
Installing the motor wheel is a crucial step in the installation process of a Dillenger street electric bike kit. To begin, make sure you have all the necessary tools and components ready. The motor wheel should come with a quick-release skewer, which will allow for easy attachment to the bike frame.
First, remove the existing wheel from the bike frame. This can be done by loosening the nuts or releasing the quick-release lever, depending on your bike’s setup. Once the old wheel is removed, align the motor wheel with the bike frame, ensuring that the axle fits securely into the dropouts. Tighten the nuts or close the quick-release lever to secure the motor wheel in place.
Troubleshooting common motor wheel installation issues may include ensuring that the wheel is centered and aligned properly. Misalignment can cause uneven tire wear and affect the bike’s handling. Additionally, check for any rubbing or interference between the motor wheel and other bike components.
With the motor wheel successfully installed, we can now move on to the next section: attaching the controller and wiring. This step is crucial for the proper functioning of the electric bike conversion kit.
Attach the controller and wiring
Make sure you have all the necessary components ready before attaching the controller and wiring. This step is crucial in the installation process of the Dillenger Street Electric Bike Kit. The controller is responsible for managing the power and performance of your electric bike. It is important to secure it properly using the provided mounting brackets to ensure stability and longevity.
To help you understand the wiring connections better, here is a table outlining the different wires and their functions:
| Wire Color | Function |
|---|---|
| Red | Power |
| Black | Ground |
| Green | Throttle |
| Blue | Brake |
Carefully connect each wire to its corresponding terminal, ensuring a secure and snug fit. Take extra caution when connecting the power and ground wires, as any loose or faulty connections can lead to malfunctions or even accidents.
Now that the controller is securely attached and the wiring connections are properly made, you are ready to move on to the next step of the installation process, which is to connect the battery. This will supply power to the electric bike and allow it to run smoothly.
Connect the battery
To connect the battery, locate the battery compartment and carefully insert the battery, making sure the positive and negative terminals match up with the corresponding connectors. Once the battery is securely in place, you can start exploring the various connectivity options available with your electric bike kit. Here are three key things to keep in mind:
-
Bluetooth Connectivity: With this option, you can connect your smartphone or other Bluetooth-enabled devices to your electric bike kit. This allows you to access additional features and settings, such as speed control or battery monitoring, right from your device.
-
USB Charging Port: Some electric bike kits come equipped with a USB charging port, which allows you to charge your phone, GPS device, or other small electronics while on the go. Simply plug in your device and enjoy a convenient charging solution during your rides.
-
Battery Charging Tips: To prolong the lifespan of your battery, it’s important to follow some basic charging tips. Avoid overcharging by removing the battery from the bike once it’s fully charged. Additionally, try to charge your battery at room temperature and avoid exposing it to extreme temperatures.
Now that the battery is connected, it’s time to move on to testing the electric bike conversion kit and ensuring everything is functioning properly.
Test the electric bike conversion kit
Once you’ve connected the battery, it’s time to test the functionality of your electric bike conversion kit. Testing your kit is an important step to ensure that everything is working properly before hitting the road. This process will not only help you troubleshoot any potential issues but also allow you to experience firsthand the benefits of electric bike conversion.
To test your electric bike conversion kit, follow these steps:
-
Turn on the power switch and check if the battery indicator lights up. This indicates that the battery is properly connected.
-
Pedal the bike and observe if the motor engages smoothly. You should feel a gentle boost of power as the motor kicks in.
-
Check the throttle control. Twist it slowly and gradually to increase the speed. Make sure the motor responds accordingly.
-
Test the brakes. Ride the bike and apply the brakes to ensure they are functioning properly.
-
Monitor the battery level. Keep an eye on the battery indicator and note if it decreases significantly during your test ride.
By conducting these tests, you can identify any potential issues and address them promptly. Troubleshooting your electric bike conversion kit at this stage will save you time and hassle in the long run.
Now that you’ve tested the functionality of your electric bike conversion kit, it’s time to adjust the settings and controls to suit your riding preferences.
Adjust the settings and controls
After testing the electric bike conversion kit, it’s time to make some adjustments and get familiar with the settings and controls. This is an important step to ensure optimal performance and a smooth riding experience. Here are the adjustment techniques and control panel troubleshooting steps you need to follow:
-
Adjust the speed settings: Use the control panel to adjust the maximum speed of your electric bike. This allows you to customize your riding experience according to your preferences and local regulations.
-
Fine-tune the pedal assist level: The pedal assist system provides an extra boost of power when you pedal. Experiment with different levels to find the one that suits your riding style and terrain the best.
-
Calibrate the brake sensors: Ensure that the brake sensors are properly calibrated to ensure smooth and responsive braking. Follow the manufacturer’s instructions to adjust the sensitivity of the sensors.
-
Troubleshoot control panel issues: If you encounter any issues with the control panel, such as display errors or unresponsive buttons, refer to the user manual for troubleshooting tips. Check the connections and make sure everything is properly plugged in.
Install the pedal assist sensor
Now that you’ve adjusted the settings and controls, it’s time to install the pedal assist sensor. The pedal assist sensor is a crucial component of your electric bike kit as it detects your pedaling motion and provides the necessary power assistance. Follow these steps to ensure a successful installation:
| Steps | Tools Required | Time Required |
|---|---|---|
| 1. Locate the crank | Allen wrench | 10 minutes |
| 2. Remove the crank | Crank puller tool | 5 minutes |
| 3. Attach the sensor | Zip ties, wrench | 15 minutes |
Begin by locating the crank on your bike. You will need an Allen wrench to remove the crank. Once the crank is removed, you can proceed to attach the pedal assist sensor. Use zip ties to secure the sensor to the bottom bracket of your bike. Make sure it is aligned properly and tightly secured.
Troubleshooting common installation issues:
- If the sensor is not detecting your pedaling motion, check the alignment and make sure it is securely fastened.
- Ensure that the sensor is not obstructed by any cables or other components.
With the pedal assist sensor successfully installed, you can now move on to mounting the LCD display and enjoy your electric bike.
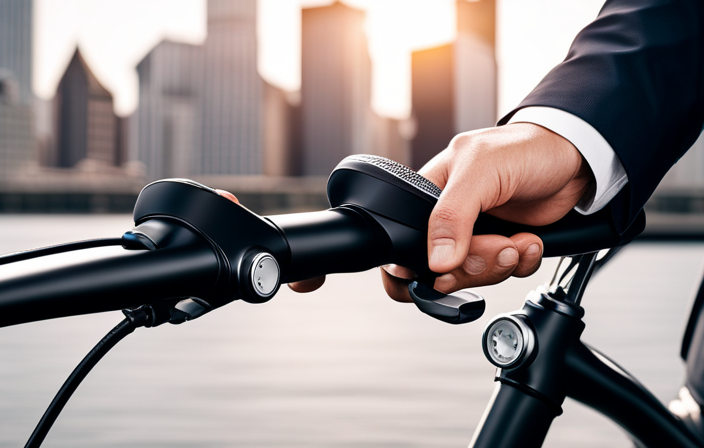
Mount the LCD display
To mount the LCD display, follow these steps:
- Locate the handlebar area on your bicycle.
- Make sure the handlebar is clean and free of any debris.
- Position the display on the handlebar in a comfortable and easily visible location.
- Use the provided clamp to secure the display in place, ensuring it is tightly fastened.
Once the display is mounted, proceed with the following:
- Connect the display to the wiring harness.
- Make sure the connectors are properly aligned and securely plugged in.
- If you encounter any issues, refer to the troubleshooting tips in the instruction manual.
It is crucial to ensure that the display is securely mounted to prevent any movement or vibrations while riding.
The next step in the installation process is to secure all the wiring and cables, so they are neat and out of the way.
Secure all the wiring and cables
Once the LCD display is securely mounted, ensure that all the wiring and cables are properly secured and organized to prevent any tangling or interference while riding.
Cable management is crucial for maintaining a neat and safe installation. Start by identifying the different cables and wires that need to be secured. Carefully route each cable along the frame of the bike, making sure they are away from any moving parts or sharp edges. Use zip ties or cable clips to hold the cables in place, ensuring they are snug but not too tight.
It’s important to avoid any excessive tension on the cables, as this may cause damage or affect their performance. Additionally, take safety precautions when organizing the cables. Keep them away from the brakes and gears to prevent any accidental entanglements. Make sure to leave enough slack in the cables to allow for smooth handlebar movement.
Double-check that all the connections are secure and free from any potential hazards, such as rubbing against the frame or other components. This will help prevent any damage to the wires and ensure a reliable and safe riding experience.
With the wiring and cables properly secured and organized, it’s time to move on to the next step: double-checking all the connections.
Double-check all the connections
Make sure you go over all the connections to ensure they are properly secured and free from any potential issues. This step is crucial to the successful installation of your Dillenger Street electric bike kit.
To help you with this process, here is a checklist of troubleshooting tips:
-
Inspect the wiring: Carefully examine all the wiring connections, including the main harness, throttle, brake cut-off sensors, and display. Look for any loose or frayed wires that may pose a safety risk or affect the performance of your electric bike.
-
Check the connectors: Confirm that all the connectors are securely plugged in and seated properly. Give them a gentle tug to ensure they are firmly attached. Loose connectors can lead to intermittent power supply or loss of functionality.
-
Test the functionality: Once all the connections are secure, test the functionality of your electric bike kit. Turn on the power and check if the throttle is responsive, the motor engages smoothly, and the brake cut-off sensors work as intended.
By following this checklist and troubleshooting tips, you can ensure that all the connections are properly installed and minimize the chances of any potential issues.
Once you are satisfied with the connections, it is time to move on to the next step: the test ride and making any necessary adjustments to optimize your electric bike’s performance.
Test ride and make any necessary adjustments
Now that you’ve ensured all the connections are secure, it’s time for you to take your electric bike for a test ride and make any necessary adjustments for optimal performance. Before you hop on, it’s important to adjust the brakes to ensure they are responsive and reliable.
Start by squeezing the brake levers and observing the brake pads. They should make contact with the rims or disc rotors evenly and without any rubbing. If you notice any inconsistencies, use an Allen wrench to adjust the brake calipers until they are properly aligned.
Once the brakes are adjusted, don’t forget to check the tire pressure. Having the right tire pressure is crucial for a smooth and efficient ride. Use a tire pressure gauge to measure the pressure and compare it to the recommended range specified by the tire manufacturer. If the pressure is too low, use a hand pump to add air until it reaches the desired level. Conversely, if the pressure is too high, release some air using the valve stem.
With the brakes adjusted and tire pressure checked, it’s time to take your electric bike for a spin. Pay attention to any unusual noises, vibrations, or handling issues. If you identify any problems, make note of them and adjust accordingly. Once you feel satisfied with the performance, you can move on to the next section about maintaining and caring for your electric bike kit.
It’s important to keep your bike in top shape to ensure longevity and continued enjoyment.
Maintain and care for your electric bike kit
To keep your electric bike kit in optimal condition, it’s essential to regularly clean and lubricate the various components. Proper maintenance will not only prolong the lifespan of your kit but also ensure a smooth and enjoyable riding experience. Here are some key tips for maintaining and caring for your electric bike kit:
-
Electric Bike Battery Maintenance:
- Regularly check the battery’s charge level and recharge it when necessary.
- Keep the battery clean and dry, and avoid exposing it to extreme temperatures.
-
Lubricate Moving Parts:
- To prevent excessive wear and tear, lubricate the moving parts of your electric bike kit regularly.
- This includes the chain, gears, and brake cables.
- Use a high-quality lubricant and make sure to wipe off any excess oil to avoid attracting dirt and debris.
-
Troubleshooting Common Electric Bike Kit Problems:
- It’s important to familiarize yourself with common issues that may arise with your electric bike kit.
- This includes problems with the motor, controller, or display.
- Consult the manufacturer’s manual or seek professional assistance if you encounter any problems.
-
Regular Inspection:
- Take the time to inspect your electric bike kit for any signs of damage or wear.
- Check the cables, connectors, and wiring for any loose or frayed parts.
- Addressing any issues promptly can prevent further damage and ensure a safe riding experience.
Enjoy the benefits of your newly converted electric bike
You’ll love experiencing the numerous advantages that come with riding your newly converted e-bike.
One of the most noticeable benefits is the increased speed. With the electric bike kit, you can effortlessly glide along at higher speeds, making your commute or leisurely rides much quicker and more enjoyable. The added boost from the motor allows you to easily keep up with traffic and breeze past fellow cyclists.
Not only will you be able to zip around town faster, but you’ll also have the opportunity to explore new bike routes. The increased speed and range of your e-bike open up a whole new world of possibilities. You can venture further from home, discovering scenic paths and hidden gems that you may have never encountered before.
Whether you’re seeking adventure or simply want to take a leisurely ride through the countryside, your newly converted e-bike will provide the means to do so.
Frequently Asked Questions
How long does it typically take to install a Dillenger street electric bike kit?
Typically, the installation of a Dillenger Street electric bike kit can take anywhere from 2 to 4 hours, depending on your experience and familiarity with bikes. However, it’s important to note that this timeframe can vary depending on individual circumstances.
To troubleshoot common installation issues, carefully follow the provided instructions and double-check all connections.
Additionally, to maximize the performance of your electric bike kit, ensure the battery is fully charged and regularly maintain the bike’s components.
Can I install the kit on any type of bike?
Yes, the Dillenger Street electric bike kit is compatible with most types of bikes. It can be installed on various frames including mountain bikes, road bikes, and cruisers.
However, it is important to note that alternative installation methods may be required depending on the specific bike. It is recommended to consult the installation manual or reach out to Dillenger customer support for guidance on how to install the kit on your particular bike model.
Are there any specific tools required that may not be commonly found in a typical toolbox?
Installing a Dillenger Street electric bike kit requires a few specialized tools that may not be commonly found in a typical toolbox. These tools are like the secret ingredients that make the installation process smooth and efficient.
From a torque wrench for precise tightening to a crank puller for removing the existing cranks, these uncommon equipment ensure that every step of the installation is done correctly.
How often should I perform maintenance on my electric bike kit?
To ensure optimal performance and longevity of your electric bike kit, regular maintenance is crucial. Here are some tips for extending its lifespan:
-
Firstly, troubleshoot common issues such as battery connection problems or motor malfunctions.
-
Secondly, regularly inspect and clean all components, including the chain, brakes, and tires.
-
Additionally, keep the battery charged and stored in a cool, dry place.
-
Lastly, follow the manufacturer’s guidelines for maintenance intervals and consult a professional if needed.
Are there any safety precautions I should be aware of during the installation process?
During the installation process, it’s important to take certain safety precautions.
Firstly, ensure that the bike’s power is turned off to avoid any accidents.
Additionally, wear protective gloves and eyewear to protect yourself from any potential injuries.
When installing the kit, make sure to follow the instructions provided by the manufacturer carefully. Common mistakes such as incorrect wiring or loose connections can cause malfunctions.
Taking these precautions will help ensure a safe and successful installation.
Conclusion
In conclusion, installing a Dillenger Street electric bike kit was a challenging but rewarding experience.
I gathered my tools and prepared my bike, ensuring everything was ready for the installation. With precision and knowledge, I installed the battery holder and motor wheel, attaching the controller and wiring. Double-checking all the connections was crucial for safety.
After a test ride and necessary adjustments, I can confidently say that my newly converted electric bike is ready to hit the road. Now, I can enjoy the benefits of effortless rides and leave others in the dust.