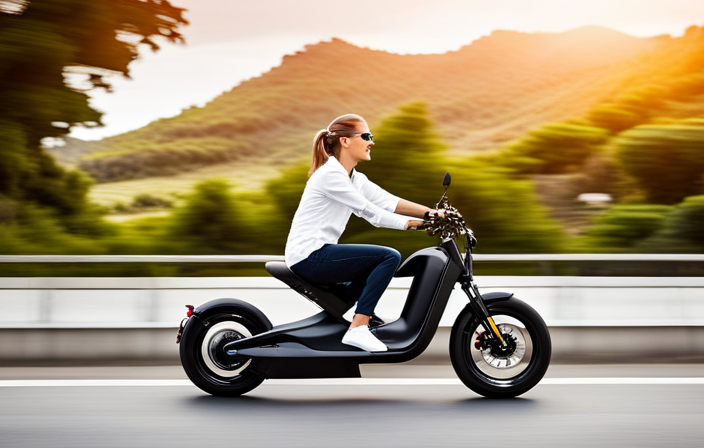

I’ve always loved biking, but sometimes I wish I had a little extra power to conquer those challenging hills or extend my range.
That’s why I decided to install an electric motor on my bike. In this article, I’ll guide you through the process step by step, ensuring a successful installation.
We’ll assess your bike’s compatibility, gather the necessary tools and materials, and choose the right electric motor kit.
So let’s get started and bring some electrifying energy to your biking adventures!
Key Takeaways
- Properly connect the controller wires to the motor wires and ensure all connections are secure to avoid damage.
- Mount the display and controls securely on the handlebars, choosing a comfortable position for easy access.
- Test and troubleshoot the installation, checking for any loose wires or damaged components and observing the motor’s response.
- Regularly maintain and inspect the electric motor and bike for optimal performance and longevity.

ROCKBROS Rear Bike Cargo Rack Quick Release Bike Carrier Rack with Fender Mountain Road Bicycle Rear Racks
QUICK RELEASE CLAMP for easily mount on the seat post or take the rear bike rack off, you...
As an affiliate, we earn on qualifying purchases.
Assess Your Bike’s Compatibility
First, you’ll need to check if your bike’s frame is compatible with an electric motor. Assessing compatibility is crucial to ensure a successful conversion.
Start by examining the frame’s design, material, and dimensions. Look for sufficient space to accommodate the motor and battery. Additionally, consider the mounting points and alignment of the frame to determine if it can handle the extra weight and torque of the motor.
If your bike meets these requirements, you can proceed to finding suitable conversion kits. Look for kits specifically designed for your bike’s frame type and size. Consider factors such as motor power, battery capacity, and control systems that match your needs and preferences.
Once you have assessed compatibility and found a suitable kit, you can move on to gathering the necessary tools and materials for the installation process.

CXWXC Rear Bike Rack with Basket - Bike Cargo Rack for Disc Brake/Non-Disc Brake Mount - Bicycle Pannier Rack, Touring Carrier Rack fit 26”-29” and 700c (Bike Rack)
【Make Sure it fits Your Bike Before Order】: Make sure if your bicycle have eyelets next to the...
As an affiliate, we earn on qualifying purchases.
Gather the Necessary Tools and Materials
Next, you’ll need to gather all the tools and materials you’ll need for installing an electric motor on your bike. Assessing compatibility and choosing the right kit options is crucial to ensure a successful installation.
Here’s a list of the essential tools you’ll require: a wrench set, screwdrivers, pliers, wire cutters, and electrical tape.
Additionally, gather the necessary materials such as the electric motor kit, battery pack, controller, throttle, and wiring harness. It’s important to carefully read the instructions provided with your kit to understand any additional tools or materials required.
Once you have everything assembled, you’ll be ready to move on to the next section about choosing the right electric motor kit, where we will explore various factors to consider before making a decision.

Ibera Bike Rack - Bicycle Touring Carrier Plus+ for Disc Brake Mount, Frame-Mounted for Heavier Top & Side Loads, Height Adjustable for 26"-29" Frames
Frame-mounted for heavier top and side loads with disk mounts
As an affiliate, we earn on qualifying purchases.
Choose the Right Electric Motor Kit
To ensure a successful installation, it’s crucial to carefully assess compatibility and select the appropriate kit options when choosing an electric motor kit for your bicycle.
When it comes to choosing the right motor power, you should consider the type of terrain you’ll be riding on and your desired speed. A more powerful motor is suitable for hilly areas or if you want to reach higher speeds. On the other hand, if you’ll be riding on mostly flat surfaces, a lower power motor may be sufficient.
Additionally, it’s important to consider the battery range. The range will determine how far you can travel on a single charge. Take into account your typical riding distance and choose a battery with enough range to meet your needs.
With the right motor power and battery range, your electric motor kit will provide the performance you desire.
Now, let’s move on to preparing your bike for installation.

YONTUO Rear Bike Rack,115 LB Capacity Solid Bearings Bike Cargo Rack w/Fender & Large Size Reflective,Quick Release Mountain Road Bicycle Rear Racks,Universal Bike Luggage Touring Carrier Rack
【High Quality Materials and Construction】The bike rear rack is made of high quality hard Aluminum Alloy.This material is...
As an affiliate, we earn on qualifying purchases.
Prepare Your Bike for Installation
Before you begin, make sure your bicycle is in good condition and all necessary tools are readily available. Here are the steps to prepare your bike for the installation of an electric motor kit:
-
Start by assessing the compatibility of your bike with the electric motor kit. Check the frame size, weight capacity, and wheel size to ensure they are suitable for the motor kit you have chosen.
-
Inspect the bike’s frame for any damage or cracks that could affect the installation. Repair or reinforce any weak spots before proceeding.
-
Remove any accessories or components that may interfere with the installation, such as fenders, racks, or water bottle cages. Clearing the bike of these items will provide a clean workspace and prevent any damage during the process.
-
Clean the frame thoroughly to remove any dirt, grease, or debris. A clean surface will ensure proper adhesion and secure attachment of the motor kit components.
Once you have completed these steps, you’re ready to install the electric motor on your bike’s frame.
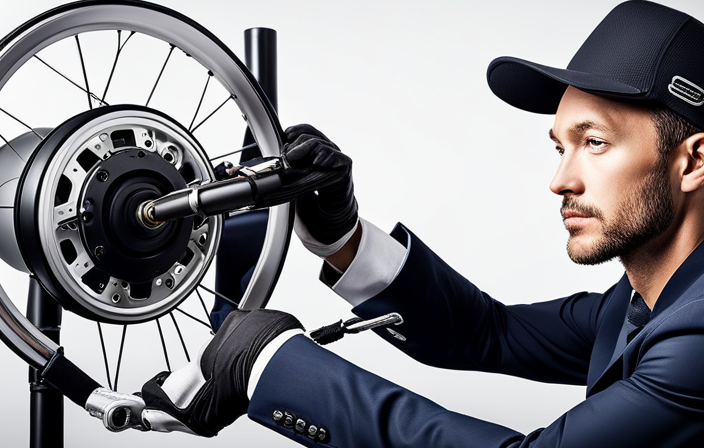
Install the Electric Motor on Your Bike’s Frame
Once you’ve completed the previous steps, it’s time to attach the motor kit securely onto your bicycle’s frame. Before proceeding, it’s important to assess the compatibility of your bike and the motor kit. Check if your bike has the necessary mounting points and clearances for the motor. Now let’s move on to the installation process. Begin by placing the motor kit on the frame and aligning it with the mounting points. Use the provided bolts and washers to secure the motor firmly in place. Make sure to tighten the bolts adequately to prevent any movement during operation. To guide you through the installation, refer to the table below for a step-by-step breakdown of the process.
| Step | Description |
|---|---|
| 1 | Assess compatibility of bike and motor kit |
| 2 | Place motor kit on frame and align with mounting points |
| 3 | Secure motor using provided bolts and washers |
| 4 | Tighten bolts to ensure stability |
With the motor kit securely attached to the frame, we can now move on to connecting the motor to the bike’s drive system.
Connect the Motor to the Bike’s Drive System
Now that the motor kit is securely attached to your bike’s frame, it’s time to connect it to the drive system. This step is crucial in ensuring that the motor and the bike’s drive system work together seamlessly.
Here are some important points to consider:
-
Chain compatibility and alignment: Before connecting the motor, make sure that the chain is compatible with the motor kit. Check the alignment of the chain and adjust it if necessary to ensure smooth operation.
-
Belt drive options: If your bike uses a belt drive system, you’ll need to ensure that the motor kit is compatible with this type of drive system. Check the specifications of the motor kit to ensure compatibility and make any necessary adjustments.
-
Proper tensioning: Whether you’re using a chain or a belt drive, it’s important to properly tension the drive system. This will ensure efficient power transfer and prevent any slippage during operation.
-
Secure fastening: Once the motor is connected to the drive system, double-check that all fasteners are securely tightened. This will prevent any loosening during use and ensure the longevity of your motor kit.
With the motor successfully connected to the bike’s drive system, the next step is to install the battery and controller, which will provide the necessary power and control for your electric bike.
Install the Battery and Controller
With the battery and controller in place, you can now power and control your electric bike.
To begin, connect the battery wires to the controller by matching the positive and negative terminals. Ensure a secure connection by tightening the connectors.
Next, connect the controller wires to the motor wires, following the color-coded instructions provided by the manufacturer. It is crucial to double-check the connections to avoid any short circuits or damage to the components.
Once all the wires are securely connected, it’s time to address the proper placement of the battery and controller on the bike frame. Make sure to choose a location that is secure and well-protected from the elements. This will prevent any potential damage to the components during rides.
Now that the battery and controller are in place, let’s move on to mounting the display and controls, allowing for effortless operation of your electric bike.
Mount the Display and Controls
To easily operate your electric bike, you’ll need to securely mount the display and controls on the handlebars. Follow these steps to ensure proper installation:
-
Choose the mounting position: Select a suitable location on the handlebars for the display and controls. Ensure it is easily accessible while riding.
-
Attach the display: Use the provided mounting bracket to attach the display securely to the chosen position. Tighten the screws to prevent any movement during use.
-
Connect the wiring: Carefully connect the wiring from the display to the controller. Ensure all connections are secure and properly aligned to avoid any electrical issues.
-
Mount the controls: Attach the controls, such as the throttle or pedal assist switch, to the handlebars in a comfortable position. Secure them tightly to prevent any movement.
By following these steps, you can successfully mount the display and controls on your electric bike.
Once completed, you can proceed to the next section to test the electric motor and ensure proper functioning.
Test the Electric Motor and Ensure Proper Functioning
You should start by testing the functionality of the electric motor on your newly mounted display and controls. This is an important step to ensure that everything is working properly before you start riding.
To test the motor, first, make sure that all the connections are secure and properly plugged in. Check for any loose wires or damaged components. Once everything is in order, turn on the power and observe the motor’s response. Pay attention to any unusual noises, vibrations, or error messages on the display.
If you encounter any issues, refer to the troubleshooting tips in the user manual or contact the manufacturer for assistance. It’s important to troubleshoot common issues before making adjustments for optimal performance.
Make Adjustments for Optimal Performance
Check the user manual for recommended adjustments to optimize the performance of your newly mounted display and controls.
To optimize performance, start by ensuring that all connections are secure and properly aligned. Check for any loose bolts or screws and tighten them as needed.
Next, adjust the display settings according to your preferences, such as brightness and contrast.
If you notice any issues with the motor, such as a decrease in power or unusual noises, refer to the troubleshooting section of the manual for guidance. It may be necessary to make further adjustments to the motor’s settings or seek professional assistance.
Remember to regularly inspect and maintain your electric motor to ensure its longevity and optimal performance. Safety precautions and proper maintenance are crucial for the continued functionality of your motor.
Ensure Safety Precautions and Proper Maintenance
Ensure that all necessary safety precautions and proper maintenance procedures are followed to guarantee the longevity and optimal performance of your newly mounted display and controls.
Before embarking on any installation or maintenance tasks, it is crucial to have the appropriate safety gear, such as gloves and eye protection, to protect yourself from any potential hazards.
Additionally, establishing a regular maintenance schedule will help keep your electric motor bike running smoothly. This includes checking the battery, inspecting the wiring connections, and lubricating the moving parts.
By adhering to these safety measures and maintenance protocols, you can ensure the safe operation of your electric-enhanced bike and extend its lifespan.
Now that your bike is ready to ride, let’s move on to the next section and discover the joy of your newly electric-enhanced bike.
Enjoy Your Newly Electric-Enhanced Bike
Now that you’ve successfully upgraded your ride, it’s time to embrace the exhilarating experience of cruising on your newly electric-enhanced bike. Here are three key benefits of electric biking:
-
Increased Speed: With the electric motor providing an extra boost, you can effortlessly reach higher speeds, allowing you to cover more ground in less time.
-
Extended Range: The electric motor extends the range of your bike, making it easier to tackle longer distances without feeling fatigued. This opens up new possibilities for exploration and adventure.
-
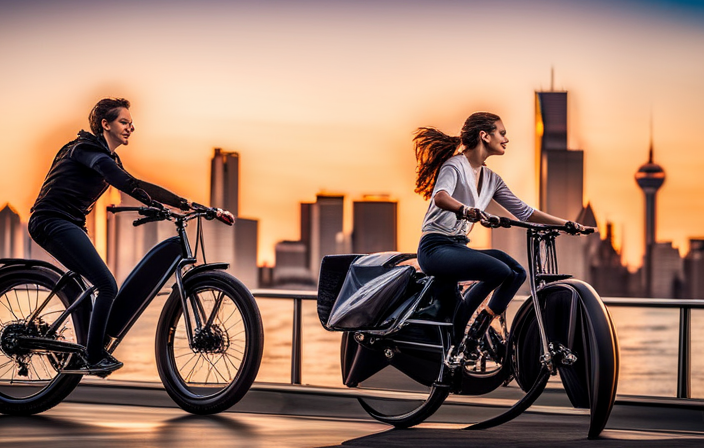
Eco-Friendly Commuting: Electric biking is a sustainable transportation option that reduces your carbon footprint. By opting for electric power instead of relying solely on fossil fuels, you contribute to a cleaner, greener environment.
Learn and Practice Responsible Riding Habits
As you start exploring the world on your newly enhanced ride, it’s important to develop and maintain responsible riding habits for your safety and the safety of others. Responsible riding goes hand in hand with using eco-friendly transportation. By adopting responsible riding habits, you can minimize your carbon footprint and contribute to a cleaner environment. Here are some key responsible riding habits to practice:
| Responsible Riding Habits | Description |
|---|---|
| Wear a helmet | Protect your head from potential injuries |
| Obey traffic laws | Follow traffic signals and signs to ensure your safety and the safety of others |
| Share the road | Respect other road users, including pedestrians and cyclists |
| Maintain your bike | Regularly check and maintain your electric bike to ensure it is in good working condition |
Explore Different Riding Modes and Features
To enhance your electric bike experience, you can easily switch between different riding modes and utilize various features.
One of the key advantages of electric bikes is the ability to choose from different battery options. Depending on your needs and preferences, you can select a battery with a higher capacity for longer rides or a smaller one for shorter commutes.
Additionally, the benefits of an electric motor on hills cannot be overstated. With the assistance of the motor, you can effortlessly conquer steep inclines that would otherwise be challenging on a regular bike.
Whether you prefer a more relaxed ride or want to push your limits, the different riding modes and features of an electric bike allow you to tailor your experience to your liking.
Share Your Experience and Encourage Others to Go Electric!
Share your own experience with an electric bicycle and inspire others to make the switch!
I’ve been using an electric bike for the past year and it has completely transformed my daily commute. The electric motor provides an extra boost of power, making it easier to conquer hills and ride longer distances without getting tired.
Not only is it convenient, but it also encourages sustainability by reducing carbon emissions. By using an electric bike, I have significantly reduced my reliance on fossil fuels and contribute to a cleaner environment.
Additionally, the cost-saving benefits are remarkable. I no longer spend money on gas or parking fees, and the maintenance costs are minimal compared to a car.
Overall, my experience with an electric bike has been exceptional, and I highly recommend it to anyone looking for a sustainable and cost-effective mode of transportation.
Frequently Asked Questions
How do I assess my bike’s compatibility before installing an electric motor?
To assess my bike’s compatibility before installing an electric motor, I would first check the bike’s condition by examining its frame, brakes, and drivetrain. I would also ensure that the battery is compatible with the motor system.
What are the necessary tools and materials required for installing an electric motor on a bike?
To install an electric motor on a bike, you will need a motor kit, battery, battery holder, controller, throttle, wiring harness, and a set of basic tools such as wrenches, screwdrivers, and pliers. Follow a step-by-step installation guide to ensure proper installation.
How do I choose the right electric motor kit for my bike?
When choosing an electric motor kit for your bike, consider factors such as power output, battery capacity, and motor type. There are various options available, including hub motors, mid-drive motors, and friction drive motors.
What safety precautions and proper maintenance should I follow after installing an electric motor on my bike?
During electric bike rides, it is crucial to follow safety precautions such as wearing a helmet, using appropriate signaling, and obeying traffic laws. Proper maintenance practices for electric bike motors include regular cleaning and inspection, checking battery connections, and lubricating moving parts.
What are some different riding modes and features that I can explore after installing an electric motor on my bike?
After installing an electric motor on my bike, I can explore various riding modes such as pedal-assist and throttle-only. Additionally, I can enjoy features like regenerative braking, LCD displays for monitoring speed and battery life, and integrated lights for enhanced visibility.
Conclusion
In conclusion, after assessing my bike’s compatibility and gathering the necessary tools and materials, I successfully installed the electric motor on my bike’s frame.
It was like giving my bike a turbo boost, allowing me to effortlessly glide through the streets with the wind at my back.
With responsible riding habits, I can now explore different riding modes and features, enhancing my cycling experience to new heights.
I encourage others to embark on this electrifying journey and witness the transformation of their bikes into powerful, electric-driven machines.