Mounting bike pedals might look like a piece of cake, but it actually takes some know-how and finesse to nail it. Having put pedals on more bikes than I can count, both mine and my buddies’, I’m here to spill the beans on how it’s done.
In this article, I will guide you through the step-by-step process of installing different types of pedals, including flat, clipless, and platform pedals.
Before we get started, it’s important to gather the necessary tools for the job. You will need a pedal wrench or a 15mm wrench, a hex wrench or an Allen key, and some grease or lubricant. It’s also a good idea to have a rag or towel on hand to wipe off any excess grease or dirt.
Once you have everything you need, it’s time to determine the correct pedal for your bike and get ready to install it.
Key Takeaways
- Different types of pedals require different installation processes and tools.
- Proper technique and safety precautions are essential when removing old pedals.
- Pedal compatibility and non-interchangeability are important factors to consider.
- Regular maintenance, including checking for tightness and using grease, is crucial for safe and efficient bike operation.
Gather the Necessary Tools
Now, you’ll want to grab a few tools before getting started, such as a pedal wrench and a grease rag to make sure everything runs smoothly. Proper pedal maintenance is important in ensuring your bike operates safely and efficiently. Neglecting to maintain your pedals can lead to common pedal issues such as creaking, looseness, or difficulty in removing them.
So, before you start installing your new pedals, take a moment to inspect your current ones and make sure they’re in good condition. Once you’ve confirmed that your pedals are in working order, it’s time to determine the correct pedal for your bike.
This is an important step to ensure that your new pedals fit your bike’s crankset. Check your bike’s manual or consult with a bike shop to determine the type of pedal and thread size that is compatible with your bike. By taking the time to determine the correct pedal, you can avoid damaging your bike’s crankset and ensure a smooth installation process.
Determine the Correct Pedal
When determining the correct pedal for installation, it’s important to understand the difference between left and right pedals. The left pedal is typically marked with an ‘L’ or a left-facing arrow, while the right pedal is marked with an ‘R’ or a right-facing arrow.
It’s crucial to install the correct pedal on the corresponding side, as pedals are non-interchangeable between the left and right sides of the bike.
Left vs. Right Pedals
Pedals are like shoes – there’s a left and a right one, and it’s important to install each one correctly. Before you start the installation process, it’s crucial to understand the difference between left and right pedals. Installing the wrong pedal in the wrong position can cause misalignment of the threads, which can lead to the pedal coming loose while riding.
To help you differentiate between the left and right pedals, I’ve created a table that outlines the key characteristics of each pedal type and size. It’s essential to match the correct pedal to the corresponding crankarm. The left pedal typically has a reverse thread, which means that you need to turn it clockwise to install it. Conversely, the right pedal has a standard thread, which means that you need to turn it counterclockwise to install it.
It’s important to note that bike pedals are non-interchangeable, which means that you can’t use a left pedal on the right side or vice versa. This is because the threading is different for each pedal type, and attempting to install them in the wrong position can cause damage to both the pedal and the crankarm. Now that we’ve discussed the difference between left and right pedals let’s move on to the next section, where we’ll discuss the tools you’ll need to install your pedals correctly.
Non-Interchangeability
It’s crucial to understand that bike pedals are non-interchangeable, which means that you cannot use a left pedal on the right side or vice versa. This is because pedals have different threading sizes, and using the wrong pedal on the wrong side can cause damage to your equipment or put you in danger while riding.
Interchangeability limitations are not only restricted to the left and right pedals but also apply to different types of pedals, such as clipless pedals and platform pedals. Pedal compatibility issues can arise when purchasing new pedals or replacing old ones.
It’s important to check the pedal specifications and ensure that they are compatible with your bike before making a purchase. Knowing the correct threading size and the type of pedal that your bike requires can save you time and money in the long run.
With this understanding of non-interchangeability and pedal compatibility, you’re now ready to install flat pedals on your bike.
Install Flat Pedals
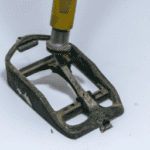
First things first, let’s get those flat pedals installed so we can hit the road (or trail)! Before beginning the installation process, it’s important to choose the right pedal materials. Generally, platform pedals for mountain biking are made of durable materials such as aluminum or steel. It’s important to ensure that the pedals fit securely onto the crank arms and that the threads match.
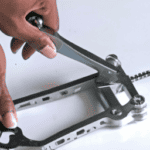
Once you have your flat pedals and the necessary tools, it’s time to get started. Begin by removing the old pedals using a pedal wrench or a 15mm wrench. Next, apply some grease to the threads of the new pedals and carefully thread them onto the crank arms. Tighten them securely using a wrench and make sure they spin smoothly.
Now that your flat pedals are installed, let’s move on to the installation of clipless pedals. In order to switch to clipless pedals, you’ll need to purchase compatible shoes and pedals. While clipless pedals may seem intimidating, they offer numerous benefits such as increased efficiency and control.
Let’s take a closer look at how to install them.
Install Clipless Pedals
Now that we’ve covered how to install flat pedals, let’s move on to clipless pedals. Despite the name, clipless pedals actually require a special type of shoe that clips into the pedal. These pedals offer a number of benefits, including increased power and efficiency, better control, and improved safety.
Before installing clipless pedals, it’s important to choose the right pedal shoes. Look for shoes that have a stiff sole, as this will help transfer power from your legs to the pedals. You’ll also want shoes that fit snugly but comfortably, as any movement between your foot and the shoe can cause discomfort and reduce power transfer. Once you have the right shoes, you can follow these steps to install your clipless pedals:
| Step | Action |
|---|---|
| 1 | Remove the old pedals using a pedal wrench |
| 2 | Grease the threads of the new pedals |
| 3 | Thread the new pedals into the crank arms by hand |
| 4 | Tighten the pedals using a pedal wrench, being careful not to overtighten |
| 5 | Attach the cleats to the bottom of your shoes according to the manufacturer’s instructions |
| 6 | Clip your shoes into the pedals and adjust the tension to your liking |
With your clipless pedals installed and your shoes clipped in, you’ll be able to enjoy the increased efficiency and control that they offer. But if clipless pedals aren’t your thing, don’t worry – we’ll cover how to install platform pedals in the next section.
Install Platform Pedals
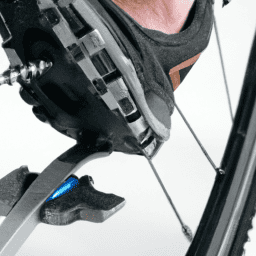
When I install platform pedals, I always follow a three-step process. First, I remove the old pedals using a pedal wrench.
Then, I grease the threads of the new pedals to ensure they go on smoothly and don’t get stuck.
Finally, I tighten the new pedals using the same pedal wrench, making sure they are secure and won’t come loose while riding.
By following these steps, I can ensure a smooth and safe ride with my new platform pedals.
Remove Old Pedals
Alright folks, it’s time to bid adieu to those old, worn-out pedals. Let’s get rid of them and make way for some shiny new ones! Proper technique and safety precautions are essential during this process to prevent injuries and damage to the bike. Here’s how I remove old pedals:
-
First, I gather the necessary tools: a pedal wrench, hex key, and a rag.
-
Next, I position the bike in a stable manner, either by using a bike stand or by flipping it over.
-
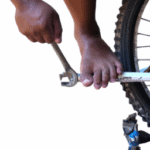
Then, I insert the hex key into the pedal axle to hold it steady while I use the pedal wrench to turn the spindle counterclockwise. It’s important to remember that the left pedal is reverse threaded, so it tightens by turning clockwise.
-
After the pedal is loose, I use my hands to unscrew it and remove it from the crank arm.
-
I wipe down the crank arm and pedal threads with a rag to remove any dirt or debris before installing the new pedals.
Now that the old pedals are off, it’s time to grease the threads and install the new pedals.
Grease Threads
First, you should apply a generous amount of grease to the threads of the pedal spindle before attaching it to the crank arm. Applying lubricant to the threads ensures that the pedal will screw in smoothly and reduces the risk of cross threading, which can cause damage to both the pedal and the crank arm.
This is an essential step that will help to prolong the life of your bike and ensure that it performs at its best.
Avoiding cross threading is crucial when installing new pedals. Cross threading can occur when the threads of the pedal spindle and crank arm don’t align correctly, causing the threads to become damaged. This can lead to a loose connection between the pedal and the crank arm, which can be dangerous.
To avoid this, always make sure that the threads are aligned properly before beginning to screw in the pedal. Once the pedal is securely attached, you can move on to the next step of tightening the new pedals.
Tighten New Pedals
Now that you’ve applied grease to the threads, it’s time to tighten your new pedals securely onto the crank arms using a pedal wrench.
Proper technique is crucial during this step to ensure that your pedals are securely attached and won’t come loose while riding.
To begin, insert the pedal into the crank arm, making sure that the threads are aligned properly.
Then, use the pedal wrench to turn the pedal clockwise, tightening it onto the crank arm.
Use firm pressure, but be careful not to overtighten the pedals, as this can cause damage to the threads or the crank arm.
One common mistake is to use a regular wrench instead of a pedal wrench, which can strip the pedal’s threads and cause it to come loose while riding.
Frequently Asked Questions
Can I use any type of pedal on my bicycle?
I only use pedals that are compatible with my bicycle. Pedal maintenance is important to ensure they work properly and safely. Always refer to your bicycle’s manual for pedal specifications.
How tight should I screw in the pedals?
Screwing in pedals is like tightening a jar lid. Improper alignment can lead to discomfort, injury, and decreased efficiency. Pedal maintenance is crucial for a smooth ride. Tighten pedals until snug, but avoid over-tightening to prevent stripping threads.
What is the difference between clipless and platform pedals?
Clipless pedals offer improved efficiency and control over platform pedals by securely attaching the shoe to the pedal. Choosing the right shoes for clipless pedals is crucial for optimal performance.
How do I know if I need to replace my old pedals?
Before installing new bike pedals, check if the old ones need replacing. Look for pedal wear indicators or looseness in the bearings. Proper maintenance, such as regular cleaning and lubrication, can extend their lifespan.
Do I need to use a special tool to install my pedals?
Yes, it’s possible to install pedals without a special tool. However, it’s important to avoid common mistakes such as cross-threading or over-tightening the pedals. As an experienced cyclist, I recommend using a proper wrench and following the manufacturer’s instructions for best results.
Conclusion
In conclusion, installing bicycle pedals may seem daunting at first, but with the right tools and knowledge, anyone can do it.
Remember to gather the necessary tools and determine the correct pedal before starting the installation process.
Installing flat pedals is relatively simple, while clipless pedals require a bit more attention to detail. Platform pedals can be installed using either method.
One anticipated objection may be that installation is too difficult or time-consuming. However, with practice and experience, the process becomes easier and can be completed in a matter of minutes.
It’s important to take the time to properly install pedals to ensure a safe and comfortable riding experience. Don’t let the fear of installation deter you from enjoying the many benefits of cycling.
With these tips, you can confidently install your own pedals and hit the road in no time.
