In the realm of cycling, the saddle is akin to the throne of a rider, offering comfort and stability during each excursion. But what occurs when it is time to replace or enhance that throne?
Fear not, for I will guide you through the precise and detailed process of installing a bicycle seat. With the right tools and a little bit of know-how, you’ll be back on your saddle, ready to conquer the road with renewed comfort and joy.
Let’s get started!
Key Takeaways
- Gather the necessary tools, including an adjustable wrench, measuring tape, lubricant, and old seat removal tools.
- When removing the old seat, unscrew the bolts using a wrench or Allen key and adjust the seat height according to the recommended height.
- To adjust the seat height and position, loosen the bolt or quick-release lever, slide the seat forward or backward, determine the right seat height, and ensure it is secure and level.
- When attaching the seatpost to the frame, insert the seatpost into the seat tube, align it with the desired height, tighten the seatpost clamp securely, and double-check for a firm installation.

CXWXC Bike Repair Stand 88lbs- E Bike Stand for Maintenance Workstand - Ebike Repair Stand Shop Home Mechanics for Mountain Bike and Road Bike (Max. 88lbs)
【Easy-Breezy Bicycle Maintenance】: A bike repair stand is an essential item when you’re working on your bike or...
As an affiliate, we earn on qualifying purchases.
Gather the Necessary Tools and Equipment
You’ll need a few tools and equipment to install your bicycle seat.
First, you’ll need an adjustable wrench to loosen and tighten the bolts that secure the seat to the seat post. This will allow you to adjust the seat height to your preferred position.
Next, you’ll need a measuring tape to ensure that you choose the right seat size. Measure the width of your sit bones to determine the appropriate seat width for optimal comfort.
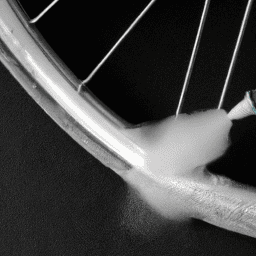
Additionally, you may need a grease or lubricant to apply to the seat post before installation, to prevent it from getting stuck in the frame.
Once you have gathered these tools and equipment, you can move on to the next step of the process, which is to remove the old bicycle seat and prepare for the installation of the new one.

GOEHNER's Upgrade 2.0 Bike Repair Stand (Max 110 lbs) – Portable Aluminum Bicycle Workstand for Electric, Mountain, and Road Bikes
【Max Load 110lbs】 Crafted from durable #6070 aluminum, this lightweight yet heavy-duty bike repair stand can support bikes...
As an affiliate, we earn on qualifying purchases.
Remove the Old Bicycle Seat
To start, simply unscrew the bolts holding the old seat in place. Use a wrench or Allen key to loosen the bolts and remove the seat from the seatpost. It’s important to gather the necessary tools and equipment before proceeding with this step. Once the old seat is removed, you can now focus on adjusting the seat height and choosing the right seatpost. Adjusting the seat height is crucial for a comfortable and efficient riding experience. Refer to the table below for the recommended seat height based on your inseam measurement.
| Inseam Measurement (inches) | Recommended Seat Height (inches) |
|---|---|
| 27-29 | 17-19 |
| 30-32 | 20-22 |
| 33-35 | 23-25 |
| 36+ | 26+ |
Now that you have removed the old seat, it’s time to adjust the seat height and position for optimal comfort and performance.

E Bike Stand Repair (Max 132 lbs) - Foldable Bike Stand for Maintenance of Road Bike Stand& Mountain Bike Stand,Bicycle Repair Stand for E-bikes with Super-strong Tube,Height Adjustable Portable Bicycle Heavy Duty Mechanics Workstands
Please Watch our video to see how to properly use and adjust the repair stand.By watching the vedio...
As an affiliate, we earn on qualifying purchases.
Adjust the Seat Height and Position
Once the old seat is removed, it’s time to adjust the height and position of the seat for optimal comfort and performance.
To adjust the seat position, loosen the bolt or quick-release lever located underneath the seat. Slide the seat forward or backward to find a position that aligns with your body’s natural posture and allows for proper leg extension while pedaling.
Next, select the right seat height by considering the bend in your knee when the pedal is at its lowest point. Adjust the seat height by loosening the seatpost clamp and raising or lowering the seatpost accordingly.
Make sure the seat is secure and level before tightening the bolts or lever. Remember that incorrect seat position or height can cause discomfort, pain, or even injury while riding.
With the seat properly adjusted, we can now move on to attaching the seatpost to the bicycle frame.

VEVOR Bike Repair Stand, 4-Leg Steel Bicycle Repair Stand, 42.5"-74.8" Adjustable Height Bike Maintenance Work Stand with Magnetic Tool Tray, Foldable Bike Service Stand for Home, Shop (Max 80 Pounds)
80 lbs High Load Capacity: Crafted from heavy-duty non-rust steel with a thick column diameter, the bike repair...
As an affiliate, we earn on qualifying purchases.
Attach the Seatpost to the Bicycle Frame
Now, make sure the seatpost is securely attached to the frame of your bike. This is an important step in the installation process to ensure a safe and comfortable ride.
Start by inserting the seatpost into the seat tube of the bicycle frame. Make sure it is inserted to the desired height that you determined when adjusting the seat height.
Next, tighten the seatpost clamp using an Allen wrench or a quick-release lever, depending on the type of clamp your bike has. It is important to tighten the clamp securely to prevent the seatpost from slipping or moving during your ride.
Double-check the seatpost installation to ensure it is firmly in place before moving on to the next step of installing the new bicycle seat onto the seatpost.
Install the New Bicycle Seat onto the Seatpost
Make sure you securely attach the new seat onto the seatpost. To install the new bicycle seat, follow these steps:
| Adjusting Seat Height | Choosing the Right Seatpost |
|---|---|
| Start by loosening the seat clamp bolt located underneath the seat. | Measure the diameter of the seat tube on your bicycle frame. |
| Slide the seatpost into the seat tube and align it with your desired height. | Choose a seatpost with the same diameter as your seat tube. |
| Tighten the seat clamp bolt to secure the seatpost in place. | Consider the material and length of the seatpost based on your riding style and preferences. |
| Test the seat height by sitting on the bicycle and adjusting as needed. | Insert the seatpost into the seat tube, ensuring it is fully inserted and level. |
Once you have installed the new bicycle seat onto the seatpost, you can proceed to the next step of tightening the seat clamp bolt to ensure a safe and comfortable riding experience.
Tighten the Seat Clamp Bolt
After successfully installing the new bicycle seat onto the seatpost, the next step is to tighten the seat clamp bolt securely. This is a crucial step to ensure that the seat remains stable during rides.
To begin, make sure you have the correct size wrench or Allen key to fit the bolt. Start by positioning the seat at your desired height and angle, then tighten the bolt using a clockwise motion. Be careful not to overtighten, as this can damage the seatpost or strip the threads. It is important to find the right balance between tightness and adjustability.
Additionally, when choosing a seatpost, consider the material and diameter that is compatible with your bicycle frame.
Once the seat clamp bolt is securely tightened, you can now move on to the next step of checking the seat for stability and comfort.
Check the Seat for Stability and Comfort
To ensure a comfortable and stable ride, you should check the stability and comfort of your newly installed seat. Here are three key steps to follow for stability testing and comfort evaluation:
-
Stability Testing: Sit on the seat and apply your weight evenly. Ensure that the seat doesn’t shift or wobble during this test. If there is any movement, tighten the seat clamp bolt further to secure it in place.
-
Comfort Evaluation: Pay attention to how the seat feels while sitting on it. Check for any pressure points or discomfort. Adjust the seat angle and position if necessary to find the most comfortable position for your body.
-
Ride Test: Take your bike for a short test ride to assess the seat’s stability and comfort while in motion. Pay attention to any vibrations or excessive movement. If you encounter any issues, make further adjustments to the seat position or angle.
Now, let’s move on to the next section where we will test the seat adjustment and make further adjustments if needed.
Test the Seat Adjustment and Make Further Adjustments if Needed
Once you’ve checked the stability and comfort of your newly installed seat, it’s time to test the seat adjustment and make any necessary adjustments.
Start by testing the seat angle to ensure it aligns with your body’s natural position while riding. If needed, make adjustments to achieve the optimal angle for comfort and performance.
Next, check for proper saddle tilt and alignment to prevent discomfort and strain on your joints. Evaluate the seat padding and cushioning to ensure it provides adequate support and shock absorption.
Assess the seat’s impact on overall bike fit and comfort, considering the use of seatpost suspension for added shock absorption and comfort. Explore different saddle designs and materials to find the best fit for your riding style.
If needed, seek professional help for seat fitting and adjustments. Compare different seat brands and models to find the one that suits you best.
Lastly, discuss the importance of proper seat height for optimal pedaling efficiency.
Transitioning to the next section, securely fasten any additional accessories or features on the seat.
Securely Fasten any Additional Accessories or Features on the Seat
Before securing any additional accessories or features, ensure that the seat is properly adjusted and aligned for optimal comfort and performance. Once the seat is in the desired position, you can proceed to securely fasten any additional accessories or features.
To do this, follow these steps:
- Use a wrench to tighten the bolts on the seat post clamp, ensuring that the seat is securely attached to the seat post.
- Attach any accessories, such as a water bottle holder or saddlebag, using the appropriate mounting brackets or clamps.
- Double-check that all bolts and screws are tightened to prevent any potential loosening during rides.
- Test the stability of the accessories by gently pulling or pushing on them to ensure they are securely fastened.
By properly fastening accessories and securing features, you can enhance your riding experience and avoid any potential safety hazards.
Now, let’s move on to ensuring the proper alignment and balance of the seat.
Ensure Proper Alignment and Balance of the Seat
Make sure your seat is properly aligned and balanced for a comfortable and stable riding experience.
Proper seat alignment is crucial to avoid discomfort and potential injuries. Begin by adjusting the seat height to ensure your legs are fully extended but still slightly bent at the knees when pedaling.
Next, adjust the seat angle to achieve a neutral position that supports your sit bones evenly.
Balancing techniques can further enhance your riding experience. Sit on the seat and distribute your weight evenly, avoiding leaning too far forward or backward.
Engage your core muscles to maintain stability and control while riding.
Finally, double-check all the bolts and connections for tightness to prevent any unexpected movement. This will ensure a secure and safe riding experience.
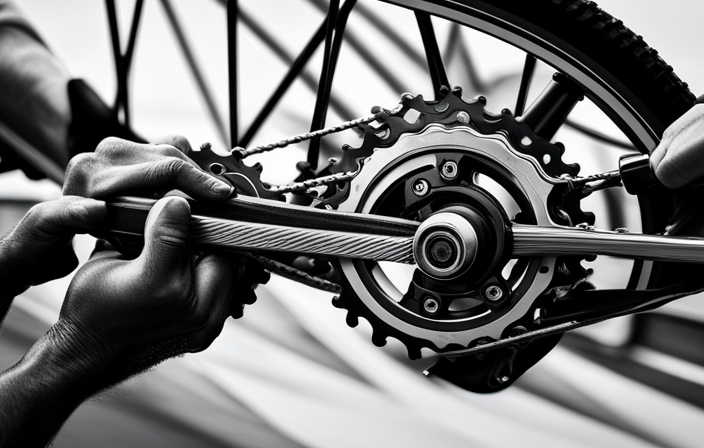
Double-check all the Bolts and Connections for Tightness
Ensure that you double-check all the bolts and connections for tightness to ensure a secure and safe riding experience. Here are four important steps to follow when tightening bolts and checking connections:
-
Use a torque wrench to tighten the bolts to the manufacturer’s recommended specifications. This ensures that the bolts are tightened to the correct level of tightness and prevents them from becoming loose during rides.
-
Inspect all the connections, including the seat clamp, seat post, and saddle rails, for any signs of wear or damage. Replace any worn or damaged components to maintain a secure connection.
-
Tighten the seat clamp bolt securely to prevent the seat from shifting or wobbling while riding. A loose seat clamp can affect your balance and stability on the bike.
-
Check that all the bolts and connections are tightened periodically, especially after long rides or when you notice any unusual movement or noise coming from the seat area.
By regularly tightening bolts and checking connections, you can ensure a safe and comfortable ride.
Moving on to the next section, it’s important to clean and maintain the bicycle seat regularly to prolong its lifespan.
Clean and Maintain the Bicycle Seat Regularly
To keep your bike seat in good condition, it’s important to regularly clean and maintain it. Cleaning techniques for bicycle seats vary depending on the material.
For leather seats, use a soft cloth dampened with mild soap and water to gently wipe away dirt and grime. Avoid using harsh chemicals as they can damage the leather.
For synthetic seats, a mixture of water and mild detergent works well. Use a soft brush to scrub away stubborn stains. When choosing cleaning products, opt for ones specifically designed for bike seats to ensure compatibility.
After cleaning, dry the seat thoroughly to prevent moisture buildup. Consider using a seat cover or cushion for extra comfort, as this can help protect the seat from wear and tear.
Consider Using a Seat Cover or Cushion for Extra Comfort
Consider using a seat cover or cushion for added comfort while riding. Not only does it provide extra padding, but it also offers several benefits. A seat cover can protect your bicycle seat from wear and tear, extending its lifespan. It can also prevent moisture buildup, reducing the chances of mold and mildew growth. When choosing the right cushion, consider factors such as material, thickness, and shape. Gel cushions are popular for their shock-absorbing properties, while foam cushions provide a balance between comfort and support. Additionally, some cushions come with features like ventilation channels or pressure relief zones. To help you make an informed decision, here is a comparison table showcasing different seat cover options and their features. By using a seat cover or cushion, you can enhance your riding experience and reduce discomfort. Now, let’s move on to the next step and take a test ride to evaluate the new seat.
Take a Test Ride to Evaluate the New Seat
Now that you’ve added a seat cover or cushion, it’s time to hop on your bike and take a test ride to see how the new seat feels.
To properly evaluate the comfort and test the durability of the seat, start by adjusting it to your desired height and angle. Ensure that it is securely fastened to the seat post.
Begin your test ride on a smooth and even surface, gradually increasing your speed to replicate real cycling conditions. Pay close attention to any discomfort or pressure points that may arise during the ride.
Evaluate how well the seat absorbs shocks and vibrations, as well as how it supports your body weight. After the test ride, make any necessary adjustments to the seat position or cushioning to optimize your comfort.
With your upgraded bicycle seat, you can now enjoy a more comfortable and enjoyable cycling experience! Happy cycling!
Enjoy Your Upgraded Bicycle Seat and Happy Cycling!
Get ready to hit the road and enjoy a more comfortable ride with your upgraded seat – happy cycling!
Installing a new bicycle seat not only improves your comfort but also enhances your overall biking experience. Here are the key benefits and some tips to maximize your enjoyment:
-
Increased comfort: The upgraded seat offers better padding and ergonomic design, reducing pressure points and allowing for a more enjoyable ride.
-
Improved stability: A properly installed seat ensures better stability and balance, enhancing your control over the bike.
-
Enhanced performance: With a comfortable seat, you can ride longer and more efficiently, increasing your endurance and speed.
To fully benefit from your upgraded seat, adjust it to the optimal height and angle for your riding style. Ensure the seat is securely tightened to prevent any unwanted movements. Finally, remember to wear appropriate cycling gear for added comfort and safety.
Now, get out there and experience the thrill of cycling with your new seat!
Frequently Asked Questions
How do I choose the right size of bicycle seat?
Adjusting the angle of the bicycle seat can improve comfort by relieving pressure on sensitive areas. For women, it’s important to choose a seat designed for female anatomy, with a wider rear and a shorter nose to prevent discomfort and ensure proper support.
Can I use the same seatpost for the new bicycle seat?
Can I use the same seatpost for the new bicycle seat? Before installing, check seatpost compatibility. Using an old seatpost may work, but it’s crucial to ensure it fits securely and meets the requirements of the new seat.
What should I do if the seat clamp bolt is difficult to tighten?
If the seat clamp bolt is difficult to tighten, try these troubleshooting steps: 1) Check if the bolt is stripped or damaged. 2) Use alternative seatpost options like a different clamp or seatpost. 3) Ensure the bolt is properly aligned and lubricated.
Are there any specific maintenance tips for the bicycle seat?
When it comes to maintenance tips for your bicycle seat, it’s crucial to ensure seatpost compatibility. Regularly inspect and clean the seatpost and seat rails, lubricate the clamp bolt, and check for any signs of wear or damage.
Is it necessary to use a seat cover or cushion for extra comfort?
Yes, using a bicycle seat cushion or seat cover can provide extra comfort while riding. A cushion can absorb shocks and reduce pressure points, while a cover can protect the seat from wear and tear.
Conclusion
After carefully gathering the necessary tools and equipment, removing the old bicycle seat, and adjusting the seat height and position, I attach the seatpost to the bicycle frame. Next, I install the new bicycle seat onto the seatpost. I make sure to clean and maintain it regularly. I also consider using a seat cover or cushion for extra comfort. Finally, I take a test ride to evaluate the new seat. With all these steps completed, I can confidently say that my cycling experience has been elevated to new heights.
Like a well-crafted symphony, the installation of a bicycle seat requires precision and attention to detail. But once completed, the harmony between rider and bike is perfectly orchestrated, allowing for a smooth and enjoyable ride.
So, embrace the upgrade and let the journey begin!