
They say that nothing beats the feeling of freedom as you ride your bike through the open road. But what if you could take that experience to the next level?
With the installation of an electric battery on your bike, you can transform your regular pedal-powered ride into a powerful and efficient machine.
In this article, I will guide you through the step-by-step process of installing an electric battery on your bike, so you can enjoy the thrill of riding with an added boost of speed and convenience.
So let’s get started!
Key Takeaways
- Assess bike compatibility and choose the right electric battery based on available space and mounting points, dimensions, weight capacity, and requirements.
- Consider battery capacity for longer-lasting charge and evaluate lithium-ion or lead-acid battery types for advantages and disadvantages.
- Balance voltage with specific needs and take battery weight into consideration for easier handling.
- Gather necessary tools and equipment, prepare the bike for installation, and install the electric battery mount securely.

Swagman Standard Fork Mount Rooftop Bike Carrier
EASY TO ASSEMBLE: The STANDARD is easy to assemble with no tools required, sets up in just minutes...
As an affiliate, we earn on qualifying purchases.
Assess Your Bike’s Compatibility
You’ll need to assess if your bike is compatible with an electric battery. To begin the bike compatibility assessment, check if your bike has enough space and mounting points for the battery. Look for a convenient location near the center of gravity, usually on the downtube or rear rack. Measure the available space and compare it to the dimensions of compatible electric batteries.
Additionally, consider the weight capacity of your bike and ensure it can handle the additional weight of the battery. If your bike meets these requirements, you can proceed to the next step of finding compatible electric batteries.
Now that you know your bike is compatible, it’s time to choose the right electric battery.
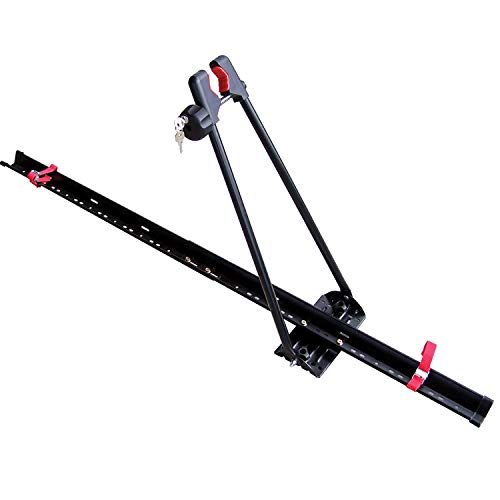
Swagman UPRIGHT Roof Mount Bike Rack
EASY TO ASSEMBLE: The UPRIGHT roof rack installs in minutes following the instructions and carries one bike with...
As an affiliate, we earn on qualifying purchases.
Choose the Right Electric Battery
First, make sure to select the appropriate battery for your bicycle. Choosing the right electric battery is crucial for optimal performance. Consider the battery capacity, which determines how long the battery will last on a single charge. Also, take into account the battery type, such as lithium-ion or lead-acid, as each has its own advantages and disadvantages.
Next, consider the battery voltage. Higher voltage batteries provide more power, but they may also be heavier and more expensive. Balancing the voltage with your specific needs is essential. Additionally, take into consideration the battery weight. A lighter battery will make your bike easier to handle and maneuver.
To summarize, when choosing the right electric battery for your bike, consider the battery capacity, type, voltage, and weight. Once you have selected the appropriate battery, you can move on to the next step of gathering the necessary tools and equipment.

SYDSZ Roof Bike Rack Mount Upright Roof Bike Rack 1 Bike Carrier Car Roof Bicycle for Car Only Suitable for Removable Universal Crossbars
【COMPATIBILITY】Only applicable for installation on the driver's roof, fits 20" - 29" wheels. 64" long tray. Fits up...
As an affiliate, we earn on qualifying purchases.
Gather the Necessary Tools and Equipment
Once you’ve gathered all the required tools and equipment, you’ll be ready to proceed with the next steps. Before you start, ensure you have the correct bike battery selected based on your bike’s specifications. The battery selection is crucial as it determines the overall performance and compatibility with your bike.
Now, let’s move on to the battery installation process. Begin by locating the battery compartment on your bike, usually found near the seat post or in the frame. Use the appropriate tools, such as a wrench or screwdriver, to remove any screws or bolts securing the compartment. Carefully insert the electric battery into the compartment, ensuring it is securely fastened.
Once the battery is installed, you can proceed to the next section, where you will prepare your bike for installation of other necessary components.

SAVADECK T800 Carbon Gravel Bike, with Shimano GRX610 12-Speed, Hydraulic Disc Brakes, 700x40c Tires for Road & Off-Road Adventure, Men's/Women's Bicycle(Elegant White, 51cm)
【With SHIMANO GRX Drivetrain Setup】Equipped with SHIMANO GRX610 shifters and RX822 rear derailleur, matched with a 12-speed M6100...
As an affiliate, we earn on qualifying purchases.
Prepare Your Bike for Installation
To get started, make sure your bicycle is ready for the installation process. Check the condition of your bike’s frame, brakes, and tires to ensure they are in good working order. You may need to make bike modifications such as adding a rear rack or installing a different handlebar to accommodate the electric battery. These modifications will depend on the specific model of your bike and the type of electric battery you are installing.
Once you have made any necessary modifications, you can proceed with the installation. Electric bikes offer numerous benefits, including increased speed and range, reduced effort during uphill climbs, and the ability to commute longer distances without getting tired.
With your bike prepared, it’s time to install the electric battery mount and begin enjoying the benefits of an electric bike.
Install the Electric Battery Mount
Now you can easily mount the battery onto your bike. To ensure a successful electric battery installation, follow these tips:
-
Choose a suitable location on your bike to mount the battery. It should be easily accessible and secure, preferably near the center of gravity.
-
Use the provided mounting brackets to attach the battery securely to your bike frame. Make sure to tighten the screws properly to prevent any movement during your ride.
-
Before mounting, double-check the battery’s orientation. Ensure that the connectors are facing the correct direction for easy access.
-
Troubleshoot common battery installation issues such as loose connections or incompatible mounts. Ensure all connections are secure and that the battery fits snugly onto the mount.
Now that the electric battery mount is securely in place, we can move on to the next step of connecting the battery to the motor.
Connect the Battery to the Motor
After successfully mounting the battery onto your bike, the next step is to connect it to the motor.
Start by identifying the connecting wires. Typically, there will be a positive wire, a negative wire, and possibly a third wire for additional functionality.
Carefully align the wires with their corresponding terminals on the motor. It is crucial to ensure a secure connection by firmly tightening the connectors.
Once the connections are made, it is important to test the system and troubleshoot any common issues that may arise. Common issues include loose connections, faulty wires, or incorrect wiring.
Troubleshooting these issues may involve rechecking the connections, replacing faulty wires, or consulting the manufacturer’s manual.
After successfully connecting the battery to the motor, we can move on to the next section, which focuses on securing the battery in place.
Secure the Battery in Place
Make sure the battery is securely fastened to prevent any movement or damage while riding. To ensure a secure attachment, there are several securing methods that can be employed.
-
Use sturdy mounting brackets: Choose robust brackets specifically designed for electric bike batteries. These brackets should firmly hold the battery in place, minimizing any potential shifting during rides.
-
Utilize Velcro straps: Wrap Velcro straps around the battery and the bike frame to create a tight and secure connection. This method allows for easy removal and reattachment of the battery when necessary.
-
Employ a battery cage: A battery cage is a metal or plastic holder that encloses the battery, keeping it stable and safe. It typically attaches to the bike frame and provides a reliable and fixed position for the battery.
By employing these securing methods and ensuring the battery is properly positioned, you can ride with confidence, knowing that your electric bike system is securely assembled.
Now, let’s move on to testing the electric bike system.
Test the Electric Bike System
To ensure the proper functioning of your electric bike system, you should test it to ensure all components are working correctly. Here are some testing procedures and troubleshooting tips to help you with the process:
| Testing Procedure | Troubleshooting Tips |
|---|---|
| Check the battery voltage using a multimeter | If the voltage is low, try charging the battery and retest |
| Test the throttle response | If the throttle is unresponsive, check the wiring connections |
| Check the motor performance | If the motor is not running smoothly, check for any loose connections or damaged wires |
| Test the pedal-assist system | If the pedal-assist is not working, check the sensor alignment and wiring connections |
By following these testing procedures and troubleshooting tips, you can ensure that your electric bike system is functioning optimally. In the subsequent section, I will discuss how to maintain and charge your electric battery.
Maintain and Charge Your Electric Battery
To properly maintain and charge your electric battery, it is crucial to understand the different charging methods and troubleshoot common issues that may arise.
One of the most common charging methods is using a standard electrical outlet and plugging in the charger provided with the electric bike system. It is important to ensure that the charger is compatible with your battery and that it is functioning properly.
Additionally, some electric bike systems offer the option of using a portable battery pack for charging on the go.
Troubleshooting common issues such as a slow charging rate or a battery that doesn’t hold a charge can often be resolved by checking the connections, cleaning the battery terminals, or contacting the manufacturer for further assistance.
By properly maintaining and charging your electric battery, you can ensure optimal performance and longevity.
Now, let’s move on to the next section and enjoy your new electric bike experience!
Enjoy Your New Electric Bike Experience!
Get ready to have a blast with your new e-bike ride!
Now that your electric battery is installed and charged, it’s time to hit the road and enjoy the benefits of your electric bike. One of the greatest advantages of an electric bike is the ease of riding uphill or against strong winds. With the assistance of the electric motor, you’ll effortlessly conquer any terrain.
However, it’s important to ride your e-bike safely. Always wear a helmet and obey traffic laws. Be aware of your surroundings and use hand signals to communicate your intentions. Additionally, maintain a safe speed and keep a safe distance from other vehicles.
By following these tips and enjoying the benefits of your electric bike, you’ll have an amazing and thrilling experience every time you ride.
Frequently Asked Questions
How long does it typically take to install an electric battery on a bike?
It typically takes around 1-2 hours to install an electric battery on a bike. The steps involved include removing the existing battery, installing the new battery, connecting the wiring, and securing it properly to ensure a safe and reliable installation.
Can any type of bike be converted into an electric bike?
Yes, any type of bike can be converted into an electric bike through the electric bike conversion process. Converting a bike into an electric bike offers numerous advantages, such as increased speed, extended range, and reduced effort while pedaling.
What is the average cost of purchasing and installing an electric battery for a bike?
On average, the cost of purchasing and installing an electric battery for a bike is around $500 to $1,000. The installation time can vary depending on the bike model and the expertise of the installer.
Are there any specific safety precautions to consider when installing an electric battery on a bike?
When it comes to electric bike safety, there are several crucial precautions to consider during battery installation. These include wearing protective gear, ensuring proper insulation, and double-checking all connections for a secure and reliable setup.
Is it possible to remove the electric battery and convert the bike back to its original state if desired?
Yes, it is possible to remove the electric battery and convert the bike back to its original state. To do so, disconnect the battery from the bike’s electrical system and remove any additional components or modifications made during the installation process.
Conclusion
I never imagined that installing an electric battery on my bike would be such a rewarding experience.
As I carefully secured the battery in place, it reminded me of a small but powerful engine, ready to propel me forward on my adventures.
The feeling of freedom and excitement that washed over me when I tested the electric bike system was unparalleled.
With the ability to maintain and charge my electric battery, I am now equipped to enjoy my new electric bike experience to the fullest.