I’ve got the ultimate guide for you on how to install an electric bike wheel. Get ready to take your biking experience to a whole new level of excitement and convenience.
In just a few simple steps, we’ll have you cruising along with the power of an electric motor. From gathering the tools to fine-tuning the settings, I’ll walk you through every precise detail.
So, let’s dive in and transform your bike into an electrifying ride!
Key Takeaways
- Gather necessary tools and refer to the instruction manual for installation.
- Double-check all connections for proper installation and ensure secure and tight connections.
- Adjust power level using buttons or dial on the control panel.
- Maximize efficiency and range through proper maintenance and care for the electric bike wheel.

TST Electric Bike for Adults, 1500W Peak Motor 60 Miles Fat Tire E Bike 48V 15Ah Removable Battery 20" Electric Bike with Full Suspension SGS UL 2849 Certification Black
【Excellent Motor Performance】This electric bike is equipped with a high-performance 750W motor(1500W peak power) with 2 to 3...
As an affiliate, we earn on qualifying purchases.
Gather the necessary tools and materials
Before you begin, make sure you have all the necessary tools and materials for installing the electric bike wheel. It is important to avoid common mistakes when installing an electric bike wheel, such as not tightening the nuts and bolts properly or forgetting to connect the wires correctly. To avoid these mistakes, make sure you have a torque wrench, Allen wrenches, pliers, and a wire stripper. Additionally, it is helpful to have a bike stand or a friend to hold the bike steady while you work.
When installing an electric bike wheel, it is also important to be prepared for any common issues that may arise. Some troubleshooting tips include checking the battery connection, ensuring that the wires are properly connected, and double-checking the alignment of the wheel. By following these tips, you can ensure a successful installation of the electric bike wheel.
Transition: Now that you have gathered all the necessary tools and materials and are aware of common mistakes and troubleshooting tips, let’s move on to the next step: choosing the right electric bike wheel for your bike.

Huffy Stone Mountain Mens 26 Inch Mountain Bike, Matte Black Frame, 21-Speed Shimano Twist Shifting, Front Suspension, Comfort Saddle | 20"/24"/26" Sizes, 6-21 Speeds, Dual Suspension Available |
SLEEK MATTE BLACK FRAME: Combines rugged durability and a modern matte black design, making it the perfect choice...
As an affiliate, we earn on qualifying purchases.
Choose the right electric bike wheel for your bike
To choose the right e-bike wheel for your ride, you’ll want to consider factors such as size, compatibility, and motor power.
When choosing compatible wheels, make sure to check the wheel diameter and width to ensure it matches your bike’s frame. Additionally, consider the type of axle your bike has, as some wheels are designed for quick-release axles while others are for thru-axles.
Understanding motor power requirements is crucial as well. Different motors have different power outputs, so you need to ensure that the wheel you choose is compatible with your motor’s power rating. It’s important to select a wheel that can handle the power demands of your motor to ensure optimal performance and safety.
Now, let’s move on to removing the existing wheel from your bike.
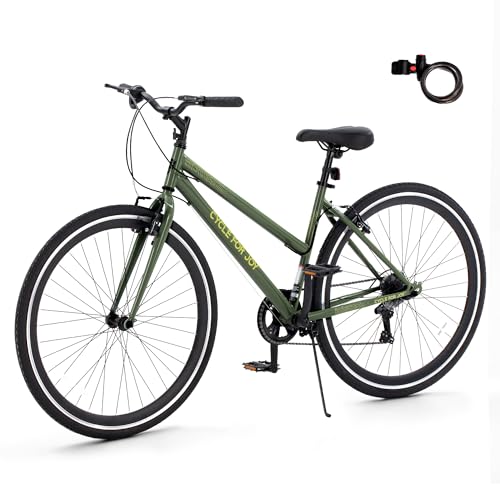
RegalRider Hybrid Bike, 700C Men's Bike, 7-Speed Commuter Bicycle, Low Step-Through Frame, Adjustable Seat & Handlebar, Reflectors, 90% Pre-Assembled
Ride in Easiness - Hybrid bike for adults features lightweight 700C aluminum double-wall rims paired with high-grip tires....
As an affiliate, we earn on qualifying purchases.
Remove the existing wheel from your bike
First, you’ll need to loosen the quick-release lever or unscrew the axle nuts to remove the existing wheel from your bicycle. To make this process easier, gather the necessary tools: a wrench or Allen key to fit the nuts or quick-release lever, and a rag or towel to protect the bike frame from scratches.
Follow these step-by-step instructions to remove the wheel:
- Shift the chain to the smallest chainring and smallest rear cog to relieve tension.
- If your bike has a quick-release lever, flip it open and unscrew the nut on the opposite side.
- If your bike has axle nuts, use the wrench or Allen key to loosen them counterclockwise.
- Once loosened, pull the wheel straight out of the dropouts.
- Gently lower the wheel to the ground, being careful not to damage the derailleur or brake components.
With the existing wheel successfully removed, you can now move on to installing the electric bike wheel onto your bike frame.

WEIZE Beach Cruiser Bike, 26 inch Commuter Bicycle for Adult Men and Women,High-Carbon Steel/Front & Rear Fenders, Comfortable City Bikes with Rear Rack&Basket, Ergonomic Upright Design,White
【Classic & High-Carbon Steel】: The combination of three-spray and four-bake process with excellent welding technology makes it a...
As an affiliate, we earn on qualifying purchases.
Install the electric bike wheel onto your bike frame
Now that you’ve successfully removed the existing wheel, it’s time to attach the new wheel to your bike frame. Follow these installing instructions to ensure a smooth installation process:
- Position the new wheel in the dropouts of the bike frame, making sure the axle aligns with the fork.
- Tighten the axle nuts or quick-release skewer to secure the wheel in place.
- Check the alignment of the wheel to ensure it’s centered and straight.
- Attach the brake rotor to the wheel hub, aligning the screw holes and tightening them securely.
- Finally, check the tire pressure and make any necessary adjustments.
By following these steps, you should have your electric bike wheel installed correctly.
However, if you encounter any common issues such as misalignment or difficulty securing the wheel, refer to the troubleshooting guide provided by the manufacturer.
With the new wheel in place, you’re now ready to connect the power cables to the motor and battery.
Connect the power cables to the motor and battery
After attaching the new wheel, it’s time to connect the power cables to the motor and battery.
This step is crucial in ensuring that your electric bike functions properly.
Begin by identifying the power cables connected to the motor and battery.
Typically, the motor will have a cable with a male connector, while the battery will have a female connector.
Align the connectors and firmly push them together until they click into place.
It’s important to ensure a secure connection to prevent power loss or intermittent operation.
If you encounter any issues with the power connection, carefully inspect the connectors for any damage or debris.
Clean the connectors if necessary and try connecting them again.
Once the power cables are securely attached, you can proceed to the next step: securing the cables and ensuring proper routing.
Secure the cables and ensure proper routing
To ensure proper functioning of your electric bike, it’s important to securely attach the power cables and ensure they are properly routed. Here are some cable management techniques to help you achieve secure cable routing:
-
Use zip ties: Use zip ties to bundle and secure the cables together. This helps to prevent them from getting tangled or caught in any moving parts.
-
Route cables away from moving parts: Make sure the cables are routed away from any moving parts, such as the wheel spokes or the pedals. This reduces the risk of damage or interference with the bike’s components.
-
Use cable clips: Cable clips can be attached to the bike frame to hold the cables in place. This helps to keep them tidy and prevents them from rubbing against the frame, which can cause wear and tear.
-
Check for any loose cables: Before riding, double-check that all the cables are securely fastened and there are no loose ends. Loose cables can get caught or snagged, leading to potential hazards.
By ensuring secure cable routing and using proper cable management techniques, you can optimize the performance of your electric bike and minimize the risk of any issues related to the power cables.
Now, let’s move on to adjusting the disc brakes or rim brakes to fit the new wheel.
Adjust the disc brakes or rim brakes to fit the new wheel
Make sure you adjust your disc brakes or rim brakes to properly fit the new wheel. This will ensure optimal braking performance.
Start by inspecting the brake calipers and ensuring they are centered on the rim or rotor. If they are misaligned, loosen the mounting bolts and adjust the calipers until they are aligned with the braking surface.
Next, check the brake pad alignment. The pads should make even contact with the rim or rotor when the brake lever is applied. If the pads are hitting the tire or not engaging properly, adjust the position of the brake pads using the pad alignment screws.
Troubleshoot any issues with brake alignment to guarantee efficient and safe braking.
With the brakes properly adjusted, you can now move on to testing the electric bike wheel for proper functionality.
Test the electric bike wheel for proper functionality
Once you’ve adjusted the brakes, it’s important to test the new wheel to ensure it is functioning properly. Testing the electric bike wheel involves checking not only the battery life but also troubleshooting common issues that may arise. To assist you in this process, refer to the table below for a detailed guide on how to test the wheel’s functionality:
| Test | Procedure |
|---|---|
| Battery Life | Turn on the electric bike and check the battery indicator. If it is fully charged, the battery life is optimal. |
| Motor Performance | Engage the throttle or pedal to test the motor’s responsiveness and power output. Ensure it accelerates smoothly and provides adequate assistance. |
| Braking System | Apply the brakes and observe if the wheel comes to a complete stop without any unusual noises or vibrations. |
| Sensor Alignment | Check if the pedal assist sensor accurately detects your pedaling and adjusts the motor assistance accordingly. Make adjustments if necessary. |
Now that you have tested the electric bike wheel’s functionality, it’s time to move on to adjusting the pedal assist sensor if necessary.
Adjust the pedal assist sensor if necessary
After ensuring that the electric bike wheel is functioning properly, I move on to the next step of the installation process. This step involves adjusting the pedal assist sensor, if necessary. The pedal assist sensor plays a crucial role in determining the sensitivity of the motor to your pedaling motion. If you find that the pedal assist is too sensitive or not responsive enough, it may be necessary to make some adjustments.
Firstly, check the sensor’s positioning and ensure it is aligned correctly with the crank arm. Next, adjust the sensor’s sensitivity using the provided settings on the control panel. If troubleshooting common sensor issues doesn’t resolve the problem, consult the manufacturer’s manual for specific instructions.
Once the pedal assist sensor is properly adjusted, we can proceed to install any additional accessories or components.
Install any additional accessories or components
To add any extra accessories or components, you’ll need to gather the necessary tools and refer to the instruction manual for proper installation.
When installing lights on your electric bike, start by selecting the desired mounting location and securing the light brackets using the provided screws. Connect the light wires to the appropriate connectors on the bike’s electrical system, ensuring a secure and tight connection. Make sure to route the wires neatly along the bike frame to avoid any potential damage.
Similarly, when adding a rear rack, attach it to the designated mounting points on the bike frame using the provided bolts and washers. Ensure that the rack is level and securely tightened to prevent any wobbling or shifting during rides.
Double-check all connections and make sure everything is secure
Make sure you’ve double-checked all the connections and ensured that everything is secure before moving on. Cable management is essential in the installation process to prevent any potential issues down the line. Troubleshooting common installation issues can save you time and frustration. To help you in this process, I have provided a table below that outlines the necessary connections for installing an electric bike wheel:
| Component | Connection |
|---|---|
| Motor | Rear dropout or front fork |
| Battery | Frame or rear rack |
| Controller | Handlebar or frame mount |
| Display | Handlebar |
Take your bike for a test ride and familiarize yourself with the electric assistance
Once you’ve secured all the connections, hop on your bike and get a feel for the electric assistance.
Test riding is crucial to understanding the electric assistance provided by your newly installed electric bike wheel. Start by pedaling gently and gradually increase your speed.
You’ll notice the electric motor kicking in and providing additional power, propelling you forward effortlessly. Pay attention to how the electric assistance feels at different speeds and while climbing hills.
This will help you gauge the level of assistance you prefer and understand how the motor responds to your pedaling.
Once you’ve familiarized yourself with the electric assistance, you can fine-tune the settings and adjust the motor’s power level if desired.
This will allow you to personalize your riding experience and optimize the electric assistance to suit your needs.
Fine-tune the settings and adjust the motor’s power level if desired
After you’ve familiarized yourself with the electric assistance, you can adjust the motor’s power level and fine-tune the settings to personalize your riding experience.
To adjust the power level, locate the control panel on your electric bike wheel. Most panels have buttons or a dial that allow you to increase or decrease the power output. Start by selecting a lower power level and gradually increase it as you become more comfortable with the assistance.
It’s important to find the right balance for your riding style and terrain. Troubleshooting common issues with the power level may involve checking the battery charge, ensuring the connections are secure, and resetting the system if necessary.
Maintain and care for your electric bike wheel for optimal performance
To keep your electric bike wheel performing at its best, regularly clean and lubricate the components. This will ensure optimal performance and longevity of your electric bike wheel. Here are some essential maintenance steps to follow:
-
Clean the wheel thoroughly: Use a mild detergent and a soft cloth to remove any dirt or grime from the wheel. Avoid using high-pressure water, as it can damage the electrical components.
-
Inspect the spokes: Check for any loose or broken spokes. Tighten any loose spokes and replace any broken ones to maintain wheel stability.
-
Lubricate the bearings: Apply a small amount of lubricant to the wheel bearings to reduce friction and ensure smooth rotation.
-
Check the tire pressure: Maintain the recommended tire pressure to prevent unnecessary wear and improve traction.
Enjoy the benefits of your newly installed electric bike wheel!
Now that you have your new electric bike wheel, you can start experiencing all the benefits it has to offer! The installation process is easy and straightforward, allowing you to quickly upgrade your regular bike into an electric one. Here are some tips for maximizing the efficiency and range of your electric bike wheel:
| Tips for Maximizing Efficiency and Range |
|---|
| Maintain proper tire pressure |
| Use pedal-assist mode for longer rides |
| Optimize your gear shifting |
| Charge the battery fully before each ride |
Frequently Asked Questions
How do I choose the right electric bike wheel for my bike?
To choose the right electric bike wheel, factors to consider include wheel size, motor power, battery capacity, and weight. Options like hub motors provide better torque and are easier to install, while mid-drive motors offer better balance and efficiency.
What tools and materials do I need to install an electric bike wheel?
To install an electric bike wheel, you will need the following tools: a wrench, a screwdriver, and a tire lever. Additionally, you will need materials such as an electric bike wheel, a battery pack, and a controller.
How do I adjust the disc brakes or rim brakes to fit the new wheel?
To adjust disc brake alignment, loosen the caliper mounting bolts, squeeze the brake lever, and align the caliper with the rotor. For rim brake adjustment, adjust the brake pads to align with the rim and tighten the mounting nut.
How do I connect the power cables to the motor and battery?
To connect the power cables to the motor and battery, first ensure that the bike is turned off. Then, locate the cable ports on both the motor and battery and securely attach the corresponding cables. If there are any issues with the power connection, troubleshoot by checking for loose or damaged cables.
How do I adjust the pedal assist sensor if necessary?
To adjust the pedal assist sensor, first locate it near the crankset. Use a small Allen wrench to loosen the mounting screws. Slide the sensor up or down to achieve the desired position. If troubleshooting pedal assist issues, check the sensor’s alignment and wiring connections.
Conclusion
In conclusion, installing an electric bike wheel is like breathing new life into your trusty steed. With the right tools and materials, you can seamlessly transform your ordinary bike into a powerful and efficient machine.
By following the step-by-step process, you’ll be riding with electrifying speed and grace in no time. Just remember to fine-tune the settings to suit your preferences and maintain the wheel for its peak performance.
So, hop on and experience the thrill of the wind in your hair as you conquer new horizons with your newly installed electric bike wheel!