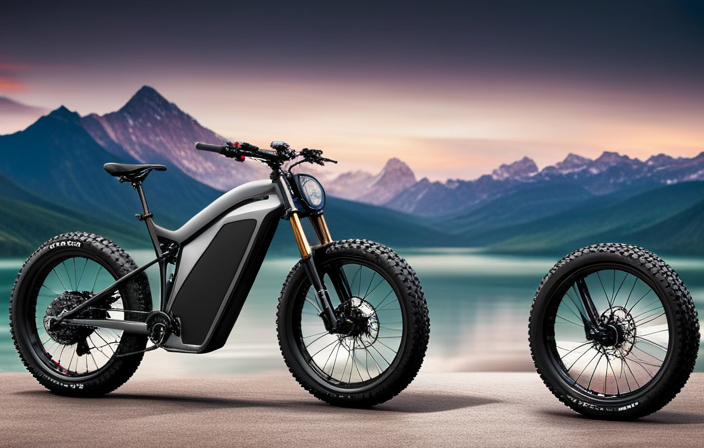

I’ve always loved the freedom and thrill of riding my electric bike, but I wanted to take it to the next level. That’s when I discovered the power of a pedal assist sensor.
This little device can transform your riding experience, giving you that extra boost when you need it most. In this article, I’ll guide you through the step-by-step process of installing a pedal assist sensor on your electric bike.
Get ready to enhance your ride and elevate your adventures to new heights.
Key Takeaways
- Gather the necessary tools and materials such as Allen wrenches, screwdriver, torque wrench (if needed), zip ties, and electrical tape.
- Troubleshoot pedal assist sensor issues by checking wiring connections, ensuring proper alignment with magnets, testing functionality with a multimeter, adjusting sensor sensitivity, and installing on different bike frames.
- Understand the different types of pedal assist sensors including cadence sensors, torque sensors, and combined sensors, considering factors such as riding style, terrain, and budget, and customizing power levels and integration with other components.
- Choose the right pedal assist sensor by ensuring compatibility with the motor and controller, looking for adjustable sensitivity levels, opting for durability and reliability, considering different mounting options, and benefiting from increased efficiency and extended battery life.

8000W Dual Motor Electric Bike for Adults, 48MPH Fast Ebike with 52V 36Ah Removable Battery, Up to 100 Miles Long Range, 26 Inch Fat Tire, Shimano 7-Speed, Shock Absorber Commuter E-Bike
Thrilling 8000W Dual Motor Performance: Command the road with this fast ebike for adults, reaching top speeds of...
As an affiliate, we earn on qualifying purchases.
Gather the necessary tools and materials
First, make sure you’ve got all the tools and materials you’ll need for installing the pedal assist sensor on your electric bike. Choosing the right tools for pedal assist sensor installation is crucial to ensure a successful and smooth process.
You will need a set of Allen wrenches, a screwdriver, and possibly a torque wrench, depending on your electric bike model. Additionally, gather materials such as zip ties, electrical tape, and a small container for any loose screws or bolts. These tools will help you securely attach the sensor to your bike frame and connect it to the appropriate wires.
Tips for troubleshooting pedal assist sensor issues include checking the wiring connections, ensuring the sensor is properly aligned with the magnets, and testing the sensor’s functionality with a multimeter.
Understanding the different types of pedal assist sensors available will further enhance your knowledge of how they work and how to install them correctly.
6000W Peak Dual Motor Ebike for Adults - 52V 34Ah Fast Electric Bike for Men Women 45 MPH,Up to 100 Miles,24" Fat Tire Lockable Suspension Electric Bicycle for Snow Off-Road Commuter Mountain E-Bike
【Dual Motor Ebike Unleash Thrilling Speed & Power】Experience heart-pounding acceleration with dual 3000W peak brushless motors delivering 6000W...
As an affiliate, we earn on qualifying purchases.
Understand the different types of pedal assist sensors available
To better understand the various options available, you’ll want to familiarize yourself with the different types of sensors for adding power to your bicycle while you pedal.
There are a few different types of pedal assist sensors commonly used in electric bikes. The most common ones are cadence sensors, torque sensors, and combined sensors.
Cadence sensors measure the speed at which you are pedaling and provide a consistent level of assistance. Torque sensors, on the other hand, measure the amount of force you are applying to the pedals and provide assistance based on that. Combined sensors use a combination of both cadence and torque measurements to determine the level of assistance to provide.
Each type of sensor has its own benefits and drawbacks, so it’s important to choose the right sensor for your needs. When choosing a sensor, consider factors such as your riding style, the terrain you will be riding on, and your budget.
Additionally, troubleshooting common sensor issues, adjusting sensor sensitivity, and installing the sensor on different bike frames are all aspects to consider. Customizing power levels and integrating the sensor with other electric bike components are also important considerations.
Ekellaka 8000W Dual Motor Electric Bike for Adults, 48MPH Fast Full Suspension Ebike, 52V 36Ah Removable Battery for 100 Miles Range, 26 Inch Fat Tire Dual Shock All-Terrain E-Bike, 400lbs Capacity
8000W Peak Power & 48MPH Top Speed (All-Terrain Dominance): Demand more power for steep inclines? Our advanced dual-motor...
As an affiliate, we earn on qualifying purchases.
Choose the right pedal assist sensor for your electric bike
When selecting the ideal pedal assist sensor for your e-bike, consider factors such as your preferred riding style, the terrain you’ll be exploring, and your budget. Here are four key factors to keep in mind:
-
Compatibility: Ensure that the sensor is compatible with your e-bike’s motor and controller to ensure proper functioning.
-
Sensitivity: Look for a sensor with adjustable sensitivity levels, allowing you to customize the level of assistance provided based on your preference and riding conditions.
-
Reliability: Opt for a sensor that is known for its durability and reliability to minimize the chances of issues arising during your rides.
-
Mounting Options: Consider the different mounting options available and choose one that suits your bike frame and personal preferences.
Pedal assist sensors offer numerous benefits, including increased efficiency, extended battery life, and a more natural riding experience. However, if you encounter any issues with your sensor, such as inconsistent assistance or faulty readings, troubleshooting guides are available online to help you diagnose and resolve the problem.
To ensure a successful installation, it is crucial to locate the ideal position for installing the sensor on your bike frame.

WEIZE Mountain Bike, 26 27.5 inch Outdoor Hybrid Bike,18-Speed/High-Carbon Steel/Dual Full Suspension, Adjustable Ergonomic Seat for Men Women Adult, MTB Bicycle with Suspension Fork,Sleek Colors
【Frame】: Durable steel dual suspension Mountain Bike frame. Featured with Front suspension fork and rear coil shock to...
As an affiliate, we earn on qualifying purchases.
Locate the ideal position for installing the sensor on your bike frame
For optimal performance, you’ll want to find the perfect spot on your bike frame to place the sensor. Finding the best location for the pedal assist sensor on your bike frame is crucial to ensure accurate readings and smooth operation. Common mistakes to avoid when installing a pedal assist sensor include placing it too close to the crank arm or in an area that is vulnerable to damage. To help you locate the ideal position, consider the following factors:
| Factor | Consideration |
|---|---|
| Frame material | Avoid areas with thick tubes or complex shapes |
| Clearance | Ensure the sensor has enough space to fit |
| Cable routing | Keep the sensor away from other cables |
| Protection | Choose a spot that is less likely to get hit |
| Accessibility | Make sure the sensor can be easily adjusted |
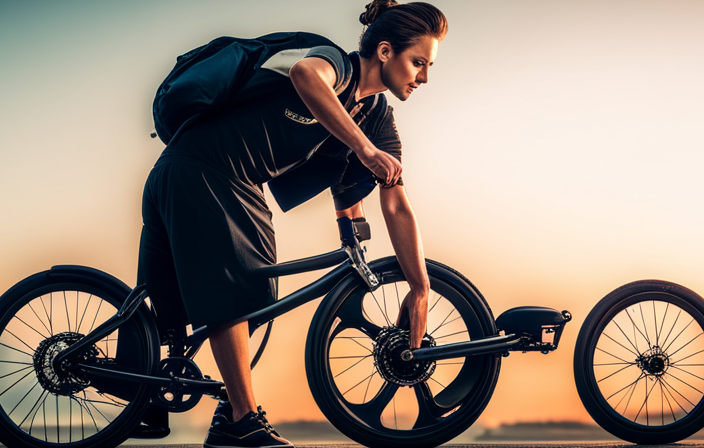
Remove the pedal from the designated side of the bike
Once you’ve located the ideal position for the sensor, it’s time to remove the pedal from the designated side of the bike. To do this, you’ll need to choose the right pedal removal tool. There are various options available, such as pedal wrenches or hex wrenches, depending on the type of pedal you have. Make sure to select the tool that fits securely onto the pedal spindle. Once you have the right tool, position it onto the pedal spindle and turn it counterclockwise to loosen the pedal. Apply steady pressure until the pedal is completely unscrewed from the crank arm.
While removing the pedal, it’s a good idea to inspect and maintain it. Regularly clean and lubricate your bike pedals to ensure smooth operation. Use a degreaser to remove any dirt or grime, then apply a suitable lubricant to the pedal threads. This will prevent rusting and ensure the pedal spins freely.
Now that you have successfully removed the pedal, it’s time to move on to the next step: installing the pedal assist sensor on the crank arm.
Install the pedal assist sensor on the crank arm
Now that the pedal has been removed, it’s time to attach the sensor to the crank arm. The pedal assist sensor is a crucial component of an electric bike, providing a seamless and efficient riding experience.
Here are some benefits of using a pedal assist sensor:
-
Enhanced riding experience: With the sensor, you can effortlessly glide along, as the motor automatically adjusts its power based on your pedaling.
-
Extended battery life: The sensor optimizes the use of the battery by delivering power only when needed, resulting in longer rides between charges.
-
Health and fitness: Pedal assist encourages physical activity, allowing you to enjoy the benefits of cycling while still receiving a boost from the motor.
When it comes to troubleshooting issues with pedal assist sensors, some common problems include connectivity glitches and inaccurate readings. To fix these, ensure proper sensor alignment, check for loose connections, and calibrate the sensor if necessary.
Now, let’s move on to securely attaching the sensor to the bike frame using zip ties or brackets.
Securely attach the sensor to the bike frame using zip ties or brackets
To securely attach the sensor to your bike frame, make sure to use either zip ties or brackets. These options provide a reliable and stable connection, ensuring that the sensor stays in place even during bumpy rides.
While zip ties are commonly used for this purpose, there are other alternatives worth considering. One option is the use of metal hose clamps, which offer a stronger grip and increased durability. Another alternative is the use of adhesive mounts, which can be attached directly to the frame without the need for additional hardware.
Whichever method you choose, it’s important to follow these best practices for securing the sensor:
- Ensure a tight fit to prevent any movement or shifting.
- Position the sensor in a location that allows it to read the pedal movement accurately.
- Avoid placing the sensor in areas where it may come into contact with other bike components or interfere with the bike’s operation.
Once the sensor is securely attached to the bike frame, the next step is to connect the sensor wires to the corresponding wires on the electric bike’s controller.
Connect the sensor wires to the corresponding wires on the electric bike’s controller
Make sure you connect the wires from the sensor to the corresponding wires on your e-bike controller for proper functionality. This step is crucial in ensuring that the pedal assist sensor works effectively.
Troubleshooting common issues with pedal assist sensors can be quite helpful when encountering any problems. One common issue is a loose connection between the sensor and the controller. By checking the wires and making sure they are securely connected, you can resolve this problem. Another common issue is a faulty sensor. If you suspect this to be the case, you may need to replace the sensor.
Now, let’s discuss the benefits of using a pedal assist sensor on an electric bike. With a pedal assist sensor, you can enjoy a more natural and intuitive riding experience. It provides assistance based on your pedaling, making it easier to tackle inclines or ride longer distances. Additionally, it promotes a healthier lifestyle by encouraging you to pedal and exercise.
Now that we have covered the importance and benefits of the pedal assist sensor, it’s time to test its functionality and ensure that it is working properly.
Test the functionality of the pedal assist sensor
To test if the pedal assist sensor is functioning properly, try pedaling and observe if the motor provides the desired level of assistance. This will help determine if the sensor accurately detects your pedaling motion and provides the appropriate level of assistance from the motor.
Here are some discussion ideas about troubleshooting common issues with pedal assist sensors:
- Check the wiring connections between the sensor and the controller.
- Ensure the sensor is properly aligned with the crank arm.
- Verify the sensor is securely attached to the bike frame.
- Inspect the sensor for any signs of damage or wear.
- Consider adjusting the sensitivity and power level of the sensor as needed.
When comparing the benefits of pedal assist sensors versus throttle-based electric bike systems, it’s important to consider factors such as efficiency, control, and overall riding experience.
Adjust the sensitivity and power level of the sensor as needed
You can easily adjust the sensitivity and power level of the sensor to customize your riding experience.
The pedal assist sensor is designed to provide varying levels of assistance based on your preference. To adjust the sensitivity, locate the sensor on the crank arm and look for the sensitivity adjustment screw. Turning it clockwise will increase the sensitivity, while turning it counterclockwise will decrease it.
Troubleshooting problems with the sensor can sometimes be resolved by adjusting the power level. This can be done by accessing the settings on your electric bike’s display panel or controller.
By fine-tuning the sensitivity and power level, you can ensure that the pedal assist sensor provides the perfect amount of assistance for a comfortable and efficient ride.
Now, let’s move on to reinstalling the pedal on the crank arm.
Reinstall the pedal on the crank arm
Now that you’ve adjusted the sensitivity and power level, it’s time to reattach the pedal onto the crank arm. To ensure a smooth installation process and troubleshoot any issues, follow these steps:
-
Inspect the pedal threads: Check for any dirt or debris that may prevent the pedal from screwing in properly.
-
Realign the pedals: Make sure the pedal is positioned correctly on the crank arm, ensuring the side marked ‘L’ is on the left and the side marked ‘R’ is on the right.
-
Hand tighten the pedal: Start by screwing the pedal in by hand until it is snug against the crank arm.
-
Use a pedal wrench: With the wrench, tighten the pedal securely, ensuring it is fully attached to the crank arm.
-
Test the pedal: Give the pedal a few rotations to ensure it spins freely without any resistance.
Now that the pedal is securely reattached, it’s important to double-check all connections and ensure everything is securely fastened.
Double-check all connections and ensure everything is securely fastened
Make sure to check all connections and ensure that everything is securely fastened.
When installing a pedal assist sensor on your electric bike, it is crucial to have secure connections to ensure proper functionality and safety.
Start by carefully attaching the sensor to the designated location on the bike frame. Use the provided screws or bolts to fasten the sensor securely in place, making sure it is not loose or wobbly.
Next, connect the sensor’s wires to the appropriate ports on the controller or display unit. Ensure that the connections are tight and secure, as loose connections can cause signal disruptions or malfunctioning of the sensor.
Finally, double-check all fastened materials, such as bolts, screws, and wires, to ensure they are tight and secure.
With all connections properly fastened, you can proceed to the next step and take your electric bike for a test ride to ensure the pedal assist sensor is working properly.
Take your electric bike for a test ride to ensure the pedal assist sensor is working properly
Once the connections are securely fastened, it’s time to take your e-bike for a test ride and ensure the pedal assist system is functioning properly.
Before you hop on, make sure the battery is fully charged and the display is showing the correct information.
Begin by pedaling and observe if the pedal assist engages smoothly and provides the desired level of assistance. If it feels too weak or too strong, you might need to fine-tune the settings of the pedal assist sensor based on your riding preferences.
Additionally, pay attention to any unusual noises or vibrations during the test ride, as these could indicate a problem with the sensor or other components.
Troubleshooting tips will be provided in the subsequent section.
Fine-tune the settings of the pedal assist sensor based on your riding preferences
To customize the pedal assist experience, adjust the settings according to how you prefer to ride. The pedal assist sensor allows you to fine-tune the sensitivity of the pedal assistance, giving you control over the amount of power the motor provides.
By adjusting the pedal sensitivity, you can optimize the power output to match your riding style and terrain. If you prefer a more responsive ride, increase the sensitivity to feel the motor kick in with even the slightest pedal stroke. On the other hand, if you prefer a smoother and more gradual assistance, decrease the sensitivity.
Finding the right balance will enhance your overall riding experience and make your electric bike feel like an extension of yourself. So, enjoy your enhanced riding experience with the newly installed pedal assist sensor, and feel the thrill of effortless pedaling.
Enjoy your enhanced riding experience with the newly installed pedal assist sensor
After fine-tuning the settings of the pedal assist sensor to my liking, I was eager to hit the road and experience the newfound power of my electric bike. As I pedaled, I could immediately feel the difference in my riding experience.
The pedal assist sensor seamlessly kicked in, providing me with a boost of power that enhanced my performance and improved the efficiency of my bike. It was like having a personal assistant, working in harmony with my pedaling efforts.
The enhanced riding experience was truly exhilarating, and I couldn’t help but smile as I effortlessly glided up hills and zipped through the streets. The installation of the pedal assist sensor had transformed my electric bike into a high-performance machine.
- The bike effortlessly accelerates with each pedal stroke
- Climbing hills becomes a breeze with the added power assistance
- The sensor adjusts to my pedaling speed, providing a smooth and consistent boost
- The bike maintains a steady speed, allowing me to conserve energy on longer rides
- The improved efficiency of the pedal assist system extends the overall battery life of the bike.
Frequently Asked Questions
How long does it typically take to install a pedal assist sensor on an electric bike?
Typically, it takes around 30 minutes to install a pedal assist sensor on an electric bike. It’s important to follow the manufacturer’s instructions carefully and make sure all connections are secure. Afterwards, you can troubleshoot common issues and maintain the sensor by regularly checking for loose connections and keeping it clean.
Are there any specific tools or materials needed to install a pedal assist sensor?
To install a pedal assist sensor on an electric bike, you’ll need a few tools such as a wrench and screwdriver. There are different types of sensors available, but a step-by-step guide can help you install one easily and efficiently.
Can a pedal assist sensor be installed on any type of electric bike?
Yes, a pedal assist sensor can be installed on any type of electric bike. The pedal assist sensor compatibility allows for a seamless integration with the existing electric bike system. The advantages of using a pedal assist sensor include effortless pedaling and extended battery life.
What are the most common issues that can arise when installing a pedal assist sensor?
The most common troubleshooting issues when installing a pedal assist sensor include incorrect wiring, improper alignment, and faulty connections. To ensure proper installation, it is important to carefully follow the manufacturer’s instructions and double-check all connections for accuracy.
Is it possible to adjust the sensitivity and power level of the pedal assist sensor after installation?
Yes, it is possible to adjust the sensitivity and power level of the pedal assist sensor after installation. This allows for personalized riding experience and troubleshooting issues related to pedal-assist functionality.
Conclusion
After following the steps outlined in this article, I can confidently say that installing a pedal assist sensor on my electric bike was a game-changer.
It was surprisingly easy to gather the necessary tools and materials, and choosing the right sensor was a breeze with the helpful information provided.
The installation process itself was straightforward, and I was thrilled to find that the sensor worked flawlessly during my test ride.
Fine-tuning the settings allowed me to personalize my riding experience, and now I can enjoy the thrill of effortless pedaling on my electric bike.