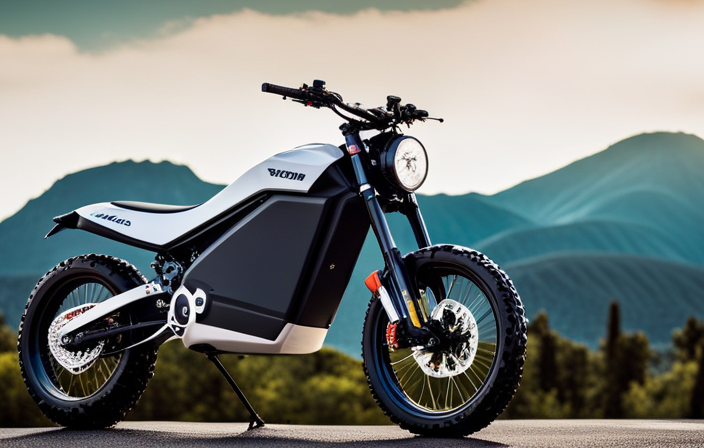

As I hold the wheel of my electric bike in my hands, I can’t help but feel the excitement building. Today, I am going to show you how to lace a 20-inch electric bike wheel, step by step.
With the right tools and materials, we will remove the old spokes and nipples, prepare the rim and hub, and determine the perfect spoke length.
Follow along as we attach the first set of spokes, inflate the tire, and test the wheel for stability and balance.
Get ready to elevate your electric bike ride to a whole new level.
Key Takeaways
- Choose the appropriate spoke gauge for your electric bike wheel (13G or 14G).
- Unscrew the spokes counterclockwise using a spoke wrench to remove old spokes and nipples.
- Check the rim and hub for any damage or wear and clean them thoroughly.
- Measure the rim diameter, hub dimensions, and use an online spoke length calculator to determine the correct spoke length.

Under Armour Squeeze Water Bottles, 32 oz Water Bottles, Sideline Sports Water Bottle with Quick-Shot Lid, Quick & Easy Hydration, Gym Water Bottles, Squeeze Bottle, 1 32oz Bottle
- Easy Hydration: Quick-shot lid and one-way valve
- On-the-Go Use: One-hand operation for active hydration
- Measurement Markings: Ounces and milliliters for tracking
As an affiliate, we earn on qualifying purchases.
Gather the Necessary Tools and Materials
You’ll need a few tools and materials to get started with lacing your electric bike wheel. First, it’s important to choose the right spoke gauge for your wheel. The spoke gauge refers to the thickness of the spokes, and it is crucial to select the appropriate size to ensure strength and stability. The most common spoke gauges for electric bike wheels are 13G and 14G. A higher number indicates a thinner spoke, so if you have a heavy-duty electric bike or plan to carry heavy loads, a thicker spoke gauge like 13G would be a better choice.
Proper spoke tension is also essential for a well-laced electric bike wheel. Spokes need to be tensioned evenly to distribute the load and prevent wheel deformation. Insufficient tension can lead to loose spokes and a wobbly wheel, while excessive tension can cause spoke breakage or rim damage. To achieve proper spoke tension, you’ll need a spoke tension meter, which measures the tension in each spoke. This tool ensures that all the spokes have the same tension, resulting in a balanced and durable wheel.
Now that you understand the importance of choosing the right spoke gauge and proper spoke tension, let’s move on to the next step: removing the old spokes and nipples.
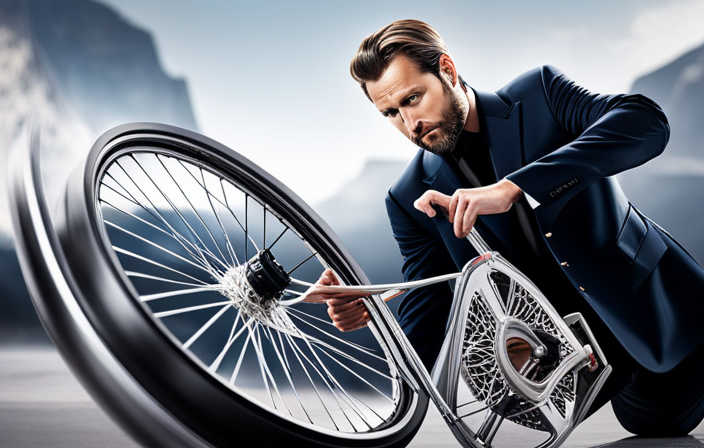
Remove the Old Spokes and Nipples
To remove the old spokes and nipples, simply unscrew them using a spoke wrench. Start by locating the spoke nipple, which is the small, threaded nut that attaches the spoke to the rim. Place the spoke wrench on the nipple and turn counterclockwise to loosen it. Repeat this process for all the spokes on the wheel. As you remove the spokes, make sure to keep them organized and separate from each other to avoid confusion later on.
Once all the spokes and nipples are removed, it’s time to replace them with new ones. Carefully inspect the rim and hub for any damage or signs of wear. If there are any issues, it’s important to address them before proceeding. Clean the rim and hub thoroughly to remove any dirt or debris that may affect the performance of the wheel.
Transitioning into the next section, preparing the rim and hub is crucial to ensure a smooth and successful lacing process. By removing the old spokes and nipples, we have cleared the way for the installation of new ones. Now, let’s move on to preparing the rim and hub to ensure a proper fit and alignment for the new spokes.
Prepare the Rim and Hub
Now that you’ve removed the old spokes and nipples, it’s important to inspect the rim and hub for any damage or signs of wear before proceeding. This step is crucial to ensure the overall strength and durability of your electric bike wheel.
Here’s what you need to do for rim preparation:
- Check for any cracks, dents, or deep scratches on the rim surface.
- Examine the spoke holes for any burrs or sharp edges that could damage the new spokes.
- Clean the rim thoroughly to remove any dirt, grease, or debris that could affect the wheel’s performance.
- Measure the spoke hole diameter to determine the correct spoke size for lacing the wheel.
And here’s what you need to do for hub preparation:
- Inspect the flanges for any signs of cracking, deformation, or excessive wear.
- Check the axle for straightness and ensure that it rotates smoothly.
- Clean the hub and remove any old grease or dirt.
- Measure the spoke hole diameter on the hub to determine the correct spoke size for lacing the wheel.
With the rim and hub properly inspected and prepared, you can now move on to determining the spoke length for lacing the electric bike wheel.
Determine the Spoke Length
Once the rim and hub are prepared, it’s time to figure out the spoke length for lacing. Determining the proper spoke length is crucial for ensuring a strong and durable wheel. To calculate the spoke length accurately, you’ll need to consider several factors, including the rim diameter, hub dimensions, and the desired spoke tensioning.
Start by measuring the rim diameter from one spoke hole to another, subtracting the thickness of the rim material. Next, measure the hub dimensions, including the flange diameter and the distance between the flanges. These measurements will help you determine the effective rim diameter and the hub center-to-flange distance.
To calculate the spoke length, you can use an online spoke length calculator or a formula that takes into account the rim and hub measurements. Ensure that you input the correct measurements and choose the appropriate cross pattern for your lacing.
Once you have determined the proper spoke length, it’s time to attach the first set of spokes. This is a critical step in the wheel building process as it sets the foundation for the rest of the lacing.
Attach the First Set of Spokes
Attach the first set of spokes by inserting them into the rim and securing them to the hub, ensuring they are evenly spaced and properly tensioned. To begin, I carefully thread each spoke through a spoke hole in the rim, making sure it fits snugly. Then, I insert the other end of the spoke into the appropriate hole on the hub. Next, I use a spoke wrench to tighten the spoke nipple, gradually increasing tension until the spoke is firm but not overly tight.
When lacing a wheel, it is important to use proper spoke tensioning techniques to ensure the wheel is strong and reliable. Here are some techniques to keep in mind:
-
Maintain consistent tension: I make sure that all the spokes in the first set are tensioned equally to avoid any imbalance. This helps distribute the load evenly and prevent spoke fatigue.
-
Check for even spacing: I measure the distance between neighboring spokes to ensure they are evenly spaced around the rim. This promotes a balanced wheel and reduces stress on individual spokes.
-
Avoid overtightening: It is crucial not to overtighten the spokes, as this can cause the rim to distort or crack. I use a spoke tension meter to ensure that each spoke is within the recommended tension range.
Common mistakes to avoid when lacing a wheel include:
-
Uneven tensioning: Neglecting to tension the spokes equally can lead to an imbalanced wheel and compromised strength.
-
Overlooking proper spacing: Failing to ensure even spacing can result in an unstable wheel that is prone to wobbling.
-
Excessive tightening: Over-tightening the spokes can cause the rim to deform and result in premature failure.
Now that the first set of spokes is securely attached, I can move on to attaching the second set, completing the wheel lacing process.
Attach the Second Set of Spokes
To properly secure the second set of spokes, ensure that each spoke is threaded through the appropriate hole in the rim and inserted into the corresponding hole on the hub. This step is crucial in maintaining the structural integrity of the wheel.
Once the spokes are in place, the next important aspect is spoke tensioning. Achieving the right tension is vital for the overall performance and durability of the wheel. It ensures that the spokes work together to evenly distribute the weight and forces applied during riding.
In order to achieve proper spoke tension, a spoke tension meter can be used to measure the tension of each spoke. This allows for adjustments to be made until the desired tension is reached.
Additionally, nipple lubrication is another important factor to consider. Applying a small amount of lubricant to the nipple threads can help reduce friction, making it easier to adjust the tension and preventing the nipples from seizing over time.
With the second set of spokes securely attached, it is now time to proceed to the next step of the process, which involves tightening the spokes to achieve the desired tension and stability of the wheel.
Tighten the Spokes
As you tighten the spokes, be sure to evenly distribute the tension to ensure the stability of the wheel. This is a crucial step in the wheel-building process, as it determines the overall strength and performance of the wheel.
To achieve the correct spoke tension, follow these steps:
- Start by using a spoke wrench to adjust the tension on each spoke. Begin with the spokes on one side of the wheel, then move to the other side.
- As you tighten each spoke, make sure to apply equal tension to all the spokes in the wheel. This will help maintain the balance and integrity of the wheel structure.
- Use the spoke wrench to make small adjustments, turning the nipple clockwise to increase tension and counterclockwise to decrease tension. Take your time and be patient, as it may require multiple adjustments to achieve the desired tension.
By carefully adjusting the spoke tension, you ensure that the wheel is strong and stable, ready to withstand the forces it will encounter during use.
Once the spoke tension is properly adjusted, the next step is to check the trueness of the wheel, ensuring that it spins straight and without any wobbles.
Check the Trueness of the Wheel
Check the trueness of your wheel by spinning it and observing if there are any wobbles or deviations from a straight path. When checking wheel alignment, it is crucial to troubleshoot any wheel wobbles to ensure a smooth and efficient ride.
To begin, place your bike in a stand or upside down so that the wheel is freely spinning. As the wheel rotates, carefully observe its movement. Look for any side-to-side or up-and-down wobbles that indicate misalignment. Even the slightest deviation from a straight path can cause issues with stability and performance.
If you notice any wobbles, it is essential to address them promptly. This can be done by adjusting the tension of the spokes, which will be discussed in the subsequent section.
By checking the trueness of your wheel and troubleshooting any wobbles, you can ensure optimal performance and a safer riding experience.
Now, let’s move on to how to adjust the tension of the spokes.
Adjust the Tension of the Spokes
Now, let’s dive into how you can adjust the tension of your spokes for optimal performance. Proper spoke tension is crucial for a well-built wheel, as it ensures stability, durability, and overall performance. To adjust the tension, you’ll need a spoke tension meter, which allows you to measure the tension of each spoke accurately.
Here’s a table illustrating the recommended spoke tension range for different types of wheels:
| Wheel Type | Front Spoke Tension (kgf) | Rear Spoke Tension (kgf) |
|---|---|---|
| Road Bike | 14-18 | 16-20 |
| Mountain Bike | 16-20 | 18-22 |
| Electric Bike | 18-22 | 20-24 |
| Fat Bike | 20-24 | 22-26 |
To adjust the tension, use a spoke wrench to turn the nipples on the spoke. Clockwise turns increase tension, while counterclockwise turns decrease tension. Start by measuring the tension of all the spokes and identifying any outliers. Gradually adjust the tension of the loose or tight spokes, aiming to achieve the recommended tension range for your specific wheel type.
With the spoke tension properly adjusted, you can now move on to the next step: installing the rim tape.
Install the Rim Tape
Once the spoke tension is properly adjusted, you can proceed to installing the rim tape. Rim tape is an essential component for a bike wheel as it prevents the inner tube from coming into contact with the spoke holes and causing punctures.
Here is a step-by-step guide on how to install the rim tape:
-
Choose the right rim tape: Rim tapes come in different widths and materials. It’s important to choose the appropriate width that matches the internal width of your rim. Additionally, consider using a high-quality tape that is durable and puncture-resistant.
-
Clean the rim: Before installing the rim tape, make sure to clean the rim thoroughly to remove any dirt or debris. This will ensure a secure and smooth installation.
-
Start at the valve hole: Begin by aligning the valve hole on the rim with the valve hole on the rim tape. This will make it easier to install the tube later on.
-
Wrap the rim tape: Starting from the valve hole, wrap the rim tape tightly around the rim, ensuring that it covers all the spoke holes. Make sure there are no gaps or overlaps in the tape.
With the rim tape securely installed, you are now ready to mount the tire and tube. This process will be discussed in the next section.
Mount the Tire and Tube
After successfully installing the rim tape, it’s time to move on to the next step in lacing the electric bike wheel: mounting the tire and tube. This part of the process is crucial in ensuring a smooth and safe ride.
To start, I carefully position the tube inside the tire, making sure it is evenly distributed and not twisted. Then, I align the valve stem with the hole on the rim and insert it through. Next, I begin to work the tire onto the rim, starting from one side and gradually working my way around. This can be a bit challenging, especially with tight-fitting tires, but patience and a steady hand are key.
If I encounter any difficulties during this process, such as the tire being difficult to mount or the tube getting pinched, I carefully remove the tire and check for any obstructions or misalignment. I also ensure that the tube is properly inflated before attempting to mount the tire again.
Once the tire is securely mounted, I proceed to the next section: inflating the tire to the recommended pressure.
Inflate the Tire
To ensure a smooth and safe ride, it’s important to properly inflate the tire to the recommended pressure. Choosing the right tire pressure is crucial for optimal performance and safety. The recommended pressure can usually be found on the sidewall of the tire or in the owner’s manual of your vehicle. It is important to note that different types of tires require different pressures, so it’s essential to check the recommended pressure for your specific tire.
To inflate the tire, you will need a tire pump or an air compressor. First, remove the valve cap from the valve stem. Attach the pump or air compressor to the valve stem and begin inflating the tire. Keep an eye on the pressure gauge to ensure that you are inflating the tire to the recommended pressure. If the pressure is too low, add more air. If it’s too high, release some air by pressing the valve stem with a small tool or the back of a pen.
Fixing a flat tire is another important skill to have. Start by locating the puncture or leak in the tire. Once you have found it, remove the tire from the wheel using tire levers. Patch the puncture or replace the inner tube if necessary. Before reinstalling the tire, inspect the rim for any sharp edges or debris that could cause another flat tire. Finally, reinstall the tire onto the wheel and inflate it to the recommended pressure.
Once the tire is properly inflated, it’s important to test the wheel for stability and balance. This can be done by spinning the wheel and observing if it wobbles or vibrates excessively. If there is any instability or imbalance, it may indicate a need for further adjustments or repairs.
Test the Wheel for Stability and Balance
Check if the wheel wobbles or vibrates excessively to test its stability and balance. Here are the steps to perform a wheel stability and balance test:
-
Spin the wheel: Lift the bike off the ground and spin the wheel freely. Observe if it spins smoothly or if there is any noticeable wobbling or vibrating.
-
Check for lateral runout: Place a marker close to the rim and slowly spin the wheel. Observe if the marker stays in a fixed position or if it moves closer to or farther away from the rim. This will indicate if there is any lateral runout, which can affect stability.
-
Conduct a spoke tension check: Use a spoke tension meter to measure the tension of each spoke. Ensure that all the spokes have similar tension to maintain balance.
Testing the stability and balance of the wheel is crucial for a safe and smooth ride. If any issues are detected, it is important to address them before proceeding to the next step, which involves fine-tuning the trueness of the wheel.
Fine-tune the Trueness of the Wheel
Once we’ve ensured that the wheel is stable and balanced, we can proceed to fine-tuning its trueness. This step is crucial to ensure optimal performance and prevent any issues while riding your electric bike.
Fine-tuning the trueness of the wheel involves two key aspects: wheel alignment and spoke tension.
Firstly, let’s talk about wheel alignment. This refers to the straightness of the wheel when viewed from the front or the side. To check the alignment, I recommend using a truing stand, which provides a stable base for the wheel. Adjust the spokes on the side where the wheel deviates from true, loosening the spokes pulling towards the deviation and tightening the ones pulling away. Make gradual adjustments until the wheel runs true.
Secondly, spoke tension plays a crucial role in the trueness of the wheel. Spokes need to be evenly tensioned to maintain the wheel’s integrity. Use a spoke tension meter to measure the tension of each spoke, making sure they are within the manufacturer’s recommended range. Adjust the tension by tightening or loosening the spokes accordingly.
Enjoy Your Upgraded Electric Bike Ride
You can now fully enjoy your upgraded e-bike ride, knowing that it is smooth and stable. Upgrading bike brakes and selecting the right electric bike battery are two key factors in enhancing your riding experience. When it comes to upgrading bike brakes, it’s important to consider the type of riding you do and your personal preferences. There are various brake systems to choose from, including rim brakes, disc brakes, and hydraulic brakes. Each has its own advantages and disadvantages, so it’s essential to do your research and select the one that best suits your needs.
In addition to upgrading your brakes, selecting the right electric bike battery is crucial for a seamless ride. The battery is the power source for your e-bike, so it’s important to choose one with sufficient capacity and longevity. Factors to consider when selecting a battery include its voltage, amp-hour rating, and overall weight. It’s also important to consider the type of battery chemistry, such as lithium-ion or nickel-metal hydride, as this can affect the overall performance and lifespan of the battery.
To help you make an informed decision, here is a table outlining the key features of different brake systems and electric bike batteries:
| Brake System | Pros | Cons |
|---|---|---|
| Rim brakes | Easy maintenance | Less stopping power |
| Disc brakes | Powerful stopping power | Requires more maintenance |
| Hydraulic brakes | Excellent modulation | More expensive |
| Electric Bike Battery | Pros | Cons |
|---|---|---|
| Lithium-ion | High energy density | Expensive |
| Nickel-metal hydride | Affordable | Lower energy density |
Frequently Asked Questions
How do I choose the right spoke length for my electric bike wheel?
To choose the right spoke length for an electric bike wheel, calculate the spoke length based on the hub and rim dimensions. Measure the hub flange diameter and spoke hole angle, and determine the desired spoke pattern. Use an online spoke calculator or consult a professional for accurate results.
What are the necessary tools and materials needed to lace an electric bike wheel?
To lace an electric bike wheel, you will need a spoke wrench, wheel truing stand, spokes, nipples, and a hub. Choosing the correct spoke length is crucial for a successful lacing process. Follow best practices for a precise and reliable result.
How do I determine the trueness of the wheel after lacing?
To determine the trueness of a wheel after lacing, I carefully spin it and observe any wobbling or unevenness. I then adjust spoke tension using a spoke wrench, tightening or loosening spokes as needed to achieve wheel stability.
What is the purpose of installing rim tape in the lacing process?
The purpose of installing rim tape in the lacing process is to protect the inner tube from the spoke holes and sharp edges of the rim. Rim tape prevents flats and ensures a secure and smooth ride by providing a barrier between the tube and the rim.
How do I fine-tune the trueness of the wheel after testing for stability and balance?
To fine-tune the trueness of the wheel after stability and balance testing, I recommend using fine adjustment tools to make minor adjustments to spoke tension. Additionally, troubleshooting tips include checking for loose spokes and ensuring proper alignment of the wheel within the frame.
Conclusion
In conclusion, lacing an electric bike wheel may seem like a daunting task, but with the right tools and materials, it can be accomplished easily.
By following the steps outlined in this article, you can upgrade your electric bike ride to a whole new level of performance.
The process may require some fine-tuning and adjustments, but the end result will be worth it.
So go ahead and give it a try, and witness your bike transform into a sleek, powerful machine that will leave you feeling like you’re riding on clouds.