
Are you ready to take control of your electric bike’s performance? Just like a well-oiled machine, ensuring the smooth functioning of your bike’s hub is crucial for a seamless ride.
Picture this: you’re cruising down the road, wind in your hair, when suddenly you feel a resistance in your pedals. Don’t fret, because in this article, we’ll guide you through the process of loosening the axle on your electric bike hub, so you can get back to enjoying the freedom of the open road.
Key Takeaways
- Use a wrench to loosen the axle nuts or quick release lever, avoiding overtightening.
- Check for misalignment or interference and loosen nuts or bolts securing the axle if needed.
- Tap the axle with a rubber mallet to remove dirt or debris that may be causing tightness.
- If the axle won’t budge, use pliers or a pipe wrench for added leverage while loosening.

EVAPLUS 54.6V 1.5A Smart Charger for 48V Lithium Batteries - UL Certified, Fast Charging with Multi-Safety Protection, Compatible with Electric Bikes/Scooters, DC 5.5 * 2.5/2.1mm Connector
Universal Fast Charging Performance: Designed specifically for 48V lithium-ion batteries (13S configuration), this 54.6V 1.5A smart charger delivers...
As an affiliate, we earn on qualifying purchases.
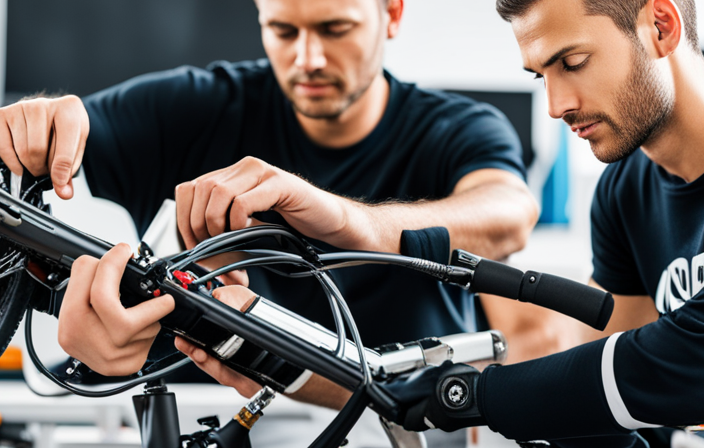
Gather the Necessary Tools
You’ll need to gather the necessary tools before you can loosen the axle on your electric bike hub. Proper bike maintenance is essential, and having the right tools will make the process much smoother.
Start by getting a 15mm wrench, a 5mm Allen key, and a pair of pliers. These tools will allow you to access and loosen the axle on your electric bike hub. Electric bike troubleshooting can be a complex task, so it’s important to be precise and detailed in your approach.
Once you have all the necessary tools, you can move on to preparing your bike for the axle loosening process. This involves securing your bike in a stable position and removing any obstacles that may hinder your work.

Varstrom 48V 1000W 1500W Rear & Front Hub Motor Kit - Ebike Conversion Kit for 26"/27.5"/28"/29"/700C Front Rear Wheel,Electric Bike Conversion Set with Display & Ebike Battery (Optional)
【POWERFUL 48V 1000W Front Hub Motor Kit】: 48V 1000W front wheel motor kit is designed for a variety...
As an affiliate, we earn on qualifying purchases.
Prepare Your Bike
To get started, make sure your bicycle is properly prepared. Before loosening the axle on your electric bike hub, it is essential to inspect your bike for any damage.
Start by checking the frame for cracks or dents, ensuring it is sturdy and safe to work on.
Next, examine the wheel itself, looking for any bent or broken spokes, as well as any wobbling or misalignment. Ensure that the quick-release lever or axle nuts are properly tightened and secure.
Additionally, check the brake pads and cables, ensuring they are in good condition and functioning correctly.
Taking the time to prepare your bike and identify any potential issues will help facilitate a smooth and successful process when it comes time to remove the wheel from the bike frame, ensuring a hassle-free experience.

DEEPOWER QS7 Electric Bike for Adults, 2000W Peak Power 28MPH E-Bike, 48V 20Ah/35Ah/60Ah Battery Options, 35–180 Mile Range, 20” Fat Tire Ebike, 7-Speed All-Terrain Electric Bicycle
【High-Torque Electrified Thrills】 The Deepower electric motorcycle for adults delivers unmatched power with its Peak 2000W motor, reaching...
As an affiliate, we earn on qualifying purchases.
Remove the Wheel from the Bike Frame
Before removing the wheel from your bike frame, make sure to follow these steps to ensure a smooth process.
-
Shift the gears: To remove the wheel easily, shift the gears to the smallest chainring and the smallest rear cog. This relieves tension on the chain.
-
Release the brakes: If your bike has rim brakes, squeeze the brake calipers together and unhook the brake cable from the brake arms. For disc brakes, use a 5mm Allen key to loosen the brake caliper bolts and slide the caliper off the rotor.
-
Unscrew the axle nuts or release the quick release lever: Locate the axle nut or quick release lever on each side of the wheel. Use a wrench or your hand to unscrew the nuts counterclockwise or open the lever to release the tension.
Proper technique for removing bike wheels is crucial to avoid damaging the frame or axle. Common mistakes to avoid when removing bike wheels include forgetting to shift gears and releasing the brakes.
Once you have completed these steps, you can move on to locating the axle nut or quick release lever.

RKJ Electric Bike for Adults, 2200W, 30/32MPH, 75 Miles, 48V 15.6AH Removable Battery, 7-Speed, 3 Modes, Full Suspension, Dual Disc Brakes, 20" All-Terrain Fat Tires, UL 2849 Certified Ebike
🔥 2200W PERFORMANCE: Powerful 750W motor (2200W Peak) delivers massive torque for 30° hills. Default 20MPH for city...
As an affiliate, we earn on qualifying purchases.
Locate the Axle Nut or Quick Release Lever
Once you’ve completed the previous steps, locate the axle nut or quick release lever on each side of your bike wheel. The axle nut is a threaded nut that you will need to loosen using a wrench. On the other hand, the quick release lever is a lever that you can simply pull or push to release the axle.
To help you understand the different types of axle nuts or quick release levers available for electric bike hubs, refer to the table below:
| Type of Axle Nut/Quick Release Lever | Description | Common Issues and Troubleshooting Tips |
|---|---|---|
| Standard Nut | A regular threaded nut that requires a wrench to loosen or tighten. | – Make sure the nut is tightened securely to prevent wheel wobbling. |
| Quick Release Lever | A lever that can be easily operated by hand to release or secure the axle. | – Ensure the lever is fully closed to prevent the wheel from coming off. |
Now that you know how to locate the axle nut or quick release lever, you can proceed to the next section and learn how to loosen the axle nut or release the lever to remove the wheel from the bike frame.
Loosen the Axle Nut or Release the Lever
First, locate the axle nut or quick release lever on your bicycle wheel. To begin the process of loosening the axle nut, use a wrench to turn it counterclockwise. Apply steady pressure until the nut is loose enough to be turned by hand.
Alternatively, if your bike is equipped with a quick release lever, flip it open to release the tension on the axle. Once the nut is loose or the lever is open, you can now adjust the quick release lever to allow for easier removal of the axle. Make sure to loosen it enough so that the axle can slide freely out of the hub without any resistance.
With the axle nut or quick release lever properly adjusted, you are now ready to move on to the next step of sliding the axle out of the hub.
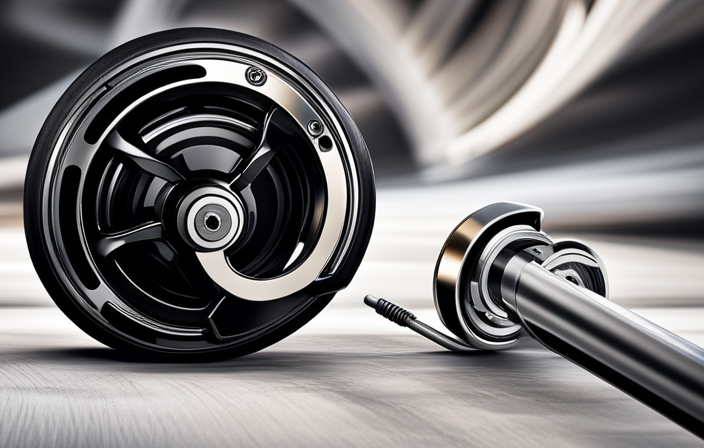
Slide the Axle Out of the Hub
To continue with the process of loosening the axle on your electric bike hub, you will now need to slide the axle out of the hub.
This step will allow you to access the inner components of the hub for lubrication and inspection.
Begin by removing any quick release levers or nuts that may be holding the axle in place. Once these are removed, gently slide the axle out of the hub, being careful not to force it or cause any damage.
As you remove the axle, take a moment to inspect it and the hub for any signs of wear and tear, such as cracks or excessive corrosion. This will help you determine if any replacement parts are needed before continuing with the maintenance process.
Inspect the Axle and Hub for Damage
Take a moment to carefully inspect the axle and hub for any signs of damage or wear and tear. This step is essential to ensure the proper maintenance of your electric bike hub.
Here are some key areas to examine:
-
Axle: Check for any bends, cracks, or dents. Ensure that it is straight and in good condition.
-
Bearings: Look for any signs of rust, pitting, or excessive play. Spin the axle to feel for any roughness or grinding sensations.
-
Hub shell: Inspect for any cracks or deformations. Make sure it is clean and free from any debris or dirt.
By thoroughly inspecting the axle and hub, you can identify any potential issues that may affect the performance and lifespan of your electric bike.
Once you have completed this inspection, you can proceed to the next step of lubricating the axle and hub to ensure smooth operation.
Lubricate the Axle and Hub
After inspecting the axle and hub for any damage or wear, you should now lubricate them to ensure smooth operation. Proper lubrication techniques are crucial for maintaining the longevity and performance of your electric bike hub.
Start by applying a thin layer of grease or oil to the axle, making sure to cover the entire surface. This will help reduce friction and prevent excessive wear. Additionally, apply a small amount of lubricant to the hub bearings, ensuring that they are well-coated. Be careful not to over-lubricate, as this can attract dirt and debris, leading to potential axle problems.
Once you have completed the lubrication process, you can proceed to reinsert the axle into the hub, ensuring it is properly aligned and tightened.
Reinsert the Axle into the Hub
Now, you can carefully reinsert the axle into the hub, ensuring it’s properly aligned and tightened. Follow these reinsertion techniques to ensure a smooth and hassle-free process:
-
Align the axle: Position the axle so that it slides smoothly into the hub. Make sure the threading on the axle matches the threading on the hub.
-
Tighten the axle nut: Once the axle is properly aligned, use a wrench to tighten the axle nut. Ensure it’s tightened securely but not overly tight, as this can cause damage to the hub.
-
Secure the quick release lever: If your electric bike has a quick release lever, make sure it’s fully engaged and tightened. This will ensure the axle is held firmly in place.
By following these reinsertion techniques, you can avoid common axle issues and ensure a secure fit.
Now, you can move on to the next step and tighten the axle nut or secure the quick release lever.
Tighten the Axle Nut or Secure the Quick Release Lever
Make sure you tighten the axle nut or secure the quick release lever to ensure the axle is held securely in place. This is crucial for the proper functioning of your electric bike hub.
To secure the quick release, simply push the lever down and tighten it clockwise until it is snug. This will lock the axle in place and prevent any movement during your ride.
If your electric bike uses an axle nut, use a wrench to tighten it clockwise until it is tight. Ensure that the axle nut is tightened enough to hold the axle securely, but be careful not to overtighten it as it may cause damage.
Once the axle is securely fastened, you can proceed to reattach the wheel to the bike frame, ensuring that it is aligned properly.
Reattach the Wheel to the Bike Frame
After tightening the axle nut or securing the quick release lever, you can proceed to reattach the wheel to the bike frame. This step is crucial in ensuring the proper alignment and function of the wheel.
Start by lining up the axle with the dropouts on the frame, making sure it sits securely in place. Next, slide the wheel into position, ensuring that the disc brakes or rim brakes are correctly aligned with the brake pads.
Once the wheel is in place, tighten the axle nuts or secure the quick release lever, making sure they are snug but not overly tight. Common mistakes to avoid during this process include misaligning the wheel, failing to secure the axle properly, or over-tightening the nuts or lever.
Now, let’s transition to the subsequent section and test the wheel for proper alignment and function.
Test the Wheel for Proper Alignment and Function
To ensure proper alignment and function, it is important to test the wheel after reattaching it to the bike frame. Start by spinning the wheel and observing its rotation. The wheel should spin freely without any wobbling or rubbing against the brake pads. If you notice any misalignment or interference, adjustments will be necessary.
Check the wheel alignment by looking at the gap between the tire and the frame on both sides. It should be equal on both sides, indicating that the wheel is centered. Additionally, inspect the brake pads to ensure they are not touching the rim when the brakes are released.
Troubleshooting common issues such as a wobbly wheel or noisy brakes may require further adjustments. Once you have tested the wheel for proper alignment and function, you can move on to the next step of adjusting as needed to fine-tune its performance.
Adjust as Needed
You’ll need to check for any misalignment or interference and make adjustments if necessary. Here are some adjustment techniques and troubleshooting tips to help you get your electric bike hub’s axle loosened properly:
- Use a wrench to loosen the nuts or bolts that secure the axle in place.
- Gently tap the axle with a rubber mallet to loosen any dirt or debris that may be causing it to stick.
- Apply a lubricant, such as WD-40, to the axle to help loosen it.
- If the axle still won’t budge, try using a pair of pliers or a pipe wrench for added leverage.
- Be careful not to overtighten the axle when reassembling.
Once you have successfully loosened the axle, it’s time to clean up and store your tools.
Clean Up and Store Your Tools
To ensure the longevity of your electric bike and its components, it is crucial to properly clean up and store your tools after making any adjustments. Tool organization and cleaning techniques play a significant role in maintaining the efficiency and functionality of your equipment. Start by organizing your tools in a systematic manner, ensuring easy access for future use. A well-organized toolbox or storage system will save you time and frustration when you need to make adjustments again. After using your tools, it is essential to clean them thoroughly. Remove any dirt, grease, or debris from the surfaces and ensure they are dry before storing them. Regular cleaning not only prolongs the lifespan of your tools but also prevents any potential damage that may occur due to build-up. By maintaining a clean and organized tool collection, you can ensure that you are always prepared for any adjustments your electric bike may require. So, let’s move on to the next section and enjoy your smooth-riding electric bike!
Enjoy Your Smooth-Riding Electric Bike!
Now that your electric bike is in top shape, it’s time to hit the road and enjoy a smooth ride! Maintaining your electric bike properly will ensure that you experience the full benefits of smooth riding.
To keep your bike running smoothly, follow these maintenance tips.
First, regularly clean your bike to remove any dirt or debris that may affect its performance. Use a gentle cleaner and a soft cloth to avoid damaging any components.
Second, inspect the tires for any signs of wear and tear, and replace them if necessary. Properly inflated tires will provide a smoother ride and improve your bike’s efficiency.
Lastly, check the brakes regularly to ensure they are functioning properly. Smooth riding is not only enjoyable, but it also prolongs the life of your electric bike.
So, remember to keep up with maintenance to keep your rides smooth and worry-free.
Frequently Asked Questions
How do I gather the necessary tools to loosen the axle on my electric bike hub?
To gather the necessary tools for loosening the axle on your electric bike hub, you’ll need a few specific items.
Start by acquiring a set of open-end wrenches or adjustable wrenches in the appropriate sizes.
Additionally, you’ll need a set of cone wrenches to adjust the hub’s cone nuts.
It’s also helpful to have a torque wrench to ensure proper tightening after loosening the axle.
Finally, make sure to have a clean cloth or rag to wipe away any dirt or debris during the process.
What steps should I take to prepare my bike before loosening the axle on the electric bike hub?
To prepare your bike before loosening the axle on the electric bike hub, start by ensuring you have all the necessary tools, including a wrench and a bike stand.
Next, secure the bike in the stand to provide stability.
Begin the preparation process by thoroughly inspecting the axle for any signs of damage or wear. Check for any loose or missing parts, and make sure the surrounding area is clean and free of dirt or debris that could interfere with the axle loosening process.
How do I locate the axle nut or quick release lever on my electric bike hub?
To locate the axle nut or quick release lever on your electric bike hub, start by identifying the area where the wheel attaches to the frame. Look for a small lever or nut on either side of the hub.
The axle nut is typically located on the non-drive side, while the quick release lever is usually on the drive side.
Adjusting the tension of the axle involves loosening the nuts or releasing the lever, allowing you to adjust the position of the wheel.
Remember to consult your bike’s manual for specific instructions.
Are there any specific techniques I should use to inspect the axle and hub for damage?
To inspect the axle and hub of your electric bike, there are several techniques you can use.
Start by visually examining the axle for any signs of bending, cracking, or corrosion.
Check the hub for any wobbling or play.
Spin the wheel and listen for any unusual noises.
Additionally, check the bearings for smooth rotation and any signs of wear.
Common signs of axle and hub damage include excessive play, grinding noises, and uneven spinning.
What are some tips for properly aligning and testing the wheel after loosening the axle on the electric bike hub?
To properly align and test the wheel after loosening the axle on your electric bike hub, start by ensuring proper tire inflation, as it acts as the foundation for a smooth ride.
Then, check for any wheel wobbling by spinning the wheel and observing any side-to-side movement. If wobbling is detected, adjust the axle and hub until the wheel spins true.
This precise alignment will enhance your riding experience and ensure optimal performance.
Conclusion
Congratulations! You’ve successfully learned how to loosen the axle on your electric bike hub.
By following the steps outlined in this article, you’ve gained the knowledge and skills to maintain your bike’s performance and ensure a smooth ride.
Remember, a well-maintained bike is like a well-oiled machine, always ready to take you on exciting adventures.
So go ahead, hit the road, and let your electric bike be your trusty steed!