Keeping a bicycle in good shape might feel overwhelming, yet with some basic understanding and the appropriate equipment, it’s something that anyone can manage. Having been a cyclist for numerous years, I’ve come to recognize the significance of consistent upkeep in preserving my bicycle’s optimal performance and prolonging its life.
In this article, I will share with you my tips and tricks for maintaining your bicycle, from basic tasks that you can do at home to more advanced maintenance tasks that may require a trip to the bike shop. Establishing a regular maintenance routine is key to keeping your bike running smoothly.
Just like with a car, regular maintenance can prevent costly repairs down the road. Basic maintenance tasks like cleaning, lubricating, and checking tire pressure should be done regularly, while more advanced tasks like replacing brake pads or chainrings may only need to be done once or twice a year. By following a maintenance schedule, you can keep your bike in top condition and avoid any surprises on your next ride.
Key Takeaways
- Regular maintenance tasks such as cleaning, lubricating and checking tire pressure should be done consistently to keep a bike running smoothly and extend its lifespan.
- Lubricating moving parts regularly with the appropriate lubricant is crucial for smooth operation and depends on the frequency of use and the conditions it is ridden in.
- Properly adjusted brakes and gears are important for a safe and efficient ride. Troubleshooting gear shifting involves checking cable tension and derailleur alignment, while different brake pads are designed for different conditions.
- Basic tools such as hex wrenches, tire levers, a bike pump, and chain lubricant are essential for every cyclist to have, while advanced tools are necessary for more intricate repairs. Quality tools should be invested in and used properly to prevent damage to the bike.

Schwinn Sporterra RX Gravel Bike, 700c Mens and Womens Bike, 14-Speed Drop Bar Gravel Bicycle, Mechanical Disc Brakes, Rigid Fork, Aerodynamic Riding Position, Quick Release Seat Post, Adult Bicycle
GRAVEL BICYCLE: Enjoy next level riding with the Sporterra RX by Schwinn. With 700c wheels, this mens and...
As an affiliate, we earn on qualifying purchases.
Establish a Regular Maintenance Routine
You’ll want to make sure you establish a regular maintenance routine for your bike so that it stays in top shape and lasts longer. The importance of consistency cannot be overstated when it comes to bike maintenance.
By performing routine checks and addressing any issues as soon as they arise, you’ll save yourself time and money in the long run. One time-saving tip is to keep a checklist of basic maintenance tasks, like checking tire pressure, cleaning and lubricating the chain, and inspecting brake pads.
By going through this list regularly, you’ll be able to quickly identify any problems that need to be addressed, and you’ll be less likely to forget important tasks. With a little bit of effort, establishing a regular maintenance routine can be a simple and effective way to keep your bike in top condition.
And speaking of basic maintenance tasks…

AVASTA 700C Road Adult Step-Over Gravel Hybrid Bike Bicycle for Men Woman Male Female,Lightweight Aluminum Alloy Frame with 21-Speed Gearing for City Commuting,Dual Disc Brakes,19 inch Frame,White
🚴♂️【Durable Aluminum Alloy Frame】This lightweight yet strong frame is built to last, offering a perfect balance of durability...
As an affiliate, we earn on qualifying purchases.
Basic Maintenance Tasks
When it comes to basic maintenance tasks for my bicycle, there are three key points that come to mind.
First and foremost, I always make sure to lubricate all of the moving parts regularly. This includes the chain, pedals, and any other areas that see frequent movement.
Secondly, I adjust my brakes and gears as needed to ensure smooth operation and optimal performance.
Finally, I keep an eye on my brake pads and replace them when they start to show signs of wear and tear.
By staying on top of these tasks, I can keep my bike in top condition and enjoy a safe and comfortable ride.
Lubricate Moving Parts
To keep your bicycle running smoothly, it’s important to regularly lubricate its moving parts like the chain, pedals, and derailleur. Failure to properly lubricate the chain is one of the most common causes of bike maintenance issues, according to a survey by the Bicycle Product Suppliers Association.
Here are some key details to keep in mind when lubricating your bike:
-
Types of Lubricants: There are many types of lubricants available for bikes, ranging from dry (wax-based) to wet (oil-based) options. Choose the type that best suits your riding conditions and preferences.
-
Lubrication Frequency: How often you should lubricate your bike’s moving parts depends on how frequently you use it and the conditions you ride in. As a general rule, aim to lubricate your chain every 100-150 miles or every 2-3 rides.
When lubricating your bike, it’s important to apply the lubricant carefully and evenly to the parts that need it. Make sure to wipe off any excess lubricant to prevent dirt buildup, which can cause additional wear and tear on your bike. With proper lubrication, your bike will be able to run smoothly and efficiently, allowing you to enjoy your rides to the fullest.
To ensure your bike is in top condition, the next step is to adjust your brakes and gears.
Adjust Brakes and Gears
Properly adjusted brakes and gears are crucial for a safe and efficient ride on your bike. One of the most important things to check when adjusting your brakes is the positioning of the brake pads. Brake pads should be positioned so that they make contact with the rim of the wheel, but not so close that they rub against it when the wheel is spinning. To adjust the position of the brake pads, loosen the bolt that holds them in place, adjust the position, and then tighten the bolt again.
Troubleshooting gear shifting can be a bit more complicated, but it is equally important for a smooth ride. If your gears are not shifting properly, start by checking the tension of the cable that controls the derailleur. If the cable is too loose or too tight, it can cause problems with shifting. You may also want to check the alignment of the derailleur itself, as it should be parallel to the gears. If these adjustments don’t solve the problem, it may be time to replace the brake pads.
Replace Brake Pads
Replacing worn-out brake pads is like giving your bike a fresh set of brakes to help you stop on a dime and ride with confidence. When selecting a new set of brake pads, it’s important to consider the type of brake system on your bike and the type of riding you do.
Different brake pads are designed for different conditions, so take the time to choose the right ones for you.
Once you have your new brake pads, installation is a fairly straightforward process. Start by removing the old pads and cleaning the brake caliper and rotor with rubbing alcohol. Then, insert the new pads into the caliper, making sure they are properly aligned with the rotor. Tighten any bolts or screws and test the brakes before hitting the road.
With new brake pads in place, you’ll be ready to tackle any terrain with confidence and control.
Now, let’s move on to some more advanced maintenance tasks.

Mongoose Men's Elroy Adventure Bike 700C Wheel Bicycle, Blue, 54cm frame size
Versatile adventure touring bike features capable adventure bike geometry, a sleek alloy frame and steel fork for the...
As an affiliate, we earn on qualifying purchases.
Advanced Maintenance Tasks
If you’re feeling handy, you might want to tackle some of the more advanced maintenance tasks on your bicycle. These tasks are more challenging, but they can also help you save money and improve your biking experience. Two examples of advanced maintenance tasks are wheel truing and bottom bracket maintenance.
Wheel truing is the process of adjusting the spokes of your wheel to make sure it spins smoothly and doesn’t wobble or rub against the brake pads. To do this, you’ll need a truing stand, a spoke wrench, and some patience. The process involves identifying which spokes need tightening or loosening, and making small adjustments until the wheel is true. Bottom bracket maintenance involves removing the crankset and cleaning and re-greasing the bearings of the bottom bracket. This is important because the bottom bracket is one of the parts of your bike that undergoes a lot of wear and tear. By properly maintaining it, you can extend the life of your bike and ensure a smoother ride.
For tips on long-term storage of your bicycle, it’s important to keep it clean and dry, store it in a cool and dry place, and periodically check the tire pressure and chain tension. By following these tips, you can help ensure that your bike stays in good condition and is ready to ride whenever you are.

KABON Carbon Gravel Road Bike, T800 Carbon Fiber Frame 700C Road Bike with 18 Speeds Drivetrain, Integrated Carbon Handlebar, Disc Brakes Racing Bicycle for Adult Unisex (Black, 53cm)
【DURABLE & LIGHTWEIGHT】- Lightweight T800 Carbon Fiber Frame combined with carbon fork,handlebar and seatpost for added vibration dampening...
As an affiliate, we earn on qualifying purchases.
Tips for Long-Term Storage
When it comes to storing your bicycle for a long period of time, there are a few important things to keep in mind. First, it’s crucial to clean and lubricate your bike thoroughly before storage, as this will help prevent rust and other damage.
Additionally, you’ll want to make sure your bike is stored in proper conditions, such as a cool, dry place with minimal exposure to sunlight and moisture.
Finally, it’s important to properly prepare your bike for use after storage, such as checking tire pressure and tightening any loose bolts or components. As someone who’s stored many bikes over the years, I can attest to the importance of these steps for keeping your bike in top condition.
Cleaning and Lubricating Before Storage
To ensure your bike stays in top shape, don’t forget to clean and lubricate it before storing it away for the season. Have you ever tried to ride a rusty, squeaky bike? Trust me, it’s not fun. Cleaning your bike before storage is not only important for its appearance, but also for its longevity. Dirt and grime can wear down your bike’s components over time, causing them to fail prematurely. To clean your bike, you’ll need some basic cleaning techniques and recommended cleaning products.
| Here’s a table of recommended cleaning products to use for each part of your bike: | Bike Part | Recommended Cleaning Product |
|---|---|---|
| Frame | Bike-specific cleaner or mild soap and water | |
| Chain | Degreaser and chain cleaning tool | |
| Cassette and derailleur | Degreaser and small brush | |
| Brake pads and rims | Rubbing alcohol or brake cleaner |
Proper cleaning and lubrication will protect your bike’s moving parts from rust and corrosion during storage. Once you’ve cleaned your bike, it’s important to lubricate it to ensure that the moving parts don’t seize up over time. After lubricating, make sure to wipe off any excess oil with a clean rag to prevent attracting dirt and grime. Now that your bike is clean and well-lubricated, it’s time to move on to proper storage conditions.
Proper Storage Conditions
After ensuring that your bicycle is properly cleaned and lubricated, the next step is to store it in the ideal conditions to prevent any damage.
The ideal storage condition for your bike is a dry and cool place where it’s protected from the elements, such as rain, sun, and dust. A storage area with a steady temperature and low humidity is also recommended. This’ll prevent any rust or corrosion from forming on the metal parts of your bike, such as the chain, gears, and brake cables.
When storing your bike, it’s important to keep it off the ground and in an upright position. This can be achieved by hanging it from a wall or using a bike stand. This’ll prevent the tires from developing flat spots and ensure that the weight of the bike is distributed evenly.
It’s also important to cover your bike with a breathable cloth or bike cover to prevent any dust or debris from settling on it.
Moving on to the next step, preparing your bike for use after storage can be done in a few easy steps.
Preparing Your Bike for Use After Storage
Now that your bike’s been stored properly, it’s time to get it ready for your next ride. Before hopping on your bicycle, there are a few important steps to take to ensure it’s safe to ride.
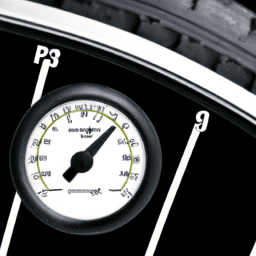
First and foremost, check the tires for any signs of wear or damage. Proper tire pressure is also crucial, so use a tire gauge to ensure the pressure is within the recommended range.
Next, inspect the frame for any cracks, rust, or other damage that may have occurred during storage. If you notice any issues, it’s best to take your bike to a professional for repairs before riding.
Finally, don’t forget to lubricate the chain and other moving parts to ensure a smooth ride. These simple steps can help prevent accidents and prolong the life of your bike.
Remember, knowing how to properly store your bike for extended periods of time is just as important as knowing how to prepare it for use after storage.
As you prepare to ride your newly un-stored bike, it’s important to have the right tools on hand for any necessary maintenance. In the next section, we’ll discuss the essential bicycle maintenance tools that every rider should have in their toolkit.
Bicycle Maintenance Tools
As an experienced cyclist, I know firsthand the importance of having the right tools for bicycle maintenance. Every cyclist should have a basic set of tools, including a tire pump, tire levers, a multi-tool, and a chain tool.
For more complex maintenance tasks, advanced tools such as a torque wrench, bottom bracket tool, and cassette removal tool may be necessary.
When choosing and using bicycle maintenance tools, it’s crucial to consider factors such as quality, compatibility with your bike, and proper technique to ensure safe and effective maintenance.
Basic Tools Every Cyclist Should Have
Equip yourself with the essential tools you’ll need to maintain your bike like a pro! Having the right tools can make all the difference when it comes to keeping your bike running smoothly and avoiding costly repairs.
Here are four basic tools every cyclist should have:
-
A set of hex wrenches: These are essential for removing and tightening bolts on your bike, such as those on the handlebars and seat post. Look for a set with a range of sizes to ensure you have the right one for every job.
-
Tire levers: These small, plastic tools are used to remove the tire from the rim when you need to change a flat. Make sure you have two or three of these in your kit to make the process easier.
-
A bike pump: Keeping your tires properly inflated is important for both performance and safety. Invest in a quality bike pump with a gauge so you can easily check and adjust the pressure.
-
Chain lubricant: Keeping your chain well-lubricated is key to preventing wear and tear. Look for a lubricant specifically designed for bike chains and apply it regularly for best results.
While these tools will cover the basics of most bike maintenance tasks, more advanced repairs may require additional tools. In the next section, we’ll take a look at some of the advanced tools you may want to consider adding to your kit.
Advanced Tools for More Complex Maintenance Tasks
To take your bike maintenance skills to the next level, you should consider adding some advanced tools to your kit for tackling more complex tasks. While basic tools such as a set of allen keys, a screwdriver, and a wrench can handle most maintenance needs, specialized equipment is necessary for more intricate repairs. Investing in these tools is worth it if you’re a regular cyclist, as it allows you to maintain your bike in top condition and avoid costly professional servicing.
Below is a table of some of the most useful advanced tools for bicycle maintenance:
| Tool | Description |
|---|---|
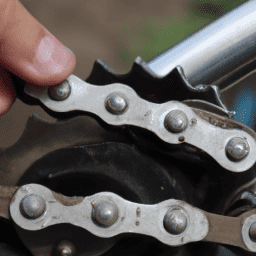
| Chain checker | Measures the wear of your bike chain and determines when it needs to be replaced. |
| Bottom bracket tool | Used to remove and install the bottom bracket, which is the bearing system that connects the frame to the crankset. |
| Headset press | A tool for installing and removing the headset, which is the bearing system that allows your handlebars to turn. |
| Spoke tension meter | Measures the tension of each spoke in your wheel, ensuring even tension for optimal performance. |
Using these advanced tools can seem daunting at first, but with practice and patience, you’ll be able to handle more complex repairs with ease. In the next section, we’ll discuss some tips for choosing and using bicycle maintenance tools to make your bike maintenance tasks even easier.
Tips for Choosing and Using Bicycle Maintenance Tools
Don’t let the fear of using advanced tools discourage you from taking your bike maintenance skills to the next level. With some practice and patience, anyone can master these tools and tackle complex repairs with ease.
Here are some tips for choosing and using bicycle maintenance tools:
-
Invest in quality tools: It’s worth spending a little extra money on good quality tools that will last longer and perform better. Cheap tools may seem like a bargain, but they often break easily and can damage your bike or make repairs more difficult.
-
Keep your tools clean and organized: Tool maintenance is important to ensure your tools work properly and last longer. Clean them after each use and store them in a dry, protected area. A tool box or wall-mounted rack can help keep everything organized.
-
Use the right tool for the job: Using the wrong tool can damage your bike or make repairs more difficult. Take the time to learn which tool is best for each task and make sure you have it on hand before starting any repair.
-
Avoid common tool mistakes: One common mistake is using too much force when tightening bolts or screws, which can strip the threads or damage the part. Another mistake is using worn or damaged tools, which can also cause damage to your bike. Always check your tools before using them and replace any that are worn or damaged.
Frequently Asked Questions
How often should I replace my bike chain?
I replace my bike chain every 2,000-3,000 miles or when it begins to show signs of wear. Proper bike chain maintenance and lubrication techniques can extend the life of the chain.
Can I use WD-40 to lubricate my bike?
I wouldn’t recommend using WD-40 on my bike as it’s not a proper lubricant. It attracts dust and dirt, leading to faster wear and tear. Instead, use bike-specific lubricants like chain lube or oil.
How do I adjust my bike’s brakes?
To adjust my bike’s brakes, I start by checking the brake pads for wear. Then, I adjust the cable tension and position of the pads. If the brakes still don’t work properly, I troubleshoot for other issues. Brake maintenance tips include regularly cleaning and inspecting the brake system.
What should I do if my bike’s gears are skipping?
Did you know that skipping gears is a common problem for cyclists? Common causes are worn chain, improper cable tension, or bent derailleur hanger. Troubleshooting may involve adjusting cable tension, replacing the chain, or realigning the derailleur.
Is it necessary to clean my bike after every ride?
Yes, it’s essential to clean your bike after every ride. Regular cleaning prevents dirt buildup, rust, and corrosion, which can damage your bike’s components. Using a bike cover also protects it from the elements.
Conclusion
In conclusion, maintaining your bicycle is crucial for its longevity and your safety while riding. By establishing a regular maintenance routine, you can prevent small issues from becoming bigger problems.
Basic maintenance tasks, such as cleaning and lubricating your bike, should be performed after each ride. Advanced maintenance tasks, like adjusting your brakes and gears, can be done on a weekly or monthly basis.
It’s also important to properly store your bicycle for long-term storage, ensuring it stays in top condition until its next use. This can be achieved by cleaning and lubricating your bike, removing the wheels and storing them separately, and covering your bike with a breathable cover.
Investing in quality bicycle maintenance tools, such as a bike stand and a torque wrench, will also make the maintenance process smoother and more efficient.
Remember, maintaining your bicycle is not only beneficial for your bike, but for your overall cycling experience. So, make sure to keep up with your routine maintenance tasks and enjoy many safe and enjoyable rides ahead!