I’ve always been drawn to jewelry that stands out and has an edgy aesthetic. Among my go-to accessories is a bracelet made from a bicycle chain. It’s not just a bold accessory, but it also serves as an innovative way to recycle a used bike chain.
Making your own bicycle chain bracelet is a fun and easy DIY project that can be done with just a few simple tools and materials.
In this article, I’ll walk you through the steps to make your own bicycle chain bracelet. I’ll show you how to clean and prepare the chain, assemble the bracelet, and even give you some tips on how to customize it to your own personal style.
So, grab your tools and let’s get started on creating a one-of-a-kind accessory that you’ll love to wear!
Key Takeaways
- Choosing the right chain material is important for both comfort and aesthetic.
- Properly cleaning and lubricating the chain before creating the bracelet is crucial for maintenance.
- Adding clasps and connectors is necessary to secure the bracelet.
- Personalizing the bracelet with color, decoration, and pattern can create a unique and edgy look.
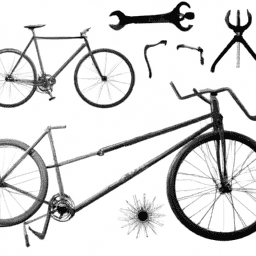
Gather Your Tools and Materials
Now it’s time to gather up all the tools and materials you’ll need to craft this snazzy bicycle chain bracelet! First things first, you’ll need to choose the right chain. There are many types of bicycle chains out there, but not all of them will work well for a bracelet. Look for a chain that is lightweight and thin enough to fit comfortably around your wrist.
You’ll also want to consider the color and design of the chain, as this will affect the overall look of your bracelet. Different chain materials will also give your bracelet a unique look and feel. Some popular materials include stainless steel, brass, and titanium.
Stainless steel is a durable and affordable option, while brass has a vintage feel and is great for creating a rustic look. Titanium, on the other hand, is lightweight and strong, making it a great choice for those who are active and on-the-go.
Once you’ve chosen your chain and material, you’ll be ready to move onto the next step: cleaning and preparing the chain.
Clean and Prepare the Chain
Before diving into the crafting process, it’s important to ensure that the chosen metal is free of any dirt or grime, allowing for a smoother creation process. Here are some cleaning methods to help you get started:
-
Use a degreaser: A degreaser is a cleaning solution that helps remove grease and grime from metal surfaces. Apply the degreaser to the chain and let it sit for a few minutes, then scrub it with a brush and rinse it with water.
-
Soak it in vinegar: Vinegar is an excellent natural cleaning agent that can remove dirt, rust, and grime from metal surfaces. Soak the chain in vinegar for a few hours, then scrub it with a brush and rinse it with water.
-
Use a wire brush: A wire brush is a tool that can help you remove rust and dirt from the chain. Scrub the chain with the wire brush until it’s clean, then rinse it with water and let it dry.
Chain maintenance is also important to ensure that your bracelet lasts longer. After cleaning the chain, make sure to lubricate it with a chain lubricant to protect it from rust and wear. With a clean and well-maintained chain, you’re now ready to assemble your bracelet.
Assemble Your Bracelet
Now that I’ve cleaned and prepared my bicycle chain, it’s time to assemble my bracelet.
First, I’ll need to add clasps and connectors to secure the chain around my wrist. This will ensure the bracelet stays in place and doesn’t fall off.
Next, I’ll get creative and start creating a unique design for my bracelet, using different color chains or adding embellishments to make it truly one-of-a-kind.
Adding Clasps and Connectors
To finish off your bicycle chain bracelet, you’ll need to add some clasps and connectors to keep it secure on your wrist. There are various types of clasps and connectors that you can choose from depending on your preference and the design of your bracelet.
Some popular types of clasps include lobster clasps, spring clasps, and toggle clasps. Lobster clasps are easy to use and secure, while spring clasps are ideal for lightweight bracelets. Toggle clasps, on the other hand, add a unique touch to your design and are perfect for chunky bracelets.
Once you have selected your clasps, you will also need connectors to attach them to your bracelet. Different connectors include jump rings, split rings, and crimp beads. Jump rings are versatile and easy to use, while split rings are ideal for added security. Crimp beads are perfect for professional finishes and are commonly used in beading projects.
When adding your clasps and connectors, be sure to use pliers to securely close them. With your clasps and connectors in place, you can now move on to creating a design that reflects your personal style.
Creating a Design
If you’re feeling creative, it’s time to start brainstorming ideas for your personalized wrist accessory. Your design inspiration can come from anything – a favorite color, a pattern, or even a meaningful symbol.
Consider the style of the bike chain you have and how you can incorporate it into your design. For example, if your chain has a unique link shape, you can use that as a focal point in your bracelet.
Color selection is another important aspect of creating your design. Do you want your bracelet to be monochromatic or have a bold pop of color? Think about what colors complement each other and what will match your personal style.
Once you have your design and color scheme in mind, it’s time to move on to customizing your bracelet to make it truly unique.
Customize Your Bracelet
Now that I’ve assembled my bicycle chain bracelet, it’s time to customize it.
The first thing I want to do is add some color to the chain links. I can use spray paint or nail polish to achieve the desired effect.
Next, I want to add some charms or decorations to make the bracelet truly unique. I can attach small trinkets, beads, or even old bike parts to give it a personal touch.
Painting or Coloring the Chain
Once you’ve cleaned the chain, it’s time to add some color by painting or coloring it. Here are some tips to help you achieve a unique look for your bracelet:
-
Chain color options: There are several options for coloring your chain, such as spray paint, acrylic paint, or even nail polish. Choose a color that complements your personal style or matches your outfit. Additionally, you can use multiple colors to create a fun and playful look.
-
Alternative chain coatings: If you prefer a more subtle look, you can try coating the chain with a layer of clear nail polish or varnish. This will give the chain a glossy finish and protect it from rust or corrosion.
-
Experiment with patterns: Get creative with your coloring by experimenting with different patterns. You can use tape to create stripes or geometric shapes, or use a small brush to paint intricate designs directly onto the chain.
By adding color to your chain, you can personalize your bracelet and make it truly your own. Once you’re satisfied with the coloring, it’s time to move onto the next step and add some charms or decorations to complete the look.
Adding Charms or Decorations
First, you’ll want to gather a variety of charms and decorations to add to your personalized piece of jewelry. When selecting charms, consider the theme or style you want to convey. You can choose from a wide range of options, such as hearts, letters, animals, or even mini bicycles.
You can also add beads, crystals, or other decorative elements to make your bracelet even more unique. Once you have your charms, it’s time to decide on their placement. You can choose to add them evenly spaced throughout the bracelet or cluster them in certain areas.
Experiment with different arrangements until you find the one that best suits your style. Remember, this is your chance to express your creativity and make the bracelet truly your own. With your charms in place, your personalized bicycle chain bracelet is complete and ready to wear and enjoy.
Wear and Enjoy Your New Bracelet
To fully appreciate your new bicycle chain bracelet, you should wear it with confidence and style. Here are some tips to help you wear and enjoy your new accessory:
-
Wearing options:
-
Wear it alone as a statement piece.
-
Layer it with other bracelets for a trendy look.
-
Stack it with a watch for a more polished style.
-
Outfit pairing:
-
Pair it with a casual t-shirt and jeans for a laid-back look.
-
Dress it up with a little black dress for a night out.
-
Wear it with a blazer and trousers for a chic office look.
By following these tips, you can easily incorporate your new bicycle chain bracelet into your wardrobe and show it off with confidence. Experiment with different wearing options and outfit pairings to find the perfect combination that suits your style.
Frequently Asked Questions
What if I don’t have the specific tools mentioned in the ‘Gather Your Tools and Materials’ section?
If I don’t have the specific tools for making a bicycle chain bracelet, I can use DIY tool substitutes. For a vintage look, I can reuse old chains. Get creative and resourceful!
Can I use a used, dirty chain for my bracelet or does it have to be new?
Yes, using a used chain is possible, but it requires proper cleaning techniques. Firstly, remove dirt, grime, and rust with a degreaser solution. Then, use a metal polish to restore its shine. Finally, rinse it with water and dry completely before making your bracelet.
How do I adjust the size of the bracelet if it’s too big or too small?
If the bracelet is too big or small, don’t worry! To adjust the size, remove/add links or use pliers to bend the links for a snug fit. Experiment with different materials and chains for a unique look.
Can I add charms or other decorative elements to my bracelet, and if so, how do I attach them?
Adding charms and attaching decorations is a great way to customize your bracelet and personalize your style. Simply use jump rings to attach your chosen elements to the chain links. Be creative and have fun!
How do I clean and maintain my bicycle chain bracelet to keep it looking new?
To keep my bicycle chain bracelet looking new, I use a rag and a degreaser to remove dirt and grime. Then, I apply a rust inhibitor to prevent rust from forming. Regular cleaning and maintenance are key to preserving its shine.
Conclusion
So there you have it, my fellow cycling enthusiasts – a step-by-step guide on how to make a bicycle chain bracelet! I hope you found this tutorial helpful and enjoyable.
As someone who loves to wear unique and personalized accessories, I find that this bracelet is not only stylish but also meaningful. It reminds me of the freedom and joy that cycling brings, whether it’s a leisurely ride around the neighborhood or an intense workout on the trails.
As the saying goes, "life is like riding a bicycle, to keep your balance, you must keep moving."So why not add a touch of that balance and movement to your fashion statement with a bicycle chain bracelet?
Don’t be afraid to customize it to your liking, whether it’s adding charms or painting it a different color. Let your creativity shine and wear your new bracelet with pride.
Happy cycling and crafting!