- How does weight distribution affect the performance of the trainer?
- Are there any modifications that can be made to increase the weight limit of the trainer?
Alternate phrasing for “Can I adjust the resistance on this trainer?”:
Modifying the level of difficulty, Utilizing various levels of resistance
Auto keywords for "How loud is this trainer when in use?":
Noise level comparison, soundproofing solutions
How To Make A Bicycle Trainer
I love cycling, but sometimes the weather or other circumstances prevent me from going out on my bike. That’s why I decided to make a bicycle trainer.
A bicycle trainer is a device that allows you to ride your bike indoors, simulating the resistance and feel of the road. It’s a great way to keep up your cycling fitness even when you can’t go outside.
To make a bicycle trainer, you’ll need some basic materials and tools, but don’t worry, it’s not too complicated. I’ll guide you through the process step-by-step, from building the frame to testing your trainer.
With this DIY project, you’ll be able to cycle indoors whenever you want, whether it’s raining, snowing, or just too dark outside. Let’s get started!
Key Takeaways
- A bicycle trainer is a useful tool for indoor cycling, especially during various weather conditions.
- Building a DIY bicycle trainer requires gathering materials and tools, choosing the right resistance level, and securing the bike onto the trainer.
- Stability and theft prevention are important considerations when building a bicycle trainer.
- Proper positioning of the bike and setting resistance at a comfortable level are crucial for a smooth and seamless indoor cycling experience.

Schwinn Sporterra RX Gravel Bike, 700c Mens and Womens Bike, 14-Speed Drop Bar Gravel Bicycle, Mechanical Disc Brakes, Rigid Fork, Aerodynamic Riding Position, Quick Release Seat Post, Adult Bicycle
GRAVEL BICYCLE: Enjoy next level riding with the Sporterra RX by Schwinn. With 700c wheels, this mens and...
As an affiliate, we earn on qualifying purchases.
Gather Materials and Tools
You’re gonna need some tools and materials to make this bicycle trainer, so let’s get started by gathering them up!
First, you’ll need a bike stand or a rack to hold your bike in place. There are a lot of options out there, including DIY options, so choose one that works for you and your bike.
Next, you’ll need a roller system. You can purchase one or make your own using PVC pipes, bearings, and rollers. Just make sure you choose the right resistance level for your needs.
In addition to the bike stand and roller system, you’ll also need screws, bolts, and washers to assemble everything together. A power drill, wrench, and Allen key will also come in handy.
Finally, if you want to reduce noise, consider adding a rubber mat or carpet underneath the trainer. You can also use foam pads to reduce vibrations and noise.
With all the tools and materials gathered, it’s time to move on to building the frame.

SAVADECK T800 Carbon Gravel Bike, with Shimano GRX610 12-Speed, Hydraulic Disc Brakes, 700x40c Tires for Road & Off-Road Adventure, Men's/Women's Bicycle(Elegant White, 51cm)
【With SHIMANO GRX Drivetrain Setup】Equipped with SHIMANO GRX610 shifters and RX822 rear derailleur, matched with a 12-speed M6100...
As an affiliate, we earn on qualifying purchases.
Build the Frame
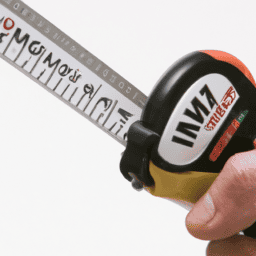
To start building the frame, first, measure and cut the PVC pipes according to the dimensions of the design plan. For example, I decided to build a bicycle trainer frame that is 4 feet long and 3 feet wide. The frame design can vary depending on personal preferences and needs. Some people may want a larger frame for stability, while others may prefer a smaller frame for easy storage. Customization options also include adding extra support beams or crossbars for added stability.
To ensure accurate measurements, I used a measuring tape and a PVC pipe cutter to cut the pipes to the desired length. Once all the pipes are cut, I assembled the frame by connecting the pipes using PVC connectors. The table below shows the materials and tools I used to build the frame.
| Materials | Tools |
|---|---|
| PVC pipes | Measuring tape |
| PVC connectors | PVC pipe cutter |
| PVC primer and cement | Marker |
Next, I will add the roller to complete the bicycle trainer.

Swagman Standard Fork Mount Rooftop Bike Carrier
EASY TO ASSEMBLE: The STANDARD is easy to assemble with no tools required, sets up in just minutes...
As an affiliate, we earn on qualifying purchases.
Add the Roller
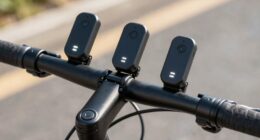
Now it’s time to attach the roller, which will allow you to pedal your bike indoors. The roller is the most important part of the bicycle trainer, as it’s what makes pedaling possible.
Begin by attaching the roller to the frame, making sure it’s securely fastened using bolts and nuts. Once it’s attached, take a moment to adjust the tension of the roller. This will ensure that your bike stays in place while you pedal. Adjust the tension by tightening or loosening the bolts on the roller. The tension should be tight enough to keep your bike in place, but not so tight that it damages your bike’s tires.
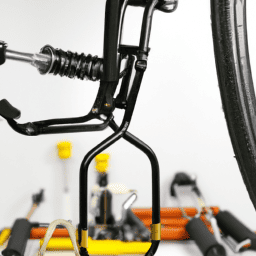
Improving stability is also important when using a bicycle trainer. To do this, make sure that the legs of the frame are securely in place and that the trainer is on a level surface. This will prevent the trainer from moving around while you pedal.
Once you’ve attached the roller and adjusted the tension, you’re ready to secure your bike onto the trainer. This will ensure that your bike stays in place while you pedal and prevent any accidents from happening.
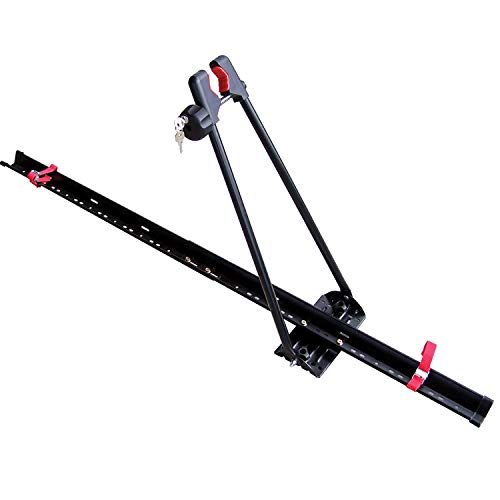
Swagman UPRIGHT Roof Mount Bike Rack
EASY TO ASSEMBLE: The UPRIGHT roof rack installs in minutes following the instructions and carries one bike with...
As an affiliate, we earn on qualifying purchases.
Secure Your Bike
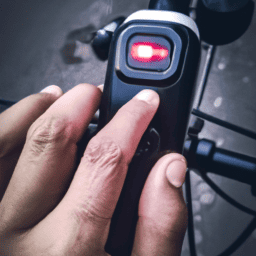
After attaching the roller and adjusting the tension, it’s important to ensure that your bike is securely fastened to prevent any accidents while pedaling. Using the bicycle trainer can feel like a thrill ride, but safety should always come first. To ensure that your bike is secure, you have several lock options to choose from.
One option is a U-lock, which is a durable and secure option that is difficult to cut through. Another option is a cable lock, which is lightweight and easy to carry but may not be as secure as a U-lock. Finally, you can also use a chain lock, which is heavy and bulky but offers a high level of security. Whichever lock option you choose, it’s important to also consider theft prevention by storing your bike and trainer in a secure location.
By taking the time to secure your bike properly, you can enjoy a safe and effective workout on your new bike trainer. Now that your bike is secured, it’s time to test the trainer to ensure that everything is working properly.
Test Your Trainer
Ready to take my indoor cycling to the next level, I was excited to test out my newly built bike trainer.
The first step to getting the most out of my trainer was to ensure proper positioning. I adjusted the height to match my outdoor bike and made sure the trainer was stable and level on the ground.
With my bike securely mounted on the trainer, I made sure the resistance was set at a comfortable level for my first ride.
Next, I measured the resistance to ensure I was getting an accurate workout. I used a power meter to measure my wattage output and adjusted the resistance accordingly. It was important to make sure the resistance was not too high or too low, as this could affect the quality of my workout.
With everything set up properly, I hopped on my bike and began my first indoor ride. The experience was smooth and seamless, and I could feel the burn in my legs as I pedaled away.
Testing my bike trainer was a success, and I was ready to take my indoor cycling to the next level.
Frequently Asked Questions
How long will it take to build a bicycle trainer?
It depends on the complexity of the design and whether you have all the necessary building materials and tools. Without the context of how to make a bicycle trainer, I cannot provide a specific timeframe.
Can I use any type of bike with this trainer?
Did you know that indoor cycling can burn up to 630 calories per hour? When it comes to bike compatibility with a trainer, most bikes will work but you’ll need a quick release skewer and a trainer tire for optimal performance.
What is the maximum weight limit for this trainer?
The weight capacity of my bicycle trainer is 330 pounds. I designed it with durability in mind, so it can withstand heavy use. I don’t recommend modifying it as it may compromise its integrity.
Can I adjust the resistance on this trainer?
Yes, you can adjust the resistance on this trainer. It allows for adjusting difficulty by using different resistance levels. This feature is useful for simulating different terrains and intensifying your workout.
How loud is this trainer when in use?
When using this trainer, the noise level is comparable to other models on the market. If noise is a concern, soundproofing solutions like using a mat or foam blocks can help reduce the sound.
Conclusion
Well, there you have it – you’ve got your very own bicycle trainer! It may have taken a bit of effort to gather the materials and build the frame, but it was definitely worth it.
Not only do you now have a way to exercise indoors, but you’ve also saved money by making it yourself. Plus, you can customize your trainer to fit your specific bike and needs.
Did you know that cycling is one of the most popular forms of exercise in the world? According to a survey by the Sports & Fitness Industry Association, over 40 million people in the United States alone participate in cycling.
And with the convenience of an indoor trainer, even more people can enjoy the benefits of this low-impact exercise. So, get pedaling on your new trainer and enjoy the many health benefits of cycling. Happy riding!