I’ve always believed that innovation can empower us to create sustainable solutions, and that’s exactly what making a bike electric generator is all about.
In this article, I’ll guide you through the process of transforming your ordinary bike into an eco-friendly power source.
By gathering the necessary tools and materials, installing a motor and battery, and connecting it all to the rear wheel, you’ll soon be generating your own electricity while enjoying the ride.
Let’s dive in and harness the power of pedal!
Key Takeaways
- Installation and testing are crucial for ensuring proper connection and functionality of the electric bike generator.
- Voltage regulation and the use of a power inverter can enhance safety, efficiency, and enable the use of AC appliances.
- Integrating a solar panel can increase power output and promote sustainability.
- Maintenance and choosing the right charging options are important for optimal performance, longevity, and cost savings.

Schwinn Sporterra RX Gravel Bike, 700c Mens and Womens Bike, 14-Speed Drop Bar Gravel Bicycle, Mechanical Disc Brakes, Rigid Fork, Aerodynamic Riding Position, Quick Release Seat Post, Adult Bicycle
GRAVEL BICYCLE: Enjoy next level riding with the Sporterra RX by Schwinn. With 700c wheels, this mens and...
As an affiliate, we earn on qualifying purchases.
Gather the Necessary Tools and Materials
First, gather all the necessary tools and materials you’ll need for this project. Make sure to have wire cutters, connectors, and electrical tape on hand for this task.
Choosing the right motor is crucial for the success of your bike electric generator. Look for a motor that is compact, lightweight, and has a high power output. Consider the voltage and current requirements of your electrical system to ensure compatibility.
Understanding the electrical connections is also important. Familiarize yourself with the different components such as the battery, controller, and inverter, and learn how to properly connect them together.
Once you have gathered all the necessary tools and materials, you can move on to the next section and choose the right bike for the conversion. This will ensure that your bike is suitable for the added weight and power requirements of the electric generator.

SAVADECK T800 Carbon Gravel Bike, with Shimano GRX610 12-Speed, Hydraulic Disc Brakes, 700x40c Tires for Road & Off-Road Adventure, Men's/Women's Bicycle(Elegant White, 51cm)
【With SHIMANO GRX Drivetrain Setup】Equipped with SHIMANO GRX610 shifters and RX822 rear derailleur, matched with a 12-speed M6100...
As an affiliate, we earn on qualifying purchases.
Choose the Right Bike for the Conversion
One important factor to consider when selecting the right bike for the conversion is ensuring it has a sturdy frame. The frame needs to be able to support the additional weight and stress that will be placed on it once the electric components are added. There are several other factors to consider when choosing a bike for electric conversion, as shown in the table below:
| Factors to Consider | Explanation |
|---|---|
| Frame Material | Look for a bike with a strong and durable frame material such as steel or aluminum. Avoid bikes with weak or lightweight frames. |
| Frame Size | Choose a bike that is the right size for your height and build to ensure comfort and proper fit. |
| Brake Type | Disc brakes are recommended for electric conversions as they provide better stopping power. |
| Wheel Size | Larger wheel sizes (26 inches or more) are preferable for better stability and smoother rides. |
| Suspension | Consider a bike with front suspension to absorb shocks and vibrations while riding on uneven terrains. |
Considering these factors will help you choose the right bike for your electric conversion. Now, let’s move on to the next step and learn how to remove the rear wheel.

Schwinn Network 1 Hybrid Bike, 700c Mens and Womens Bike, 21-Speed Hybrid Bicycle, Aluminum Frame, Suspension Fork, Alloy Linear Pull Brakes, Adult Bicycle
HYBRID BICYCLE: Ride confidently on or off the pavement in the Network 1 by Schwinn. With 700c wheels,...
As an affiliate, we earn on qualifying purchases.
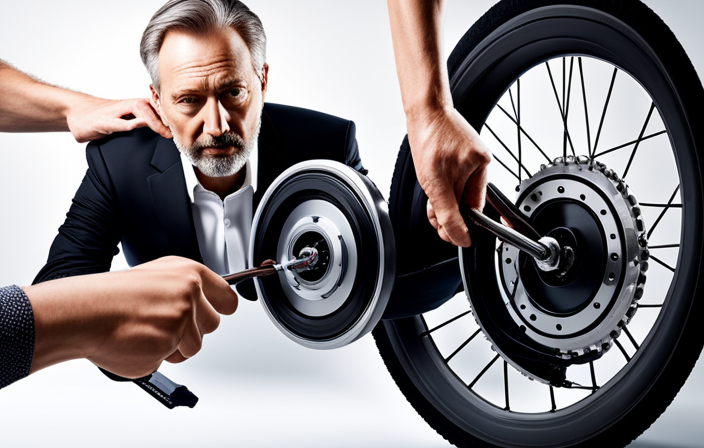
Remove the Rear Wheel
To remove the rear wheel, start by loosening the nuts or quick release lever on either side of the axle. This will allow you to detach the wheel from the frame of the bike. Here are three key steps to follow:
- Use a wrench or an Allen key to loosen the nuts or quick release lever.
- Once the nuts are loose, lift the bike slightly off the ground and pull the wheel out of the dropouts.
- Carefully slide the chain off the rear cassette or freewheel.
Now that the rear wheel is removed, you can proceed with other modifications such as replacing or upgrading the rear wheel. This will be necessary if you want to install the motor and battery for the electric conversion.
With the rear wheel removed, you are ready to move on to the next phase of the process: installing the motor and battery.

SAVADECK Carbon Gravel Bike - T800 Carbon Frame & Fork | Shimano U6000 11-Speed Groupset | Hydraulic Disc Brakes | 700CX40mm All-Terrain Tires | Men & Women Road/Off-Road Bicycle (Gray, 53cm)
【Ultralight T800 Carbon Performance】: Featuring a premium T800 R21 carbon fiber frame and fork weighing just 10.4kg (22.92...
As an affiliate, we earn on qualifying purchases.
Install the Motor and Battery
Now that you have the rear wheel removed, you’re ready to proceed with the installation of the motor and battery.
This step is crucial in transforming your bike into an electric generator.
First, position the motor near the rear dropouts, ensuring that it aligns with the chain and sprocket.
Use the provided mounting brackets and screws to securely attach the motor to the frame.
Next, connect the motor to the battery by following the manufacturer’s instructions. This typically involves connecting the wires from the motor to the corresponding terminals on the battery.
Once the motor and battery are properly installed, you can move on to connecting the motor to the rear wheel.
This step involves attaching the motor’s sprocket to the rear wheel’s sprocket, allowing the motor to power the bike’s movement.
Connect the Motor to the Rear Wheel
Aligning the motor’s sprocket with the rear wheel’s sprocket and securing them together is crucial for connecting the motor to the rear wheel. This connection allows the motor to power your bike’s movement and transform it into an electric generator. To ensure a successful connection, follow the steps below:
| Step | Instructions |
|---|---|
| 1 | Remove the chain from the rear wheel’s sprocket. |
| 2 | Slide the motor’s sprocket onto the rear wheel’s sprocket. |
| 3 | Align the teeth of both sprockets to ensure proper engagement. |
| 4 | Secure the sprockets together using a chain tensioner or another suitable method. |
Troubleshooting the motor connection may be necessary if you encounter any issues. Check for misalignment, loose bolts, or faulty components. Ensure that the chain tension is appropriate and that the sprockets are securely fastened. Once the motor is successfully connected to the rear wheel, you can move on to the next section, which is about installing the controller and throttle, allowing you to control the electric power generated.
Install the Controller and Throttle
After securing the motor to the rear wheel, the next step is installing the controller and throttle.
The controller is the brain of the electric system, regulating the flow of power to the motor.
Begin by finding a suitable location to mount the controller on the bike frame, ensuring it is secure and protected from the elements.
Connect the throttle to the controller, making sure to follow the manufacturer’s instructions for proper wiring.
Troubleshooting the throttle and controller connections is crucial to ensure a smooth and efficient operation.
Double-check all the connections, ensuring they are tight and properly insulated.
Test the throttle and controller by turning on the system and checking if the throttle responds smoothly.
Once everything is in order, you can proceed to the next section, which is connecting the controller to the motor and battery.
Connect the Controller to the Motor and Battery
To connect the controller to the motor and battery, ensure that all the proper connections are secure and follow the manufacturer’s instructions for wiring. This step is crucial in ensuring the smooth operation of your electric bike.
Here are some key points to keep in mind when connecting the controller correctly:
- Double-check all the wires and connectors to ensure they are securely attached.
- Follow the color codes provided by the manufacturer to connect the wires correctly.
- Pay attention to any specific instructions regarding the placement of the controller.
- Troubleshoot common motor issues, such as loose connections or faulty wiring, by carefully inspecting the connections and making necessary adjustments.
Now that the controller is properly connected, we can move on to the next step: attaching the battery to the bike frame.
Attach the Battery to the Bike Frame
Now that the controller is properly connected, we can proceed with attaching the battery securely to the frame.
The first step is to ensure that the bike frame is compatible with the battery attachment. Check for any pre-installed mounting points or brackets designed specifically for battery integration. If your bike does not have these, you may need to purchase a battery mounting kit that is compatible with your frame.
Once you have the necessary equipment, carefully position the battery on the frame in a location that does not interfere with your pedaling or steering. Use the provided straps or brackets to securely fasten the battery in place, ensuring that it is stable and won’t move during your ride.
Now that the battery is securely attached, we can move on to testing the electric system without delay.
Test the Electric System
Ensure you have properly secured the battery to the frame before proceeding to test the electric system. Testing the electric system is crucial to ensure that your bike generator is functioning properly. Here are three testing methods and troubleshooting tips to help you:
-
Multimeter Testing: Use a multimeter to measure the voltage output of the generator. Connect the multimeter to the generator’s terminals and rotate the wheel to generate power. The reading should match the specifications provided by the generator’s manufacturer.
-
Load Testing: Connect a load, such as a light bulb or small appliance, to the generator. Check if it is receiving sufficient power and operating as expected. If not, there may be an issue with the generator’s output or wiring.
-
Wiring Inspection: Carefully inspect all wiring connections for any loose or damaged wires. Ensure that they are securely connected and free from any fraying or wear.
By following these testing methods and troubleshooting tips, you can identify and resolve any potential issues with your bike generator’s electric system.
Once you have completed the testing, you can proceed to the next section, which focuses on installing a charging port for devices.
Install a Charging Port for Devices
Once you’ve completed testing the electric system, it’s time to install a charging port for your devices. This step is crucial if you plan on using your bike generator to charge multiple devices.
To begin, locate a suitable spot on your bike frame to install the charging port. Make sure it is easily accessible and protected from the elements.
Next, connect the charging port to the electric system of your bike generator. This will allow the power generated by the solar panels or other energy sources to flow into the charging port.
Once installed, you will be able to plug in your devices and charge them while riding.
Now that you have a charging port, the next step is to add a voltage regulator for safety.
Add a Voltage Regulator for Safety
To ensure safety, it’s important to add a voltage regulator to your charging port setup. Voltage regulation plays a crucial role in electric bike generators as it helps maintain a stable and controlled electrical output. Without a voltage regulator, the charging process can become unpredictable and potentially damage your devices or the generator itself.
There are different types of voltage regulators available for bike electric generators, such as linear regulators and switching regulators. Linear regulators are simple and affordable, but they are less efficient and produce more heat. On the other hand, switching regulators are more complex and expensive, but they offer higher efficiency and generate less heat.
By incorporating a voltage regulator into your setup, you can ensure the safety and longevity of your electric bike generator.
Now, let’s move on to the next section about installing a power inverter for AC appliances.
Install a Power Inverter for AC Appliances
Installing a power inverter allows you to use AC appliances with your charging port setup. The power inverter installation process involves a few simple steps.
First, you need to locate a suitable spot for the inverter, preferably near your charging port.
Next, you’ll need to connect the inverter to your battery using the provided cables. Make sure to follow the manufacturer’s instructions for proper wiring.
Once the connections are secure, you can test the inverter by plugging in an AC appliance. If you encounter any issues, such as a lack of power or strange noises, troubleshooting power inverter issues is essential.
This may involve checking the battery connections, ensuring the correct voltage settings, or consulting the manufacturer’s troubleshooting guide.
Considering adding a solar panel for extra power can further enhance your charging port setup.
Consider Adding a Solar Panel for Extra Power
Adding a solar panel is a great way to increase the power of your charging port setup. By harnessing the sun’s energy, you can maximize your power output and ensure a reliable source of electricity for your electric bike. Here are three reasons why incorporating a solar panel is a smart choice:
- Sustainability: By using solar energy, you reduce your carbon footprint and contribute to a cleaner environment.
- Independence: With a solar panel, you are not reliant solely on grid power, giving you the freedom to charge your bike anywhere.
- Cost savings: Solar energy is a renewable resource, meaning you can save money on electricity bills in the long run.
Now, let’s explore how to maintain and troubleshoot your electric bike.
Maintain and Troubleshoot Your Electric Bike
Maintaining and troubleshooting your electric bike is essential for optimal performance and longevity. To ensure your bike continues to perform at its best, it is important to address any battery issues that may arise.
If you notice a decrease in battery life or the battery is not charging properly, start by checking the connections to ensure they are secure. Additionally, regularly cleaning the battery terminals and contacts can prevent corrosion and improve conductivity.
Another crucial aspect of maintaining an electric bike is to regularly inspect and maintain the motor. This includes checking for any loose or worn-out components, such as belts or gears, and replacing them if necessary.
Enjoy the Benefits of Your Bike Electric Generator
To fully experience the advantages of your electric bike’s generator, you’ll want to ensure you’re using it efficiently and effectively. One key aspect to consider is your charging options.
Most electric bike generators can be charged by plugging them into a standard wall outlet. However, some models also offer the option to charge through solar panels or a portable power bank. It’s important to choose the charging method that best suits your needs and lifestyle.
Another advantage of using an electric bike generator is the long term cost benefits. By generating your own electricity, you can significantly reduce your reliance on traditional power sources and save money on energy bills. Additionally, the maintenance and operating costs of an electric bike generator are generally lower compared to a gasoline-powered generator.
Frequently Asked Questions
How much does it cost to convert a bike into an electric generator?
Converting a bike into an electric generator can cost anywhere from $200 to $1000, depending on the quality of components. However, the benefits of cost savings and eco-friendliness outweigh the initial investment.
Can any type of bike be converted into an electric generator?
Sure, any type of bike can be converted into an electric generator. However, it is important to consider bike maintenance and the benefits of using an electric bike generator, such as reducing carbon emissions and saving money on electricity.
How long does it take to install the motor and battery?
Installing the motor and battery in an electric bike generator can take several hours, depending on experience and familiarity with the components. Common challenges include proper alignment and connection of wires. To optimize performance, maintain the battery’s charge and ensure proper motor maintenance.
What is the maximum weight capacity of the electric bike generator?
What is the maximum weight capacity of the electric bike generator? With a robust weight capacity, the electric bike generator allows for efficient power production while providing the convenience of transportation.
How often should the battery be charged and how long does it take to fully charge it?
To increase the battery life of an electric bike generator, it is important to charge the battery regularly and fully. Common issues can be resolved by troubleshooting the wiring connections and checking for any damaged components.
Conclusion
In conclusion, creating an electric bike generator is an exciting and rewarding project that can provide numerous benefits.
By converting a regular bike into an electric generator, you can generate power for various appliances and devices. Did you know that an electric bike generator can produce up to 200 watts of electricity? This impressive statistic highlights the potential of this DIY project and showcases the efficiency of harnessing human power.
So, why not give it a try and enjoy the benefits of your own bike electric generator?