Coinciding with my love for DIY projects and a desire for an eco-friendly transportation solution, I stumbled upon an ingenious method to create a drill-powered electric bike. By repurposing a drill motor and battery, and a few other materials, you too can transform an ordinary bicycle into a powerful and efficient electric ride.
In this guide, I will walk you through the step-by-step process of converting your bike, ensuring safety and providing tips for maintenance. Let’s dive in and embark on this exciting journey towards a greener way to commute.
Key Takeaways
- Regular maintenance and safety precautions are essential for ensuring the safety and longevity of the drill-powered electric bike.
- Using a drill as a power source offers accessibility, affordability, high torque output, and versatility for other applications, enhancing the efficiency and durability of the bike.
- Increasing speed and range can be achieved by choosing a high-capacity battery, using lightweight materials, optimizing aerodynamics, regular maintenance, and considering motor upgrades or adding a second drill.
- Proper battery performance can be ensured by fully charging before each ride, storing in a cool and dry place, avoiding overcharging or deep discharging, regularly checking connections, and replacing if performance decreases significantly.

Schwinn Sporterra RX Gravel Bike, 700c Mens and Womens Bike, 14-Speed Drop Bar Gravel Bicycle, Mechanical Disc Brakes, Rigid Fork, Aerodynamic Riding Position, Quick Release Seat Post, Adult Bicycle
GRAVEL BICYCLE: Enjoy next level riding with the Sporterra RX by Schwinn. With 700c wheels, this mens and...
As an affiliate, we earn on qualifying purchases.
Gather the Necessary Materials and Tools
You’ll need to gather all the necessary materials and tools for making a drill powered electric bike.
First and foremost, choosing the correct drill type is crucial. Opt for a cordless drill with a high voltage and ample torque to ensure optimal performance. Additionally, consider the drill’s battery capacity and charging time to maximize the bike’s range.
To maximize the drill’s power, keep it well-maintained by regularly cleaning and lubricating the moving parts. Ensure the drill is securely attached to the bike frame using sturdy clamps or brackets.
When connecting the drill to the bike’s drivetrain, use a suitable adapter or coupling mechanism to transfer power efficiently.
Lastly, choose the right bicycle for your conversion, taking into account factors such as frame material, size, and weight capacity.
With these preparations complete, you can move on to the next step of the process.

SAVADECK T800 Carbon Gravel Bike, with Shimano GRX610 12-Speed, Hydraulic Disc Brakes, 700x40c Tires for Road & Off-Road Adventure, Men's/Women's Bicycle(Elegant White, 51cm)
【With SHIMANO GRX Drivetrain Setup】Equipped with SHIMANO GRX610 shifters and RX822 rear derailleur, matched with a 12-speed M6100...
As an affiliate, we earn on qualifying purchases.
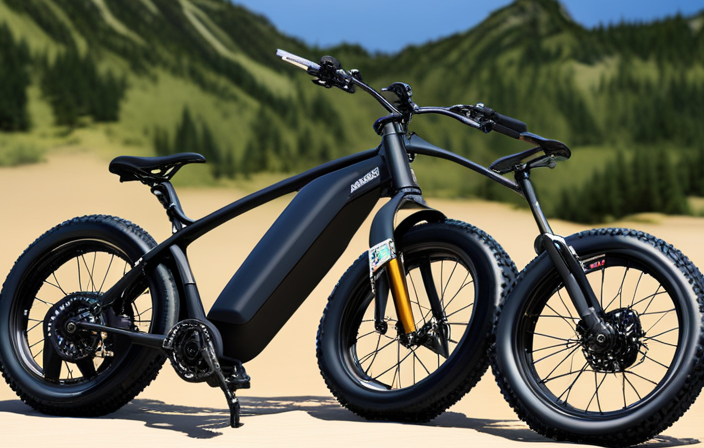
Choose the Right Bicycle for Your Conversion
Find the appropriate bicycle for your conversion by selecting one that suits your needs and preferences. Choosing the right bicycle for your conversion is crucial to ensure a successful and efficient electric bike.
When selecting the ideal bike, there are several factors to consider. Firstly, consider the frame material. Opt for a sturdy and durable frame, such as steel or aluminum, to withstand the added weight of the motor and battery.
Additionally, consider the bike’s weight and size. A lighter and smaller bike will make the conversion process easier and improve maneuverability.
Moreover, evaluate the bike’s geometry and suspension. Look for a bike with a suitable geometry for your riding style and terrain, and consider a suspension system if you plan to ride off-road.
By carefully considering these factors, you can choose the right bicycle for your conversion project.
In the subsequent section, we will discuss how to remove the drill’s motor and battery.
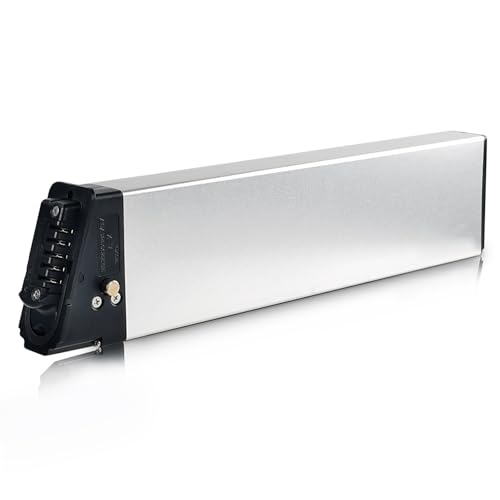
ShunTongDa 48V 10.4Ah 14Ah Folding Ebike Battery 48 Volt DCH-006 Built in Electric Bike Batteries with 30A BMS Totguard for 250W 500W 750W 1000W Motor Foldable E-Bike Battery (48V10.4Ah A Grade Cell)
①Battery Type: 18650 lithium ion batteries, Voltage: 48V, Capacity: 10.4Ah, Real High-Label Capacity. 30A BMS, Wattage at 500Wh,...
As an affiliate, we earn on qualifying purchases.
Remove the Drill’s Motor and Battery
To start the conversion process, it’s important to remove both the motor and battery from the drill. Here are the steps to follow:
-
Disconnect the drill’s power source: Before anything else, ensure that the drill is completely turned off and unplugged from any power source.
-
Remove the drill’s motor: Use a screwdriver or appropriate tool to unscrew the motor from the drill’s housing. Carefully detach any wires connecting the motor to the drill.
-
Take out the battery: Locate the battery compartment on the drill and remove it by sliding or releasing any latches. Ensure that the battery is fully disconnected from the motor and any other components.
After successfully removing the drill’s motor and battery, we can move on to attaching the motor to the bicycle’s rear wheel. This step is crucial in transforming the bicycle into an electric bike.
Amazon Product B0CYT6TBYX
As an affiliate, we earn on qualifying purchases.
Attach the Motor to the Bicycle’s Rear Wheel
Once the motor and battery have been removed from the drill, the next step is to securely attach the motor to the rear wheel of the bicycle.
This step is crucial in converting a regular bicycle into a drill powered electric bike. Firstly, ensure that the motor is aligned with the center of the rear wheel. Use strong adhesive or metal brackets to fix the motor in place.
It is important to ensure that the motor is tightly secured to avoid any wobbling or loosening during operation. Once the motor is securely attached, the drill powered electric bike is ready for use.
Using a drill powered electric bike for commuting offers several advantages such as increased speed and reduced effort. However, it is important to consider the limitations of using a drill motor for bike conversion, including limited power and range.
To overcome these limitations, the next step is to connect the motor to the battery.
Connect the Motor to the Battery
After securely attaching the motor to the rear wheel, the next step is connecting it to the battery. This step is crucial as it allows the motor to draw power and propel the bike forward. To ensure a successful connection, it is important to follow the correct wiring configuration. I have provided a table below to guide you through the process:
| Motor Wire Color | Battery Wire Color | Connection |
|---|---|---|
| Red | Red | Positive |
| Black | Black | Negative |
| Green | Green | Ground |
If you encounter any issues during the connection, here are some troubleshooting tips: double-check the wire connections, ensure the battery has sufficient charge, and inspect for any loose or damaged wires. Additionally, there are alternative methods for connecting the motor, such as using a motor controller or a relay switch. These options may provide greater control and flexibility. Moving forward to the next step of the process, we will now install the throttle and wiring.
Install the Throttle and Wiring
Installing the throttle and wiring is a crucial step in the process of converting a regular bike into an electric one. Throttle placement is important as it determines the ease of controlling the motor’s power. Choose a location on the handlebars that is comfortable and easily accessible while riding. Secure the throttle and ensure it is properly aligned with the handlebars.
Next, make the necessary wiring connections. Connect the throttle to the controller by matching the color-coded wires and securing them tightly. Double-check the connections to ensure there are no loose wires that could cause issues later on.
Once the throttle and wiring are installed, it’s time to move on to the next section about testing and adjusting the electric bike conversion. This allows for fine-tuning and making any necessary adjustments for optimal performance.
Test and Adjust the Electric Bike Conversion
After installing the throttle and wiring, it’s time to test and adjust the electric bike conversion. This step is crucial to ensure everything is functioning properly before hitting the road. To help you with this process, I have prepared a table detailing the test results and troubleshooting tips you may encounter:
| Test Results | Troubleshooting Tips |
|---|---|
| No power | Check battery connections and voltage |
| Weak acceleration | Adjust throttle settings or check motor connections |
| Uneven power delivery | Inspect wiring for loose connections or damaged wires |
| Overheating motor | Reduce load or check for obstructions in the motor |
| Battery drain | Monitor battery voltage and check for excessive power draw |
By referring to this table, you can quickly identify any issues and take appropriate action. Once you have successfully tested and adjusted the electric bike conversion, it’s time to add any additional features or accessories.
Add any Additional Features or Accessories
To enhance your ride, you can choose to add extra features or accessories to your newly converted electric bicycle.
One option is to give your bike a custom paint job to make it stand out and reflect your personal style. A vibrant color or unique design can make your bike look even more impressive.
Another useful accessory is a smartphone holder that allows you to securely mount your phone on the handlebars. This allows you to easily access navigation or listen to music while riding.
Additionally, you may want to consider adding a rear rack or panniers to increase your bike’s storage capacity. These accessories will not only make your ride more enjoyable but also more functional.
With these enhancements in place, you can now focus on ensuring safety measures and proper maintenance for your electric bike.
Ensure Safety Measures and Proper Maintenance
Ensuring safety and proper maintenance is essential for your electric bicycle. Safety precautions should be taken to prevent accidents and injuries. Always wear a helmet and other protective gear, and follow traffic rules when riding your drill-powered electric bike.
Regular maintenance is crucial for the longevity and performance of your bike. Check the brakes, tires, and battery regularly to ensure they are in good condition. Clean and lubricate the chain, gears, and other moving parts to avoid wear and tear. Regularly inspect the electrical components and connections for any signs of damage or loose connections.
Following these safety measures and performing regular maintenance will not only keep you safe but also enhance the efficiency and durability of your drill-powered electric bike.
So, enjoy your DIY drill-powered electric bike and ride with confidence!
Enjoy Your DIY Drill-Powered Electric Bike!
You can have a great time riding your DIY drill-powered e-bike! Using a drill as a power source for your electric bike comes with several advantages. First, drills are easily accessible and affordable, making them a convenient option for powering your bike. Additionally, drills provide a high torque output, allowing for excellent acceleration and climbing capabilities. To increase the speed and range of your drill-powered e-bike, there are a few tips to consider. Firstly, choose a high-capacity battery for longer rides. Secondly, ensure your bike is lightweight by using lightweight materials for the frame and components. Finally, optimize your bike’s aerodynamics by reducing wind resistance through streamlined design. By following these tips, you can enhance the performance of your drill-powered electric bike and enjoy a thrilling ride!
| Advantages of Using a Drill as a Power Source | Tips for Increasing Speed and Range |
|---|---|
| Affordable and easily accessible | Choose a high-capacity battery |
| High torque output for excellent acceleration | Use lightweight materials for the bike |
| Suitable for climbing steep hills | Optimize aerodynamics for reduced wind resistance |
| Versatile and can be used for other applications | Regularly maintain and lubricate the bike for optimal performance |
Frequently Asked Questions
How long does it take to complete the drill-powered electric bike conversion?
On average, the completion time for a drill-powered electric bike conversion is around 8-10 hours. To complete this project, you will need a drill, bike frame, electric motor, battery, controller, and various tools for assembly.
What is the maximum speed that can be achieved with a drill-powered electric bike?
The maximum speed achievable with a drill-powered electric bike depends on various factors such as the power of the drill, efficiency of the bike’s conversion, and aerodynamics. However, it’s important to note that the benefits of a drill-powered electric bike lie in its efficiency and eco-friendliness.
Can any type of bicycle be used for the conversion?
Any type of bicycle can be used for the conversion, as long as it meets the power requirements. Alternative bike options include mountain bikes, road bikes, or even folding bikes, depending on personal preference and intended use.
Can the drill-powered electric bike be ridden in the rain?
Sure thing! Riding a drill-powered electric bike in the rain can be risky. Safety measures must be taken, like wearing appropriate gear and maintaining good visibility. To keep the bike functioning, waterproofing components and regular maintenance are essential.
Are there any legal restrictions or regulations for riding a drill-powered electric bike on public roads?
There are legal requirements and safety concerns when riding a drill-powered electric bike on public roads. It is important to comply with local laws regarding vehicle registration, safety equipment, and speed limits to ensure a safe and legal ride.
Conclusion
In conclusion, building a drill-powered electric bike is a fun and rewarding DIY project. By following the steps outlined in this article, you can easily convert a regular bicycle into an electric one using a drill motor and battery.
While some may argue that this conversion may not provide enough power or speed, it’s important to note that with the right materials and proper adjustments, you can achieve satisfactory results.
Visualize your ideas by imagining yourself cruising effortlessly on your newly created electric bike, experiencing the thrill of a unique and eco-friendly transportation solution.