
Picture the excitement of riding down the street on your own electric bike, smoothly passing by traffic and feeling the breeze in your hair.
In this article, I will guide you through the step-by-step process of creating your own electric bike, from understanding the components to customizing it to your liking.
Get ready to embark on an exhilarating journey of DIY bike building, where you’ll learn the ins and outs of electric bike conversion and unleash your inner engineer.
Let’s dive in and make your electric bike dreams a reality.
Key Takeaways
- Benefits of electric bike conversion include increased speed and efficiency, reduced carbon footprint, and saving money and resources by repurposing an existing bike.
- When installing brakes and accessories, start with brake installation and replace the old brake system with conversion kit components. Enhance visibility with lights and consider adding a rear rack for increased carrying capacity.
- Adjusting the bike for optimal performance involves adjusting tire pressure, checking and adjusting brakes, optimizing battery life, and balancing power output with riding style to extend range.
- Ensuring proper safety measures includes wearing a properly fitted helmet, using bright and reflective clothing, installing front and rear lights, obeying traffic rules and signals, and regularly inspecting the bike for wear or damage.

Under Armour Squeeze Water Bottles, 32 oz Water Bottles, Sideline Sports Water Bottle with Quick-Shot Lid, Quick & Easy Hydration, Gym Water Bottles, Squeeze Bottle, 1 32oz Bottle
- Easy Hydration: Quick-shot lid and one-way valve
- On-the-Go Use: One-hand operation for active hydration
- Measurement Markings: Ounces and milliliters for tracking
As an affiliate, we earn on qualifying purchases.
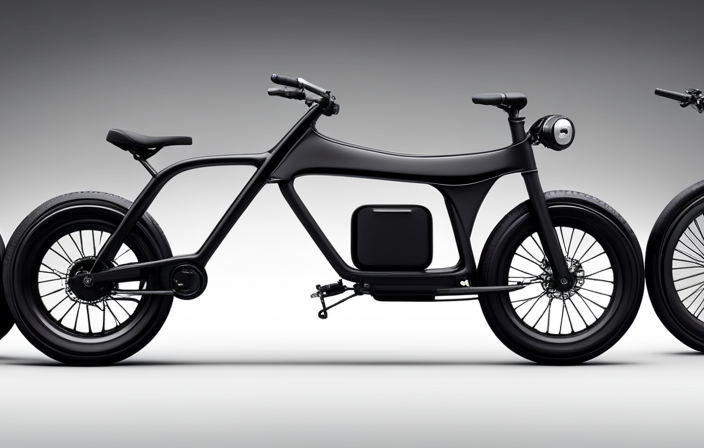
Understand the Basics of Electric Bike Components
Get ready to dive into the exciting world of electric bikes and discover the fundamental components that make these two-wheeled wonders come to life!
Understanding electric bike components is crucial for troubleshooting common issues and ensuring a smooth ride. The heart of an electric bike is its battery pack, which provides the power to propel the bike. The motor, typically located in the rear hub or mid-drive, converts that power into rotational force.
The controller acts as the brain of the bike, regulating the flow of electricity between the battery and the motor. Don’t forget the throttle or pedal assist system, allowing riders to control the speed and level of assistance.
Now that we understand the basics of electric bike components, we can move on to gathering the necessary tools and materials for our electric bike project.
Gather the Necessary Tools and Materials
First, you’ll want to acquire all the essential tools and materials needed to embark on this exciting journey. Understanding the electrical components is crucial for building an electric bike. You’ll need a brushless DC motor, a motor controller, a throttle, and wiring connectors.
Make sure to choose a battery that is suitable for your needs. Consider factors such as voltage, capacity, and weight. Lithium-ion batteries are commonly used due to their high energy density and long lifespan. Additionally, you’ll need a battery charger, a battery management system, and a voltage converter.
Once you have gathered all the necessary tools and materials, you can move on to the next step: choosing the right bike frame for conversion. This will ensure a solid foundation for your electric bike project.
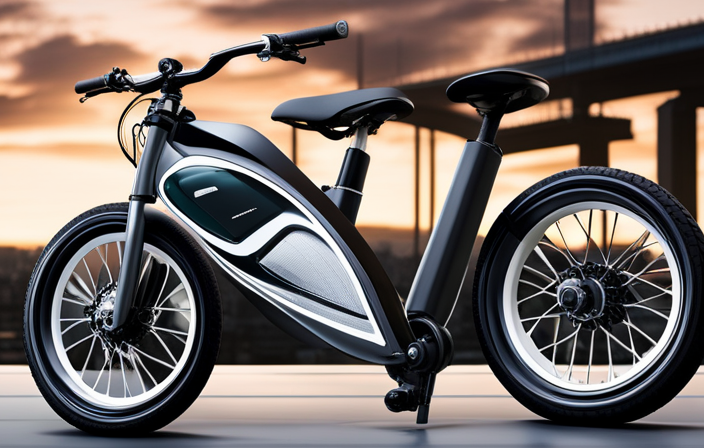
Choose the Right Bike Frame for Conversion
Selecting the perfect bike frame to convert into an electrifying ride is a crucial step on this thrilling journey. Choosing the right frame size is essential to ensure a comfortable and efficient riding experience. It is important to consider your height, inseam length, and riding preferences when selecting the frame size.
Understanding frame materials is also vital in making the right choice. Aluminum frames are lightweight and durable, making them a popular option for electric bike conversions. Steel frames offer a smooth and stable ride, but they can be heavier. Carbon fiber frames are lightweight and provide excellent vibration damping, but they can be expensive. Titanium frames are known for their durability and strength.
Now that you have chosen the perfect bike frame, it’s time to select an electric bike conversion kit that suits your needs.
Select an Electric Bike Conversion Kit
Once you’ve settled on the ideal bike frame, it’s time to dive into the exciting world of electrifying your ride by choosing an electric bike conversion kit that perfectly fits your needs and gives you that extra boost of power.
When selecting a conversion kit, there are several factors to consider. First, determine the type of motor you want, such as a hub motor or a mid-drive motor. Consider the power output and torque of the motor, as well as its efficiency and noise level.
Next, think about the battery capacity and range, ensuring it meets your desired distance requirements. Lastly, evaluate the compatibility of the kit with your bike frame, including the wheel size and brake type.
With these factors in mind, you can confidently choose the right conversion kit that will transform your bike into an electric powerhouse.
Moving forward, the next step is to remove the existing bike components.
Remove the Existing Bike Components
To begin the transformation, you’ll need to carefully disassemble the current components of your bicycle. Start by removing the pedals using a pedal wrench, turning counterclockwise.
Next, unscrew the handlebars and remove the stem bolts to detach them from the fork. Use a wrench to loosen the bolts on the front and rear brakes, then disconnect the brake cables.
Proceed to remove the front and rear wheels by loosening the quick release levers or unscrewing the axle nuts. Take off the chain by using a chain tool to push out the pin and separate the links.
Lastly, remove the old bike seat and seatpost by loosening the seat clamp bolt. Remember to wear safety gloves and goggles to protect yourself from any potential injuries when handling sharp or heavy bike parts.
Next, we will move on to installing the electric bike conversion kit, which will transform your regular bicycle into an electric one.
Install the Electric Bike Conversion Kit
Now that you have successfully removed the existing bike components, it’s time to dive into the exciting process of installing your brand new electric bike conversion kit. To ensure that you install the conversion kit correctly, follow these detailed steps:
- Begin by unpacking the conversion kit and familiarizing yourself with its components, including the motor, battery, controller, and wiring harness.
- Consult the installation manual provided with the kit to determine the specific steps for your particular model. Pay close attention to any warnings or precautions mentioned.
- Mount the motor onto the bike frame securely, ensuring proper alignment with the chain and gears.
- Attach the battery to the designated spot on the frame, taking care to secure it tightly to prevent any movement during rides.
- Connect the necessary wires according to the wiring diagram provided, ensuring a proper connection between the motor, battery, and controller.
By following these steps and troubleshooting common conversion kit issues, you’ll be well on your way to transforming your bike into an electric powerhouse. In the next section, we’ll discuss how to connect the battery and motor seamlessly.
Connect the Battery and Motor
To seamlessly connect the battery and motor, you’ll be joining forces and unlocking the true power of your newly converted ride.
Before diving into the connection process, it’s crucial to prioritize battery maintenance. Ensure that the battery is fully charged and securely fastened to the bike frame.
Next, locate the motor installation area, typically near the rear wheel. Position the motor carefully, aligning it with the frame and ensuring a secure fit.
Connect the motor wires to the corresponding connectors on the battery, making sure to follow the manufacturer’s instructions for proper wiring. Take extra care to avoid any loose connections or exposed wires that could result in damage or malfunction.
Once the battery and motor are successfully connected, you can move on to the next step of testing the electric bike conversion, ensuring all components are functioning optimally for a smooth ride.
Test the Electric Bike Conversion
Once you’ve connected the battery and motor, it’s time to test your electric bike conversion and see if it lives up to the hype. Here are a few challenges you might encounter during the testing phase of your electric bike conversion:
-
Battery Life: Ensure that the battery can provide sufficient power for your desired distance and speed. Test the range and monitor any fluctuations in battery life.
-
Motor Performance: Assess the motor’s ability to provide a smooth and consistent ride. Check for any unusual noises, vibrations, or overheating.
-
Control System: Test the functionality of the control system, including throttle response, pedal-assist modes, and any additional features like regenerative braking.
The benefits of electric bike conversion are numerous. You’ll enjoy increased speed and efficiency while reducing your carbon footprint. Additionally, the conversion allows you to repurpose your existing bike, saving money and resources.
Now, as we move into the next section about installing the brakes and other accessories, it’s essential to ensure a seamless transition for a fully functional electric bike.
Install the Brakes and Other Accessories
To ensure a safe and complete electric bike conversion, you’ll want to start by installing the brakes and other essential accessories. The brakes are crucial for maintaining control and stopping power on your electric bike. Additionally, adding lights to your bike will greatly enhance visibility, especially during nighttime rides. To install the brakes, begin by removing the old brake system and replacing it with the electric bike conversion kit’s brake components. Follow the manufacturer’s instructions carefully to ensure proper installation. As for the lights, attach them securely to the front and rear of the bike frame, making sure they are aligned properly and functional. Lastly, consider adding a rear rack to increase carrying capacity. Once the brakes, lights, and rear rack are installed, you can move on to adjusting the bike for optimal performance.
Adjust the Bike for Optimal Performance
Now that you’ve got all the necessary accessories in place, it’s time to fine-tune your ride for the best performance possible. To achieve optimal performance, there are a few key steps you need to take:
First, adjust the tire pressure to the recommended level. This ensures proper traction and minimizes rolling resistance, allowing for smoother rides and increased efficiency.
Next, check and adjust the brakes for optimal stopping power. Properly aligned and responsive brakes are crucial for both safety and performance.
Finally, optimize the battery life by adjusting the power settings. Balancing the power output with your riding style can help extend the range of your electric bike.
By fine-tuning your ride and optimizing battery life, you can enjoy a more efficient and enjoyable experience on your electric bike.
Ensure proper safety measures are also in place to protect yourself and others.
Ensure Proper Safety Measures
Remember, your safety should always be a top priority while riding. Ensuring safety while riding an electric bike involves taking several important precautions. First, make sure to wear a properly fitted helmet to protect your head in case of a fall or collision. Additionally, wear bright and reflective clothing to enhance your visibility to other road users. It is also crucial to install front and rear lights on your electric bike to ensure you can see and be seen, especially when riding at night. Furthermore, always obey traffic rules and signals, and be cautious of potential hazards on the road. Lastly, regularly inspect your electric bike for any signs of wear or damage and have it maintained by a professional if needed. By following these safety measures, you can enjoy your electric bike rides with peace of mind. As we move on to the next section about maintaining and troubleshooting your electric bike, remember that proper safety practices will also help prevent potential mechanical issues.
Maintain and Troubleshoot Your Electric Bike
Ensuring regular upkeep and addressing any potential hiccups along the way will keep your two-wheeled companion running smoothly. To maintain and troubleshoot your electric bike effectively, there are several techniques and tips to remember.
Firstly, regularly inspect the battery and charging system to ensure optimal performance. Clean the battery terminals and check for any signs of damage or corrosion.
Additionally, keep the bike clean and lubricate the chain regularly to prevent wear and tear. Take note of any unusual noises or vibrations during rides, as they may indicate a problem that needs attention.
Familiarize yourself with basic troubleshooting techniques such as checking the wiring connections and diagnosing common electrical issues.
By following these maintenance tips and troubleshooting techniques, you can keep your electric bike in top condition.
Moving forward, let’s explore how to upgrade and customize your electric bike.
Upgrade and Customize Your Electric Bike
To enhance your riding experience and add a personal touch, why not consider upgrading and customizing your e-bike? Customizing features allow you to make your electric bike truly unique.
Here are three popular customizations that you can consider:
-
Upgrading battery capacity: By upgrading your battery, you can extend your e-bike’s range and enjoy longer rides without worrying about running out of power. Look for higher capacity batteries that are compatible with your e-bike model.
-
Installing a suspension fork: A suspension fork can greatly improve your comfort and control while riding, especially on rough terrains. It absorbs shocks and bumps, providing a smoother ride and reducing fatigue.
-
Adding accessories: Personalize your e-bike by adding accessories like a rear rack, fenders, or lights. These not only enhance the functionality of your bike but also make it more practical and safe for everyday use.
By customizing and upgrading your electric bike, you can tailor it to your specific needs and preferences. However, it’s important to follow local laws and regulations to ensure your modifications comply with safety standards and requirements.
Transitioning into the subsequent section, it is crucial to familiarize yourself with the rules to ride your e-bike responsibly and legally.
Follow Local Laws and Regulations
Obeying local laws and regulations is crucial when it comes to riding your e-bike responsibly and within legal parameters, as ignorance of the law is no excuse. Understanding the legal requirements for electric bikes in your area is essential to ensure you comply with all necessary rules. To help you navigate these regulations, here is a table outlining some common legal requirements and safety precautions to follow:
| Legal Requirement | Safety Precaution |
|---|---|
| Helmet use | Proper signaling when turning |
| Maximum speed limit | Adequate lighting at night |
| Age restrictions | Regular maintenance checks |
By adhering to these laws and taking the necessary safety precautions, you can enjoy riding your DIY electric bike with peace of mind. Transitioning into the subsequent section about ‘enjoy riding your DIY electric bike,’ it’s important to understand the legal aspects to ensure a safe and enjoyable experience.
Enjoy Riding Your DIY Electric Bike
Get ready to experience the thrill of cruising down the open road on your very own DIY e-bike, as you embrace the freedom and joy of riding.
Now that you have successfully built your electric bike, it’s time to enjoy it to the fullest. One of the great advantages of having a DIY e-bike is the ability to customize features according to your preferences. You can add accessories like a comfortable seat, a stylish handlebar, or even a storage compartment.
However, it’s important to remember that safety should always be a priority. Before taking your e-bike for a spin, make sure to double-check all the safety precautions. Wear a helmet, use appropriate lighting, and follow traffic rules. Regularly inspect your e-bike for any signs of wear and tear and perform maintenance tasks as needed.
With your custom features and safety precautions in place, get ready to enjoy the exhilarating ride on your DIY electric bike.
Frequently Asked Questions
Can I convert any type of bike into an electric bike?
Yes, not all bikes can be converted into electric bikes. Bike compatibility is crucial as it depends on factors like frame design, weight, and available space for the motor and battery. The benefits of electric bike conversion include increased speed, reduced effort, and eco-friendly transportation.
How long does it take to install an electric bike conversion kit?
Installing an electric bike conversion kit typically takes around 2-3 hours, depending on your mechanical skills and familiarity with the process. Basic tools such as wrenches, screwdrivers, and pliers are generally required for a successful installation.
Are there any specific safety precautions I need to take when riding an electric bike?
While riding an electric bike, it is essential to prioritize safety. Wearing a helmet and protective gear such as knee and elbow pads is crucial. Regular electric bike maintenance ensures a safe and smooth riding experience.
Can I upgrade the battery and motor of my electric bike in the future?
Yes, you can upgrade the battery and motor of your electric bike in the future. Ensure battery compatibility with your bike’s system and explore motor power options to find the best fit for your needs.
Are there any local regulations or laws I need to be aware of when riding my DIY electric bike on public roads?
Yes, there are local regulations and laws that need to be followed when riding a DIY electric bike on public roads. For example, in the US, the maximum speed limit is typically 20 mph for electric bikes.
Conclusion
In conclusion, making an electric bike is a rewarding and fulfilling experience. By understanding the basics of electric bike components and gathering the necessary tools and materials, one can easily convert a regular bike into an electric one. Additionally, learning how to build an ebike allows for customization, ensuring that the bike meets personal preferences and needs. It also promotes eco-friendly transportation, reducing reliance on fossil fuels and lowering carbon emissions. With proper planning and effort, anyone can create a reliable and efficient electric bike for daily use.
Choosing the right bike frame and selecting a suitable conversion kit are crucial steps in the process. Removing existing bike components, maintaining and troubleshooting the electric bike, and upgrading and customizing it further enhance the overall experience.
It is essential to follow local laws and regulations while enjoying the ride on your DIY electric bike.