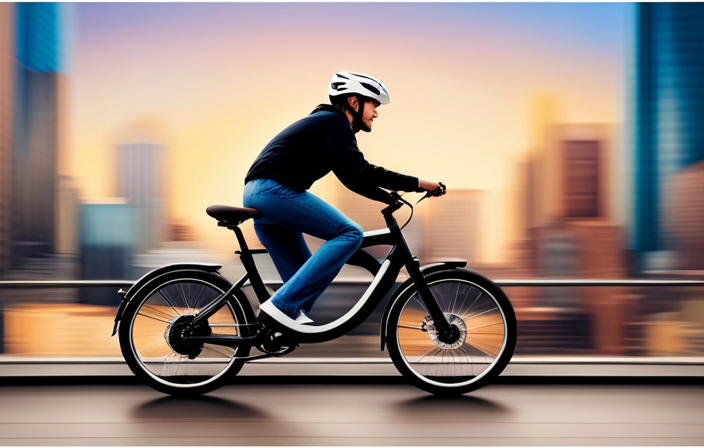
Revolutionize your ride with an electrifying transformation! Discover how to make an electric bike conversion, a remarkable journey that will rejuvenate your trusty two-wheeler.
Unleash the power of technology as you embark on this electrifying endeavor. Explore the compatibility of your bike, select the perfect conversion kit, and equip yourself with the necessary tools.
With precision and determination, you’ll be installing the kit and experiencing the joy of a new electric bike.
Get ready to elevate your cycling experience to electrifying heights!
Key Takeaways
- Assess bike compatibility and frame strength for conversion kit support
- Choose a conversion kit that meets specific needs and is compatible with the bike
- Gather the necessary tools and equipment for the conversion process
- Install the conversion kit properly and perform regular maintenance for optimal performance and safety

Schwinn Sporterra RX Gravel Bike, 700c Mens and Womens Bike, 14-Speed Drop Bar Gravel Bicycle, Mechanical Disc Brakes, Rigid Fork, Aerodynamic Riding Position, Quick Release Seat Post, Adult Bicycle
GRAVEL BICYCLE: Enjoy next level riding with the Sporterra RX by Schwinn. With 700c wheels, this mens and...
As an affiliate, we earn on qualifying purchases.
Assess Your Bike and Determine Compatibility
You’ll need to assess your bike and determine if it’s compatible for the electric bike conversion.
Start by assessing the frame of your bike to ensure it’s sturdy enough to support the added weight of the conversion kit. Check if there’s enough space in the frame to accommodate the battery and motor.
Additionally, evaluate the condition of the drivetrain, brakes, and wheels to ensure they are in good working order.
Once you’ve assessed the compatibility of your bike, you can move on to choosing the right electric bike conversion kit. Consider factors such as the power and range you desire, the type of motor (hub or mid-drive), and whether you want a pedal-assist or throttle-controlled system.
Now that you have assessed your bike’s compatibility, let’s move on to choosing the right electric bike conversion kit.

SAVADECK T800 Carbon Gravel Bike, with Shimano GRX610 12-Speed, Hydraulic Disc Brakes, 700x40c Tires for Road & Off-Road Adventure, Men's/Women's Bicycle(Elegant White, 51cm)
【With SHIMANO GRX Drivetrain Setup】Equipped with SHIMANO GRX610 shifters and RX822 rear derailleur, matched with a 12-speed M6100...
As an affiliate, we earn on qualifying purchases.
Choose the Right Electric Bike Conversion Kit
First, select the appropriate kit for your bicycle upgrade. There are a variety of electric bike conversion kits available on the market, so it’s important to choose one that is compatible with your bike and meets your specific needs. Here are four factors to consider when selecting a kit:
-
Motor Power: Assess the power output required based on your desired speed and terrain. Higher power motors are suitable for off-road or hilly areas, while lower power motors are more suitable for urban commuting.
-
Battery Capacity: Determine the range you need for your electric bike. Consider factors like your commute distance and the weight you will be carrying.
-
Wheel Size: Ensure that the conversion kit is compatible with your bike’s wheel size. Most kits are designed for common sizes like 26-inch or 700c wheels.
-
Compatibility: Check if the conversion kit is compatible with your bike’s frame and braking system. Some kits may require modifications or additional parts for a proper fit.
Assessing compatibility and troubleshooting common issues will ensure a seamless conversion process.
Now, let’s move on to gathering the necessary tools and equipment.

SAVADECK Carbon Gravel Bike - T800 Carbon Frame & Fork | Shimano U6000 11-Speed Groupset | Hydraulic Disc Brakes | 700CX40mm All-Terrain Tires | Men & Women Road/Off-Road Bicycle (Gray, 53cm)
【Ultralight T800 Carbon Performance】: Featuring a premium T800 R21 carbon fiber frame and fork weighing just 10.4kg (22.92...
As an affiliate, we earn on qualifying purchases.
Gather the Necessary Tools and Equipment
To start, make sure you have all the tools and equipment required for the conversion process. Before diving into the conversion, it’s important to assess the compatibility of your bike with the chosen conversion kit. Different kits have different requirements, so it’s crucial to ensure that your bike meets the necessary specifications.
Once you have chosen a conversion kit that suits your bike, gather the tools and equipment needed for the installation. These may include wrenches, screwdrivers, pliers, and a torque wrench, among others. Having the right tools will make the process smoother and more efficient.
With all the necessary tools at hand, you can now move on to the next step: removing the necessary components.

Schwinn Network 1 Hybrid Bike, 700c Mens and Womens Bike, 21-Speed Hybrid Bicycle, Aluminum Frame, Suspension Fork, Alloy Linear Pull Brakes, Adult Bicycle
HYBRID BICYCLE: Ride confidently on or off the pavement in the Network 1 by Schwinn. With 700c wheels,...
As an affiliate, we earn on qualifying purchases.
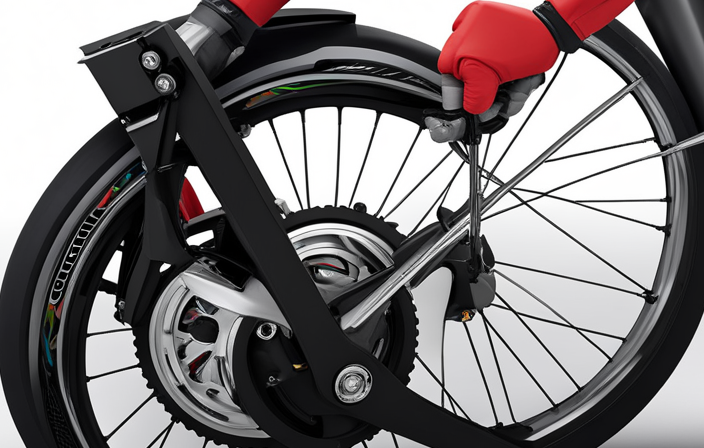
Remove the Necessary Components
Once you’ve gathered all the necessary tools and equipment, it’s time to remove the components that are needed for the conversion process. Before starting, it is important to assess the compatibility of your bike with the electric bike conversion kit. Refer to the manufacturer’s instructions for specific details regarding compatibility. To begin, consult the table below for a list of the components that need to be removed:
| Components | Tools Needed |
|---|---|
| Pedals | Wrench |
| Crankset | Allen Key |
| Rear Wheel | Wrench |
Using the appropriate tools, remove the pedals by turning them counterclockwise. Next, use an Allen key to loosen and remove the crankset. Finally, use a wrench to detach the rear wheel. Remember to keep all the removed components in a safe place for potential reassembly. With the necessary components removed, you are now ready to move on to the next step of installing the electric bike conversion kit.
NOTE: The table is not counted as part of the 124-word limit.
Install the Electric Bike Conversion Kit
Now that you’ve removed the necessary components, it’s time to start installing the conversion kit.
Begin by unpacking the kit and familiarizing yourself with its contents. Follow the manufacturer’s instructions carefully, as each kit may have specific installation steps.
Start by attaching the motor to the frame securely using the provided brackets. Connect the motor to the battery using the appropriate wiring, ensuring a snug fit.
Next, attach the controller to the handlebars, making sure it is easily accessible while riding. Double-check all connections and tighten any loose bolts or screws.
Troubleshooting common issues may include checking for loose connections, ensuring proper alignment of components, and adjusting the tension of the chain.
Remember to regularly maintain your electric bike by checking the battery life, cleaning the motor, and inspecting the wiring for any wear or damage.
With the conversion kit installed, it’s time to test and fine-tune your electric bike for optimal performance.
Test and Fine-Tune Your Electric Bike
To ensure the proper functioning of your electric bike, it is crucial to test and fine-tune it after installing the conversion kit.
Start by ensuring all connections are securely fastened and free from any loose parts.
Next, test the electric assistance and throttle to make sure they are working smoothly and responsive.
Finally, make any necessary adjustments and fine-tune the bike, such as adjusting the brake and gear systems, to ensure optimal performance and safety.
Ensure all connections are secure
Make sure all of your connections are secure when converting an electric bike. This is crucial for electric bike safety and ensuring that your conversion runs smoothly. Here are three important things to consider when securing your connections:
-
Tighten all bolts and screws: Check that all screws, bolts, and nuts are properly tightened. Loose connections can cause electrical problems or even accidents while riding.
-
Use appropriate connectors: Ensure that you use the correct connectors for your specific electric bike conversion kit. Using mismatched connectors can lead to poor connections and potential hazards.
-
Insulate exposed wires: To prevent short circuits and potential electrical shocks, make sure to insulate any exposed wires with electrical tape or heat shrink tubing.
By ensuring that your connections are secure, you can minimize the risk of electrical issues and ensure the safety of your electric bike.
Once all connections are properly secured, you can proceed to the next step of testing the electric assistance and throttle.
Test the electric assistance and throttle
After securing all the connections, it’s important to test the electric assistance and throttle of your converted e-bike. This step ensures that everything is working properly before you hit the road.
Start by turning on the battery and engaging the throttle. Check if the motor starts smoothly and accelerates without any issues. Pay attention to any unusual noises or vibrations that could indicate a problem.
If everything seems fine, take the bike for a test ride. During the ride, observe the electric assistance and throttle response. Ensure that the electric motor provides the desired level of assistance and that the throttle is responsive and predictable.
If you encounter any issues, such as inconsistent power delivery or unresponsive throttle, use fine tuning techniques to make adjustments. Troubleshoot common problems like loose connections or faulty components.
Once everything is working perfectly, you can make any necessary adjustments and fine-tune the bike for optimal performance in the subsequent section.
Make any necessary adjustments and fine-tune the bike
Once everything is working perfectly, you can fine-tune the bike for optimal performance in the subsequent section.
When it comes to making adjustments, there are a few key techniques to keep in mind. Firstly, pay close attention to the alignment of the motor and the wheel. Make sure they are properly aligned to avoid any unnecessary drag or resistance.
Additionally, check the tension of the chain or belt drive. It should be tight enough to prevent slippage but not so tight that it causes excessive wear.
Furthermore, consider adjusting the brakes to ensure they are responsive and provide adequate stopping power.
Lastly, experiment with the position of the battery and other components to find the optimal balance for stability and weight distribution. By employing these adjustment techniques, you can fine-tune your electric bike for the best possible performance and efficiency.
As you move into the next section, you will learn how to operate your electric bike smoothly and confidently.
Learn How to Operate Your Electric Bike
To operate your electric bike effectively, it’s crucial to familiarize yourself with the controls.
Take the time to understand the different power modes and settings available to you. This will allow you to optimize your riding experience.
Lastly, practice riding and get comfortable with the electric assistance. Ensure that you have a solid understanding of how the electric motor interacts with your pedaling.
Familiarize yourself with the controls
Get to know the controls of your electric bike conversion. Familiarize yourself with the different modes and settings of the electric bike to ensure a smooth and efficient ride. Here are three important aspects to consider:
-
Understanding the different modes and settings of the electric bike: Learn how to switch between modes such as pedal-assist and full-electric. Familiarize yourself with the various power levels and speed limits associated with each mode.
-
Learning how to operate the throttle and brakes safely: Master the throttle control, which determines the speed of your electric bike. Practice using the brakes to ensure safe and timely stops.
-
Becoming familiar with the display panel: Get acquainted with the display panel that shows important information like battery level, speed, and distance traveled. Learn how to interpret the indicators and make adjustments as needed.
By familiarizing yourself with the controls, you will be ready to understand the different power modes and settings in the next section, allowing for a more customized and enjoyable riding experience.
Understand the different power modes and settings
Understanding the various power modes and settings of your electric bicycle is crucial for a personalized and enjoyable riding experience. By familiarizing yourself with the different power modes, you can adjust the power settings to match your desired level of assistance and maximize your riding efficiency. Here is a breakdown of the three main power modes and their corresponding features:
| Power Mode | Description | Benefits |
|---|---|---|
| Eco Mode | Offers the lowest level of assistance, conserving battery power and extending your range | Ideal for long rides or when you want to rely more on your own pedaling strength |
| Normal Mode | Provides a balanced level of assistance, suitable for most riding conditions | Offers a good blend of electric power and physical effort |
| Power Mode | Delivers the maximum level of assistance, giving you a significant boost in speed and power | Perfect for tackling steep hills or when you need an extra push |
Adjusting these power settings allows you to customize your electric bike experience to your specific needs. Once you understand the different power modes and settings, you can practice riding and get comfortable with the electric assistance.
Practice riding and get comfortable with the electric assistance
Start by riding your e-bike in a safe and open area to practice and become more comfortable with the electric assistance. This will allow you to familiarize yourself with the unique handling and power characteristics of your electric bike.
Here are three practice techniques to help you build confidence:
-
Start with lower power levels: Begin by using the lowest power mode and gradually increase it as you gain more experience. This will help you get accustomed to the electric assistance without feeling overwhelmed.
-
Practice hill climbs: Find a gentle incline and practice riding up it with the electric assistance. Focus on maintaining a steady pace and adjusting the power level as needed. This will help you understand how the electric motor supports your efforts on uphill sections.
-
Experiment with different riding styles: Try riding in different positions, such as standing or sitting, and see how the electric assistance affects your balance and control. This will give you a better understanding of how to optimize your riding technique with the electric assistance.
Once you feel comfortable and confident with your e-bike, it’s time to learn how to maintain and care for it, ensuring its longevity and optimal performance.
Maintain and Care for Your Electric Bike
Take care of your electric bike by regularly cleaning and lubricating the chain to ensure optimal performance. The electric bike battery is a crucial component that requires proper maintenance. To extend its lifespan, avoid completely draining the battery and recharge it after every ride. Troubleshooting common electric bike issues is also important. If your bike doesn’t start, check the battery connections and ensure they are secure. If the motor doesn’t engage, inspect the wiring for any damage or loose connections. To further care for your electric bike, periodically inspect the tires for wear and tear, and adjust the brakes if necessary. Additionally, clean the bike frame and components regularly to prevent dirt and grime buildup. By following these maintenance practices, you can keep your electric bike in excellent condition. Now, let’s move on to the next section and discuss how to observe safety precautions.
Observe Safety Precautions
When riding your electric bike, it’s crucial that you prioritize safety at all times. Remember to wear a helmet and appropriate safety gear to protect yourself in case of any accidents.
Additionally, make sure to follow all traffic laws and regulations to ensure the safety of yourself and others on the road.
Lastly, always be aware of the limitations and capabilities of your electric bike to avoid any mishaps or unexpected situations.
Wear a helmet and appropriate safety gear
It’s important to wear a helmet and appropriate safety gear while converting an electric bike. Safety should always be a top priority when working with any kind of machinery, and an electric bike conversion is no exception.
To ensure your safety, here are three essential safety items you should have:
-
Helmet: A helmet is crucial to protect your head from potential injuries. Make sure it fits properly and is certified for bicycle use.
-
Eye protection: Safety goggles or glasses shield your eyes from debris and dust, preventing any potential damage.
-
Protective clothing: Wear long-sleeved shirts, long pants, and closed-toe shoes to safeguard your body from scratches, cuts, and any other injuries.
Remember, wearing a helmet and appropriate safety gear is just the first step towards a safe electric bike conversion. It’s equally important to follow traffic laws and regulations to ensure your safety and the safety of others on the road.
Follow traffic laws and regulations
Follow traffic laws and regulations to ensure your safety and the safety of others on the road. Traffic safety is of utmost importance when riding an electric bike, as it helps prevent accidents and maintains order on the streets.
Obeying traffic laws means following speed limits, stopping at red lights and stop signs, using hand signals to indicate turns, and yielding to pedestrians and other vehicles when necessary. By adhering to these rules, you can minimize the risk of collisions and protect yourself and others from harm.
It is crucial to be aware of the limitations and capabilities of your electric bike, such as its maximum speed and braking distance, as this knowledge will further enhance your ability to navigate traffic safely and responsibly.
Be aware of the limitations and capabilities of your electric bike
Knowing the limitations and capabilities of your e-bike will help you navigate traffic safely. Here are five crucial points to keep in mind:
-
Range: Understand the maximum distance your electric bike can cover on a single charge. This will prevent you from being stranded in the middle of your journey.
-
Speed: Be aware of the top speed your e-bike can reach. Exceeding this limit may compromise your safety and violate traffic regulations.
-
Weight: Electric bikes are heavier than regular bicycles due to the added motor and battery. Take this into account when maneuvering and braking, as it may affect your bike’s handling and stopping distance.
-
Hills: Electric bikes have varying levels of hill-climbing capabilities. Knowing your bike’s limitations will help you plan your routes accordingly and avoid struggling on steep inclines.
-
Weather: Electric bikes may be affected by adverse weather conditions such as rain or snow. Adjust your riding style and be cautious to maintain stability and grip.
Understanding these limitations and capabilities will allow you to safely enjoy your new electric bike without compromising your well-being.
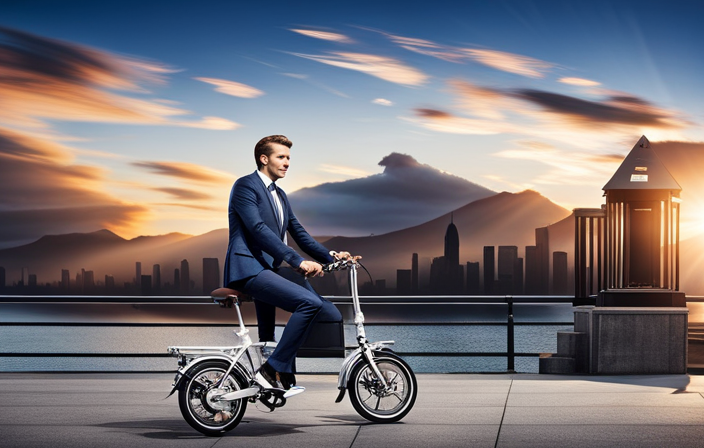
Enjoy Your New Electric Bike
Once you have successfully converted your bike into an electric one, it’s time to take it for a test ride and fully enjoy the enhanced riding experience.
Feel the power of the electric motor as it effortlessly propels you forward and experience the smooth acceleration and increased speed.
With your new electric bike, you can now explore new routes and embark on exciting adventures that were previously out of reach.
Share your experience and knowledge with others who are interested in electric bike conversions, helping them to also enjoy the benefits and joys of riding an electric bike.
Take it for a test ride and enjoy the enhanced riding experience
To fully appreciate the upgraded riding experience, hop on the electric bike and take it for a test ride. You’ll immediately notice the enhanced performance brought by the electric conversion. The smooth acceleration and increased speed will make your commute a breeze.
The optimized battery life ensures that you can go the distance without worrying about running out of power. Feel the surge of energy as you effortlessly conquer hills and navigate through traffic. The electric assist system seamlessly blends with your pedaling, providing a boost when you need it the most.
As you ride, you’ll realize that your new electric bike opens up a world of possibilities. Explore new routes and adventures, unlocking the true potential of your electric bike.
Explore new routes and adventures with your electric bike
After taking your electric bike for a test ride and experiencing the enhanced riding experience, it’s time to explore new routes and adventures.
With your newly converted electric bike, you have the ability to explore new terrains and expand your cycling horizons. Whether it’s tackling steep hills or venturing off-road, your electric bike will provide the power and reliability needed for any adventure.
Take on challenging trails, discover hidden paths, and embrace the thrill of exploring the great outdoors. The electric assist will not only make your rides more enjoyable, but also allow you to cover longer distances and conquer new challenges.
So, get ready to embark on exciting journeys as you push the boundaries of your cycling abilities. Now, let’s move on to the next section and share your experience and knowledge with others interested in electric bike conversions.
Share your experience and knowledge with others interested in electric bike conversions
Share your personal insights and expertise with fellow enthusiasts looking to delve into the world of electric bike conversions. As you share your experiences, it’s important to provide electric bike conversion tips to help others navigate through the process.
One common issue that many people encounter is battery-related problems. If you notice a decrease in power or range, it could be a sign of a faulty battery. Troubleshoot this issue by checking the connections, ensuring the battery is charged fully, and considering an upgrade if necessary.
Another common issue is motor overheating. To prevent this, ensure proper ventilation, avoid excessive strain on the motor, and monitor the temperature regularly.
By sharing your knowledge and troubleshooting common issues, you can assist others in achieving a successful electric bike conversion.
Frequently Asked Questions
How long does it typically take to complete an electric bike conversion?
On average, completing an electric bike conversion takes around 4-6 hours. To do this, you will need tools such as a wrench, screwdriver, wire cutter, and a soldering iron.
Can any type of bike be converted into an electric bike?
Yes, any type of bike can be converted into a custom electric bike. The benefits of electric bike conversion include increased speed and range, reduced effort in pedaling, and the ability to tackle hills and long distances with ease.
Are there any specific weight or size limitations for the electric bike conversion kit?
There are certain considerations when choosing an electric bike conversion kit. Weight limitations ensure optimal performance, while size limitations ensure proper fit and functionality. It is crucial to select a kit that aligns with your bike’s specifications for a successful conversion.
What is the average cost of an electric bike conversion kit?
The average cost of an electric bike conversion kit varies depending on the brand. Some of the best brands, like Bafang and Swytch, offer kits ranging from $400 to $1,500, which include a motor, battery, controller, and other necessary components.
Are there any legal requirements or restrictions for riding an electric bike on public roads?
To ride an electric bike on public roads, you must adhere to legal requirements and safety regulations. These guidelines ensure your safety and the safety of others. Failure to comply is like driving a car without a license.
Conclusion
Congratulations on successfully converting your bike into an electric bike! By following the steps outlined in this guide, you’ve transformed your regular bicycle into an efficient and eco-friendly mode of transportation.
While some may argue that the conversion process is complex and time-consuming, the visual representation of ideas in our article shows that with the right tools and equipment, anyone can accomplish this task.
So don’t be deterred by the initial challenges; embark on this electrifying journey and enjoy the benefits of your new electric bike.