
If you are prepared to elevate your cycling journey to new levels (and speeds), then get ready and brace yourself for the ultimate ride of your life.
In this step-by-step guide, I will show you how to transform an ordinary bicycle into a powerful, motorized machine that will leave others in the dust.
With the right tools, materials, and a little bit of technical know-how, you’ll be cruising down the streets with ease, effortlessly turning heads and conquering any terrain that comes your way.
Are you ready to unleash the true potential of your bicycle? Let’s dive in!
Key Takeaways
- Choose the right motor type based on power output, fuel efficiency, and maintenance ease.
- Select a suitable bicycle frame that is sturdy and compatible with the chosen motor.
- Consider power output, compatibility, and ease of installation when selecting a motor kit.
- Ensure safety measures are followed, such as wearing protective gear and regularly maintaining the motorized bicycle.
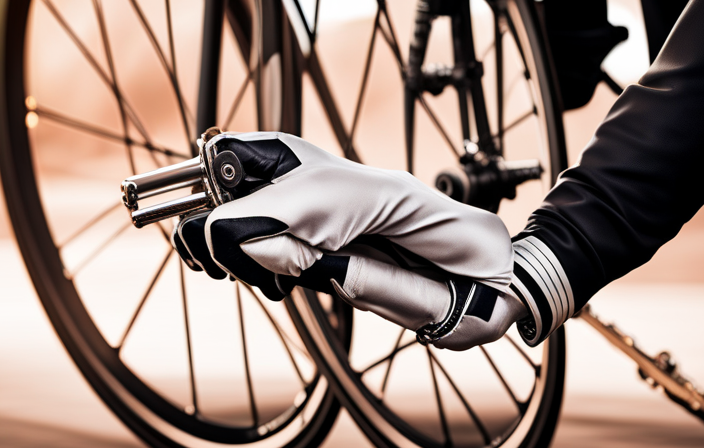
Gather the Necessary Tools and Materials
You’ll need a variety of tools and materials to make a motorized bicycle.
First, you need to choose the right motor type for your project. There are various options available, including two-stroke and four-stroke engines. Consider factors such as power output, fuel efficiency, and ease of maintenance when making your decision.
Once you have chosen the motor type, you will need to source the necessary materials. This includes a bicycle frame that is suitable for conversion, along with additional components like an engine mount, fuel tank, exhaust pipe, and chain drive system. Make sure to select high-quality materials that are durable and compatible with your chosen motor.
With the right tools and materials in hand, you can move on to the next step of choosing the right bicycle for conversion.
Choose the Right Bicycle for Conversion
To choose the right bike for your conversion, start by considering its size and frame type.
Choosing the right bicycle for conversion is crucial to ensure a successful motorized transformation. You want a bike that is sturdy enough to handle the additional weight and power of the motor kit. Look for a frame that is strong and well-built, preferably made of steel or aluminum.
Consider the size of the bicycle as well, making sure it is suitable for your height and weight. A larger bike may provide better stability and control while riding.
Additionally, consider the benefits of motorized bicycles, such as increased speed, reduced effort in pedaling, and the ability to go longer distances without getting tired. With the right bicycle, you can fully enjoy the advantages of motorization.
Now, let’s move on to the next section and select the right motor kit.
Select the Right Motor Kit
When selecting the appropriate motor kit, it’s important to consider factors such as power output, compatibility with the chosen bicycle, and ease of installation.
There are several motor kit options available in the market, each offering different features and specifications. Here are some key points to consider when choosing a motor kit:
- Power output: Determine the desired power output of the motor kit based on your requirements and the terrain you’ll be riding on.
- Compatibility: Ensure that the motor kit is compatible with your bicycle’s frame size, wheel size, and brake system.
- Ease of installation: Look for a motor kit that comes with clear instructions and all the necessary components for a straightforward installation process.
- Additional features: Some motor kits offer additional features like pedal-assist modes or regenerative braking.
With the right motor kit selected, you can now move on to preparing the bicycle for installation, ensuring a smooth and successful conversion process.
Prepare the Bicycle for Installation
Before installing the motor kit, it’s important to prepare the bike for the conversion process.
First, you need to ensure that the bicycle frame is in good condition and strong enough to handle the additional weight and power of the motor. Check for any signs of damage or wear, such as cracks or dents, and repair or reinforce the frame if necessary.
Next, inspect the brakes and gears to make sure they are functioning properly. Adjust the brakes if needed and ensure that the gears are shifting smoothly. This is crucial for safety and optimal performance.
Once the bicycle frame is ready and the brakes and gears are in top shape, you can confidently move on to the next step of installing the motor kit.
Install the Motor Kit
Now it’s time to install the motor kit onto the bike.
Before getting started, it’s important to understand the different motor types available for a motorized bicycle. The most common types are two-stroke and four-stroke engines.
Two-stroke engines are lighter and more powerful, but they require a mixture of oil and gasoline. On the other hand, four-stroke engines are more fuel-efficient and produce less pollution, but they are heavier.
Once you have chosen the motor type that suits your needs, follow the instructions provided with the motor kit to install it onto the bike frame. Make sure to double-check all the connections and tighten the bolts securely.
If you encounter any issues during the installation, refer to the troubleshooting tips included in the motor kit manual.
After successfully installing the motor kit, we can now move on to connecting the electrical components.
Connect the Electrical Components
To connect the electrical components, start by carefully following the instructions provided with the motor kit.
Begin by identifying the electrical wiring components, such as the controller, throttle, and ignition switch. Ensure that the wires are properly labeled and organized before proceeding.
Connect the wires according to the diagram provided in the instructions, making sure to securely fasten them with electrical connectors or soldering. Pay close attention to the battery placement, ensuring that it is securely mounted and protected from potential damage.
Double-check all connections to guarantee they are tight and secure.
Once the electrical components are connected, you can move on to the next step of testing and adjusting the motorized bicycle. This will ensure that everything is functioning correctly before taking it for a ride.
Test and Adjust the Motorized Bicycle
After connecting the electrical components, it’s important to test and adjust the motorized bicycle to ensure optimal functionality.
To test the performance, start the engine and observe how it runs. Check for any unusual noises or vibrations.
Next, take the bicycle for a short test ride, varying the speed and terrain to assess its overall performance. Pay attention to how the throttle responds and make adjustments if necessary.
To adjust the throttle, locate the throttle cable and adjust its tension according to your preference. Test the throttle response by gradually increasing and decreasing the speed while riding. If the throttle feels too sensitive or unresponsive, fine-tune the tension until it’s comfortable to use.
Additionally, check the brakes and ensure they are working properly for safe operation.
Ensuring safety measures is crucial for a motorized bicycle.
Ensure Safety Measures
Ensuring safety is crucial when operating a motorized bicycle. To minimize the risk of accidents, it’s important to follow a few safety precautions.
First and foremost, always wear the appropriate protective gear, including a helmet, gloves, and sturdy shoes. This will help protect you in case of a fall or collision.
Additionally, make sure the bicycle is equipped with proper lighting, including headlights and taillights, to increase visibility. Regularly check the brakes, tires, and other components to ensure they are in good working condition.
When riding, always be aware of your surroundings and follow traffic laws. By taking these safety measures, you can enjoy a smooth and secure ride on your motorized bicycle.
Moving on to maintaining and troubleshooting the motorized bicycle, it’s important to regularly inspect and service the engine and other mechanical parts.
Maintain and Troubleshoot the Motorized Bicycle
After ensuring the safety measures, it is crucial to maintain and troubleshoot your motorized bicycle to ensure its smooth operation. Regular maintenance is essential to keep the bike running at its best. Here are three key troubleshooting techniques and common maintenance issues to look out for:
-
Check the spark plug: A faulty spark plug can cause starting issues and poor engine performance. Replace it if necessary.
-
Clean the carburetor: Over time, the carburetor can get clogged with dirt and debris, leading to fuel flow problems. Regularly clean and inspect the carburetor to avoid performance issues.
-
Inspect the chain and sprockets: Excessive wear or improper tensioning of the chain can affect the bike’s power delivery. Regularly lubricate and adjust the chain and sprockets to ensure smooth operation.
By following these maintenance practices and troubleshooting techniques, you can keep your motorized bicycle in top shape.
Now, let’s move on to the next section and enjoy your motorized ride.
Enjoy Your Motorized Ride
Get ready to have a blast on your motorized ride!
Now that you have successfully maintained and troubleshooted your motorized bicycle, it’s time to hit the road and enjoy the thrill of riding.
To improve the performance of your motorized bicycle, consider upgrading certain components such as the carburetor, exhaust system, or spark plug. These upgrades can enhance the speed, acceleration, and overall power of your ride.
Additionally, customization options are available to personalize your motorized bicycle. You can choose from a variety of colors, decals, and accessories to make your bike unique and reflect your style.
Remember to always follow safety guidelines, wear protective gear, and ride responsibly.
So, hop on your motorized bicycle and experience the exhilaration of a customized ride!
Frequently Asked Questions
How much does it cost to make a motorized bicycle?
The cost breakdown for making a motorized bicycle can vary depending on the quality of parts and accessories chosen. However, potential savings can be achieved by sourcing affordable components and doing the installation yourself.
Can any type of bicycle be converted into a motorized bicycle?
Any type of bicycle can be converted into a motorized bicycle, allowing for easy transportation with added power. The benefits of motorized bicycle conversions include increased speed, longer distances, and reduced effort during rides.
Are there any legal requirements or restrictions for riding a motorized bicycle?
To legally ride a motorized bicycle, you must meet licensing requirements and adhere to safety regulations. These include obtaining the appropriate driver’s license, registering the vehicle, wearing protective gear, and following traffic laws.
How long does it take to install a motor kit on a bicycle?
Installation time for a motor kit on a bicycle can vary depending on experience, but it typically takes around 2-4 hours. Troubleshooting tips include checking connections, ensuring proper alignment, and following the manufacturer’s instructions carefully.
What kind of maintenance does a motorized bicycle require?
Motorized bicycle maintenance involves addressing common issues like spark plug problems, carburetor adjustments, and chain tension. Essential tools include a spark plug wrench, carburetor adjustment tool, and a chain tensioner.
Conclusion
In conclusion, making a motorized bicycle requires careful planning and execution. By gathering the necessary tools and materials, choosing the right bicycle, and selecting the appropriate motor kit, one can successfully convert a regular bicycle into a motorized one.
It is important to thoroughly prepare the bicycle for installation and to test and adjust the motorized bicycle to ensure optimal performance. Safety measures must also be taken into consideration to prevent accidents.
Regular maintenance and troubleshooting will keep the motorized bicycle running smoothly. So, hit the road and enjoy the wind in your hair, knowing you’ve mastered the art of turning a regular bike into a ‘horse of a different color.’