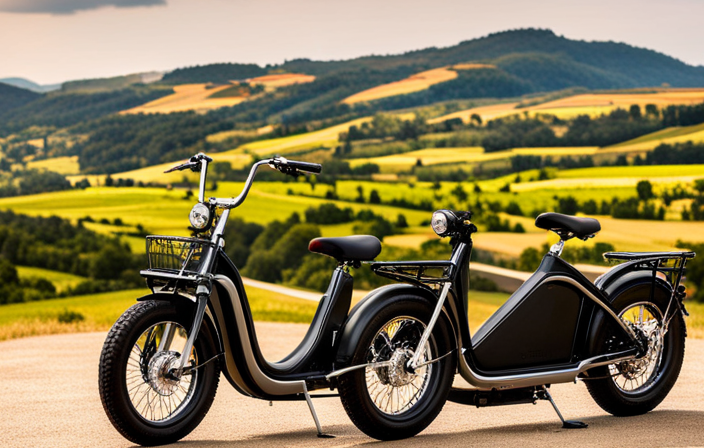
Imagine transforming your ordinary bike into a powerful, eco-friendly machine that effortlessly propels you forward. With the right tools and a little know-how, you can convert your bike into an electric one.
In this article, I will guide you through the process of making a normal bike electric, step by step. From gathering the necessary materials to adjusting and testing the final product, you’ll learn everything you need to know to turn your pedal-powered bike into an electrifying ride.
Let’s get started!
Key Takeaways
- Choose a compatible conversion kit with motor, battery, controller, and wiring harness
- Determine motor type: hub motor or mid-drive motor
- Remove accessories that may interfere with the installation
- Attach the motor securely to the bike frame
Gather the Necessary Tools and Materials
You’ll need to gather the necessary tools and materials to make your normal bike electric. Choosing the right conversion kit is crucial in this process. Look for a kit that is compatible with your bike’s size and specifications. It should include a motor, battery, controller, and wiring harness. Additionally, consider the power output and range of the kit to ensure it meets your needs.
Sourcing the necessary materials is the next step. You will need a battery pack, which can be lithium-ion or lead-acid depending on your preference and budget. Other materials include a torque arm, throttle, and display panel. It’s important to carefully research and compare options to find high-quality and reliable components.
Once you have gathered all the tools and materials, you can move on to choosing the right electric bike conversion kit, which we will discuss in the next section.
Choose the Right Electric Bike Conversion Kit
To convert your regular bicycle into an e-bike, it’s crucial to select the appropriate electric bike conversion kit. Choosing the right conversion kit is essential to ensure a smooth and successful conversion process.
There are a few factors to consider when making this decision. First, you must determine the type of motor you want, such as a hub motor or a mid-drive motor. Additionally, you should consider the battery capacity and range, as well as the level of assistance provided by the kit. It’s also important to research and read reviews to find a reliable and high-quality kit. Troubleshooting common conversion kit issues, such as motor overheating or battery malfunction, is also a skill you should acquire.
By choosing the right conversion kit, you can transform your regular bike into a powerful and efficient e-bike.
Now, let’s move on to preparing your bike for the conversion.
Prepare Your Bike for the Conversion
Before beginning the conversion process, it’s important to get your bicycle ready for the transformation. This involves making some necessary bike modifications to ensure a smooth and successful conversion. Here are the key steps to prepare your bike for the conversion:
- Remove any accessories or components that may interfere with the installation of the electric bike conversion kit.
- Check the condition of your bike’s frame and make any necessary repairs or reinforcements to ensure it can handle the added weight and power of the electric components.
- Clean and lubricate the drivetrain to ensure optimal performance and reduce wear and tear on the electric bike components.
Once your bike is properly prepared, you can move on to the next step of the process and install the electric bike conversion kit.
Install the Electric Bike Conversion Kit
To install the electric bike conversion kit, the first step is to attach the motor to the bike frame securely. This ensures that the motor stays in place during rides and provides the necessary power.
Next, I install the battery and controller, making sure they are positioned in a way that doesn’t interfere with the bike’s balance.
Finally, I connect the wiring and cables, ensuring a proper and secure connection to ensure a smooth and efficient electric bike conversion.
Attach the motor to the bike frame
Attach the motor to your bike frame using the provided mounting brackets.
To ensure a secure motor attachment, follow these steps:
- Position the motor in the desired location on the bike frame.
- Align the mounting brackets with the frame and mark the mounting hole locations.
- Use a drill to create holes at the marked locations.
- Attach the mounting brackets to the frame using bolts and ensure they are tightly secured.
By securely attaching the motor to the bike frame, you create a stable foundation for the electric conversion.
Once the motor is securely in place, the next step is to install the battery and controller. This will allow for seamless integration of the electric components and ensure optimal performance of your newly converted electric bike.
Install the battery and controller
Once you’ve securely attached the motor to your bike frame, it’s time to install the battery and controller.
The battery installation is a crucial step in electrifying your bike. Choose a suitable location on your frame to mount the battery pack securely. Make sure it is easily accessible and well-protected from any external elements.
Connect the battery to the controller using the provided wiring harness. The controller installation is equally important as it regulates the power flow from the battery to the motor. Attach the controller to a convenient spot on your bike frame, ensuring it is well-protected and easily reachable for maintenance.
Once the battery and controller are installed, you can move on to the next step of connecting the wiring and cables. This will ensure seamless communication between all the components and maximize the efficiency of your electric bike.
Connect the wiring and cables
Now that the battery and controller are installed, it’s time to connect the wiring and cables.
This step is crucial to ensure that the electric conversion is successful. Troubleshooting common wiring issues can save you time and frustration. Check for loose connections, damaged wires, or incorrect polarity.
It’s important to follow the manufacturer’s instructions and wiring diagram precisely. To achieve a neat and secure cable routing, use zip ties or cable clips to keep the wires organized and away from moving parts. Make sure to leave some slack in the cables to allow for handlebar movement.
Lastly, double-check all the connections before moving forward.
With the wiring and cables connected properly, we can now move on to the next section: adjusting and testing the electric bike.
Adjust and Test the Electric Bike
To adjust and test your electric bike, you’ll first need to ensure that all the electrical connections are secure. This is crucial for proper functioning and avoiding any potential electric bike troubleshooting. Make sure that all wires are tightly connected and that there are no loose connections. Additionally, check the battery to ensure it is securely attached and properly charged. Once the electrical connections are secure, it’s time to test your electric bike. Start by turning on the power and checking if the motor engages smoothly. Take a short test ride to ensure that the bike accelerates and brakes properly. Remember to wear safety precautions such as a helmet and reflective gear. To learn how to operate your electric bike effectively, refer to the subsequent section.
Learn How to Operate Your Electric Bike
When operating my electric bike, it’s important for me to understand the throttle and pedal-assist modes.
The throttle mode allows me to control the speed of the bike using a handlebar-mounted throttle.
On the other hand, the pedal-assist mode provides assistance when I pedal, making it easier to ride.
Additionally, I need to learn how to charge and maintain the battery of my electric bike to ensure optimal performance.
This involves regularly charging the battery, following the manufacturer’s instructions, and keeping it clean and free from damage.
Understand the throttle and pedal-assist modes
First, familiarize yourself with the throttle and pedal-assist modes to understand how they can enhance your biking experience.
The throttle mode allows you to control the speed of your electric bike by simply twisting the throttle grip. This mode is perfect for situations where you want instant acceleration without the need to pedal.
On the other hand, pedal-assist mode provides a combination of throttle power and pedal power. As you pedal, the electric motor will provide an additional boost, making it easier to climb hills and maintain a consistent speed. The benefits of pedal assist mode include increased range, improved fitness, and a more natural riding experience.
Now that you understand the throttle and pedal-assist modes, let’s move on to learning how to charge and maintain the battery.
Learn how to charge and maintain the battery
To properly maintain your electric bike’s battery, it is important to learn how to charge and care for it. Battery charging is a crucial aspect of ensuring optimal performance and longevity. When charging your battery, always use the charger provided by the manufacturer and follow the instructions in the user manual. Avoid overcharging or undercharging the battery, as both can negatively impact its lifespan. Additionally, it is recommended to store the battery in a cool and dry place when not in use. As for battery maintenance, regularly check for any signs of damage or wear and tear. Clean the battery and its connectors with a damp cloth to remove any dirt or debris. Following these practices will help maximize the lifespan and efficiency of your electric bike’s battery. Taking care of your battery is essential for a smooth and enjoyable riding experience. Moving forward, let’s delve into the next section and practice riding to get comfortable with your electric bike.
Practice Riding and Get Comfortable with Your Electric Bike
Once you’re comfortable with your electric bike, take it for a ride to practice and get used to the feeling. Getting comfortable on your electric bike is essential in building confidence and ensuring a smooth ride. Start by finding a safe and open area where you can ride without any obstacles or distractions.
Begin with short rides, gradually increasing the distance as you become more comfortable. Pay attention to how the bike accelerates, brakes, and handles corners. Practice shifting gears if your electric bike has them, and get a feel for the different power modes. This will help you understand the capabilities and limitations of your electric bike.
Finally, remember to always follow safety guidelines and regulations to ensure a safe and enjoyable ride. Transitioning into the next section, it’s crucial to familiarize yourself with the necessary safety measures and regulations to ride your electric bike responsibly.
Follow Safety Guidelines and Regulations
After practicing riding and getting comfortable with my electric bike, it’s important to follow safety guidelines and regulations to ensure a safe and legal experience. There are specific safety precautions that should be taken when riding an electric bike, such as wearing a helmet, using lights and reflectors, and obeying traffic laws. Additionally, it is crucial to familiarize yourself with the legal requirements for electric bikes in your area, including any age restrictions, speed limits, and licensing requirements. To make it easier to understand, I have created a table that outlines some common safety guidelines and legal requirements for electric bikes:
| Safety Precautions | Legal Requirements |
|---|---|
| Wear a helmet | Check age restrictions |
| Use lights and reflectors | Obey speed limits |
| Follow traffic laws | Check licensing requirements |
By following these safety guidelines and legal requirements, I can ensure a safe and legal ride on my electric bike. Now, let’s explore how to maintain and service your electric bike regularly.
Maintain and Service Your Electric Bike Regularly
Regularly maintaining and servicing your e-bike is crucial to ensure its longevity and optimal performance. Here are some important steps to follow in order to keep your electric bike in top shape:
-
Perform regular inspections: Check the tires, brakes, and gears for any signs of wear and tear.
-
Keep the battery charged: Make sure to charge your e-bike’s battery regularly to maintain its efficiency.
-
Lubricate the chain: Apply lubricant to the chain to reduce friction and extend its lifespan.
-
Troubleshoot common issues: Learn how to diagnose and fix common problems such as battery drainage or motor malfunctions.
By following these maintenance practices, you can keep your e-bike running smoothly and avoid any unnecessary breakdowns.
Now, let’s move on to the next section and learn how to enjoy the benefits of your electric bike.
Enjoy the Benefits of Your Electric Bike
To fully experience the advantages of your e-bike, you’ll love how it effortlessly enhances your daily commute and allows you to explore new destinations with ease. Electric bike commuting offers numerous benefits, such as reducing your carbon footprint, saving money on transportation costs, and promoting a healthier lifestyle.
With the right electric bike conversion kit, you can transform your normal bike into an efficient and eco-friendly mode of transportation. When choosing a conversion kit, consider factors such as motor power, battery range, and compatibility with your existing bike. Look for kits that offer easy installation and reliable performance. Additionally, take into account your commuting needs, whether you require a higher top speed or more assistance on steep hills.
By choosing the right electric bike conversion kit, you can fully enjoy the benefits of your electric bike and optimize your riding experience.
Frequently Asked Questions
Can I convert any type of bike into an electric bike?
Yes, any type of bike can be converted into an electric bike. Pros of converting include cost savings and the ability to customize. However, using an electric bike conversion kit is advantageous over buying a new electric bike due to affordability and versatility.
How long does it take to install an electric bike conversion kit?
Installing an electric bike conversion kit typically takes a few hours if you’re experienced. It’s worth the time and money, as the cost of installation is relatively low compared to the benefits of converting your bike to electric.
Is it possible to remove the electric conversion kit and revert the bike back to its original state?
Yes, it is possible to remove the electric conversion kit and restore the bike to its original state. However, there may be challenges when converting a vintage bike into an electric bike due to compatibility issues and modifications required.
What is the average cost of an electric bike conversion kit?
The average cost of an electric bike conversion kit can vary depending on the brand and features. Some of the best brands in terms of quality and performance include Bafang, Tongsheng, and Swytch.
Are there any legal restrictions or regulations for riding an electric bike?
There are legal restrictions and regulations for riding electric bikes. Safety concerns have led to additional safety regulations, such as helmet requirements and speed limits. Electric bikes contribute to sustainability efforts by reducing carbon emissions and promoting eco-friendly transportation.
Conclusion
In conclusion, transforming a regular bike into an electric one is an exhilarating endeavor. By gathering the necessary tools and materials, choosing the right conversion kit, and properly installing it, one can embark on a thrilling journey.
Adjusting and testing the electric bike, followed by practicing and getting comfortable with it, is vital. Safety guidelines and regulations must always be adhered to, and regular maintenance and servicing should be conducted.
Ultimately, relish the remarkable benefits of your newly electrified bike, and ride on with renewed zest!