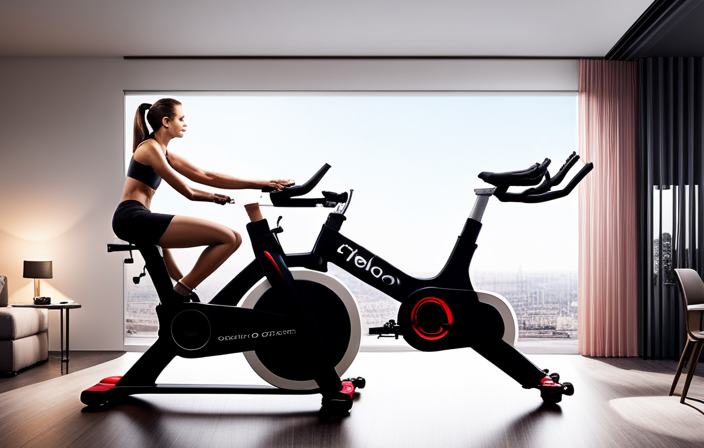
I’ve discovered the ultimate way to transform an ordinary bike into an electrifying powerhouse: the Electric 100. This cutting-edge conversion will revolutionize your cycling experience and take you to new heights of speed and efficiency.
In just a few simple steps, I’ll show you how to equip your bike with an electric hub motor and battery, giving you the freedom to effortlessly cruise through any terrain.
Get ready to ride like never before with the Electric 100!
Key Takeaways
- Assess the compatibility of the bike for conversion by checking frame sturdiness, available space, and condition of drivetrain, brakes, and wheels.
- Acquire a suitable conversion kit with a motor, battery, controller, etc., that aligns with budget, needs, and preferences.
- Follow the installation process, including removing the front wheel, installing the hub motor, battery, controller, wiring, throttle, and brake cutoffs, and adjusting the bike’s gearing and brakes.
- Test ride the electric bike, fine-tune as necessary, consider additional accessories and upgrades, and learn the basics of electric bike maintenance.
![LISEN Bike Phone Holder, [Super Easy Install] Motorcycle Phone Mount Ebike Accessories Bicycle Handlebar Holder Mount Gifts for Adults Kids Men Mountain Mini Bike Scooter Gear Accessories for iPhone](https://m.media-amazon.com/images/I/41f8iCmkMsL._SL500_.jpg)
LISEN Bike Phone Holder, [Super Easy Install] Motorcycle Phone Mount Ebike Accessories Bicycle Handlebar Holder Mount Gifts for Adults Kids Men Mountain Mini Bike Scooter Gear Accessories for iPhone
[Ultra-Secure Hold] – LISEN bike phone holder mount keeps your phone firmly in place even on bumpy or...
As an affiliate, we earn on qualifying purchases.
Assess Your Bike’s Compatibility for Conversion
First, you’ll want to assess if your bike’s frame and components are compatible for conversion. The bike compatibility is crucial in determining if your bike can be successfully transformed into an electric one.
Start by examining the frame to ensure it is sturdy enough to handle the added weight and stress of an electric motor and battery. Check if there is enough space to accommodate the required components. Additionally, assess the condition of your bike’s drivetrain, brakes, and wheels. The conversion process may require some adjustments or replacements to ensure everything works seamlessly.
By thoroughly evaluating your bike’s compatibility, you can determine if it is suitable for conversion and identify any necessary modifications.
Once you have assessed compatibility, you can move on to gathering the necessary tools and materials needed for the conversion process.

Ascher Ultra Bright USB Rechargeable Bike Light Set, Powerful Bicycle Front Headlight and Back Taillight, 4 Light Modes, Easy to Install for Men Women Road Mountain Cycling Black
Bright Bike Lights for Night Riding: This bike light set includes both a bright headlight and taillight. Powerful...
As an affiliate, we earn on qualifying purchases.
Gather the Necessary Tools and Materials
To get started on the project, you’ll need a variety of tools and materials. Assessing compatibility is the first step in converting a normal bike into an electric one. Make sure your bike is suitable for the conversion by checking if it has a sturdy frame, standard wheel sizes, and enough space to accommodate the battery and motor.
Troubleshooting common issues such as loose or damaged components is crucial before beginning the conversion process. Once you have determined that your bike is compatible, gather the necessary tools and materials. You will need a conversion kit, which typically includes a motor, battery, controller, and other essential components. Additionally, you’ll need basic tools like wrenches, screwdrivers, pliers, and wire cutters.
Now that you have all the tools and materials ready, it’s time to choose the right electric bike conversion kit.

SY Bicycle Speedometer and Odometer Wireless Waterproof Cycle Bike Computer with LCD Display & Multi-Functions by YS
【Auto Wake-up Function】Automatically wakes from sleep mode upon sensing vibration in the bicycle. Bright LCD display to easily...
As an affiliate, we earn on qualifying purchases.
Choose the Right Electric Bike Conversion Kit
Once you’ve assessed your bike’s compatibility, it’s time to choose the right electric bike conversion kit. When selecting a kit, there are several factors to consider.
First, you need to determine your price range. Conversion kits can vary in price, so it’s important to find one that fits your budget.
Next, battery capacity is crucial. Consider how far you want to travel on a single charge and choose a kit with a battery that can accommodate your needs.
Additionally, motor power is an important consideration. Determine the level of assistance you desire and select a kit with a motor that aligns with your preferences.
Finally, consider the installation difficulty. Some kits may require more technical expertise than others, so choose one that matches your skill level.
Once you’ve chosen the right kit, you can move on to the next step of removing the front wheel and installing the electric hub motor.

Topeak Ratchet Rocket Lite DX Bike Repair and Maintenance Tool, 16 Functions, Includes Nylon Bag, Black
Fine tooth ratchet mechanism with reverse lever and thumb wheel
As an affiliate, we earn on qualifying purchases.
Remove the Front Wheel and Install the Electric Hub Motor
Now that you’ve selected the right electric bike conversion kit, it’s time to remove the front wheel and install the electric hub motor. This is a crucial step in transforming your regular bike into an efficient and powerful electric vehicle. To guide you through the process, here are the steps you need to follow:
| Step | Description |
|---|---|
| Step 1 | Begin by loosening the nuts or quick release mechanism on your front wheel using the appropriate tools. |
| Step 2 | Carefully remove the front wheel from the bike frame and set it aside. |
| Step 3 | Align the electric hub motor with the front fork of your bike. Make sure the axle of the motor fits snugly into the dropouts of the fork. |
| Step 4 | Secure the hub motor in place by tightening the nuts or quick release mechanism. Double-check that it is properly aligned and centered. |
Install the Battery and Controller
After successfully installing the electric hub motor, the next step is to attach the battery and controller onto your bike. This is a crucial part of the conversion process as it powers the motor and controls its functions. Here are the steps to install the battery and controller:
- Choose a suitable location on your bike frame to mount the battery and controller.
- Securely attach the battery using mounting brackets or straps.
- Connect the wiring from the battery to the controller, ensuring proper insulation and protection.
- Attach the controller to the frame using zip ties or brackets.
- Double-check all connections and make sure they are secure.
When installing the battery and controller, it’s important to troubleshoot common conversion issues such as loose connections, faulty wiring, or mismatched components. This will ensure a smooth and efficient electric conversion.
Now that the battery and controller are installed, let’s move on to connecting the wiring and testing the system.
Connect the Wiring and Test the System
To ensure proper functionality, you’ll need to connect the wiring and test the system after installing the battery and controller. Connecting the wiring is a crucial step in converting a normal bike into an electric one. It allows all the components to communicate with each other and ensures smooth operation. After connecting the wiring, it is important to test the system to identify any potential issues or malfunctions. Here are some testing procedures and troubleshooting tips to help you with this process:
| Testing Procedures | Troubleshooting Tips |
|---|---|
| Check the battery voltage | Ensure all connections are secure |
| Test the throttle response | Verify proper wiring placement |
| Check the brake cutoff function | Inspect for any damaged wires or components |
Install the Throttle and Brake Cutoffs
To install the throttle and brake cutoffs, follow these steps for proper installation and functionality.
First, choose the right brake cutoffs for your electric bike conversion. There are two types to consider: mechanical and hydraulic. Mechanical cutoffs are compatible with most bikes, while hydraulic cutoffs are specifically designed for hydraulic disc brakes.
Next, install the throttle onto the handlebars. Position it in a comfortable and accessible spot for easy control. Attach the throttle cable to the controller, ensuring it is securely connected.
Now, it’s time to install the brake cutoffs. These devices will cut off power to the motor when the brakes are applied, ensuring safety. Connect the brake cutoffs to the controller and adjust them according to the manufacturer’s instructions.
With the throttle and brake cutoffs properly installed, you can now move on to adjusting the bike’s gearing and brakes for optimal performance.
Adjust the Bike’s Gearing and Brakes
Now, you’ll need to fine-tune the bike’s gearing and brakes for optimal performance. Here are a few key steps to follow in order to achieve the best results:
-
Adjust the bike’s gearing: Begin by selecting the appropriate gear ratio for your electric bike. This will depend on factors such as the motor power and the terrain you’ll be riding on. Make sure the chain is properly aligned and tensioned to prevent any slipping or skipping.
-
Fine-tune the brake adjustment: Ensure that the brakes are responsive and provide sufficient stopping power. Adjust the brake pads so that they make proper contact with the rim or disc. Check for any signs of wear or damage and replace any worn-out components.
-
Test the gear shifting and braking: Take your bike for a short ride and test the gear shifting and braking performance. Pay attention to any issues such as gear skipping, chain rubbing, or brake squealing. Make necessary adjustments to achieve smooth and efficient operation.
By fine-tuning the bike’s gearing and brakes, you’ll create a solid foundation for a well-performing electric system.
Now, let’s move on to the next section and test ride the bike while fine-tuning the electric system.
Test Ride and Fine-Tune the Electric System
After adjusting the bike’s gearing and brakes, it’s time to move on to the next step: test riding and fine-tuning the electric system. This is a crucial part of the conversion process as it ensures that the electric system is functioning optimally and meets your specific needs.
To begin, take your newly converted electric bike for a test ride. Pay close attention to the performance of the motor, battery, and controller. Observe how the bike accelerates, climbs hills, and handles different terrains. Make notes of any issues or areas that require improvement.
To further fine-tune the system, refer to the table below for troubleshooting common issues and their possible solutions:
| Common Issue | Possible Solution |
|---|---|
| Motor not working | Check connections and wiring. Ensure motor is properly mounted. |
| Battery draining quickly | Check for any power-consuming components. Adjust power settings. |
| Controller malfunctioning | Inspect wiring and connections. Consider replacing the controller. |
| Uneven power delivery | Adjust pedal assist levels and programming settings. |
Consider Additional Accessories and Upgrades
As you explore options for enhancing your electric bike, don’t forget to consider additional accessories and upgrades. These additions can greatly improve your riding experience and give your bike a personal touch.
When it comes to additional accessories, there are plenty of options to choose from. Consider adding a rear rack or panniers for extra storage, a comfortable saddle for long rides, or even fenders to protect you from dirt and water.
For performance upgrades, you can invest in a more powerful battery or motor to increase speed and range. Upgrading the brakes or suspension can also enhance your bike’s handling and overall performance.
By carefully selecting and installing these additional accessories and upgrades, you can truly customize your electric bike to suit your needs and preferences.
Now, let’s delve into the next section and learn the basics of electric bike maintenance.
Learn the Basics of Electric Bike Maintenance
Learning the basics of maintaining your e-bike is essential for keeping it in good condition. Proper maintenance not only ensures the longevity of your electric bike but also enhances its performance. Here are some electric bike maintenance tips to help you keep your e-bike running smoothly:
- Regularly clean your e-bike to prevent dirt and debris buildup.
- Check and tighten all bolts and screws to ensure they are secure.
- Keep the battery charged and stored in a cool, dry place when not in use.
- Inspect the tires for any signs of wear and tear, and maintain proper tire pressure.
- Lubricate the chain and other moving parts to reduce friction and prolong their lifespan.
Common electric bike troubleshooting issues include battery problems, motor malfunctions, and electrical system failures. By following these maintenance tips, you can prevent many of these issues and enjoy a hassle-free riding experience.
It’s important to note that while maintaining your e-bike is crucial, it’s equally important to follow local laws and regulations for electric bikes.
Follow Local Laws and Regulations for Electric Bikes
Following local laws and regulations is essential when riding an e-bike. Electric bike safety should always be a top priority, and understanding the legal requirements for electric bikes is crucial for a smooth and hassle-free ride.
In most jurisdictions, electric bikes are classified as bicycles and are subject to similar rules and regulations. However, there are specific guidelines that vary by location. These may include age restrictions, speed limits, and helmet requirements. It is important to research and familiarize yourself with the specific regulations in your area to ensure compliance.
By adhering to these legal requirements, you can ensure your safety and the safety of others while enjoying the benefits of riding an electric bike.
Now, let’s transition into the subsequent section about practicing safe riding techniques.
Practice Safe Riding Techniques
Riding an e-bike safely involves familiarizing yourself with and implementing proper riding techniques. To ensure a smooth and enjoyable ride, it is crucial to maintain your e-bike and use the correct riding techniques. Here are some key points to remember:
| Riding Techniques | Bike Maintenance |
|---|---|
| Maintain a steady pace | Regularly check tire pressure |
| Use proper hand signals | Keep the chain clean and lubricated |
| Maintain a safe distance from vehicles | Check the brakes for proper functioning |
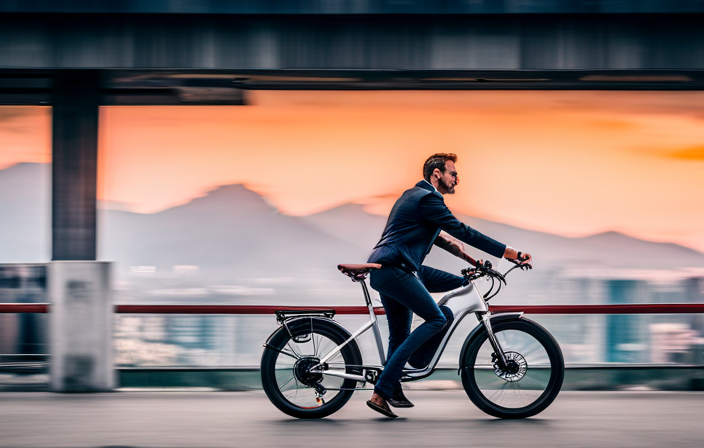
Enjoy the Benefits of Your Electric 100 Bike
To fully experience the advantages of your e-bike, you’ll find that it allows you to effortlessly cruise through your daily commute. Here are some benefits of owning an electric bike:
-
Increased Speed: With the assistance of the electric motor, you can easily reach speeds of up to 20 mph, making your commute faster and more efficient.
-
Reduced Effort: The electric motor provides pedal-assist, making it easier to conquer hills and ride longer distances without feeling fatigued.
-
Eco-Friendly Transportation: By riding an electric bike, you contribute to reducing air pollution and greenhouse gas emissions, helping to create a cleaner and healthier environment.
With these electric bike benefits in mind, you can share your experience and inspire others to convert their bikes. By showcasing the advantages of owning an e-bike, you can encourage others to embrace this eco-friendly and efficient mode of transportation.
Share Your Experience and Inspire Others to Convert Their Bikes
Experience the benefits of owning an e-bike and inspire others to switch to this eco-friendly mode of transportation.
Converting my regular bike into an electric one has been a game-changer. I have successfully transformed my bike by adding an electric motor, battery, and controller. The process involved carefully selecting the right components and following precise installation instructions.
The conversion has allowed me to enjoy the thrill of riding while effortlessly cruising at higher speeds. I have also noticed significant environmental benefits. By using an electric bike, I am reducing my carbon footprint, as there are no harmful emissions produced. Additionally, I am contributing to the reduction of noise pollution.
Converting your bike into an electric one may come with its challenges, but the rewards are well worth it. Share your success stories, tips, and challenges to inspire others to make the switch and embrace a greener way of commuting.
Frequently Asked Questions
How much does it cost to convert a normal bike into an electric bike?
Converting a normal bike into an electric bike can cost between $300 to $3000. DIY conversions are cheaper, ranging from $300 to $1000, while professional conversions can be more expensive, ranging from $1000 to $3000.
Can any bike be converted into an electric bike?
Yes, any bike can be converted into an electric bike. One of the common misconceptions is that only certain bikes can be converted. However, with the best electric bike conversion kits, any bike can be transformed into an electric bike.
How long does it take to complete the conversion process?
Converting a normal bike into an electric one can take around 5-10 hours. The process involves purchasing materials, such as a motor and battery, which can cost between $200-$1000. Basic mechanical skills are necessary for the conversion.
Are there any specific safety precautions to follow during the conversion process?
There are several safety measures to follow during the conversion process. It is important to wear protective gear, ensure proper wiring and insulation, and be cautious of potential risks such as electrical shocks or short circuits.
Can I still use my bike as a normal bike after it has been converted into an electric bike?
Yes, you can still use your bike as a normal bike after converting it to electric. However, using an electric bike for commuting is more convenient, while using a normal bike is better for exercise. Converting a bike benefits those with physical limitations.
Conclusion
In conclusion, converting a normal bike into an electric 100 bike is a rewarding and fulfilling project. While some may argue that it can be a complex and difficult task, with the right tools and instructions, it can be easily accomplished.
By following the outlined steps and adhering to local laws and regulations, you can create a powerful and efficient electric bike that will enhance your riding experience. Don’t let the fear of challenges deter you from embarking on this exciting journey.
Start converting your bike today and enjoy the convenience and thrill of riding an electric 100 bike.