Were you aware that globally, more than 100 million bicycles are manufactured every year? That’s quite a number of bicycles! However, imagine if you could transform one of those bicycles into something even more amazing, such as a tricycle?
With just a few tools and some elbow grease, you can transform your old bicycle into a three-wheeled machine that’s perfect for cruising around town or hitting the trails.
In this article, I’m going to walk you through the process of making a trike from a bicycle. We’ll start by gathering the materials you’ll need, then move on to disassembling the bike and installing the axle and differential.
Once those steps are complete, we’ll reassemble the bike and test and adjust the trike to make sure it’s running smoothly. So if you’re ready to turn your old bike into something new and exciting, let’s get started!
Key Takeaways
- Turning a bicycle into a trike requires disassembling the bike and gathering materials such as three wheels, brakes, chain, crank set, rear derailleur, handlebars, and seat post.
- Proper alignment is crucial for a smooth ride and preventing wear and tear, and common alignment mistakes should be avoided.
- Precautions should be taken for safe riding, such as testing on a safe surface with appropriate safety gear and performing routine maintenance.
- With the right tools and techniques, it is possible to turn a bicycle into a trike and enjoy a unique and fun mode of transportation.

Under Armour Squeeze Water Bottles, 32 oz Water Bottles, Sideline Sports Water Bottle with Quick-Shot Lid, Quick & Easy Hydration, Gym Water Bottles, Squeeze Bottle, 1 32oz Bottle
- Easy Hydration: Quick-shot lid and one-way valve
- On-the-Go Use: One-hand operation for active hydration
- Measurement Markings: Ounces and milliliters for tracking
As an affiliate, we earn on qualifying purchases.
Gather Your Materials
You’re gonna need some tools and a few key materials to turn that bike into a trike. The first step is to procure the necessary items.
You’ll need a few budget considerations in mind, so it’s important to pick out the right materials that fit your needs and budget. First, you’ll need a bike frame that’s in good condition. You can purchase one from a bike shop or online, or you can salvage one from an old bike.
You’ll also need three wheels, which you can either buy new or get from a salvage yard. Additionally, you’ll need a set of brakes and brake cables, a chain, a crank set, and a rear derailleur. Don’t forget to get a set of handlebars and a seat post too.
Once you have all these materials, you’re ready to move on to the next step: disassembling the bicycle.
Disassemble the Bicycle
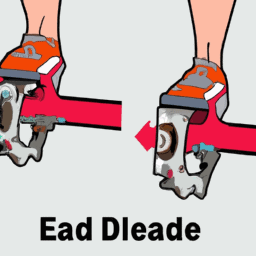
First, start taking apart the bike by removing the pedals and loosening the bolts that attach the wheels to the frame. This step is crucial to disassembling the bike properly.
Make sure to keep track of all the parts you remove and store them in a safe place. A common mistake to avoid during bicycle disassembly is not labeling the removed parts. This can cause confusion later on when it’s time to reassemble the trike.
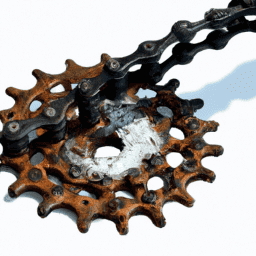
Next, remove the chain and the rear derailleur carefully. This is another important step in bicycle disassembly. Take a picture of how the chain and derailleur are set up before removing them. This will be helpful when it’s time to put them back on.
Keep in mind that the chain may be greasy, so be prepared to get your hands dirty. With the bike fully disassembled, it’s now time to install the axle and differential.
Install the Axle and Differential
Now it’s time to slide the axle and differential into place, securing them snugly with screws. Before doing so, make sure to adjust the height of the axle so that it aligns with the frame of the bicycle. This will ensure that the trike will be stable and easy to ride.
Once the height is adjusted, slide the axle into place, making sure it is centered and straight. Next, choose the wheels for the trike. Look for wheels that are compatible with the axle and differential you’ve installed. Make sure they’re the same size and have the same number of spokes.
Attach the wheels to the axle using the appropriate hardware and make sure they’re secure. With the axle and wheels in place, the trike is starting to take shape. Now it’s time to reassemble the bicycle by attaching the handlebars, pedals, and seat.
Reassemble the Bicycle
After adjusting the height of the axle and installing the wheels, it’s time to put the finishing touches on your new three-wheeled ride by reassembling the bicycle.
The first step is to reattach the handlebars. Make sure they’re aligned properly with the front wheel and tighten the bolts securely.
Next, attach the pedals to the cranks, making sure they’re tightened to the correct torque specifications.
Finally, install the seat onto the seat post and tighten the bolts securely.
Proper alignment techniques are key in ensuring a smooth and safe ride. Check the alignment of the front wheel by looking at it from the side and making sure it’s perfectly vertical. If it’s not, adjust the spokes on the wheel until it’s aligned.
Troubleshooting common issues such as loose bolts or misaligned wheels is important before taking your trike out for a spin.
Once everything is properly aligned and tightened, it’s time to test and adjust the trike to your liking.
Test and Adjust the Trike
Now that I’ve successfully converted my bicycle into a trike, it’s important to ensure proper alignment. This will prevent accidents and ensure stability.
Adjust the brakes and steering to ensure smooth and safe operation of the trike.
Testing the trike on a safe surface will give me confidence in its performance. It will also allow me to make any necessary adjustments before taking it on the road.
Ensure Proper Alignment
To get the perfect alignment, you’ll need to use a straightedge and measure the distance between the center of the wheel and the frame. Proper alignment is crucial for ensuring a smooth ride and preventing unnecessary wear and tear on your trike.
If the alignment is off, the trike may pull to one side or the other, making it difficult to steer and control. It may also cause premature wear on the tires, brakes, and other components.
Common alignment mistakes include not checking the alignment after making adjustments, not measuring the distance accurately, and not ensuring that both wheels are aligned properly. If you’re not comfortable with aligning the trike yourself, it’s best to take it to a professional.
Once you have the alignment dialed in, you can move on to adjusting the brakes and steering to ensure that your trike is safe and comfortable to ride.
Adjust the Brakes and Steering
Before you start your ride, ensure your safety by adjusting the brakes and steering on your trike. Proper brake adjustment is crucial for a successful ride. The brake pads should make contact with the rims of the wheels, but not be too tight or too loose. Use a 5mm Allen wrench to adjust the brake pads to the correct position. If the brake pads are too tight, the wheels may not spin freely. If they are too loose, they may not stop the trike effectively.
In addition to brake adjustment techniques, it’s important to troubleshoot any issues with the steering mechanism. Make sure the handlebars are straight and aligned with the front wheel. If they are not, loosen the stem bolts and adjust the position of the handlebars. Check for any looseness in the headset by holding onto the front wheel and gently rocking the trike back and forth. If there is any play, adjust the headset by tightening the top cap bolt. Once the brakes and steering are properly adjusted, you can proceed to test the trike on a safe surface.
Test the Trike on a Safe Surface
Once you’ve adjusted the brakes and steering, it’s time to take your trike for a spin on a safe surface to ensure everything is working properly and to your liking.
Before you hop on, make sure you’re wearing appropriate safety gear such as a helmet and reflective clothing. It’s also important to ride in a safe area free from traffic or obstacles that could cause harm.
As you ride, pay attention to how the trike handles. Are the brakes responsive? Is the steering smooth? If you notice any issues, stop immediately and make necessary adjustments.
Additionally, it’s important to perform routine maintenance such as checking tire pressure and tightening bolts to ensure safe riding. By taking these precautions, you can enjoy your new trike while minimizing the risk of accidents or mishaps.
Frequently Asked Questions
How much weight can the trike hold?
The max weight that my trike can hold depends on the materials used during assembly process. It is important to ensure that all components are sturdy and can support the weight of the rider and cargo.
Can I still shift gears on the trike?
Yes, shifting gears is possible on a trike made from a bicycle. Depending on the modifications, shifting may be done with hand controls or foot pedals. Disabled riders may need additional adaptations.
How do I ensure the trike is stable and won’t tip over?
Maintaining stability on a trike requires careful adjustment of the center of gravity. A mere 5-degree tilt can lead to a loss of balance. Regular maintenance and proper weight distribution are key to avoiding dangerous tipping.
Is it possible to add a canopy or storage compartment to the trike?
Yes, it is possible to add a canopy design or storage solutions to a trike. Canopies can be attached to the frame or handlebars, while storage compartments can be built into the rear area. Consider weight distribution and balance when adding these features.
Are there any safety precautions I should take while riding the trike?
When riding a trike, safety measures are important. Make sure the trike is stable and secure. Check brakes, tires, and steering before each ride. Wear a helmet and reflective clothing for visibility.
Conclusion
So, that’s how to make a trike from a bicycle! It may seem like a daunting task, but with the right tools and some patience, anyone can do it.
Remember to gather all your materials beforehand, disassemble the bike carefully, install the axle and differential, and then reassemble the bike. Finally, test and adjust the trike to ensure everything is working as it should be.
Now, some of you may be thinking that this is too difficult or beyond your skillset. However, I encourage you to give it a try! Making a trike from a bicycle is not only a fun and rewarding experience, but it can also save you money and provide a unique form of transportation.
Plus, with the detailed instructions provided in this article, you’ll have all the guidance you need to succeed. So, go ahead and take on the challenge – you might just surprise yourself with what you’re capable of!