Have you ever wondered if it’s possible to turn a regular bicycle into an electric bike using just a cordless drill? Well, I’m here to tell you that it absolutely is!
In this article, I will guide you through the step-by-step process of converting your bicycle into an electric powerhouse. We’ll cover everything from gathering the necessary materials and tools to connecting the motor and battery.
So, grab your cordless drill and let’s get started on this exciting DIY project!
Key Takeaways
- Choose a lithium-ion battery with high energy density and long cycle life.
- Ensure the battery voltage matches the motor voltage.
- Look for a sturdy steel or aluminum frame for the bicycle.
- Connect the motor and battery using the appropriate gauge wire and insulate all wiring and circuitry.

Schwinn Sporterra RX Gravel Bike, 700c Mens and Womens Bike, 14-Speed Drop Bar Gravel Bicycle, Mechanical Disc Brakes, Rigid Fork, Aerodynamic Riding Position, Quick Release Seat Post, Adult Bicycle
GRAVEL BICYCLE: Enjoy next level riding with the Sporterra RX by Schwinn. With 700c wheels, this mens and...
As an affiliate, we earn on qualifying purchases.
Gather the Necessary Materials and Tools
To make an electric bike with a cordless drill, you’ll need to gather the necessary materials and tools.
The first step is to choose the right battery for your electric bike conversion. Look for a lithium-ion battery that has a high energy density and a long cycle life. Make sure the battery voltage matches the motor voltage for optimal performance. Additionally, consider the battery capacity to determine how far you can ride on a single charge.
Next, it’s important to understand the motor specifications. Look for a brushless DC motor with a high power rating for better acceleration and climbing ability. Consider the motor’s RPM (revolutions per minute) to ensure it is suitable for your desired speed range. Also, check the motor’s efficiency rating to ensure it converts electrical energy into mechanical power effectively.
Now that you have chosen the right battery and understood the motor specifications, it’s time to gather the necessary tools. You will need a drill, wrenches, screwdrivers, wire strippers, and electrical tape. These tools will help you assemble and install the electric components onto your bicycle.
With the materials and tools gathered, you are now ready to move on to the next section, where we will discuss how to choose the right bicycle for conversion.

SAVADECK Carbon Gravel Bike - T800 Carbon Frame & Fork | Shimano U6000 11-Speed Groupset | Hydraulic Disc Brakes | 700CX40mm All-Terrain Tires | Men & Women Road/Off-Road Bicycle (Gray, 53cm)
【Ultralight T800 Carbon Performance】: Featuring a premium T800 R21 carbon fiber frame and fork weighing just 10.4kg (22.92...
As an affiliate, we earn on qualifying purchases.
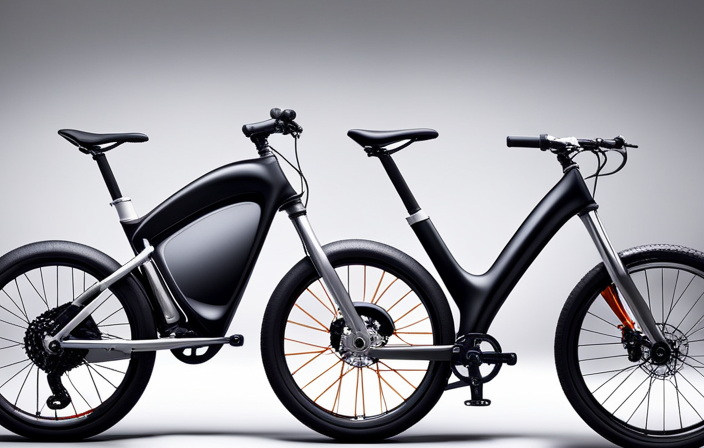
Choose the Right Bicycle for Conversion
First, you’ll need to select the appropriate bicycle for your conversion project. Choosing the right frame is essential for a successful electric bike conversion. Look for a sturdy frame made of steel or aluminum to ensure it can handle the additional weight of the motor and battery. Consider the bike’s geometry and size to ensure a comfortable and safe riding experience.
Understanding battery capacity is crucial when selecting the right bicycle for conversion. Determine the distance you plan to ride on a single charge and choose a battery with enough capacity to meet your needs. Consider factors such as terrain, weight, and speed to estimate the required battery capacity.
To choose the right bicycle for conversion, keep the following factors in mind:
- Frame material: Look for a sturdy steel or aluminum frame.
- Bike geometry: Consider the bike’s geometry for a comfortable ride.
- Size: Ensure the bike fits your body size for optimal comfort and control.
- Battery capacity: Determine the distance you plan to ride and choose a battery with sufficient capacity.
- Weight capacity: Check the bike’s weight limit to accommodate the additional weight of the motor and battery.
Now that you have selected the right bicycle, it’s time to remove the bicycle’s pedals and crankset without damaging the bike’s components.

SAVADECK T800 Carbon Gravel Bike, with Shimano GRX610 12-Speed, Hydraulic Disc Brakes, 700x40c Tires for Road & Off-Road Adventure, Men's/Women's Bicycle(Elegant White, 51cm)
【With SHIMANO GRX Drivetrain Setup】Equipped with SHIMANO GRX610 shifters and RX822 rear derailleur, matched with a 12-speed M6100...
As an affiliate, we earn on qualifying purchases.
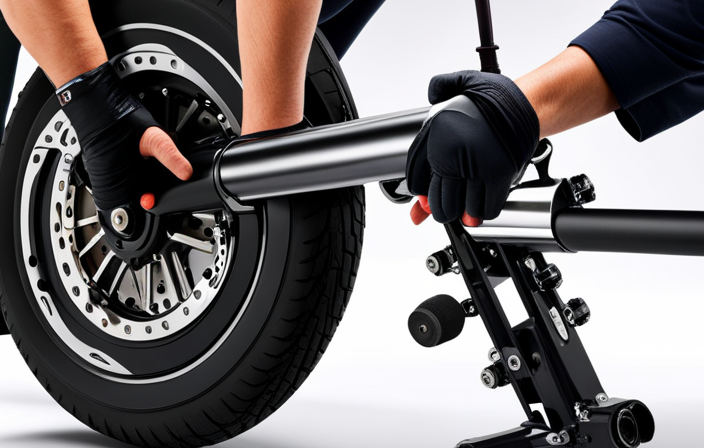
Remove the Bicycle’s Pedals and Crankset
Now you can start by taking off the pedals and crankset from your bicycle without causing any damage to its components. To do this, you will need a few tools: a pedal wrench, a crank puller, and a chainring bolt wrench. These tools will help you safely and efficiently remove the pedals and crankset.
First, you need to remove the chain guard, if your bike has one. This can usually be done by unscrewing a few bolts or screws that hold it in place. Use a screwdriver or an appropriate wrench to carefully remove the chain guard, making sure not to strip any threads or damage the bolts.
Next, you will need to remove the pedals. Start by locating the pedal wrench flats on each pedal. Insert the pedal wrench and turn it counterclockwise to loosen the pedals. Once they are loose, you can use your hands to unscrew them completely. Remember that the left pedal has reverse threads, so you will need to turn it clockwise to loosen it.
After removing the pedals, you can move on to the crankset. Use the crank puller tool to remove the crank arms from the bottom bracket spindle. Insert the crank puller into the crank arm and tighten it until it is securely in place. Then, turn the handle of the crank puller counterclockwise to remove the crank arm from the spindle.
With the pedals and crankset removed, you are now ready to install the electric bike conversion kit.

Schwinn Network 1 Hybrid Bike, 700c Mens and Womens Bike, 21-Speed Hybrid Bicycle, Aluminum Frame, Suspension Fork, Alloy Linear Pull Brakes, Adult Bicycle
HYBRID BICYCLE: Ride confidently on or off the pavement in the Network 1 by Schwinn. With 700c wheels,...
As an affiliate, we earn on qualifying purchases.
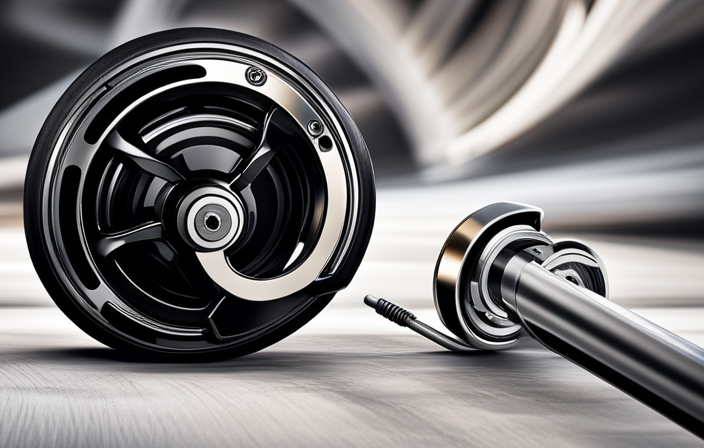
Install the Electric Bike Conversion Kit
Once you have successfully removed the pedals and crankset, it’s time to start installing the electric bike conversion kit. This kit offers numerous benefits, such as transforming your regular bike into an efficient and eco-friendly electric bike. Now, let’s dive into the step-by-step installation process.
First, attach the motor to the bike frame using the mounting brackets provided. Ensure that it is securely fastened and aligned with the rear wheel.
Next, connect the motor to the bike’s rear wheel by attaching the motor’s sprocket to the bike’s rear cassette or freewheel. This allows the motor to power the bike’s rear wheel.
Now, let’s move on to the battery installation. Find a suitable location on the bike frame to mount the battery pack. It should be easily accessible and well-balanced for the best riding experience. Use the provided straps or brackets to secure the battery in place.
Lastly, connect the motor and battery using the wiring harness included in the kit. Follow the manufacturer’s instructions to ensure proper connections, as this will vary depending on the specific kit you have.
With the electric bike conversion kit successfully installed, you’re now ready to enjoy the benefits of electric biking.
Connect the Motor and Battery
To connect the motor and battery, follow the manufacturer’s instructions for proper wiring. This is crucial for safe and efficient operation.
First, identify the positive and negative terminals on the motor and battery. The positive terminal is usually marked with a plus sign (+), and the negative terminal with a minus sign (-).
Next, connect the positive terminal of the battery to the positive terminal of the motor using an appropriate gauge wire. Similarly, connect the negative terminals. Ensure the connections are tight and secure to prevent loose wires or short circuits.
Pay attention to the wiring and circuitry of your electric bike, insulating and protecting all connections from potential damage or water exposure.
Once the motor and battery are connected, you can move on to mounting the controller and throttle to control the speed and power of your electric bike.
Mount the Controller and Throttle
To mount the controller and throttle, you’ll need to locate the appropriate mounting points on your electric bike frame and securely attach them using the provided hardware. Here’s a step-by-step guide on how to do it:
-
Identify the mounting points: Look for designated areas on your bike frame where the controller and throttle can be attached. These are typically near the handlebars or on the downtube.
-
Position the controller: Place the controller in the designated area and align it with the mounting holes. Make sure it is oriented correctly, with the wires facing the right way.
-
Secure the controller: Use the provided screws or bolts to fasten the controller to the mounting points. Ensure that it is tightly secured and does not move around.
-
Attach the throttle: Locate the appropriate spot on the handlebars for the throttle. Slide it onto the handlebars and position it for optimal comfort and accessibility. Use the provided clamp or screws to secure it in place.
Troubleshooting tips:
- If the controller or throttle feels loose after mounting, double-check that all screws are tightened properly.
- Ensure that the wires are connected correctly and securely to the controller and throttle.
Now that the controller and throttle are securely mounted, we can move on to the next step: adjusting the brakes and gears.
Adjust the Brakes and Gears
Now that the controller and throttle are securely mounted, let’s start by adjusting the brakes and gears.
Properly functioning brakes and smooth gear shifting are crucial for a safe and enjoyable ride. To adjust the brake pads, first, locate the adjustment nut on each brake caliper. Loosen the nut and position the brake pads so they make even contact with the rim when the brake lever is pulled. Then, tighten the adjustment nut while holding the brake lever to secure the position of the pads.
Next, let’s fine-tune the gear shifting. Start by shifting the bike into the highest gear and turning the pedals backward. Use the barrel adjuster located on the derailleur to align the jockey wheel with the smallest cog. Then, shift into the lowest gear and adjust the barrel adjuster until the jockey wheel aligns with the largest cog. Repeat this process a few times to ensure smooth shifting throughout the gear range.
Now that the brakes and gears are properly adjusted, it’s time to test the electric bike conversion.
Test the Electric Bike Conversion
Once the brakes and gears have been properly adjusted, it’s time to give the electric bike conversion a test run. Testing the conversion is an important step to ensure that everything is functioning correctly before hitting the road. Here are some testing methods and troubleshooting techniques to help you with this process:
-
Start by checking the battery connection to ensure it’s secure. A loose connection can cause issues with power supply.
-
Turn on the electric motor and observe if it starts smoothly. Any unusual noises or vibrations could indicate a problem.
-
Test the throttle and brakes to ensure they’re responsive. Gradually increase the throttle and check if the motor accelerates smoothly.
-
Take the bike for a short ride, paying attention to any issues with speed, handling, or balance.
-
Monitor the battery life during the test ride. If it drains too quickly or doesn’t hold a charge, it may indicate a problem with the battery or charging system.
Make Any Necessary Adjustments
If you notice any issues during the test run, you should promptly adjust them to ensure optimal performance of your converted electric bike. Making necessary adjustments and troubleshooting problems is an essential part of the conversion process. To assist you in this task, I have prepared a table that highlights common issues and the corresponding adjustments you may need to make:
| Problem | Solution |
|---|---|
| Motor not running | Check wiring connections and ensure battery is fully charged |
| Poor acceleration | Adjust throttle sensitivity and check motor controller settings |
| Uneven power distribution | Inspect chain tension and alignment, adjust as necessary |
| Battery draining quickly | Verify battery capacity and charging system, replace if necessary |
| Brakes not working | Adjust brake pads and check brake cables for proper tension |
By referring to this table, you can quickly identify and resolve any issues that may arise during the test run. Remember, attention to detail and careful adjustments are crucial in achieving the best performance from your electric bike conversion.
Now that you have made the necessary adjustments, it’s time to learn how to operate the electric bike safely.
Learn How to Operate the Electric Bike Safely
To ensure your safety while operating the electric bike, familiarize yourself with the proper use of the throttle, brakes, and other controls. Here are some electric bike safety tips to keep in mind:
-
Master the throttle: The throttle is what controls the speed of your electric bike. Gradually increase the throttle to avoid sudden accelerations that can lead to accidents. Practice using the throttle in a safe environment before venturing onto busy roads.
-
Brake responsibly: Electric bikes come with different types of brakes, such as disc brakes or drum brakes. Familiarize yourself with the type of brakes on your bike and practice using them effectively. Remember to apply both brakes evenly and gradually to avoid skidding or losing control.
-
Stay visible and alert: Always wear bright, reflective clothing and use lights when riding your electric bike, especially in low-light conditions. Pay attention to your surroundings and anticipate potential hazards, such as pedestrians, vehicles, or obstacles.
By following these electric bike safety tips, you can significantly reduce the risk of common electric bike accidents. Understanding how to operate the throttle and brakes properly, staying visible and alert, will help ensure a safe riding experience.
Now let’s transition into the next section, where we will discuss how to maintain and service your electric bike.
Maintain and Service Your Electric Bike
To keep your electric bike in optimal condition, it’s important to regularly maintain and service it. Proper battery maintenance is crucial for the overall performance and longevity of your electric bike. Here are some key tips for maintaining your electric bike’s battery:
| Battery Maintenance Tips | Description |
|---|---|
| Charge regularly | Regularly charge your battery to keep it at optimal levels. Avoid fully discharging the battery as it can shorten its lifespan. |
| Store properly | When not in use, store your battery in a cool, dry place. Avoid extreme temperatures as they can affect the battery’s performance. |
| Clean connections | Clean the battery connections periodically with a mild detergent and a soft cloth to ensure proper electrical contact. |
| Inspect for damage | Regularly inspect your battery for any signs of physical damage, such as cracks or leaks. If you notice any issues, contact a professional for repair or replacement. |
In addition to battery maintenance, troubleshooting common issues is also necessary to keep your electric bike running smoothly. Here are some common problems you may encounter and their possible solutions:
-
Loss of power: Check the battery charge and connections. If the battery is fully charged and the connections are secure, there may be an issue with the motor or controller. Contact a professional for further assistance.
-
Braking issues: Inspect the brake pads and cables for wear or damage. Adjust or replace as necessary. If the problem persists, consult a bike mechanic.
-
Strange noises: Unusual noises can indicate loose components or faulty bearings. Inspect the bike for loose parts and tighten as needed. If the noise persists, seek professional help.
-
Faulty display or controls: Check the connections between the display/control panel and the battery. Ensure they are securely connected. If the issue persists, consult the manufacturer or a bike technician.
Upgrade and Customize Your Electric Bike
When upgrading and customizing your electric bike, there are a variety of options to personalize it to your preferences and needs. Customizing features allow you to enhance the performance, style, and functionality of your electric bike.
One popular customization option is upgrading the battery pack. By installing a higher capacity battery, you can extend the range of your electric bike, allowing for longer rides without worrying about running out of power.
Another customization option is upgrading the motor. A more powerful motor can provide increased speed and torque, making hill climbing easier and overall performance better.
Additionally, you can customize the handlebars, saddle, and pedals to ensure a comfortable riding experience.
Troubleshooting issues is another aspect of upgrading and customizing your electric bike. Sometimes, despite our best efforts, issues may arise with our electric bikes. It is important to be able to identify and resolve these issues to keep your bike in optimal condition.
Common troubleshooting issues include battery charging problems, motor malfunctions, and electrical system failures. By understanding the technical aspects of your electric bike and having the necessary tools, you can diagnose and fix these issues on your own.
In summary, upgrading and customizing your electric bike allows you to tailor it to your specific preferences and needs. Whether it is upgrading the battery or motor, or troubleshooting any issues that may arise, these customizations ensure that your electric bike performs at its best.
Joining an electric bike community can provide further support and knowledge sharing to enhance your electric biking experience.
Join an Electric Bike Community
Joining an electric bike community will provide you with a supportive network of fellow riders who can offer valuable advice and share their experiences. Being part of a community is essential, especially when it comes to electric bike maintenance and troubleshooting common issues.
When you encounter problems with your electric bike, there’s no need to panic. Members of the community can guide you through the process of diagnosing and fixing various issues. Whether it’s a problem with the battery, motor, or any other component, someone in the community has likely encountered it before and can help you find a solution.
Additionally, being part of a community allows you to stay updated on the latest maintenance techniques, recommended products, and general best practices. By participating in discussions and sharing your own experiences, you contribute to the collective knowledge of the community. This exchange of information ensures that everyone benefits from a wealth of expertise.
Now that you understand the importance of joining an electric bike community, let’s explore electric bike laws and regulations.
Explore Electric Bike Laws and Regulations
Understanding the rules and regulations surrounding electric bikes can help you navigate the roads safely and avoid any potential legal issues. It’s important to familiarize yourself with the laws in your area to ensure that you are riding within the legal boundaries.
Two key aspects to consider are electric bike insurance and electric bike speed limits.
Electric bike insurance is not always mandatory, but it’s highly recommended. Having insurance can protect you in the event of an accident or theft, providing financial coverage for any damages or losses. It’s best to check with your local authorities or insurance providers to determine the specific requirements for electric bike insurance in your area.
In addition to insurance, electric bike speed limits are another important factor to understand. These limits vary depending on location, but typically electric bikes are restricted to certain speeds. In many places, the maximum speed allowed for electric bikes is around 20 mph (32 km/h). However, it’s crucial to check your local regulations as speed limits may differ.
To summarize, being knowledgeable about electric bike insurance and speed limits can ensure a safe and legal riding experience. By following these regulations, you can confidently enjoy the benefits of your DIY electric bike without any unnecessary legal complications.
Enjoy the Benefits of Your DIY Electric Bike
To fully experience the benefits of your DIY e-bike, it’s important to take regular maintenance and safety precautions. DIY electric bikes offer numerous advantages, such as increased speed and range, reduced effort during rides, and the satisfaction of building your own personalized transportation.
However, like any other vehicle, electric bikes can encounter issues that require troubleshooting. One common issue with DIY electric bikes is battery-related problems. If you notice a decrease in power or shorter battery life, it could be due to a faulty battery or improper charging. Firstly, ensure that the battery is securely connected and fully charged. If the problem persists, consider replacing the battery or consulting the manufacturer for assistance.
Another common issue is motor malfunction. If your motor is not functioning properly, it may be due to loose connections or damage. Check all wiring connections and ensure they are tightly secured. If the motor is damaged, consider replacing it with a new one.
Additionally, problems with the throttle or controller can affect the performance of your DIY e-bike. If you experience issues with acceleration or responsiveness, check the throttle and controller for loose connections or damage. Make sure all connections are secure and consider replacing any faulty components.
Regular maintenance and troubleshooting will ensure that you can fully enjoy the benefits of your DIY electric bike. By addressing these common issues promptly, you can keep your e-bike running smoothly and continue to experience the convenience, efficiency, and joy of riding your own creation.
Frequently Asked Questions
How fast can an electric bike with a cordless drill go?
An electric bike with a cordless drill can reach speeds of up to 25 mph. To increase speed, optimize the drill’s power output and reduce friction. Improving battery life involves using efficient batteries and managing power consumption.
Can any type of bicycle be converted into an electric bike using a cordless drill?
Converting any bicycle into an electric bike using a cordless drill has pros and cons. It’s a cheaper option but lacks power and range compared to traditional electric bike kits.
How much does it cost to convert a bicycle into an electric bike using a cordless drill?
Converting a bicycle into an electric bike with a cordless drill is cost-effective compared to other methods. The cost varies depending on the drill and battery chosen, but expect to spend around $200-$500. Battery life will depend on the drill’s power and capacity.
Are there any safety precautions I should take when operating an electric bike with a cordless drill?
When operating an electric bike with a cordless drill, it is crucial to wear proper safety gear, such as a helmet, gloves, and knee pads. To prevent overheating or battery malfunction, avoid overusing the drill and ensure proper ventilation.
Can I still pedal the bike even after converting it into an electric bike with a cordless drill?
Yes, you can still pedal the bike even after converting it into an electric bike with a cordless drill. This pedal assist feature allows you to effortlessly switch between pedaling and using the electric motor, providing added convenience and flexibility during your ride. When choosing the right cordless drill for conversion, consider factors like power, battery life, and compatibility with bike components.
Conclusion
In conclusion, building my own electric bike with a cordless drill has been an incredibly rewarding experience. I’ve learned so much about the mechanics of bicycles and the intricacies of electric motors.
Not only did I save money by converting my existing bike, but I also gained a newfound appreciation for the customization possibilities.
Now, as I zip around town effortlessly on my DIY creation, I can’t help but wonder: What other amazing projects can I tackle with my newfound skills?