Alright, folks, buckle up because I’m about to show you how to transform your ordinary bike into an electrifying ride with a jazzy motor.
In this step-by-step guide, I’ll walk you through gathering the materials and tools you’ll need, selecting the perfect bike for conversion, and installing the impressive Jazzy Motor Kit.
We’ll also cover connecting the motor controller and battery, riding safely, and reaping the benefits of an electric bike.
Get ready to save money and reduce your carbon footprint while cruising in style.
Let’s dive in!
Key Takeaways
- Gear Adjustment and Brake Maintenance are important for ensuring the smooth functioning of an electric bike with a jazzy motor.
- Regular inspection and maintenance of the bike’s components, including wiring and connections, battery charging, and motor controller, is crucial for avoiding issues and maximizing performance.
- Electric biking offers advantages such as increased speed and convenience, low-impact exercise for cardiovascular health, full-body workout, and cost savings on fuel.
- Transitioning to an electric bike with a jazzy motor can contribute to a greener environment by reducing carbon emissions, dependence on fossil fuels, and fuel expenses.
Gather the Necessary Materials and Tools
First, you’ll need to gather all the materials and tools needed for the electric bike project.
Choosing the right motor size is crucial for the success of your conversion. Consider factors like the weight of the bike, desired speed, and terrain. A smaller motor may be suitable for a lightweight bike used on flat surfaces, while a larger motor might be necessary for a heavier bike or hilly terrain.
Additionally, finding a suitable battery is essential. Look for a high-capacity lithium-ion battery that can provide the necessary power and range for your electric bike.
Transitioning to the next section, it’s important to choose the right bike for conversion, taking into account factors such as frame strength and compatibility with electric components.
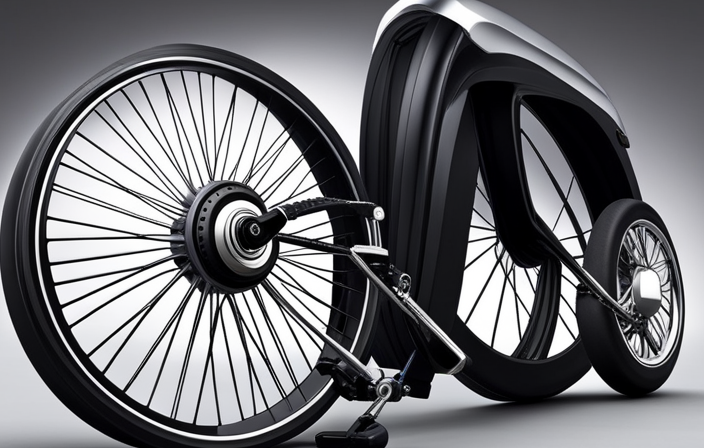
Choose the Right Bike for Conversion
To choose the right bike for your conversion, you’ll want to consider factors like size, frame material, and weight capacity. When it comes to choosing an appropriate frame, you need to make sure it can accommodate the additional weight and stress of an electric motor. Opt for a sturdy frame made of materials like aluminum or steel, as they provide the necessary strength and durability.
Additionally, consider the weight limit of the bike. The motor and battery will add extra weight, so it’s crucial to choose a bike with a weight capacity that can handle the combined load.
Once you have selected the ideal bike, you can proceed to the next step of removing the existing bike components.
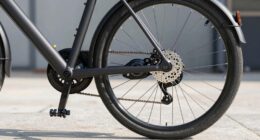
Remove the Existing Bike Components
Now, you’ll want to start by removing the existing components on your chosen bike. This step is crucial in order to make way for the installation of the jazzy motor kit.
To begin, carefully detach the handlebars by loosening the bolts and disconnecting any cables.
Next, remove the front wheel by releasing the quick-release skewer or loosening the axle nuts.
Moving on, take out the pedals by unscrewing them in a counterclockwise direction. Don’t forget to remove the chain from the crankset and rear derailleur.
Lastly, remove the seat and seat post by loosening the clamp bolt.
Proper disposal of bike components is essential to minimize waste and environmental impact. Once the components are removed, they can be donated or recycled if possible.
With the existing components removed, we can now move on to the exciting task of installing the jazzy motor kit.
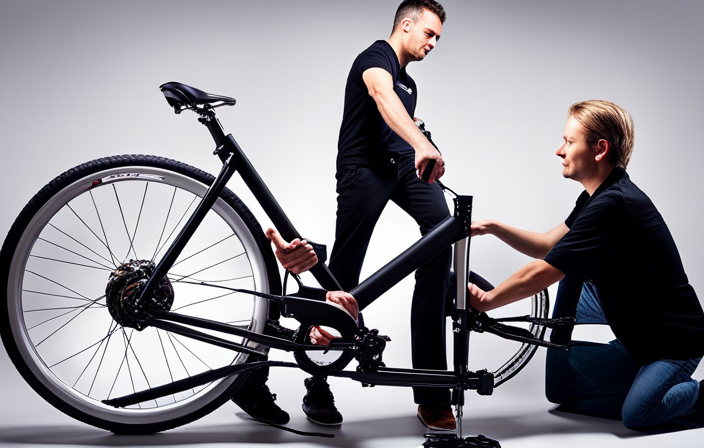
Install the Jazzy Motor Kit
When installing the jazzy motor kit, you’ll need to follow the provided instructions carefully to ensure a smooth and successful installation. Start by gathering all the necessary tools and components, including the motor kit, wrenches, and electrical tape.
Begin by removing the old bottom bracket and installing the motor assembly in its place. Ensure that the motor is securely fastened and aligned properly. Connect the necessary wires according to the instructions, making sure to double-check all connections for accuracy.
Once everything is connected, test the motor to ensure it is functioning correctly. If you encounter any issues, refer to the troubleshooting guide provided with the kit. By installing the motor kit correctly and troubleshooting any issues that arise, you’ll be on your way to a fully functioning electric bike.
Next, we will discuss how to connect the motor controller and battery.
Connect the Motor Controller and Battery
First, ensure that the motor controller and battery are securely connected according to the provided instructions. This step is crucial for the proper functioning of your electric bike.
Battery maintenance is essential to maximize its lifespan and ensure optimal performance. Regularly check the battery’s charge level and avoid overcharging or discharging it completely. Additionally, keep the battery clean and free from any debris or corrosion.
The motor controller programming is another vital aspect to consider. Follow the manufacturer’s instructions to program the controller according to your desired settings, such as speed limits and acceleration profiles. Proper programming ensures that the motor operates efficiently and provides a smooth riding experience.
Once the connections are secure and the programming is complete, proceed to test the motor and ensure proper functioning, verifying that all components are working as expected.
Test the Motor and Ensure Proper Functioning
Once you have securely connected the motor controller and battery, it’s important to test the motor and ensure that it is functioning properly. This step is crucial in the process of building an electric bike with a jazzy motor. By following the testing procedures outlined below, you can optimize the motor’s performance and ensure a smooth ride.
To test the motor, you will need to connect it to the battery and controller, and then perform a series of checks. Start by turning on the power and observing if the motor spins smoothly without any unusual noises. Next, check the motor’s response to the throttle input. Gradually increase the throttle and make sure the motor accelerates smoothly. Finally, test the motor’s performance by taking the bike for a short ride, paying attention to its speed and responsiveness.
Install the Electric Bike Conversion Kit Accessories
After thoroughly testing the motor and ensuring its proper functioning, I am now ready to move on to the next crucial step of installing the electric bike conversion kit accessories.
This process requires attention to detail and adherence to specific guidelines to ensure a successful conversion. One of the most important electric bike conversion kit installation tips is to carefully read the manufacturer’s instructions and follow them step by step. This will help avoid common mistakes that can lead to complications later on.
Another common mistake to avoid during electric bike conversion is neglecting to properly secure all the components, such as the battery pack and controller, to the bike frame. Failing to do so can result in damage or even accidents during rides.
Now, let’s discuss how to adjust the bike’s gearing system for optimal performance.
Adjust the Bike’s Gearing System
To optimize your ride, you’ll want to ensure that the bike’s gearing system is properly adjusted. Adjusting gear ratios is crucial for optimizing power transfer and achieving maximum efficiency. Here are the key steps to follow:
-
Determine the gear ratios: Calculate the number of teeth on the front and rear gears to determine the gear ratio for each gear combination.
-
Fine-tune the gear ratios: Adjust the front and rear derailleur to ensure smooth shifting between gears and eliminate any chain rub or misalignment.
- Ensure the front derailleur is properly aligned with the chainrings.
- Adjust the rear derailleur so that it accurately moves the chain across the cassette.
By adjusting the gear ratios, you can optimize power transfer, making pedaling easier or more challenging based on the terrain and your preference.
Once the bike’s gearing system is properly adjusted, you can move on to the next step of ensuring the brakes are in working order, ensuring a safe ride.
Make Sure the Brakes are in Working Order
Checking that the brakes are functioning properly is essential for a safe and smooth ride. To ensure the brakes are in working order, it is important to regularly check brake pads and test brake responsiveness. Brake pads should be inspected for wear and tear, and replaced if necessary. Testing brake responsiveness involves applying gradual pressure to the brake lever and observing how quickly and effectively the brakes engage. To emphasize the importance of brake maintenance, consider the following table:
| Brake Inspection Checklist | |
|---|---|
| Check brake pad wear | ✔️ |
| Test brake responsiveness | ✔️ |
| Replace worn brake pads | ✔️ |
| Ensure proper brake alignment | ✔️ |
Now, let’s move on to the next section where we will discuss how to ensure proper wiring and connections without compromising safety.
Ensure Proper Wiring and Connections
When checking the wiring and connections, you’ll want to ensure that all connections are secure and free from any loose or exposed wires. Proper insulation is essential to prevent any accidental short circuits or electrical malfunctions.
Start by visually inspecting all the wires and connections, looking for any signs of wear or damage. Use a multimeter to test the continuity of each wire, ensuring that there are no breaks or interruptions in the circuit.
Additionally, make sure to follow safety precautions by wearing insulated gloves and goggles to protect yourself from any potential electrical shocks.
Once you have confirmed that all the wiring and connections are in good condition, you can move on to the next step of charging and maintaining the battery.
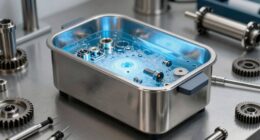
Charge and Maintain the Battery
Charging and maintaining the battery is crucial for ensuring optimal performance and longevity. Proper battery charging techniques are essential to preserve the battery’s capacity and maximize its lifespan.
When charging the battery, it is important to follow the manufacturer’s instructions and use the designated charger. Avoid overcharging the battery, as it can lead to reduced battery life and potential damage. Additionally, it is advisable to avoid deep discharging the battery, as this can also negatively impact its overall health.
Regularly inspect the battery for any signs of damage or corrosion, and clean the terminals with a battery terminal cleaner if necessary. By following these battery maintenance tips, you can ensure that your electric bike’s battery remains in peak condition.
Now, let’s transition into the next section about practicing safe riding techniques.
Practice Safe Riding Techniques
To ensure your safety while riding, it’s important to practice proper riding techniques and follow all traffic rules. Safe riding techniques include choosing the right gear, maintaining balance while riding, avoiding obstacles, and signaling and communicating with other road users. Here are some tips to help you ride safely:
| Safe Riding Techniques |
|---|
| Choose the right gear |
| Maintain balance while riding |
| Avoid obstacles |
| Signal and communicate with other road users |
Choosing the right gear is crucial for a safe ride. Make sure to wear a properly fitting helmet and protective clothing. Maintaining balance while riding is essential. Keep your body centered and distribute your weight evenly. Be aware of your surroundings and anticipate obstacles such as potholes or debris on the road. Use hand signals to communicate your intentions to other road users. Remember, safety should always be your top priority when riding.
Enjoy the Benefits of an Electric Bike
You can experience the numerous advantages of riding an e-bike, such as increased speed and convenience. Electric bike commuting offers a range of benefits that make it an attractive option for many individuals.
The first advantage is the increased speed that an electric bike provides. With the assistance of the motor, you can effortlessly reach higher speeds, allowing you to get to your destination faster.
Additionally, electric biking offers health benefits. It provides a low-impact form of exercise that can improve cardiovascular health and help with weight management. The pedaling motion also engages various muscle groups, providing a full-body workout. By incorporating electric biking into your daily routine, you can improve your overall fitness level.
Transitioning into the next section, electric bikes also offer the opportunity to save money on fuel costs and reduce your carbon footprint.
Save Money on Fuel Costs and Reduce Your Carbon Footprint
By opting for an e-bike, you can significantly cut down on fuel expenses and contribute to a greener environment. Here are three reasons why an e-bike is a smart choice for reducing carbon emissions and promoting sustainable transportation:
-
Efficiency: E-bikes use electric motors that require minimal energy to operate, making them highly efficient compared to traditional fuel-powered vehicles. This efficiency translates to reduced carbon emissions and a smaller environmental footprint.
-
Renewable Energy: Charging an e-bike’s battery can be done using renewable energy sources such as solar power. By utilizing clean energy to power your bike, you further reduce your carbon emissions and promote a more sustainable transportation option.
-
Reduced Dependence on Fossil Fuels: E-bikes eliminate the need for gasoline or diesel, reducing our reliance on fossil fuels. With the ever-increasing concern about climate change, transitioning to e-bikes is a meaningful step towards a greener future.
Troubleshooting Common Issues
Now that we have explored the benefits of making an electric bike with a jazzy motor, it is important to address the potential issues that may arise during the operation of such a vehicle.
In this section, I will guide you through troubleshooting common problems related to the battery and motor controller.
When troubleshooting battery issues, start by checking the battery connections for any loose or corroded terminals. Ensure that the battery is fully charged and that the voltage is within the recommended range. If the battery is in good condition and properly connected, but the bike still fails to start or experiences a sudden loss of power, it may be an issue with the motor controller.
Troubleshooting motor controller problems involves inspecting the wiring, connectors, and fuses for any signs of damage or loose connections. Additionally, you should verify that the throttle and brake sensors are functioning correctly. If necessary, consult the manufacturer’s manual or seek professional assistance to diagnose and resolve any motor controller issues.
Frequently Asked Questions
How can I choose the right bike for conversion?
To choose the right bike for an electric bike conversion, I analyze factors such as frame material, weight, and compatibility with the jazzy motor. It is crucial to ensure the bike has a sturdy frame and sufficient space for the motor and battery.
What are the necessary materials and tools needed for the conversion?
To convert a bike into an electric one, you need to choose the right motor and battery, and ensure proper installation techniques. The motor and battery selection is crucial for optimal performance and range. Installation should be done meticulously for safety and functionality.
How do I connect the motor controller and battery?
To connect the motor controller and battery, I first ensure that the wiring is compatible. I then connect the positive and negative terminals of the battery to the corresponding terminals on the motor controller, following the manufacturer’s instructions for proper connection.
What are some common troubleshooting issues I might encounter?
Some common troubleshooting issues you might encounter when working with an electric bike’s motor controller and battery include connection problems, motor overheating, and battery drainage. To resolve these issues, try checking and fixing any loose connections, ensuring proper ventilation for the motor, and optimizing battery usage.
How do I ensure proper wiring and connections during the installation process?
To ensure safety and proper insulation during the installation process, it is crucial to carefully wire and connect all components. A single loose connection can cause a short circuit, potentially leading to accidents.
Conclusion
In conclusion, converting a regular bike into an electric one with a jazzy motor has been a rewarding experience.
The process involved gathering the necessary materials and tools, choosing the right bike, and removing existing components.
Installing the Jazzy Motor Kit and connecting the motor controller and battery was a precise task, but the end result was worth it.
Practicing safe riding techniques while enjoying the benefits of an electric bike has been a game-changer.
Not only am I saving money on fuel costs, but I’m also reducing my carbon footprint, which is anachronistic in today’s world.
Troubleshooting common issues has been an important aspect of maintaining my electric bike.
Overall, this project has been a technical and analytical endeavor that I’m proud to have undertaken.