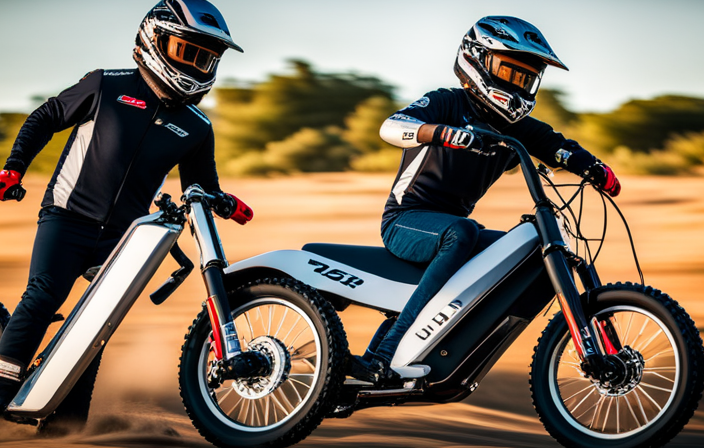
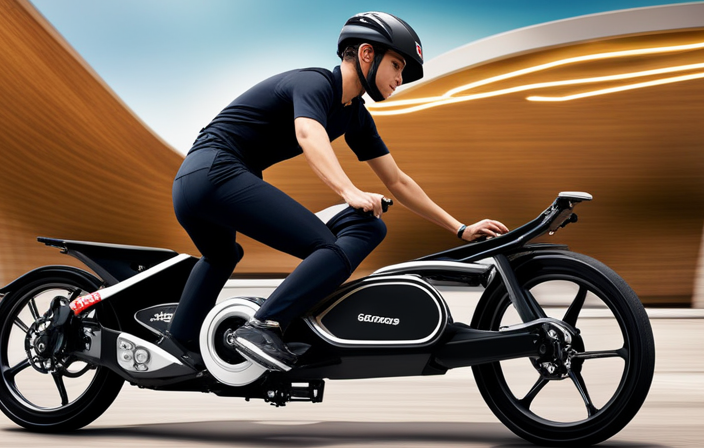
So, you want to add a little spark to your road biking adventures? Well, look no further because I’m about to unveil the secrets of transforming your ordinary road bike into an electrifying machine.
In this step-by-step guide, I’ll show you how to:
- Assess your bike’s compatibility
- Choose the perfect electric bike conversion kit
- Gather the necessary tools
- Install it all like a pro.
Get ready to embrace the power and thrill of an electric road bike as we dive into this electrifying journey.
Key Takeaways
- Assess bike compatibility and condition before starting the conversion process
- Consider motor power, battery capacity, and range needs when choosing a conversion kit
- Select the appropriate wheel size and type based on terrain and riding style
- Decide between a mid-drive or hub motor based on weight distribution, torque, and ride smoothness
Assess Your Bike and Determine Compatibility
You’ll need to assess your bike and determine its compatibility.
To determine bike compatibility, start by checking the frame. Ensure it is sturdy and can handle the additional weight of an electric motor and battery.
Next, assess the wheels and tires. Electric road bikes require durable wheels and tires to support the increased speed and power.
Evaluate the braking system as well. Upgrading to a stronger set of brakes may be necessary to handle the higher speeds.
Additionally, consider the bike’s drivetrain. An electric bike conversion kit often requires a specific type of drivetrain, so make sure your bike is compatible.
Lastly, assess the overall condition of your bike. If it’s in poor shape, it may not be suitable for conversion.
Once you’ve determined your bike’s compatibility, you can move on to choosing the right electric bike conversion kit seamlessly.
Choose the Right Electric Bike Conversion Kit
When choosing the right electric bike conversion kit, I first consider the motor power and battery capacity that will suit my needs. This ensures that I have enough power and range to tackle any terrain or distance.
Next, I carefully select the appropriate wheel size and type to ensure a smooth and comfortable ride.
Lastly, I decide between a mid-drive or hub motor, taking into account factors such as torque, efficiency, and ease of installation.
Consider Motor Power and Battery Capacity
To ensure optimal performance, it’s important to consider motor power and battery capacity when building an electric road bike. Motor efficiency plays a crucial role in determining the bike’s power output and overall efficiency. A higher motor efficiency means less energy is wasted during operation, resulting in better performance and longer battery life. Additionally, battery capacity determines the range and charging frequency of the bike. A larger battery capacity allows for longer rides and fewer charging stops.
To emphasize the importance of motor power and battery capacity, consider the following table:
| Motor Power (Watts) | Battery Capacity (Ah) |
|---|---|
| 250 | 10 |
| 500 | 15 |
| 750 | 20 |
| 1000 | 25 |
| 1500 | 30 |
Selecting the appropriate wheel size and type is the next crucial step in building an electric road bike, ensuring a smooth and efficient ride.
Select the Appropriate Wheel Size and Type
Choosing the right wheel size and type is essential for achieving a smooth and efficient ride on your electric road bike. When it comes to wheel size selection, it’s important to consider factors such as terrain, riding style, and personal preference.
For road biking, a common wheel size is 700c, which provides excellent speed and performance on paved surfaces. However, if you plan on riding on rougher roads or off-road trails, you may want to consider a larger wheel size, such as 29 inches, for improved stability and traction.
In addition to wheel size, tire type selection is also crucial. For road biking, slick or semi-slick tires are ideal as they offer low rolling resistance and maximum efficiency on smooth surfaces. However, if you plan on venturing onto gravel or dirt paths, you may want to opt for wider tires with more aggressive tread patterns to ensure better grip and control.
Now that you have selected the appropriate wheel size and tire type, it’s time to decide between a mid-drive or hub motor for your electric road bike.
Decide Between Mid-drive or Hub Motor
Deciding between a mid-drive or hub motor is an important step in customizing your electric road bike. When choosing the right motor for your bike, it’s essential to consider the advantages of a mid-drive system and the benefits of a hub motor.
Here is a comparison of the two options:
| Mid-drive | Hub Motor |
|---|---|
| – Provides better weight distribution as the motor is located at the bike’s center | – Simpler design, making it easier to install and maintain |
| – Offers better torque and power, allowing for efficient climbing and faster acceleration | – Provides a smoother and quieter ride |
| – Allows for more precise control and responsiveness | – Offers a more affordable option |
| – Enables the use of the bike’s existing gears, maximizing efficiency | – Requires less maintenance due to fewer moving parts |
Considering these factors, you can make an informed decision based on your specific needs and preferences. Once you have chosen your motor, it’s time to move on to the next section and gather the necessary tools and materials to build your electric road bike.
Gather the Necessary Tools and Materials
First, you’ll need to gather all the necessary tools and materials for making your electric road bike. Here is a list of items that will help you get started:
-
Assess bike frame: Begin by evaluating your bike frame to ensure it is suitable for an electric conversion. Look for a sturdy frame that can handle the added weight and stress of an electric motor.
-
Choose battery type: Next, select the appropriate battery type for your electric road bike. Consider factors such as capacity, weight, and range. Lithium-ion batteries are commonly used due to their high energy density and lightweight nature.
-
Motor kit: Purchase a quality motor kit that suits your needs. Consider factors such as power output, torque, and compatibility with your bike frame.
-
Tools: Finally, gather the necessary tools such as wrenches, screwdrivers, and wire cutters to assemble and install the electric components.
With all the tools and materials in hand, you can now proceed to the next section and prepare your bike for the conversion seamlessly.
Prepare Your Bike for the Conversion
Now, it’s time to get your bicycle ready for the conversion process. Before you start, it’s essential to assess your bike’s compatibility with an electric conversion. Ensure that your bike is in good condition, with no significant structural damage or rust. Check the frame, fork, and wheels for any signs of wear or weakness. Additionally, make sure your bike has enough clearance for the electric components and that the wheel size matches the conversion kit specifications.
To help you visualize the process, refer to the table below. It outlines the necessary materials you will need for the conversion:
| Materials Needed | Quantity |
|---|---|
| Electric motor | 1 |
| Battery | 1 |
| Controller | 1 |
Once you’ve assessed your bike’s compatibility and gathered the necessary materials, you’re ready to move on to the next step and install the electric bike conversion kit.
Install the Electric Bike Conversion Kit
To start the installation process of your electric bike conversion kit, you’ll need to gather the necessary tools and components. Before beginning, ensure you have a wrench, pliers, wire cutters, and a screwdriver. Once you have everything ready, follow these steps:
- Begin by removing the front wheel of your bike.
- Attach the electric motor to the front fork using the provided brackets.
- Connect the motor to the battery pack using the included wiring harness.
- Install the throttle handle on the handlebars for easy control.
- Finally, attach the battery pack securely to the bike frame.
Electric bike conversion kits offer several benefits, such as increased speed and the ability to tackle hilly terrains effortlessly. However, it’s important to consider the drawbacks, such as the added weight and the need for periodic battery recharging.
With the installation complete, you can now move on to the next section and test and adjust the electric system.
Test and Adjust the Electric System
When testing and adjusting the electric system of an electric bike conversion kit, there are three key points to consider.
Firstly, I need to check the motor and battery performance to ensure they’re functioning optimally.
Secondly, I need to adjust the speed and power settings according to my preferences and riding needs.
Lastly, it’s crucial to ensure proper brake integration to guarantee safe and efficient stopping power.
By addressing these key points, I can fine-tune the electric system of my electric road bike for an enhanced riding experience.
Check the Motor and Battery Performance
Firstly, you’ll want to check the motor and battery performance of your electric road bike. To ensure optimal functionality, follow these steps:
-
Check battery life: Begin by examining the battery level of your electric road bike. This will help you determine if it needs to be charged or replaced. A fully charged battery is essential for maximum motor performance.
-
Compare motor performance: Evaluate the motor’s efficiency and power output. Take note of any unusual noises or vibrations during operation. Test the motor’s responsiveness by accelerating and decelerating at different speeds. Compare the motor’s performance to the manufacturer’s specifications.
-
Assess battery and motor compatibility: Ensure that the motor and battery are compatible with each other. Check their voltage and capacity ratings to confirm they are well-matched. Incompatible components can lead to subpar performance or even damage.
After thoroughly examining the motor and battery performance, it’s time to move on to adjusting the speed and power settings of your electric road bike.
Adjust the Speed and Power Settings
Next, you’ll need to adjust the speed and power settings of your e-bike. This step is crucial to ensure optimal performance and a comfortable riding experience.
To begin, locate the control panel or display on your electric road bike. This panel will allow you to access the speed and power settings. Using the corresponding buttons or touchscreen, you can increase or decrease the speed limit and adjust the power output of the motor.
It’s important to find the right balance between speed and power to suit your preferences and needs. Once you have adjusted the settings, take your e-bike for a test ride to assess its performance.
Ensure proper brake integration by smoothly transitioning to the subsequent section.
Ensure Proper Brake Integration
Now that we have adjusted the speed and power settings, it is crucial to ensure proper brake integration on our electric road bike. Brake maintenance is essential for optimal brake performance and rider safety. Properly functioning brakes allow for efficient stopping power and control, especially when riding at high speeds. To emphasize the importance of brake maintenance, let’s take a look at the following table:
| Brake Maintenance Tips | Benefits |
|---|---|
| Regularly inspect brake pads and rotors | Ensures proper contact and maximum stopping power |
| Clean brake surfaces to remove debris | Prevents brake pad contamination and maintains consistent performance |
| Adjust brake cable tension | Ensures precise and responsive braking action |
By following these brake maintenance tips, we can ensure our electric road bike’s brake performance is at its best. Now, let’s move on to the next section and explore how to install additional features and accessories for an enhanced riding experience.
Install Additional Features and Accessories
When it comes to installing additional features and accessories on my electric road bike, there are a few key points to consider.
First, adding lights, fenders, and racks can greatly enhance the bike’s functionality and versatility. These features not only improve visibility and safety but also provide convenient storage options for carrying essentials.
Additionally, I should also consider upgrading the bike’s suspension to ensure a smoother and more comfortable ride, especially on rough terrains.
Add Lights, Fenders, and Racks
To add lights, fenders, and racks to your electric road bike, start by selecting the appropriate components.
For lights installation, choose LED lights that are specifically designed for bicycles. These lights should have a high lumens output and should be easily mountable on the handlebars and seat post. Ensure that they have a rechargeable battery and multiple lighting modes for different conditions.
Next, for fenders and racks assembly, select lightweight and durable options that are compatible with your bike’s frame. Fenders will protect you from water and mud splashes, while racks will provide you with a convenient way to carry additional gear.
Once you have installed these components, consider upgrading the bike’s suspension for a smoother and more comfortable ride.
Consider Upgrading the Bike’s Suspension
Consider upgrading the suspension on your electric road bike for a smoother and more comfortable ride. Upgrading the suspension can greatly improve the overall performance of your bike by enhancing weight distribution and impact absorption. A well-designed suspension system can help distribute the weight of the rider and the bike more evenly, resulting in better stability and control. It also plays a crucial role in absorbing the impact from bumps and uneven surfaces, reducing the strain on your body and ensuring a more enjoyable ride. When choosing a suspension upgrade, consider factors such as the type of riding you do and your weight. Consulting with a bike specialist can help you find the best suspension system for your needs. By upgrading your bike’s suspension, you can take your electric road biking experience to the next level. In the next section, you will learn how to operate and maintain your electric road bike seamlessly.
Learn How to Operate and Maintain Your Electric Road Bike
Take the time to familiarize yourself with the proper operation and maintenance of your electric road bike. Operating an electric road bike requires some specific knowledge and understanding.
Start by reading the user manual provided by the manufacturer. This will give you valuable information on how to turn on and off the bike, adjust the speed settings, and use the different modes available.
Additionally, it is important to learn how to properly maintain your electric road bike. This includes regular cleaning, checking the tire pressure, and ensuring that all the components are in good working condition. By following these maintenance guidelines, you can prolong the lifespan of your bike and ensure optimal performance.
Now, let’s move on to the next important topic of riding safely and responsibly.
Ride Safely and Responsibly
When it comes to riding an electric road bike, it is crucial to observe traffic laws and regulations. This means following speed limits, stopping at traffic lights and stop signs, and yielding to pedestrians.
Additionally, wearing appropriate safety gear is essential to protect oneself in the event of an accident or fall. This includes a properly fitted helmet, reflective clothing, and gloves.
Lastly, it is important to be mindful of pedestrians and other cyclists while riding. This means giving them enough space, signaling when turning or changing lanes, and being aware of their presence at all times.
Observe Traffic Laws and Regulations
To ensure your safety while riding an electric road bike, it’s important to abide by all traffic laws and regulations. This includes understanding road signs and signals, as they play a crucial role in maintaining traffic safety.
Here are some key points to keep in mind:
- Pay attention to traffic lights: Stop at red lights, yield at yellow lights, and proceed when it’s safe at green lights.
- Observe speed limits: Maintain a safe speed that allows you to react to any unexpected situations.
- Yield the right of way: Give priority to pedestrians, cyclists, and other vehicles as indicated by traffic signs.
- Use hand signals: Indicate your intentions to turn or stop by using appropriate hand signals.
By following these traffic laws and regulations, you can ensure a safer riding experience.
Now, let’s move on to the next section about wearing appropriate safety gear.
Wear Appropriate Safety Gear
Wearing the right safety gear is essential for a safer riding experience on an e-bike. One of the most important pieces of safety gear to wear while riding an electric road bike is a helmet. In the event of a fall or collision, a helmet can protect your head from serious injuries. It is crucial to choose a helmet that fits properly and meets safety standards. Additionally, it is important to consider other protective gear such as knee and elbow pads, gloves, and reflective clothing. These can provide added protection and visibility on the road. By wearing the appropriate safety gear, you can minimize the risk of injuries and ensure a safer ride. Moving forward, it is important to also be mindful of pedestrians and other cyclists, creating a harmonious environment for everyone sharing the road.
Be Mindful of Pedestrians and Other Cyclists
Being considerate of pedestrians and other cyclists is crucial for a harmonious and safe riding experience. Sharing the road with others requires a heightened awareness of our surroundings and a proactive approach to road safety.
When riding an electric road bike, it is important to always yield to pedestrians and give them enough space. Slow down and be prepared to stop if necessary. Additionally, signal your intentions clearly when passing other cyclists, giving them ample time to react and adjust their position.
Remember to always stay on designated bike lanes or shared paths when available. By prioritizing the safety of everyone on the road, we can create a positive cycling environment.
Transitioning into the next section, joining the electric bike community allows us to share our experiences and contribute to the collective knowledge of electric road biking.
Join the Electric Bike Community and Share Your Experience
Join the electric bike community and share your experiences with other enthusiasts. Being part of a community can greatly enhance your electric road biking journey. Here are some reasons why you should join and contribute to the electric bike community:
-
Access to valuable knowledge: By interacting with other electric bike enthusiasts, you can learn from their experiences and gain insights into various aspects of electric road biking, such as maintenance, modifications, and recommended routes.
-
Networking opportunities: Connecting with like-minded individuals can lead to valuable connections, whether it’s finding riding buddies, discovering local events, or even potential business opportunities.
-
Sharing your expertise: Being an active member of the community allows you to share your own experiences and knowledge, helping others who are new to electric road biking and fostering a sense of camaraderie.
By joining the electric bike community, you can tap into a wealth of information, expand your network, and contribute to the growth of this exciting and innovative field. So, don’t hesitate – share your experiences and be part of the electric bike revolution!
Frequently Asked Questions
How much does an electric road bike conversion kit cost?
The cost of an electric road bike conversion kit varies depending on the brand and features, but a basic kit can range from $200 to $500. More advanced kits with higher performance can cost up to $1000 or more.
Can any type of road bike be converted into an electric bike?
Converting any road bike into an electric bike is possible, but not without potential issues. While the benefits include increased speed and ease of riding, drawbacks include added weight and reduced range.
How long does it typically take to install the electric bike conversion kit?
The installation time for an electric bike conversion kit typically depends on the complexity of the kit and the person’s experience. It can range from a few hours to a full day. Basic tools such as wrenches and screwdrivers are usually required.
Are there any specific maintenance requirements for an electric road bike?
Maintenance tips for an electric road bike include regular cleaning, checking tire pressure, and lubricating the chain. It’s important to keep the battery charged and inspect the brakes and cables for wear. A troubleshooting guide can help diagnose and fix common issues.
What safety precautions should be followed when riding an electric road bike?
When riding an electric road bike, it is crucial to prioritize safety. By mastering proper riding techniques and wearing the appropriate gear, such as a helmet and reflective clothing, you can ensure a secure and enjoyable ride.
Conclusion
In conclusion, building an electric road bike has been an exhilarating journey. I never thought I could transform my regular bike into a powerful and efficient electric vehicle.
With the right conversion kit and some handy tools, I was able to achieve my dream of riding an eco-friendly and fast road bike. Maintaining and operating it has been a breeze, thanks to the helpful electric bike community.
So hop on your e-bike and join the revolution, it’s truly electrifying!