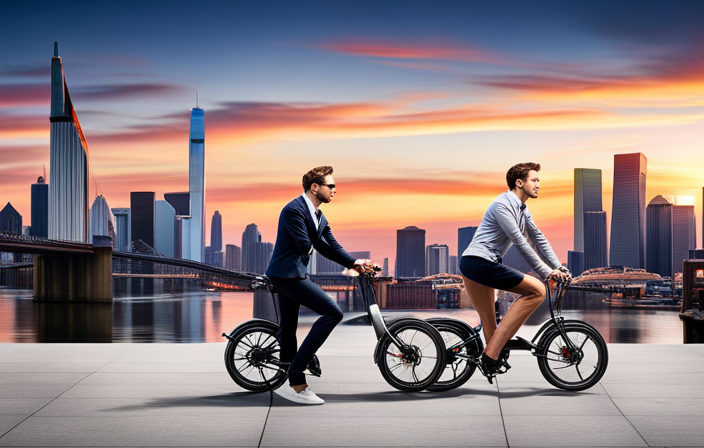
I’ve always loved the feeling of freedom that comes with riding a bike. But lately, I’ve been longing for a little extra power to tackle those steep hills and long distances. That’s when I discovered the world of electric bike conversion kits.
With the right tools and materials, you can transform your ordinary bike into a powerful electric machine. In this article, I’ll guide you through the step-by-step process, from choosing the perfect kit to maintaining and customizing your new electric bike.
Get ready to experience a whole new level of cycling joy.
Key Takeaways
- Gathering all necessary tools and materials for the electric bike conversion is crucial for a successful installation.
- When choosing an electric bike conversion kit, it is important to consider both affordability and quality, as well as the battery range for your desired riding distance.
- Proper installation of the electric motor and battery involves removing the pedals and crankset, positioning and securing the motor and battery mount, and connecting the motor to the battery and controller correctly.
- Installing the throttle and brake cutoffs, as well as mounting the battery onto the bike frame, should be done with attention to comfort, safety, and balanced weight distribution.
Gather the Necessary Tools and Materials
Gather all the tools and materials you’ll need for the electric bike conversion kit. Before you start, make sure you have a wrench set, pliers, wire cutters, and a screwdriver. Additionally, you’ll need a conversion kit that matches the specifications of your bike, typically including a motor, battery, controller, and display.
To ensure a smooth installation, it’s important to carefully read the instructions provided with the kit. Pay attention to any specific requirements or recommendations for your particular bike model. Taking the time to gather all the necessary tools and materials, along with following the provided instructions, will greatly increase your chances of a successful electric bike conversion.
Now, let’s move on to the next section where we will discuss how to choose the right electric bike conversion kit for your bike.
Choose the Right Electric Bike Conversion Kit for Your Bike
Selecting the correct conversion kit for your bicycle can be a bit overwhelming, but it’s essential to ensure a smooth and successful electric bike transformation. When choosing the right electric bike conversion kit, there are a few factors to consider.
First, you should compare prices to find a kit that fits your budget. Look for kits that offer a good balance between affordability and quality.
Additionally, it’s important to estimate the battery range of the kit. This will give you an idea of how far you can ride on a single charge. Consider your riding needs and choose a kit with a battery range that suits your requirements.
Now that you have chosen the perfect conversion kit, it’s time to remove the pedals and crankset from your bike, preparing it for the electric transformation.
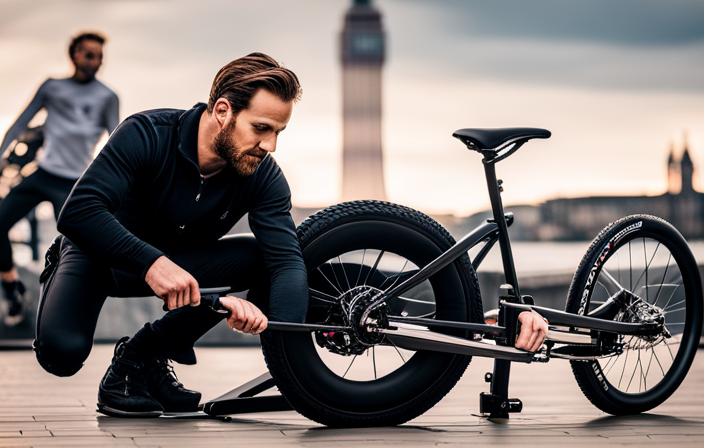
Remove the Pedals and Crankset from Your Bike
To start preparing your bike for the electric transformation, you’ll need to remove the pedals and crankset. This step is crucial in order to install the motor bracket and make way for the electric motor and battery mount.
To remove the pedals, use a pedal wrench to loosen the pedal from the crank arm. Rotate the pedal counterclockwise to unscrew it completely.
Next, to remove the crankset, use a socket wrench to loosen the bolts that hold the crank arms in place. Once the bolts are loosened, gently slide the crank arms off the bottom bracket spindle.
Now that the pedals and crankset are removed, you can move on to the next step: installing the motor bracket and preparing for the installation of the electric motor and battery mount.
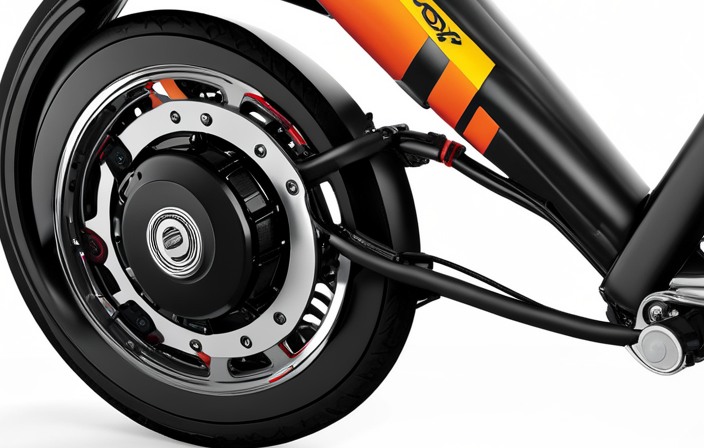
Install the Electric Motor and Battery Mount
Now that the pedals and crankset are removed, you can easily install the electric motor and battery mount.
Start by positioning the motor in the desired location on your bike’s frame. Ensure that it aligns with the chain and rear wheel. Once in place, secure the motor tightly using the supplied mounting brackets and screws. Make sure the motor is stable and free from any unnecessary movement.
Next, attach the battery mount to the frame using the appropriate mounting hardware. Ensure that it is securely fastened and will not shift during rides.
Troubleshooting common installation issues may include checking for proper alignment, adjusting mounting brackets, or tightening screws.
Once the motor and battery mount are securely installed, you can move on to the next step of connecting the motor to the battery and controller.
Connect the Motor to the Battery and Controller
Attach the motor to the battery and controller by connecting the corresponding wires and ensuring a secure connection.
First, locate the motor wires and the corresponding wires on the battery and controller.
The motor wires typically consist of a positive (red) and negative (black) wire.
The battery and controller will have corresponding positive and negative wires as well.
Once you have identified the wires, connect the positive motor wire to the positive battery wire and the negative motor wire to the negative battery wire.
Make sure to use connectors or solder the wires together for a reliable connection.
Double-check that the wires are securely fastened to prevent any loose connections.
Troubleshooting common issues with electric bike conversion kits may include checking for loose or damaged wires, ensuring proper polarity, and verifying the compatibility of the motor, battery, and controller.
Now, let’s move on to installing the throttle and brake cutoffs.
Install the Throttle and Brake Cutoffs
Once you’ve secured the motor and battery connections, it’s time to install the throttle and brake cutoffs.
The throttle sensitivity is an important factor in ensuring smooth and controlled acceleration. Start by locating the desired position for the throttle on your handlebars. Make sure it is easily accessible and comfortable to use. Connect the throttle wires to the controller, following the manufacturer’s instructions.
Now, let’s talk about brake cutoff installation tips. The brake cutoffs are crucial for safety, as they automatically cut power to the motor when the brakes are applied. Install the brake cutoffs near the brake levers and connect them to the controller. It’s important to properly adjust the cutoffs to ensure they engage the moment you squeeze the brakes.
With the throttle and brake cutoffs in place, you are ready to mount the battery onto your bike frame, ensuring a secure and balanced fit.
Mount the Battery onto Your Bike Frame
To securely mount the battery onto your bike frame, ensure that it is positioned in a balanced and stable manner. Here are the steps to properly mount your electric bike battery:
-
Choose the right mounting option: Depending on your bike frame, you may have different mounting options available. Common options include using a battery rack, frame bag, or directly attaching it to the frame.
-
Consider weight distribution: The battery should be positioned in a way that maintains the bike’s balance. Placing it too far forward or backward can affect the bike’s handling and stability.
-
Use secure fasteners: Make sure to use high-quality fasteners that can withstand the vibrations and movements of the bike. Avoid using zip ties or weak straps that may fail over time.
-
Protect the battery: Consider using padding or insulation to protect the battery from shocks and vibrations. This will help prolong its lifespan and maintain its performance.
By following these steps, you can ensure that your battery is securely mounted and positioned for optimal performance.
Now, let’s move on to connecting the wiring and testing the system to complete your electric bike conversion.
Connect the Wiring and Test the System
Now that you have securely mounted the battery, it’s time to connect the wiring and test the system for proper functionality.
Begin by identifying the connectors on the battery and the corresponding connectors on the electric bike conversion kit. Ensure that the connectors are properly aligned and securely fastened together.
Once the wiring is connected, turn on the power switch and observe the system. Pay close attention to any error codes or warning lights that may indicate an issue.
Testing the system involves activating the throttle and checking if the motor engages smoothly. Troubleshoot common issues such as a faulty connection or a malfunctioning throttle by inspecting the wiring and making necessary adjustments.
Once you have successfully tested the system, you can proceed to the next section and reinstall the pedals and crankset, ensuring a seamless transition into the next step.
Reinstall the Pedals and Crankset
After securely mounting the battery and connecting the wiring, it’s time to reinstall the pedals and crankset. This step is essential to ensure that the electric bike conversion kit functions properly and provides a smooth riding experience.
Begin by aligning the pedal threads with the crank arms and screw them in clockwise until they are tightly secured. Make sure to use a pedal wrench for a secure fit.
Next, place the crank arms back onto the bottom bracket spindle, ensuring that they are properly aligned. Tighten the crank bolts using an appropriate tool, such as an Allen wrench, making sure they are secure.
If you encounter any issues during the reinstalling process, such as difficulty in alignment or loose pedals, refer to troubleshooting tips provided by the manufacturer.
Now that the pedals and crankset are back in place, it’s time to adjust the bike’s gearing and chain tension for optimal performance.
Adjust the Bike’s Gearing and Chain Tension
Once the pedals and crankset have been reinstalled, it’s important to adjust the bike’s gearing and chain tension for optimal performance. To ensure a smooth and efficient ride, follow these steps:
-
Start by selecting the appropriate gears based on the terrain and your riding style. This will help you maintain a comfortable cadence and prevent strain on the motor.
-
Next, adjust the chain tension by loosening the rear wheel nuts and moving it forward or backward to achieve the desired tension. Make sure the chain is properly aligned with the gears.
-
Use a chain tensioner if necessary to fine-tune the tension and prevent chain slippage.
-
Check the shifting mechanism and adjust the derailleur if needed. This will ensure precise gear changes and prevent skipping or ghost shifting.
-
Finally, test the bike’s gear range by cycling through all gears and making any necessary adjustments.
By properly adjusting the chain tension and selecting appropriate gears, you’ll optimize the performance of your electric bike.
Now, it’s time to test ride and fine-tune your electric bike for the best riding experience.
Test Ride and Fine-tune Your Electric Bike
To ensure the best riding experience, take your electric bike for a test ride and fine-tune it accordingly. Fine tuning is crucial to optimize the performance and address any issues that may arise.
Start by checking the brakes for proper responsiveness and adjusting them if necessary.
Next, focus on the gears, ensuring smooth shifting and proper chain tension. If you encounter any issues, such as chain skipping or gear slipping, make adjustments to the derailleur and cable tension.
Additionally, pay attention to the tire pressure and ensure it is within the recommended range. Troubleshoot any noise or vibration by checking the tightness of bolts and connections.
By fine-tuning your electric bike, you’ll have a smoother and more enjoyable riding experience.
Moving forward, let’s explore how to maintain and care for your electric bike, ensuring its longevity and reliability.
Maintain and Care for Your Electric Bike
After fine-tuning my electric bike, it is essential to maintain and care for it properly to ensure its longevity and optimal performance. Electric bike maintenance involves regular checks and troubleshooting common issues that may arise. Here are some key aspects to consider:
-
Battery Maintenance: Regularly check the battery connections and clean them if necessary. Keep the battery charged to the recommended levels and store it in a cool, dry place when not in use.
-
Tire Care: Check tire pressure regularly and ensure they are properly inflated. Inspect the tires for any signs of wear or damage and replace if needed.
-
Brake Adjustment: Test the brakes regularly and adjust them if they feel loose or unresponsive. Ensure the brake pads are in good condition and replace if necessary.
-
Chain Lubrication: Keep the chain clean and well-lubricated to prevent rust and improve performance.
Maintaining and troubleshooting these common issues will help ensure a smooth and enjoyable riding experience with your electric bike.
Now, let’s move on to the importance of following safety guidelines and regulations.
Follow Safety Guidelines and Regulations
When riding, it’s important to remember to follow safety guidelines and regulations to ensure a safe and enjoyable experience.
To adhere to the necessary safety measures, make sure to wear a properly fitting helmet that meets the required safety standards.
Additionally, it is essential to equip your electric bike with working lights, reflectors, and a bell to ensure visibility and alert others of your presence.
Following legal requirements, such as obeying traffic laws and speed limits, is crucial for both your safety and the safety of others.
Regularly inspecting your electric bike for any signs of wear or damage is also important to prevent accidents.
By taking these safety measures and fulfilling the legal requirements, you can confidently enjoy your electric bike rides.
Now, let’s explore how you can upgrade and customize your electric bike.
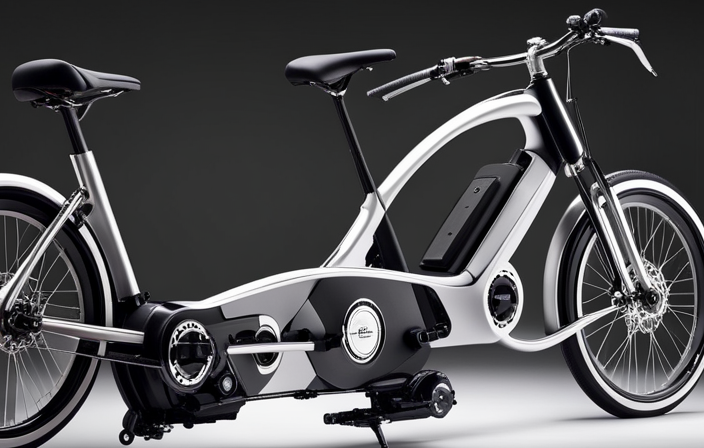
Upgrade and Customize Your Electric Bike
Looking to enhance your electric bike? Consider adding some personalized touches and upgrades to make it uniquely yours.
There are a variety of customization options available for electric bike conversion kits, allowing you to tailor your bike to your specific needs and preferences.
One popular option is to upgrade the battery, which can increase your bike’s range and overall performance.
Another option is to add accessories such as lights, fenders, or a cargo rack, which can make your bike more practical and convenient.
Additionally, you can choose to customize the look of your bike by adding decals or painting it in your favorite color.
The benefits of electric bike conversion are numerous, and by upgrading and customizing your bike, you can enjoy a truly personalized riding experience.
Enjoy Your New Electric Bike Conversion!
Now that you’ve upgraded and customized your electric bike, it’s time to enjoy the benefits of your new ride. Here are some tips for maximizing the range of your electric bike and choosing the right battery for your electric bike conversion:
-
Properly inflate your tires: Maintaining the correct tire pressure can significantly improve your bike’s range.
-
Use pedal assist wisely: Utilize the pedal assist feature judiciously to conserve battery power and extend your range.
-
Choose the right battery capacity: Consider your riding needs and terrain to select a battery with the appropriate capacity for your electric bike conversion.
-
Optimize your riding style: Smooth acceleration, avoiding sudden braking, and maintaining a consistent speed can help you conserve battery power and maximize your bike’s range.
By following these tips and choosing the right battery for your electric bike conversion, you can enjoy longer rides and make the most of your new electric bike.
Happy riding!
Frequently Asked Questions
Can I use any bike for an electric bike conversion kit, or are there specific requirements?
To ensure electric bike conversion kit compatibility, specific requirements must be met. Benefits of using an electric bike conversion kit include increased speed, range, and the ability to tackle hills effortlessly.
How long does it take to install an electric bike conversion kit?
Installing an electric bike conversion kit typically takes around 2-4 hours. To choose the right kit, consider factors like motor power, battery capacity, and compatibility with your bike frame. Tools needed include wrenches, screwdrivers, and a bike stand.
How far can I expect to ride on a single charge with an electric bike conversion kit?
With proper electric bike conversion kit maintenance, factors such as battery capacity, terrain, rider weight, and speed affect the range. On a single charge, I can expect to ride a distance determined by these factors.
Are there any weight restrictions for using an electric bike conversion kit?
Weight restrictions and safety concerns are important when using an electric bike conversion kit. It is crucial to check the manufacturer’s guidelines and ensure that the weight of the rider and the bike do not exceed the recommended limits to maintain optimal performance and safety.
Can I switch back to a regular bike setup after installing an electric bike conversion kit?
Sure, you can switch back to a regular bike setup after installing an electric bike conversion kit. However, keep in mind that there are advantages and disadvantages to both setups, so consider your needs and preferences before making the switch.
Conclusion
In conclusion, converting my bike into an electric one was a rewarding experience.
With the right tools and materials, I was able to remove the pedals and crankset, install the electric motor and battery mount, and connect everything seamlessly.
Following safety guidelines and regulations ensured a smooth ride, and I even had the opportunity to upgrade and customize my electric bike to my liking.
Now, with a simple twist of the throttle, I soar down the road like a bird with newfound freedom.