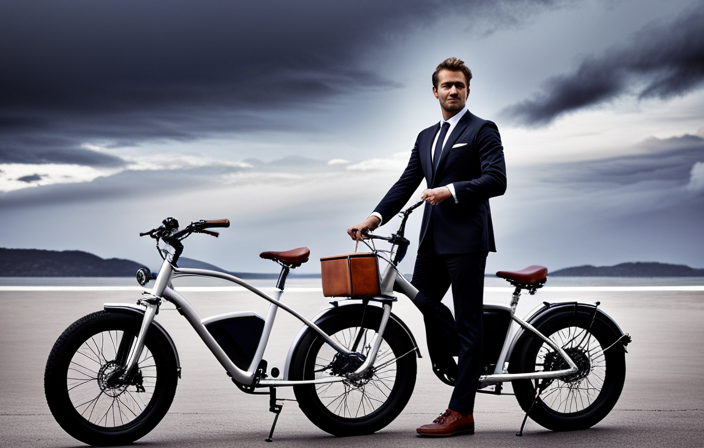
Imagine the thrill of zooming through city streets on your very own electric bike, effortlessly gliding past traffic and feeling the wind in your hair.
In this comprehensive guide, I will show you step-by-step how to transform an ordinary bicycle into a powerful electric ride.
From selecting the right frame to installing the conversion kit, I will provide you with the tools, knowledge, and safety measures you need to create your own electric bike.
Get ready to embark on an electrifying journey and experience the joy of building and riding your own eco-friendly mode of transportation.
Key Takeaways
- Mount and secure the battery pack properly using brackets or straps.
- Regularly check and clean the battery contacts for optimal performance.
- Ensure the battery indicator displays the correct charge level and check the battery connection if it’s not accurate.
- Adjust and fine-tune the electric bike for comfort, smooth ride, and proper functioning of brakes and gears.

Schwinn Sporterra RX Gravel Bike, 700c Mens and Womens Bike, 14-Speed Drop Bar Gravel Bicycle, Mechanical Disc Brakes, Rigid Fork, Aerodynamic Riding Position, Quick Release Seat Post, Adult Bicycle
GRAVEL BICYCLE: Enjoy next level riding with the Sporterra RX by Schwinn. With 700c wheels, this mens and...
As an affiliate, we earn on qualifying purchases.
Gather the Necessary Tools and Materials
You’ll need a few tools and materials to make an electric bike. First, it’s important to choose the right electric bike conversion kit. Look for a kit that is compatible with your bike’s size and frame. Consider the motor power and battery capacity that will best suit your needs. Additionally, make sure the kit includes all the necessary components such as a motor, battery, controller, and wiring.
When gathering the necessary tools and materials, there are a few tips to keep in mind. Start by making a list of all the tools you’ll need, including wrenches, screwdrivers, and wire cutters. Check if you already have some of these tools or if you’ll need to purchase them. As for materials, ensure that you have enough electrical wires, connectors, and zip ties.
Now that you have gathered the necessary tools and materials, it’s time to move on to choosing the right bicycle frame.

SAVADECK T800 Carbon Gravel Bike, with Shimano GRX610 12-Speed, Hydraulic Disc Brakes, 700x40c Tires for Road & Off-Road Adventure, Men's/Women's Bicycle(Elegant White, 51cm)
【With SHIMANO GRX Drivetrain Setup】Equipped with SHIMANO GRX610 shifters and RX822 rear derailleur, matched with a 12-speed M6100...
As an affiliate, we earn on qualifying purchases.
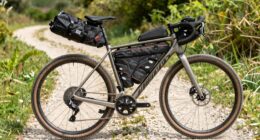
Choose the Right Bicycle Frame
When selecting the appropriate bicycle frame, it’s important to consider factors such as size, material, and riding style.
The choice of frame material will greatly affect the performance and durability of your electric bike. Aluminum frames are lightweight and corrosion-resistant, making them a popular choice for electric bike conversions. Steel frames, on the other hand, offer a more comfortable ride and are known for their strength and durability. Carbon fiber frames are extremely lightweight and provide excellent vibration damping, but they can be quite expensive.
In terms of size, it’s crucial to select a frame that fits your body proportions and riding style. A frame that is too small or too large can lead to discomfort and poor control.
Once you have chosen the right bicycle frame, it’s time to move on to selecting the right electric bike conversion kit.

SAVADECK Carbon Gravel Bike - T800 Carbon Frame & Fork | Shimano U6000 11-Speed Groupset | Hydraulic Disc Brakes | 700CX40mm All-Terrain Tires | Men & Women Road/Off-Road Bicycle (Gray, 53cm)
【Ultralight T800 Carbon Performance】: Featuring a premium T800 R21 carbon fiber frame and fork weighing just 10.4kg (22.92...
As an affiliate, we earn on qualifying purchases.
Select the Right Electric Bike Conversion Kit
To select the right electric bike conversion kit, consider factors such as your budget, desired range, and level of technical expertise. The cost of an electric bike conversion can vary depending on the quality and features of the kit. It is important to find a kit that fits within your budget while still meeting your needs.
Additionally, consider the benefits of electric bike conversion. Converting your regular bike into an electric one allows you to enjoy the advantages of assisted pedaling, making your rides more enjoyable and less strenuous. It also gives you the flexibility to choose how much assistance you want, depending on your fitness level or the terrain you’re riding on.
With these factors in mind, let’s now move on to the next step of the process: removing the existing bike components.

Swagman Standard Fork Mount Rooftop Bike Carrier
EASY TO ASSEMBLE: The STANDARD is easy to assemble with no tools required, sets up in just minutes...
As an affiliate, we earn on qualifying purchases.
Remove the Existing Bike Components
First, assess the existing bike components that need to be removed. Before starting the electric bike conversion process, it’s essential to choose the right tools for the job. You’ll need a wrench, screwdrivers, and possibly a pair of pliers.
Begin by removing the pedals, followed by the front and rear wheels. Then, detach the brakes, gears, and chain from the bike frame. Make sure to dispose of the old bike components properly, either by recycling them or donating them if they’re still in good condition.
Once you’ve removed all the necessary parts, you’re ready to move on to the next step: installing the electric bike conversion kit.
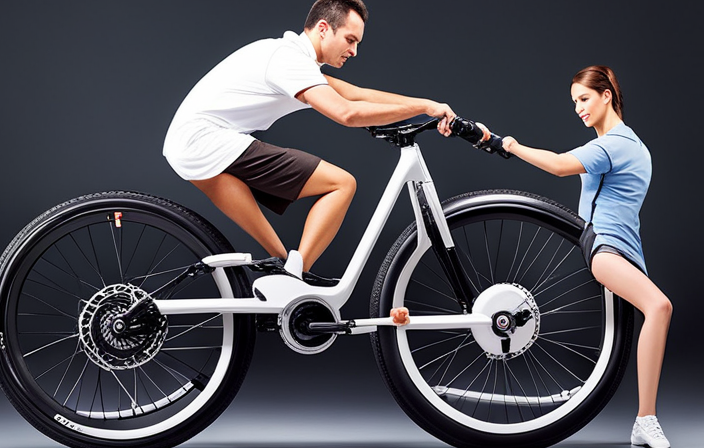
Install the Electric Bike Conversion Kit
Next, you’ll need to install the conversion kit onto your bicycle. Choosing the right conversion kit is crucial to ensure a successful electric bike transformation. Consider factors like compatibility with your bike’s frame, motor power, battery capacity, and available features.
Once you have the appropriate kit, begin by removing the front wheel and attaching the hub motor. Make sure to secure it tightly using the provided bolts.
Next, mount the battery holder onto the frame, ensuring it is stable and well-positioned. Connect the controller to the motor and secure it in a convenient location. Troubleshooting common installation issues, such as loose connections or misalignment, is essential to ensure optimal performance.
Finally, connect the battery and controller to complete the installation process smoothly. Transitioning into the subsequent section, we will now move on to connecting the battery and controller.
Connect the Battery and Controller
Once you have successfully installed the conversion kit, it’s time to connect the battery and controller to complete the electric bike transformation. The battery and controller wiring is a crucial step in ensuring the smooth operation of your electric bike. To simplify the process, refer to the table below for a clear understanding of the connections:
| Battery Wires | Controller Wires |
|---|---|
| Red wire | Red wire |
| Black wire | Black wire |
| Yellow wire | Yellow wire |
| Green wire | Green wire |
| Blue wire | Blue wire |
Make sure to double-check the color-coded wires to avoid any mistakes. In case you encounter any issues, such as the battery not powering up or the controller not responding, consult the troubleshooting section of the electric bike manual. Once the battery and controller are successfully connected, you can proceed to the next section to install the electric motor.
Install the Electric Motor
To install the electric motor, you’ll need to securely attach it to the designated area on your bike frame. Start by positioning the motor in the desired location and using the appropriate mounting brackets or clamps to secure it firmly.
Make sure the motor is aligned properly with the chain and sprocket for smooth operation. When connecting the wires, refer to the manufacturer’s instructions and ensure that all connections are tight and secure. It’s important to double-check the polarity of the connections to prevent any damage or malfunctions.
If you encounter any issues during the installation process, such as difficulty fitting the motor or loose connections, refer to electric motor installation tips and troubleshooting guides provided by the manufacturer.
With the motor securely in place, we can now move on to connecting the throttle and pedal assist sensor.
Connect the Throttle and Pedal Assist Sensor
Now, you can easily connect the throttle and pedal assist sensor to your bike’s electric motor.
The throttle is responsible for controlling the speed of your electric bike, while the pedal assist sensor detects when you are pedaling and provides additional power.
Start by locating the throttle and pedal assist sensor wires coming from the motor controller.
Connect the throttle wires to the corresponding wires on the handlebars, ensuring a secure connection.
Next, connect the pedal assist sensor wires to the designated wires on the pedal crank.
It is important to ensure that the throttle sensitivity is set correctly to avoid any sudden surges in speed.
If you encounter any issues with the throttle or pedal assist sensor, you can refer to the troubleshooting section of the electric bike’s manual.
The next step is to mount the battery pack onto your electric bike frame.
Mount the Battery Pack
First, securely attach the battery pack to the frame of your e-bike. This is a crucial step in the installation process as it ensures the stability and safety of your electric bike. To do this, refer to the manufacturer’s instructions and locate the designated mounting points on your bike frame. Use the provided brackets or straps to firmly secure the battery pack in place. It is important to check the tightness of the attachments regularly to prevent any potential loosening. Additionally, proper battery pack maintenance is essential for optimal performance and longevity. This includes regularly cleaning the contacts and ensuring a full charge before each ride. Once the battery pack is securely mounted, you can move on to the next step of testing the electric bike’s functionality.
Test the Electric Bike’s Functionality
Once the battery pack is securely mounted, you can test your e-bike’s functionality to ensure everything is working properly. Here are the test procedures and troubleshooting tips to follow:
-
Turn on the bike’s power switch and check if the battery indicator displays the correct charge level. If not, double-check the battery connection.
-
Engage the throttle and observe if the motor smoothly accelerates. Listen for any unusual noises or vibrations that may indicate mechanical issues.
-
Test the pedal-assist system by pedaling lightly. Ensure that the motor provides the appropriate level of assistance and responds correctly to changes in pedaling speed.
If any issues arise during testing, consult the user manual for troubleshooting tips or contact customer support for further assistance.
With the functionality of your electric bike confirmed, it’s time to move on to adjusting and fine-tuning its performance.
Adjust and Fine-Tune the Electric Bike
To fine-tune the e-bike, start by adjusting the seat height and handlebar position to ensure a comfortable riding position.
Fine tuning techniques are essential for optimizing the bike’s performance and ensuring a smooth ride.
Check the brakes and gears to ensure they are properly adjusted and functioning correctly.
Troubleshooting tips can help identify any issues that may arise during the fine-tuning process. For example, if the bike is making unusual noises, check for loose components or worn-out parts.
Additionally, inspect the tires for proper inflation and wear.
Once all adjustments are made, ensure safety measures are in place to prevent accidents and injuries. This includes wearing a helmet, using lights for visibility, and following traffic rules.
Ensure Safety Measures are in Place
Make sure you wear a helmet, use lights for visibility, and follow traffic rules to ensure your safety while riding the e-bike. Safety precautions should be a top priority when using any type of electric bike. Here are four important safety measures to consider:
- Inspect your e-bike before each ride to ensure all components are functioning properly.
- Always wear appropriate safety gear, including a helmet, knee and elbow pads, and reflective clothing.
- Use lights and reflectors to enhance visibility, especially when riding at night or in low-light conditions.
- Familiarize yourself with traffic rules and ride defensively to minimize the risk of accidents.
Following these safety precautions will significantly reduce the chances of injuries or accidents while riding your electric bike.
Now that you understand the importance of safety gear, let’s transition into the subsequent section about learning how to properly maintain your electric bike.
Learn How to Properly Maintain Your Electric Bike
To ensure the longevity and optimal performance of your e-bike, it’s important for you to learn how to properly maintain it. Proper maintenance tips are essential in keeping your electric bike running smoothly.
Firstly, regularly clean your bike, especially after riding in muddy or dusty conditions, to prevent dirt buildup and potential damage to the components.
Additionally, check your tire pressure often and make sure they are properly inflated to ensure a comfortable and safe ride.
Keeping the chain lubricated and properly tensioned is also crucial to avoid premature wear and tear.
Lastly, be aware of common electric bike issues such as battery health and motor performance, and consult with your manufacturer or a professional if you encounter any problems.
By following these proper maintenance tips, you can ensure that your electric bike remains in excellent condition and provides you with years of reliable use.
Now, let’s move on to the next section and enjoy your new electric bike!
Enjoy Your New Electric Bike!
Now that you have your new e-bike, it’s time to start enjoying it! Before we move on to sharing your electric bike building experience, let’s discuss some important tips for choosing the best electric bike conversion kit.
First and foremost, consider the power and range of the kit. Make sure it suits your needs and preferences.
Secondly, check for the compatibility of the kit with your bike’s frame and components. This will ensure a smooth installation process.
Lastly, don’t forget to consider the quality and reputation of the manufacturer.
Now, let’s talk about common mistakes to avoid when building an electric bike. One mistake is choosing a conversion kit that doesn’t match your bike’s specifications. Another mistake is overlooking safety features such as lights, reflectors, and fenders. By avoiding these mistakes, you can enjoy a safe and efficient electric bike ride.
Transitioning into the next section, let’s now share your electric bike building experience.
Share Your Electric Bike Building Experience
Share how I built my e-bike and what challenges I faced along the way. Building an electric bike can be a rewarding but challenging experience. One of the common challenges I encountered was finding the right components for my e-bike. It took some time and research to source the appropriate motor, battery, and controller that fit my needs. Another challenge was ensuring that all the electrical connections were properly made and secure. I had to double-check the wiring and connections to prevent any potential safety hazards. Common mistakes in electric bike building include incorrect wiring, insufficient battery capacity, and improper motor installation. It is important to carefully follow the instructions and seek guidance if needed to avoid these pitfalls. Building an electric bike requires attention to detail and patience, but the end result is well worth it.
| Challenge | Description | Solution |
|---|---|---|
| Finding the right components | Researching and sourcing appropriate motor, battery, and controller | Thoroughly researching and comparing specifications, seeking advice from experienced builders |
| Ensuring secure electrical connections | Double-checking wiring and connections | Using proper connectors and following wiring diagrams |
| Avoiding common mistakes | Incorrect wiring, insufficient battery capacity, improper motor installation | Carefully following instructions, seeking guidance when needed |
Frequently Asked Questions
What are the benefits of converting a regular bike into an electric bike?
Converting a regular bike into an electric bike offers several benefits and advantages. It provides an eco-friendly transportation option, eliminates the need for a driver’s license, allows for longer rides, and can be cost-effective in the long run.
Are there any legal regulations or restrictions for riding electric bikes?
Yes, there are legal requirements and safety regulations for riding electric bikes. These vary by country and region but generally include age restrictions, speed limits, helmet requirements, and restrictions on where they can be ridden.
How long does it typically take to complete the conversion process?
The conversion process for an electric bike typically takes around 6-8 hours. It involves installing a motor, battery, and controller, as well as modifying the bike’s frame and wiring. Overall, it’s a straightforward but time-consuming process.
Can any type of bicycle frame be used for an electric bike conversion?
Yes, any type of bicycle frame can be used for an electric bike conversion. The electric bike conversion process involves adding a motor, battery, and controller to the frame. Using a bike frame for conversion has advantages such as cost-effectiveness and adaptability.
Are there any specific maintenance requirements for an electric bike that differ from a regular bike?
When it comes to electric bikes, there are a few key differences in maintenance requirements compared to regular bikes. These include battery maintenance, motor maintenance, and ensuring proper electrical connections.
Conclusion
In conclusion, building an electric bike can be a rewarding and fulfilling experience. By following the necessary steps and ensuring safety measures, you can create a personalized transportation solution that is both eco-friendly and efficient.
Remember, ‘Rome wasn’t built in a day,’ so take your time and enjoy the process. With proper maintenance and care, your new electric bike will provide you with years of enjoyment and reliable transportation.
So go ahead, embark on this journey, and share your electric bike building experience with others.